
Welcome to part two of the vanilla JavaScript adventure!
If you missed part one and would like to give it a try, click here.
Click here for the starter code to part two, if you didn't complete part one or don't have the code anymore.
Why CSS?
HTML and CSS are the peanut butter and jelly of the web development world; they always go hand in hand.

Since the basis of part one was using JavaScript in lieu of HTML, learning how to use JavaScript in lieu of CSS seems like a logical next step.
If you know basic HTML and basic JavaScript, chances are you have come in contact with CSS as well. CSS (short for Cascading Style Sheets) essentially controls the stylistic/visual component of the elements on the webpage: colors, fonts, text decoration, animations (sometimes), and more. If you need a more thorough explanation of CSS check out this MDN article.
Let's continue where we left off with our part one code, and take a look at how to use CSS within JavaScript.
Using CSS in your JavaScript file
As explained in previous articles, having separate files for HTML and CSS as well as many different files for different JavaScript components of your project is standard practice, and for good reason. Adhering to the principle of separation of concerns allows for clearer organization of code, as well as reducing the chances of breaking changes occurring in the whole project because of a single faulty edit in one module. As in part one, we will still be using our index.js file for all of our CSS, to immerse fully into the JavaScript experience. However, please remember that 99% of projects you work on will not follow this practice, we are only doing it for the sake of learning how!
The general principle of styling in JavaScript is actually quite simple. The majority of this part of the tutorial will just be learning the most essential style features that you will probably need.
The basic pattern of styling in JavaScript is:
<element to be styled>.style.<style property> = "desired outcome";
That wasn't very well-explained. Let me give you a more concrete example to demonstrate; the next line of code will result in my header turning green:
header.style.color = "green";

That looks better. In that example, header is the element being acted upon, style is usually the keyword for accessing style properties, color is the style property that is being accessed, and green is the new desired color.
With our basic pattern of styling elements in mind, let's segue into our first CSS essential: color.
CSS Essential #1: Color
Color is one of the most important style elements in visual design. As such, there is substantial functionality built into CSS to support color; however, covering every aspect of using color in your styling could be an entire tutorial series by itself, so we will only be exploring a few basics.
Let's start by taking the example from the previous section and applying it here: change the color of your header. Use my code above, but instead of green you can select any basic color you like. Think color wheel/kindergarten colors, not the wackiest color you remember from the crayon box you used to have. For example:
header.style.color = "orange";
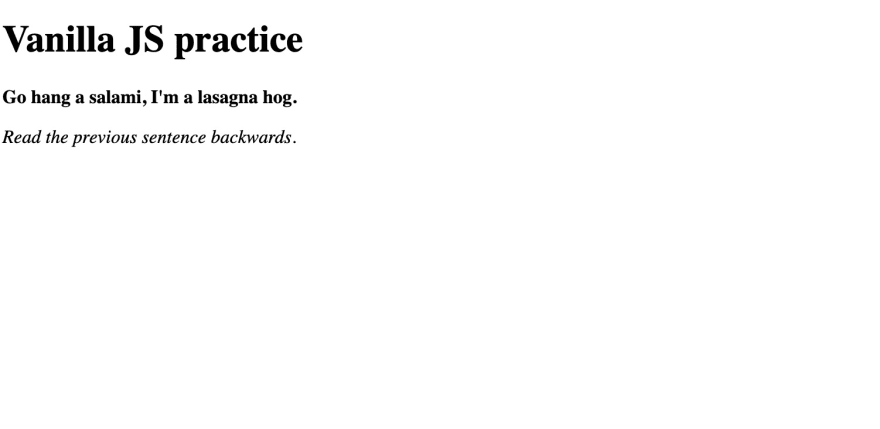
Your display should now look something like this, depending on what color you chose:

Nicely done. The color property can be applied to text, backgrounds, borders, and pretty much any element on your webpage that you can think of.
Before we move on, go ahead and apply that same color you chose to your text1 and text2 elements.
Cool, now let's think about background color. White background is cool and all, but let's decide on something a little more exciting.
Use this code to modify your background color (you can substitute my color for a color of your choosing), then read on for an explanation:
document.body.style.backgroundColor = "red";
Good! Although this might seem quite different from changing the color of our header, it still follows our same basic pattern:
<element to be styled>.style.<style property> = "desired outcome";
For our background color styling, document.body is the element to be styled, the style keyword is still used, backgroundColor is the style attribute we are modifying, and red is my desired outcome.
One important distinction between CSS and JavaScript styling becomes relevant when modifying styling attributes that are more than one word (such as background color). In CSS, the syntax for such attributes is kebab-case (i.e. background-color). For JavaScript, the syntax is camelCase (i.e. backgroundColor).
Now then, with my choice of orange text and red background, my example looks like this:

Bleh. That is not an attractive color combination, but more importantly it is quite difficult to read, even for users with standard vision. For users with vision impairments, this would be extremely difficult if not impossible to read. Always keep web accessibility standards in mind when selecting color combinations! There are several tools (like this one) that help web developers/designers select color combinations that are appropriate for users of all vision levels.
With that in mind, I'm going to change my background color to something that will contrast the bright orange a little better.
document.body.style.backgroundColor = "black";

Much better! We can use more colors than just the primary ones, however. To be precise, we have 16,777,216 color options (although some may argue that because of transparency options, we actually have a great deal more than that).
There are three ways to specify color in web design:
In the interest of brevity, click on any of the three items above to learn more. The "Keyword" link leads to a list of all keywords that can be used in your color styling. The "RGB value" and "Hex code" links lead to respective explanations of the concepts, if you are unfamiliar.
Here are a couple examples of how each approach would look syntactically.
Keyword:
header.style.color = "cornflowerblue";
text1.style.color = "chartreuse";
text2.style.color = "lightsalmon";
document.body.style.backgroundColor = "dimgray";
RGB:
header.style.color = "rgb(100, 149, 237)";
text1.style.color = "rgb(127, 255, 0)";
text2.style.color = "rgb(255, 160, 122)";
document.body.style.backgroundColor = "rgb(105, 105, 105)";
Hex code:
header.style.color = "#6495ed";
text1.style.color = "#7fff00";
text2.style.color = "#ffa07a";
document.body.style.backgroundColor = "#696969";
These three examples are visually identical, and should all display like this:

This wraps up our color section, but you will continue to get practice with it along with other style elements.
CSS Essential #2: Backgrounds
background-color
In the previous section, we learned that we can modify the background color of the page with document.body.style.backgroundColor = "color_goes_here";. There is another important tidbit to know about the background color property, which is that it can be applied to individual elements as well. For example:
const header = document.createElement('h1');
header.textContent = 'Vanilla JS practice';
header.style.backgroundColor = "red";
document.body.appendChild(header);

const text1 = document.createElement('p');
text1.textContent = 'Go hang a salami, I\'m a lasagna hog.';
text1.style.backgroundColor = "yellow";
document.body.appendChild(text1);

const text2 = document.createElement('p');
text2.textContent = 'Read the previous sentence backwards.';
text2.style.backgroundColor = "green";
document.body.appendChild(text2);

background-image
In addition to a solid color, we can use images as backgrounds as well. Say, for example, we wanted to use this yummy-looking lasagna as a background image:

We can use this image as our background one of two ways.
- Image file saved to local filesystem
document.body.style.backgroundImage = 'url("lasagna.jpg")';
- Image file is online
document.body.style.backgroundImage = 'url("https://imgur.com/TUQLNdi.jpg")';

background-repeat and background-size
Oftentimes our background image does not perfectly match the size of the display. Therefore, we often have to stretch or repeat the image to make the background look complete.
The two main style properties that affect this are background-repeat and background-size.
background-repeat has four options:
-
no-repeat(image renders one time, default location is top left corner)
document.body.style.backgroundImage = "url('https://biologydictionary.net/wp-content/uploads/2020/09/Walrus-1.jpg')";
document.body.style.backgroundRepeat = "no-repeat";

-
repeat-x(image repeats horizontally across the screen)
document.body.style.backgroundImage = "url('https://biologydictionary.net/wp-content/uploads/2020/09/Walrus-1.jpg')";
document.body.style.backgroundRepeat = "repeat-x";

-
repeat-y(image repeats vertically across the screen)
document.body.style.backgroundImage = "url('https://biologydictionary.net/wp-content/uploads/2020/09/Walrus-1.jpg')";
document.body.style.backgroundRepeat = "repeat-y";

-
repeat(default behavior; image repeats horizontally and vertically to fill the entire screen)
document.body.style.backgroundImage = "url('https://biologydictionary.net/wp-content/uploads/2020/09/Walrus-1.jpg')";
document.body.style.backgroundRepeat = "repeat";

background-size has two main options:
-
auto(default behavior; image renders at its original size)
document.body.style.backgroundImage = "url('https://biologydictionary.net/wp-content/uploads/2020/09/Walrus-1.jpg')";
document.body.style.backgroundRepeat = "no-repeat";
document.body.style.backgroundSize = "auto";

-
cover(a single image stretches to cover the entire screen)
document.body.style.backgroundImage = "url('https://biologydictionary.net/wp-content/uploads/2020/09/Walrus-1.jpg')";
document.body.style.backgroundRepeat = "no-repeat";
document.body.style.backgroundSize = "cover";

CSS Essential #3: Text emphasis
The main types of text/typographical emphasis include bold, italic, and underline.
Bold text
To make text bold, set the font-weight property to the value "bold".
text1.style.fontWeight = "bold";

Italic text
To make text italic, set the font-style property to the value "italic".
text2.style.fontStyle = "italic";
Underlined text
To make text underlined, set the text-decoration property to the value "underline".
header.style.textDecoration = "underline";
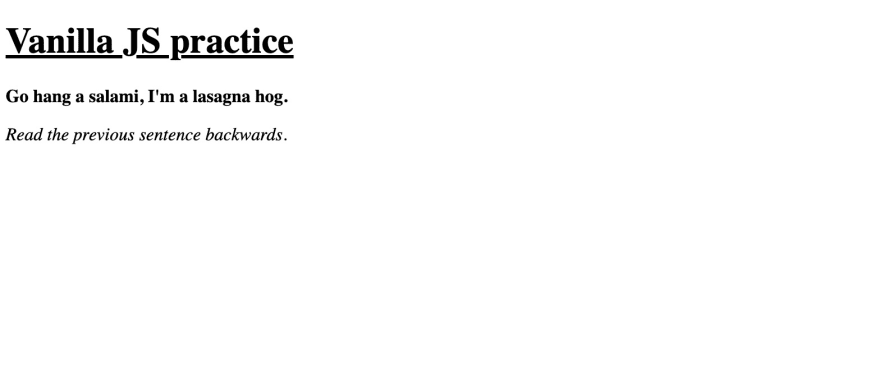
In addition to underlined text, the text-decoration property can also overline and line-through/strikethough text.
header.textContent = 'Vanilla JS practice';
header.style.textDecoration = "underline";

text1.textContent = 'Go hang a salami, I\'m a lasagna hog.';
text1.style.fontWeight = "bold";
text1.style.textDecoration = "overline";

text2.textContent = 'Read the previous sentence backwards.';
text2.style.fontStyle = "italic";
text2.style.textDecoration = "line-through";

CSS Essential #4: Borders
Borders have several properties, which can be set and modified individually. However, in my experience most developers use the shorthand border property, which combines the border-width, border-style, and border-color properties. Instead of writing three lines of code...
header.style.borderWidth = "5px";
header.style.borderStyle = "dotted";
header.style.borderColor = "salmon";
...one could write one line of code:
header.style.border = "5px dotted salmon";

When using the border property, the only parameter that is required is border-style. border-width and border-color are optional, and default to 3px and black respectively.
As with color, borders are big topic with lots of different options for customization and specification. Rather than explain and show all the options in this tutorial, click here if you wish to learn more about CSS border properties and options.
Try it yourself – Task
Congrats on getting this far! To try to synthesize the information presented in this tutorial, try this task on your own. Of course, if you need to refer back to earlier parts of this article for information, you are encouraged to do so!
Your task: Make a square on the screen, below your text. This is very open-ended, and there are nearly limitless ways to do this.
Extra Credit: If you complete this task, try to complete it one or two MORE times using different approaches.
Before you get started, you should do some independent Google research on CSS height and width properties. I didn't cover those properties in this tutorial, but you may need them now.
If you get stuck, scroll down for a few hints, and down to the next section for a couple sample answers. Good luck!

.
.
.
.
.
.
.
.
.
.
Hint #1: The first step to completing this task is to create a new element, likely a <div>. From there, you can use a combination of the style properties you learned in this tutorial to make a square.
.
.
.
.
.
.
.
.
.
.
Hint #2: Have you looked up the height and width properties yet? You may need to set those properties on your new element to give it a defined area.
.
.
.
.
.
.
.
.
.
.
Hint #3: If you can't get a square to appear on the screen, re-check the basic stuff:
Have you used
document.body.appendChild(YOUR_SQUARE_HERE)?Have you given your square some sort of style feature that makes it visible? Double check your syntax for every line.
Try it yourself – Example solutions
I hope you were able to make a square! If you were not, or if you want to see some more ways to do it, check out some example solutions:
- Using the
borderproperty:
const newSquare = document.createElement('div');
newSquare.style.border = "solid";
newSquare.style.height = "200px";
newSquare.style.width = "200px";
document.body.appendChild(newSquare);

- Using the
background-colorproperty:
const newSquare = document.createElement('div');
newSquare.style.backgroundColor = "red";
newSquare.style.height = "200px";
newSquare.style.width = "200px";
document.body.appendChild(newSquare);

- Using the
background-imageproperty:
const newSquare = document.createElement('div');
newSquare.style.backgroundImage = "url('purple-square.png')"
newSquare.style.height = "200px";
newSquare.style.width = "200px";
document.body.appendChild(newSquare);

Conclusion
That was but a brief introduction to all that CSS has to offer, and how to implement it in JavaScript. I hope you learned a lot that you can apply in your own projects! Be sure to check out the third part of this tutorial, which will (I think) cover modals in JavaScript.
Attributions:
- Peanut butter and jelly image by Freddy G, linked from Unsplash
- Colorful festival image by Robert Katzki, linked from Unsplash
- Lasagna image by sunorwind, linked from Unsplash
- Horseback rider image by Mikayla Storms, linked from Unsplash
- Patrick Star gif is the property of ViacomCBS, Inc. Linked from GIPHY

Latest comments (0)