
Software Testing is a method to check whether the actual software product matches expected requirements and to ensure that the software product is defect-free. This article only focuses on the unit, integration, and API but there are more than 150 types of testing types and still adding. Also, note that not all testing types are applicable to all projects but depend on the nature & scope of the project.
Importance
When a software developer, developed a new feature or make changes to an old one, It’s compulsory to write a test for that change or feature so that the PR (Pull Request) Reviewer or QA (Quality Assurance) Engineer should know what your code is doing by looking into your test.
Software Testing can also help in process of CI/CD and pre-commits hooks if you are maintaining your code using version-controlling platforms i.e GitHub, GitLab, etc. If you decided to write tests from the very beginning of your project, This will also help you in covering edge case when your project codebase increase then tests will help you to know which case was failing because of a new feature or change.
Prerequisite
Before going deeper into Software Testing, You should know that I’m using JavaScript frameworks and libraries to test my code.
In this article we will cover 3 types of Software Testing namely:
1) Unit Testing
2) Integration Testing
3) API Testing
Here is the list of tools and software's which I'm using for Software Testing namely:
1) Node.js
2) npm
4) Jest
5) Supertest
6) Expess.js
Let’s Start
First, install Node.js and NPM for your operating system so that you can run JavaScript code, download and install packages from Node Package Manager.
I’m using Visual Studio Code IDE (Integrated Development Environment) but you can use any IDE for yourself.
1) Unit Testing
It is the process of testing a single software unit. For example, your team created a new feature that is responsible for adding two integers using JavaScript.
Add this file within your project directory and then run node add.js. You can see that it prints 3 to the console.

I know now you may be wondering how to test this unit right? Relax! I will show you.
You successfully developed a feature that is responsible for adding two numbers and now can simply test it by installing jest cli from npm.
Install jest-cli globally by using this command: npm install -g jest-cli
This command will install jest globally within the system, after installing jest-cli you can use the jest command directly from the terminal.
But still, you need to configure jest so that you can test the add.js file; create a new file jest.config.json and add this within the project directory.
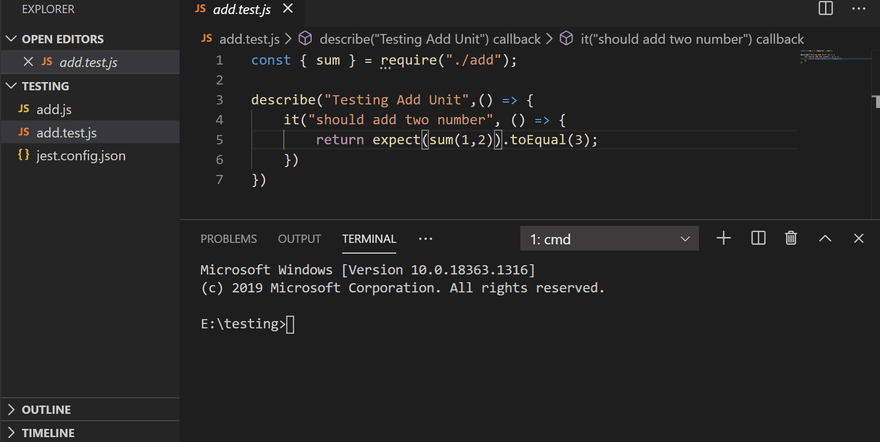
After creating jest.config.json file within the project directory, now you will be able to test your add.js file; So to test this code create a new file as add.test.js.
All test files should have .test before .js extension so that jest should know that.
As you can see below this is my add.test.js which is testing sum() within the add.js file.
In this file, I first import sum() from add.js file then created a describe() that is responsible for describing my test, and within its callback, I created it() which is responsible for testing my sum(). Remember that your it() and describe() should have a description so that everyone should know what this unit is doing.
Now let's run this test by using this command:
jest
As you can see above we successfully test our add.js using jest and our test is passed.
2) Integration Testing
It is the process of testing combined units. For Example, Your team now decided to perform arithmetic operations in a way that it should be able to add and subtract those two numbers. So here we go with the new file arithmetic.js according to requirements.
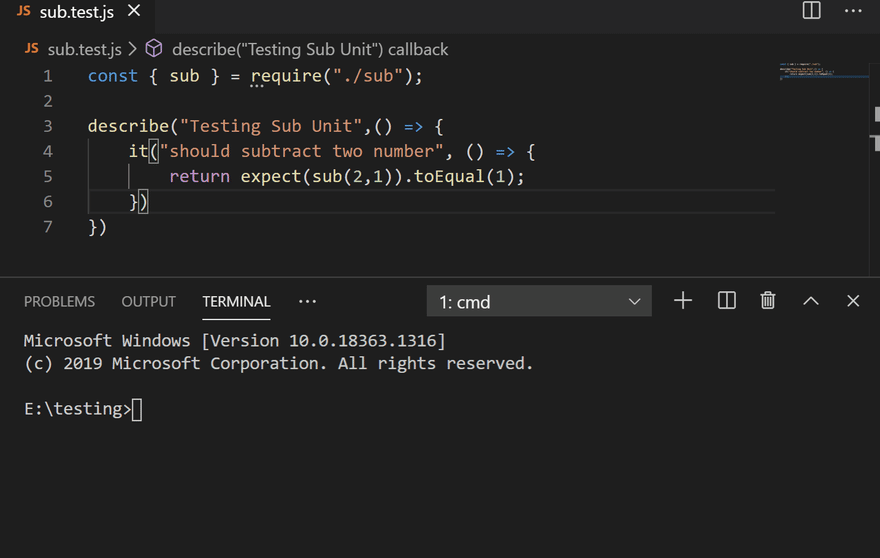
But before directly jumping to arithmetic.js we need to create a new unit sub.js which will be responsible for subtracting two numbers.
Now we will create a new file arithmetic.js which will be responsible for the addition and subtraction of two numbers by combining add.js and sub.js into arithmetic.js.
Add this file within your project directory and then run node arithmetic.js. You can see that it prints “3:1" to the console by adding and subtracting 2 with 1.

It is good practice to write a unit of sub.js, which we previously created so here it is;
Now just run sub.test.js using this command: jest -- sub.test.js
This command will only run a single test which is sub.test.js got it?
After testing both units add.js and sub.js, This is the right time to test arithmetic.js so here is the integration test of it.
You can run this testing using this command: jest -- arithmetic.test.js
3) API Testing
API (Application Programming Interface) testing is a type of software testing that aims to determine whether the APIs that are developed meet expectations when it comes to functionality, performance, reliability, and security for an application.
So now we will create an API using the De-Facto framework of Node.js known as Express.js.
First initialize npm within the project directory, so that we can install modules: Express.js, and super test for our use case.
Initialize npm within project directory this command;
npm init
Here is package.json from npm init and after installing modules.
Installs Express.js, Body Parser, and Supertest by this command;
npm install express supertest --save
After installing these libraries and frameworks you can see node_modules folders created by npm and added as package.json dependencies.
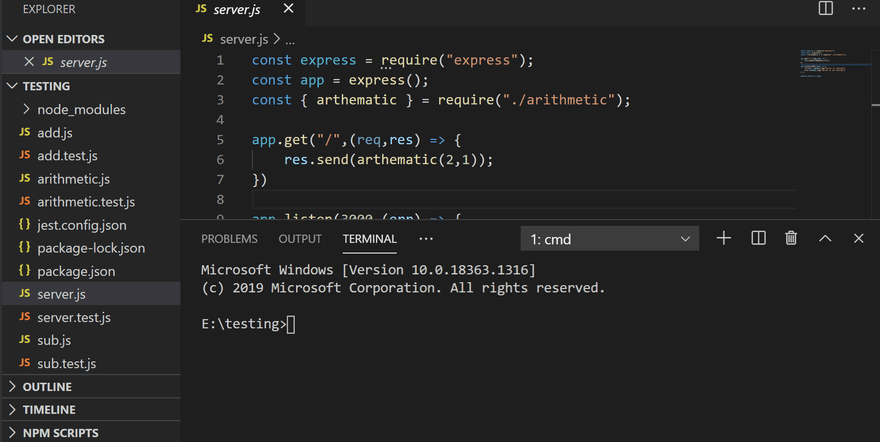
Now create a new file server.js which we will responsible for running Express.js server and using arithmetic.js as an API.
Here is the codebase of running the server and using arithmetic as API.
Run server.js using this command:
node server.js
After the server is successfully running you can now see the output of arthematic.js file on localhost:3000.
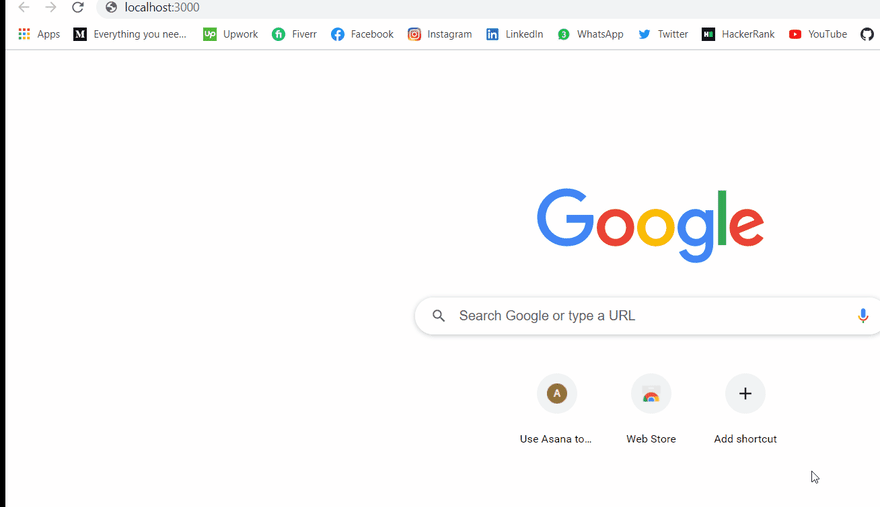
Now we set up the server using Express.js and we verify that it is running and sending responses on localhost:3000.
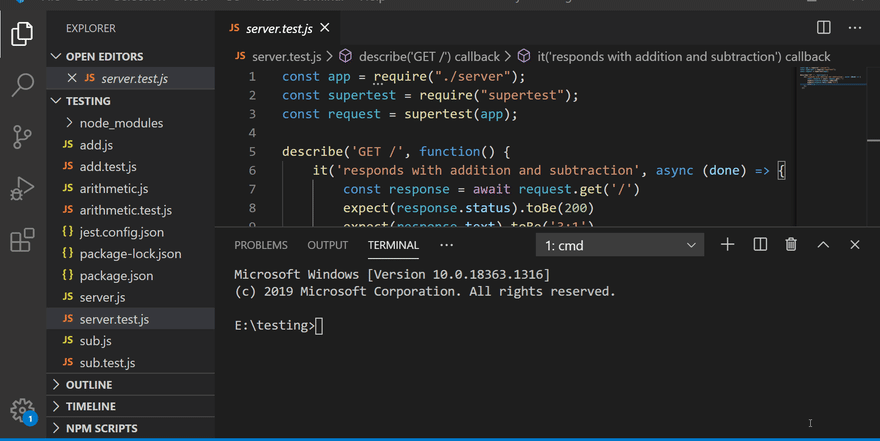
Now we are on right track to writing an API test of API which we created so here it is;
Now our test is ready we added two assertions one for status from API and the second for response texted;
Run API test using this command: jest -- server.test.js
Conclusion
This article was a complete package of testing your code and API using jest and super test. Testing types which we covered were unit, integration, and API.
In this article, we learn that how software testing is important for software developers and his team. We also look into practical ways to test code and API but if you are interested to learn more then don’t forget to look into automation testing also, I will cover it in my next article.
Thank you for reading this article.

Top comments (0)