OAuth 2.0 and OpenID Connect (OIDC) are getting more and more popular as authentication and authorization protocols. OIDC also uses JSON Web Tokens (JWT) as a simple token standard. Another protocol that is gaining popularity is MQTT. Since Solace PubSub+ Event Broker supports all these protocols, why don’t we see how they all work together nicely in a simple demo? We will use the Keycloak server as the authorization server and a simple dotnet core application to build a full end-to-end demo.
Set up the servers
For this blog, I’m running both Solace PubSub+ Event Broker and the Keycloak server as Docker containers on macOS. The configuration steps are the same regardless where we run the servers. One thing to note is that we need connectivity from the Solace PubSub+ Event Broker to the Keycloak server.
Run this command to set up Solace PubSub+ Event Broker software in your local Docker environment.
$ docker run -d --network solace-net -p 8080:8080 -p 1883:1883 --shm-size=2g --env username_admin_globalaccesslevel=admin --env username_admin_password=admin --name=mypubsub solace/solace-pubsub-standard:9.3.0.22
Run this command to set up the Keycloak authorization server in your local Docker environment.
$ docker run -p 7777:8080 \
--network solace-net \
--name keycloak \
-e KEYCLOAK_USER=user \
-e KEYCLOAK_PASSWORD=password \
-e DB_VENDOR=H2 \
-d jboss/Keycloak:7.0.0
If Port 8080 is already used on your local machine, change it to any other available port (the first port in the -p argument).
Using the docker network parameter enables you to access this host using hostname from other Docker instances. If you don’t have one yet, create one with the following command:
$ docker network create solace-net
Once the Keycloak server container is started, we can verify it from the Keycloak homepage.

Figure 1 Keycloak Homepage – use the port we published in the docker run command
Keycloak as the Authorization Server
An authorization server grants clients the tokens they can use to access protected resources. In this setup, we are using the Keycloak server as the authorization server.
In this section, we will set up the user account in the authorization server. We will use this user to get the access and ID token from the authorization server.
The first step is to log in using the username and password defined during the Docker container creation.
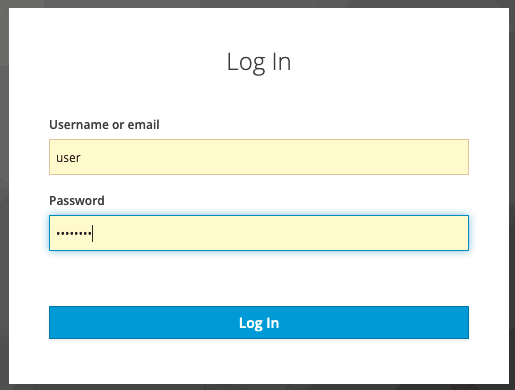
Figure 2 Use the username and password defined as environment variable
By default, Keycloak is set up with a built-in realm called Master. For simplicity, we will use this realm for our user. If you want to create a new realm, you can do that as well.
Create a Client
The next step is to create a new client in the realm. We do this by clicking the Create menu on the top right of the clients table.
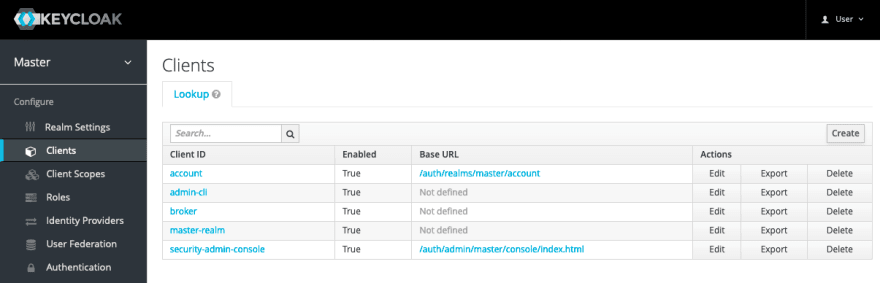
Figure 3 Client Admin Page
Enter a client ID and choose openid-connect as the client protocol. We will use this client for our OpenID Connect test.
We can leave the Root URL field empty for this demo.

Figure 4 Create a new client
Next, enter the mandatory Redirect URLs for this client. Since we’re not going to use this for the Web, we can use a simple URL such as localhost/* for this demo.

Figure 5 Enter the Redirect URL
Optionally, change the default Access Token Lifespan to a longer period if you want to use a single token for multiple tests spanning several minutes or more.

Figure 6 Change the default Access Token Lifespan
Configure Client Scope for a Custom Audience
Additionally, we will add a custom audience called “pubsub+” to this client for audience validation. Keycloak will add the client ID as the audience attribute value and provide a few ways to add a custom audience. For this test, we create a client scope by the name of “pubsub+” and include a custom audience there. We then include this client scope in the client we created earlier.

Figure 7 Create a client scope to have a custom audience value
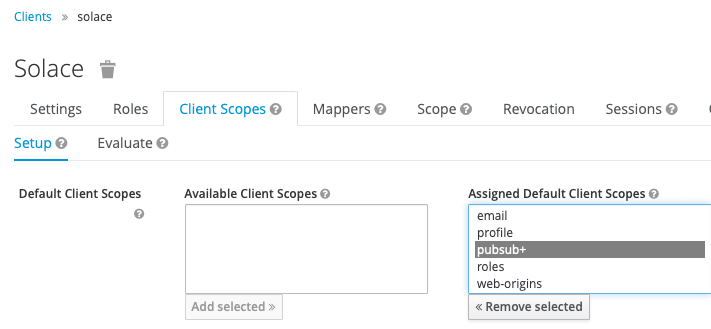
Figure 8 Add the client scope to the Solace client
Configure Solace PubSub+ Event Broker
Create an OAuth Provider
The first step is to configure an OAuth provider for OpenID Connect in the Solace PubSub+ Event Broker.

Figure 9 Create a new OAuth provider
We will create the new OAuth provider based on the Keycloak authorization server. We will enable audience validation and authorization group as per our Keycloak client configuration, use the JWKS URL from the Keycloak, and use the preferred_username field from the id_token as the username claim source.
We will look for audience and authorization group claims from the access_token since Keycloak will have those in access_token by default. This is not a mandatory option. Simply configure against how your authorization server would have the claims.
Refer to the screenshot below for the configuration values and don’t forget to enable this provider by toggling the Enabled option on.

Figure 10 Set up a new OAuth provider
We will not configure Token Introspection for this test.
For the username, we will find the username claim from the id_token from the preferred_username attribute rather than from sub. This attribute should carry the value of “user” as the username we use in Keycloak. We will use the username “user” in our sample application.
And as a bonus feature, not really part of OpenID Connect, we can enable API username validation so that the broker validates if the username provided in your application API call matches the username claim extracted from the token.
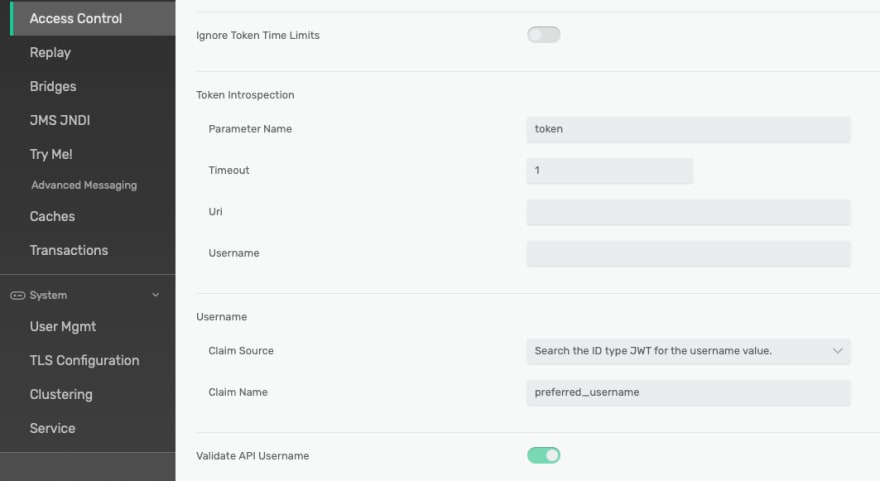
Figure 11 Set up a new OAuth provider (2)
Enable OAuth
Next, we will set up the Solace PubSub+ Event Broker’s Client Authentication to enable the OAuth Authentication. This is done by toggling the OAuth Authentication switch and then select one of the available OAuth providers as the default provider for OAuth authentication. This value is used when a client using OAuth authentication does not provide the OAuth provider information.
Notice that we disable the Basic Authentication and Client Certificate Authentication for this test to ensure that our broker will only do OAuth authentication.
To keep it simple, we will use default Authorization Type of Internal Database.
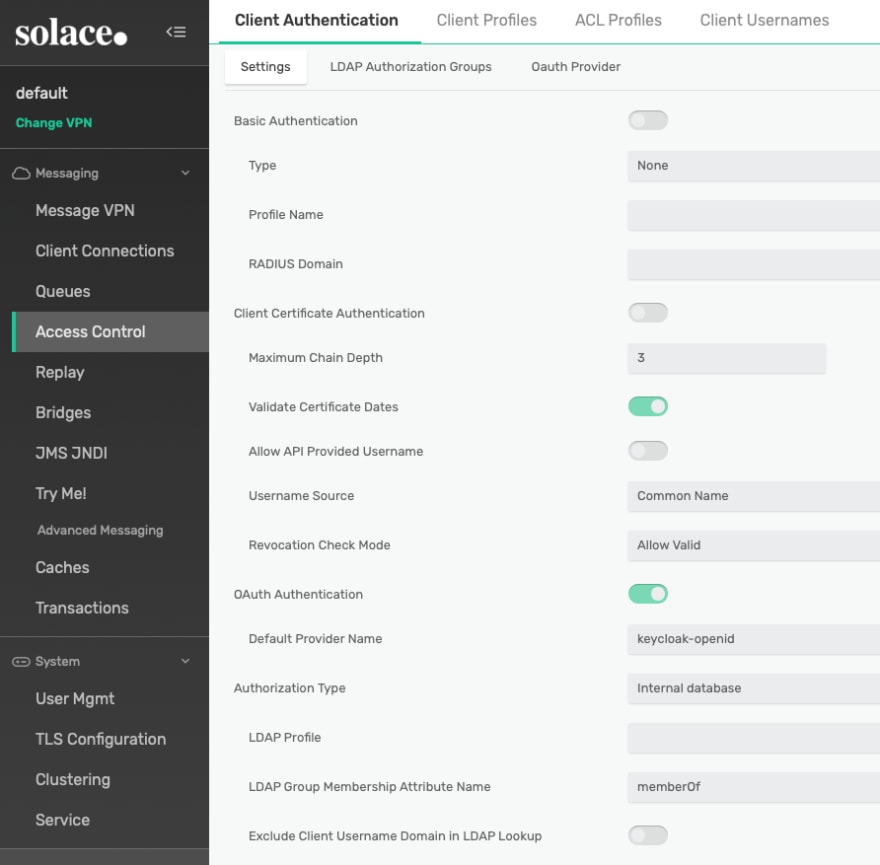
Figure 12 Enable OAuth Authentication and set the Default Provider Name
Create an Authorization Group
The next step is to make sure we have configured authorization groups to be used by the broker to validate the authorization claim in the token.

Figure 13 Create an authorization group
Let’s create a sample authorization group by the name “pubsub+” to be used later by the OAuth client.
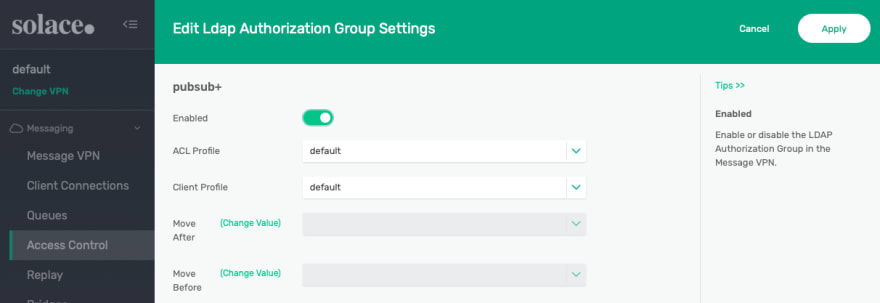
Figure 14 Enable and select profiles
Make sure to enable this new authorization group and feel free to play around with the ACL and Client Profiles. For now, we will settle with the default profiles for both.
Ready for Test
Now we have the Solace PubSub+ Event Broker and the Keycloak authorization server configured, we are ready to run some tests.
Sample Project
This is a sample .Net Core application to test the OAuth authentication and authorization features. It will take the two arguments access_token and id_token and subscribe and publish a message.
<Project Sdk="Microsoft.NET.Sdk">
  <PropertyGroup>
    <OutputType>Exe</OutputType>
    <TargetFramework>netcoreapp2.2</TargetFramework>
    <RootNamespace>solace_dotnet_mqtt</RootNamespace>
  </PropertyGroup>
  <ItemGroup>
  </ItemGroup>
  <ItemGroup>
  </ItemGroup>
  <ItemGroup>
  </ItemGroup>
  <ItemGroup>
    <PackageReference Include="M2MqttClientDotnetCore" Version="1.0.1"/>
  </ItemGroup>
</Project>
using System;
using System.Text;
using M2Mqtt;
using M2Mqtt.Messages;

namespace solace_dotnet_mqtt

{
    class Program
    {
        static void Main(string[] args)
        {
            if (args.Length < 2) {
                Console.WriteLine("Usage: dotnet run <access_token> <id_token>");
                Environment.Exit(-1);
            }

            MqttClient client = new MqttClient("localhost");

            client.MqttMsgPublishReceived += client_MqttMsgPublishReceived;
            string clientId = Guid.NewGuid().ToString();
            string solace_oauth_provider = "keycloak-openid";
            string oidcpass = "OPENID~" + solace_oauth_provider + "~" + args[1] + "~" + args[0];
            client.Connect(clientId, "user", oidcpass);
            string strValue = "Hello World!";
            client.Subscribe(new string[] { "test/topic" }, new byte[] { MqttMsgBase.QOS_LEVEL_AT_LEAST_ONCE });
            client.Publish("test/topic", Encoding.UTF8.GetBytes(strValue), MqttMsgBase.QOS_LEVEL_AT_LEAST_ONCE, false);
        }

        static void client_MqttMsgPublishReceived(object sender, MqttMsgPublishEventArgs e)
        {
            Console.WriteLine("Message received: " + System.Text.Encoding.UTF8.GetString(e.Message));
        }
    }
}
Prepare the Tokens
To get the tokens, we can use tools such as Postman to get new tokens from the Keycloak authorization server.
We can simply create a new request and go to the Authorization tab, select OAuth 2.0 as the type, and click the Get New Access Token button on the right panel.
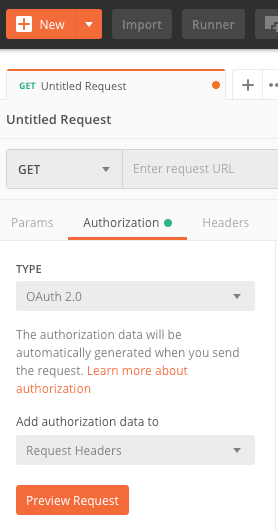
Figure 15 Use Postman to get the tokens using OAuth 2.0 Authorization

Figure 16 Get to the New Access Token menu
Fill in the token request details as per the sample below. Make sure you enter the correct client ID.
Since we have set the client ID with public access, we don’t need to enter any client secret. And for Scope, we will use openid so that this is handled as OpenID Connect.
For State , we just put any value for this test.

Figure 17 Use Auth URL from the Keycloak server
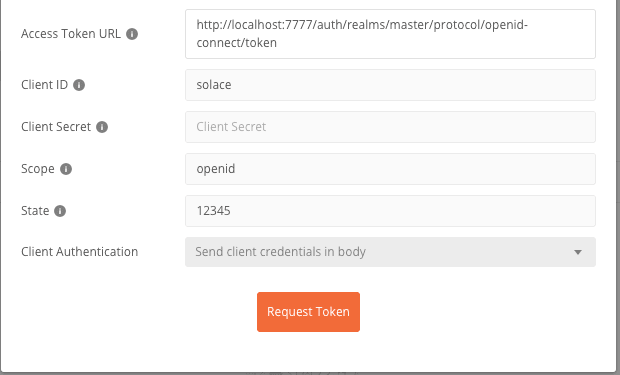
Figure 18 Use Access Token URL from Keycloak and change the Client Authentication setting
You will be presented with the Keycloak login page to authenticate yourself to be able to get the tokens. Use the username “user” and password “password” that we used when running the Docker container for the Keycloak server.
Once you get the tokens, you can copy both the access_token and id_token for use in the test later.
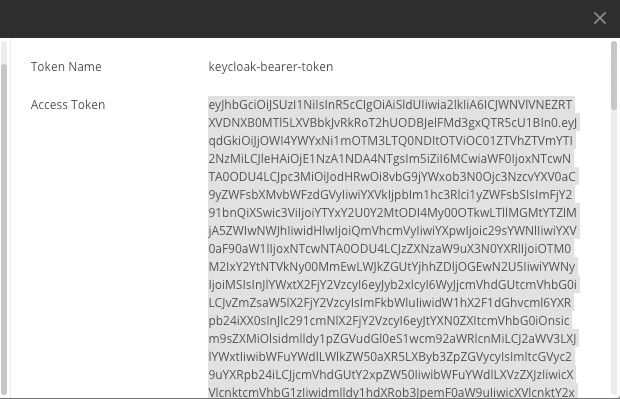
Figure 19 Copy the Access Token

Figure 20 Copy the id_token
Peek into the Tokens
You can peek into the tokens to see the contents and attribute values. You can go to https://jwt.io and simply paste the token into the Encoded text box on the left.

Figure 21 Decode a JWT access token
The highlighted aud and scope attributes are the ones we use in this test. As you can see, the aud value of pubsub+aud is extracted from the token, as well as the scope of pubsub+.

Figure 22 Decode a JWT id_token
As we can see, the id_token will contain a preferred_username attribute with the value “user”.
Run the Test Program
To test with the provided sample program, simply run the dotnet run command with both tokens as arguments. For this sample, I have simply used localhost for the Solace PubSub+ Event Broker address as we are running it on Docker locally. Upon successful run, the program will simply print out “Message received: Hello World!” to the console.
ari@Aris-MacBook-Pro solace-dotnet-mqtt % dotnet run [access_token] [id_token]Message received: Hello World!^C
ari@Aris-MacBook-Pro solace-dotnet-mqtt %
I hope you find this blog post useful. For more information about the topic, please refer to the following:
The post How to set up Solace PubSub+ Event Broker with OAuth for MQTT against Keycloak appeared first on Solace.

Top comments (0)