
MQTT is the de-facto messaging protocol in the IoT world. When it comes to authenticating and identifying thousands of devices, you may see mention of client certificate authentication, but very little on how to actually achieve this. Although managing certificates, revocation lists, and everything that comes with being a certificate authority are complicated, getting started with client certificate authentication is not.
In this article, we will be performing all the steps necessary to begin creating a Node.js MQTT application authenticating via client certificates. There are three basic things we will be doing:
- Creating a certificate authority (CA) and a client certificate
- Uploading the CA certificate to the MQTT broker (Solace PubSub+ in this case)
- Configuring a JS MQTT client to use the client certificate for authentication
There are a few things you need before we get started:
- OpenSSL
- Node.js
- NPM
- Solace Cloud PubSub+ Developer or Starter Service
Now let’s create the beginnings of an IoT solution!
First, we’ll create a certificate authority (CA) to sign client certificates using OpenSSL.
openssl req -nodes -new -x509 -newkey rsa:4096 -keyout root.key -out root.pem -subj "/C=/ST=/L=/O=/OU=/CN=root"
Next, we’ll create a client certificate that your MQTT client will authenticate with and a request to be signed by your CA.
How the client certificate is handled is dependent on your MQTT broker. This article will use Solace’s PubSub+ Broker which, in addition to authenticating the client, can use the common name (CN) or subject alternative name (SAN) to identify the client (see Solace’s documentation for more details). By default, the CN will map to a client username. In this article we’re using the CN “demo-client”.
openssl req -nodes -new -newkey rsa:4096 -keyout client.key -out client.csr -subj "/C=/ST=/L=/O=/OU=/CN=demo-client"
Finally, we’ll sign this certificate with our CA.
openssl x509 -req -in client.csr -CA root.pem -CAkey root.key -CAcreateserial -out client.pem -days 1825 -sha256
We should have all the files we need to continue. In particular, we’ll need the following files:
root.pem
client.pem
client.key
We now need to setup the MQTT broker. In PubSub+ Cloud, you require either a Developer or Starter service to take advantage of client certificate authentication.
The client certificate will be sent to the MQTT broker as part of the TLS-handshake. The validity of the client certificate will be determined based on the broker’s implementation. For the Solace PubSub+ Broker, this is done by uploading the CA’s certificate stored in root.pem.
In your service’s detail page, click on Manage, and then Authentication.

Under the Service Authentication tab, enable Client Certificate Authentication, then click Save.

Back in the Manage tab, click on Certificate Authorities .
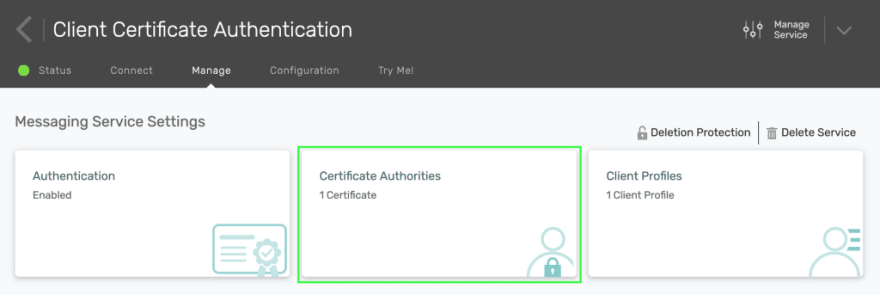
Then, click on the + Add New button. Choose a name, and paste the contents of your root.pem then click Submit .

Next, a client username must be created using the CN of the client. Under Manage in your service’s detail page, click on Access Control.
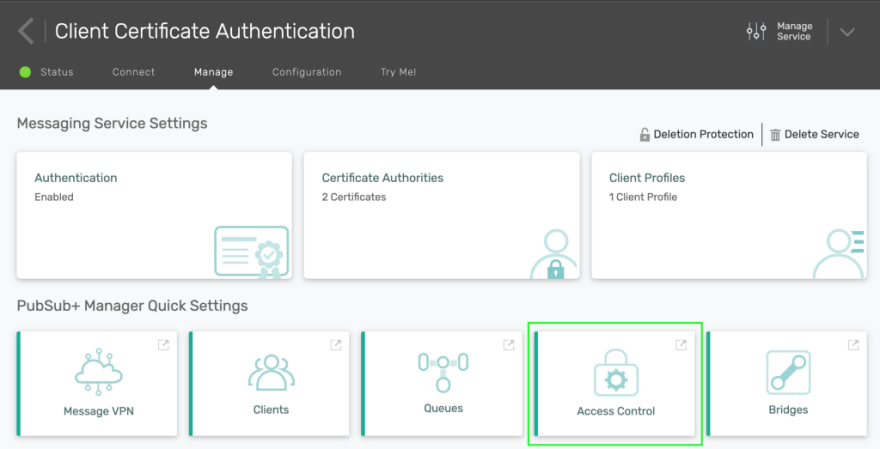
You will be brought directly to the Solace PubSub+ Broker’s management interface. Click on the Client Usernames tab and click on the + Client Username button.

Enter “demo-client” as the client username. Click on Enable then Apply.

Your Solace PubSub+ Broker is now configured to authenticate clients using certificates signed by your CA.
We can now finally setup our client and send and receive a message.
We’ll be using Node.js and MQTT.js to subscribe to a topic, send a message to that topic, and print out the message we receive via the subscription.
Create a file named demo.js in the same directory as the certificate files with the following contents:
**const** mqtt = require('mqtt');
**const** fs = require('fs');

**const** client = mqtt.connect('<HOST>', {
  key: fs.readFileSync('client.key'),
  cert: fs.readFileSync('client.pem'),
});

client.on('connect', () => {
  client.subscribe('demotopic');
  client.publish('demotopic', 'Hello mqtt');
});

client.on('message', (topic, message) => {
  console.log(`Received message: ${message.toString()}`);
  client.end();
});
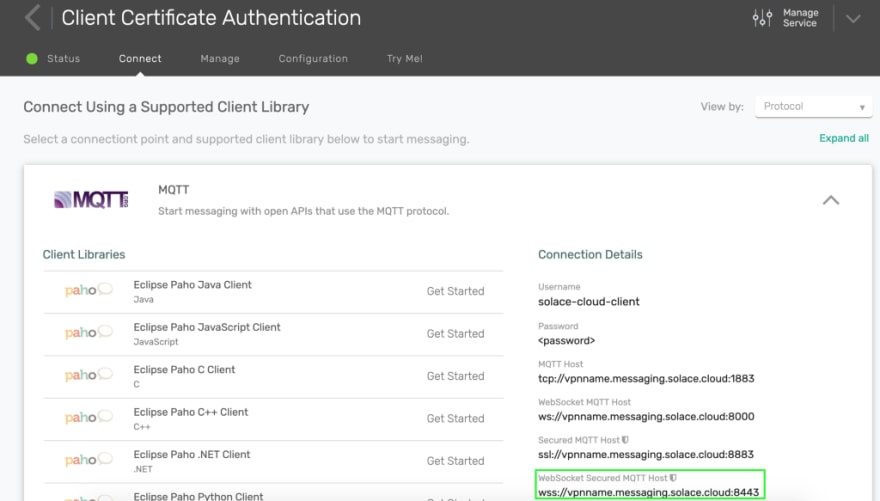
Replacing with the secured MQTT host of the broker (remember that the client certificate is sent as part of the TLS handshake, so insecure connections will not work for client certificate authentication). In Solace PubSub+ Cloud, in your service’s detail page, under the Connect tab, you can use the WebSocket Secured Host under the MQTT section.
Then run npm install mqtt in this directory. Finally, publish and receive a message with node demo.js. You should see the following output:
Received message: Hello mqtt
We now have the foundations of an IoT solution. There is more to work on from here, including how to provision, manage, and revoke the client certificates. Although this example used OpenSSL, you may want to look into more sophisticated solutions like CloudFlare’s CFSSL, Vault, or something managed from your favourite cloud provider.
As a bonus, Solace PubSub+ uses the same client certificate authentication for other protocols, so you can start using the same client certificate to authenticate with SMF, AMQP, and others. See the official documentation for more details.
I hope this helps you on your journey to connecting the world, one device at a time.

Oldest comments (0)