Hello guys,
Last month, when I started my journey with Blazor, I found that there were not many authentication libraries supported it, especially the client app, maybe because it’s still in preview? I decided to do some stuffs with an exiting Javascript library - oidc-client-js – wrote a simple library around it to do the authentication in my researching project. And now I think it looks not bad and maybe I should share it.
Ok, let’s get start.
Download The Starting Sample Solution.
Because we are going to build a full-feature authentication sample, beside the Blazor app, we will need an Identity Server and an API. To get in action faster, I will give you a GitHub repository to download the sample solution that already had these two projects. If you have your own Identity Provider and API, you can use them and ignore this step.
GitHub: https://github.com/sounj142/Authentication.Sample
Note: There are two projects in this repo, the Identity Server running on port 5000, and API on 5001.
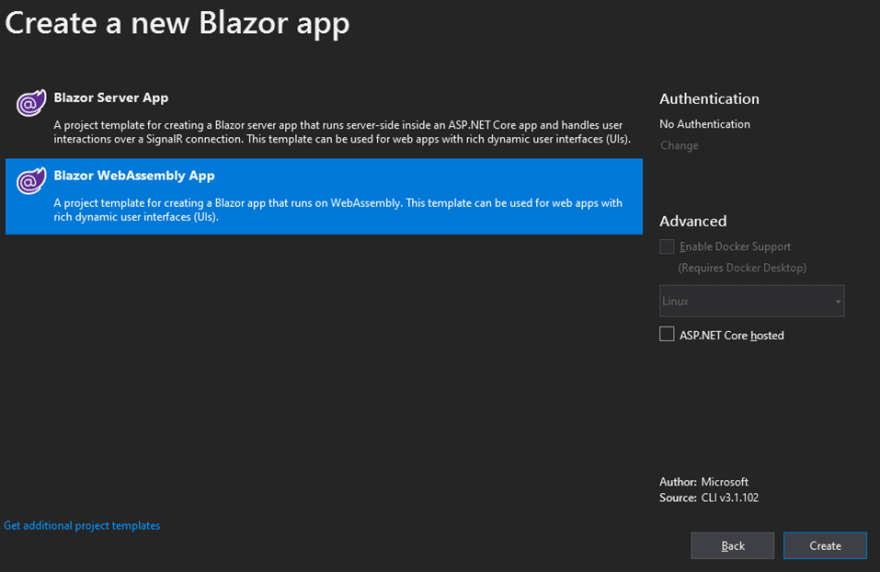
Create Blazor WebAssembly App
- Open the sample solution
- In this solution, add a new Blazor Webassembly project, call it BlazorClient
I almost forget. I wrote this library when developed an App using Blazor 3.2.0 Preview 2. It’s better if you have the same template, get download link in this post: https://devblogs.microsoft.com/aspnet/blazor-webassembly-3-2-0-preview-2-release-now-available/
Ok, now we have a working Blazor sample app. I will add the Authentication to it.
Configure port and install Nuget package to BlazorClient App
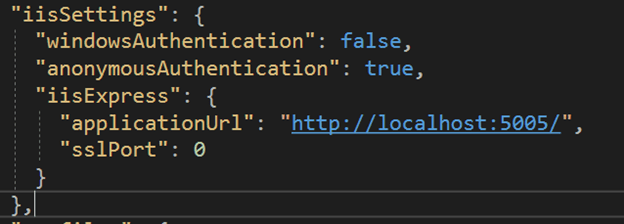
- In Identity Server, I already had a Client running on port 5005. So we will change the port of BlazorClient to leverage this port: In BlazorClient project, expand Properties, open file launchSettings.json, change the iisSettings section to something like bellow:
- Add nuget HLSoft.BlazorWebAssembly.Authentication.OpenIdConnect to project, notice that it’s prerelease. You can install it using Visual Studio or CLI
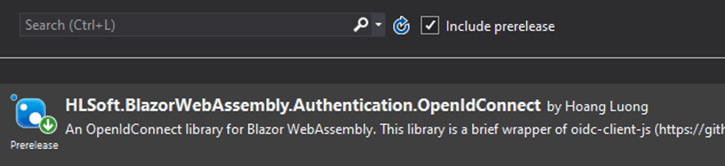
Install-Package HLSoft.BlazorWebAssembly.Authentication.OpenIdConnect -Version 0.6.1-Preview2
Configure authentication for BlazorClient app
Program.cs
- In Program.cs, call AddBlazoredOpenIdConnect() to config Oidc:
public class Program
{
    public static async Task Main(string[] args)
    {
        var builder = WebAssemblyHostBuilder.CreateDefault(args);
        builder.RootComponents.Add<App>("app");
        builder.Services.AddBaseAddressHttpClient();
        builder.Services.AddOptions()
            .AddAuthorizationCore()
            .AddBlazoredOpenIdConnect(options =>
            {
                options.Authority = "http://localhost:5000/";

                options.ClientId = "Client.Code";
                options.ResponseType = "code";

                options.Scope.Add("openid");
                options.Scope.Add("profile");
                options.Scope.Add("api");
            })
            .AddHttpClient<WeatherForecastService>(client =>
            {
                client.BaseAddress = new Uri("http://localhost:5001/");
            });
        await builder.Build().RunAsync();
    }
}
WeatherForecastService.cs
- Add a service class to wrap the Weather Forecast API
public class WeatherForecastService
{
    private HttpClient _httpClient;
    private readonly IAuthenticationStateProvider _stateProvider;

    public WeatherForecastService(HttpClient httpClient, IAuthenticationStateProvider stateProvider)
    {
        _httpClient = httpClient;
        _stateProvider = stateProvider;
    }

    public async Task<IList<WeatherForecast>> GetAll()
    {
        await _stateProvider.SetAuthorizationHeader(_httpClient);
        return await _httpClient.GetJsonAsync<IList<WeatherForecast>>("WeatherForecast");
    }
}

public class WeatherForecast
{
    public DateTime Date { get; set; }

    public int TemperatureC { get; set; }

    public string Summary { get; set; }

    public int TemperatureF { get; set; }
}
App.razor
- In App.razor, wrap all elements within CascadingAuthenticationState component and replace RouteView with AuthorizeRouteView. App.razor content should look like bellow:
<CascadingAuthenticationState>
    <Router AppAssembly="@typeof(Program).Assembly">
        <Found Context="routeData">
            <AuthorizeRouteView RouteData="@routeData" DefaultLayout="@typeof(MainLayout)">
                <NotAuthorized>
                    <h1>Sorry, you're not authorized to view this page.</h1>
                </NotAuthorized>
            </AuthorizeRouteView>
        </Found>
        <NotFound>
            <LayoutView Layout="@typeof(MainLayout)">
                <p>Sorry, there's nothing at this address.</p>
            </LayoutView>
        </NotFound>
    </Router>
</CascadingAuthenticationState>
_Imports.razor
- Open _Imports.razor and add these namespaces:
@using Microsoft.AspNetCore.Components.Authorization
@using Microsoft.AspNetCore.Authorization
@using HLSoft.BlazorWebAssembly.Authentication.OpenIdConnect
wwwroot/index.html
- Open wwwroot/index.html, add these script elements ( place it after blazor.webassembly.js script )
<script src="/_content/HLSoft.BlazorWebAssembly.Authentication.OpenIdConnect/oidc-client.min.js"></script>
<script src="/_content/HLSoft.BlazorWebAssembly.Authentication.OpenIdConnect/app.js"></script>
Shared/NavMenu.razor
- Add inject command to import the required service
@inject IAuthenticationService authenticationService
- Replace “Fetch data” menu with this code, we will add login/out menu here
<AuthorizeView>
    <Authorized>
        <li class="nav-item px-3">
            <NavLink class="nav-link" href="fetchdata">
                <span class="oi oi-list-rich" aria-hidden="true"></span> Fetch data
            </NavLink>
        </li>
        <li class="nav-item px-3">
            <NavLink class="nav-link" @onclick="authenticationService.SignOutAsync" href="javascript:void(0)">
                <span class="oi oi-list-rich" aria-hidden="true"></span> Log out
            </NavLink>
        </li>
    </Authorized>
    <NotAuthorized>
        <li class="nav-item px-3">
            <NavLink class="nav-link" @onclick="authenticationService.SignInAsync" href="javascript:void(0)">
                <span class="oi oi-list-rich" aria-hidden="true"></span> Log in
            </NavLink>
        </li>
    </NotAuthorized>
</AuthorizeView>
Shared/MainLayout.razor
Replace the About link with this code to display the greeting:
<div class="top-row px-4">
        <AuthorizeView>
            <Authorized>
                Hello @context.User.Identity.Name
            </Authorized>
            <NotAuthorized>
                Please login!
            </NotAuthorized>
        </AuthorizeView>
</div>
Pages/FetchData.razor:
- Add Inject command and Authorize attribute at the top:
@page "/fetchdata"
@inject WeatherForecastService weatherForecastService
@attribute [Authorize]
- Edit @code section to use API endpoint instead of static json file
@code {
    private IList<WeatherForecast> forecasts;

    protected override async Task OnInitializedAsync()
    {
        forecasts = await weatherForecastService.GetAll();
    }
}
Run the application
- Run all three projects, you should have Identity Server on 5000, API on 5001 and Blazor App on 5005.
- Test the Log in, log out feature in app. You can use these two “awesome” accounts: alice/alice , bob/bob
That’s All
Yes, that’s all :D
In this topic, to make everything short and simple, I only introduced the basic way to use this library, step-by-step. I will cover more details in README.md in my repository.
So, see you soon.

Top comments (5)
Great content. You're my hero!!!!!!!!!!!!!!
HL is brilliant
good read! Thank you a lot. You save my life!
Thank Hoang, I love you.
Some comments may only be visible to logged-in visitors. Sign in to view all comments. Some comments have been hidden by the post's author - find out more