
Authentication is an integral part of application development, as it helps to secure user data and authorization.
In this tutorial, we'll be learning how to integrate authentication into our Strapi Application, and we'll be building a simple Recipe Application with Strapi backend and Vue.js frontend. Users will search for recipes in this Application and will pull results from the Edamam recipe API. Users will be able to register, log in to our Application and also perform password recovery.
Table of Contents:
- What is Strapi?
- Installing Strapi
- Basic overview of a Strapi application
- Building the backend API
- Building our bookmarks collection-type
- Getting our Edamam recipe API credentials
- Installing Vue.js
- Installing Tailwindcss
- Building the Frontend
- User registration
- User login
- Forgot password
- Setting up email with strapi-provider-email-nodemailer
- Reset password
Prerequisites
What'll you need for this tutorial:
What you will learn
Here's what the final version of our Application will look like


You can find the GitHub repository for the frontend application here and the repository for the backend application.
Links to the assets used in this project:
Background image &
Other assets
I hope you're very excited, so let's get started with our Strapi Backend setup:
What is Strapi?
The Strapi documentation says that "Strapi is a flexible, open-source Headless CMS that gives developers the freedom to choose their favorite tools and frameworks while also allowing editors to manage and distribute their content easily."
By making the admin panel and API extensible through a plugin system, Strapi enables the world's largest companies to accelerate content delivery while building beautiful digital experiences.
Strapi is fantastic, and I'm modest about it, and I'm still stunned by what Strapi can do.
Installing Strapi
The documentation works you through installing Strapi from the CLI, the minimum requirements for running Strapi, and how to create a quickstart project.
The Quickstart project uses SQLite as the default database, but feel free to use whatever database you like.
    yarn create strapi-app my-project //using yarn
    npx create-strapi-app my-project //using npx
Replace my-project with the name you wish to call your application directory. Your package manager will create a directory with the name and will install Strapi.
If you have followed the instructions correctly, you should have Strapi installed on your machine.
    yarn develop //using yarn
    npm run develop //using npm
To start our development server, Strapi starts our app on http://localhost:1337/admin.
Building the backend API
We can start building our backend API now that our server is up and running

Building our bookmarks collection type
Next, we are going to create the Bookmarks Collection Type. Follow these steps below to create your first Collection Types.
- Open up the Strapi admin panel.
- Navigate to the content builder section
- Under Collection Types, click "create new collection type."
- A popup window should come up and prompt you to enter a display name, type
bookmarkand then click Continue. - Another popup should come up where you can choose the fields you want the Collection-Type to have.
Next, we are going to choose all the fields on the Notes Collection Type. Follow the step below to choose your types.
- On the popup window, click
Text, name the fieldlabel, leave the type selection asShort Text, and add another field.- Select
Text, name the fieldsource, leave the type selection asShort Text, and click on add another field. - Select
Text, name the fieldimage, leave the type selection asShort Text, and click on add another field. - Select
Text, name the fieldyield, leave the type selection asShort Text, and next, add another field.
- Select
- Select
JSON, name the fieldingredientLines, then click on add another field - Finally, select
Relations, and then click on the dropdown on the right side of the popup window, selectUser (from: users-permissions-user), then click onUsershave many bookmarks. It should look like the image below.

If you follow the steps above correctly, the final bookmarks collection type schema should look like the image below.

Setting the permissions for Authenticated user
Now, we have successfully created our Bookmark Content Types, let's add and assign a permission level on the bookmarks Collection-Type for authenticated User by following the steps below.
- Click on Settings under
GENERALin the side menu - Click on Roles under Users and Permissions Plugin.
- It will display a list of roles. Click on authenticated
- Scroll down, under Permissions, click on Application, then check the
Create, findOne and Findcheckboxes. - Click save, then go back.
Setting the permissions for public users
Next, we will also create and assign permissions on notes collection-type for our public users by following the steps below.
- Click public
- Scroll down, under permissions, click on users-permissions, then check all the checkboxes.
- Click save, then go back.
Password Recovery set-up
On the side menu bar under settings,
- Under
users and permissionplugin, click onAdvanced settings. - Fill up the
reset password pageinput with the following url :http://localhost:8080/resetpassword. - Click save, then go back.
Getting our Edamam recipe API credentials
- Visit https://www.edamam.com/
- Under
recipe search API, clicksign up - Under Developer, click
start now - Enter your credentials to sign up
- Click dashboard
- Click
create new Application - Select
recipe search API - On the next page, give the Application a name and a description
- Click
create Application - The next page that's rendered should contain your
Application IDandApplication keys
Now, we're done with both our backend setup, and we have our API credentials. We can proceed with installing Vue.js and building the Front-end of our Application.
Installing Vue.js
Next, we will install and configure Vue.Js to work with our Strapi backend.
To install Vue.js, using the @vue/cli package visit the Vue CLI docs or run one of these commands to get started.
    npm install -g @vue/cli
    # OR
    yarn global add @vue/cli
Once the vue CLI is installed on your local machine, run the following commands to create a Vue.js project.
vue create my-project
Replace my-project with the name you wish to call your project.
The above command should start a command-line application that walks you through creating a Vue.js project. Select whatever options you like, but select Router, Vuex, and linter/formatter because the first two are essential in our Application, then the last one is to format our code nicely.
After vue CLI is done creating your project, run the following command.
    cd my-project
    yarn serve //using yarn
    npm serve //using npm
Finally, visit the following URL: [http://localhost:8080](http://localhost:8080/) to open your Vue.js Application in your browser.
Integrating Tailwindcss with Vue.js
We are going to use TailwindCss as our css framework. Let's see how we can integrate TailwindCss into our Vue.js Application.
    npm install -D tailwindcss@npm:@tailwindcss/postcss7-compat postcss@^7 autoprefixer@^9
    or
    yarn add tailwindcss@npm:@tailwindcss/postcss7-compat postcss@^7 autoprefixer@^9
- Then in the root of your Vue.js folder, create a
postcss.config.jsand fill it up with the following lines.
    module.exports = {
      plugins: {
        tailwindcss: {},
        autoprefixer: {},
      }
    }
Also, in the root of the Vue.js folder create a tailwindcss.config.js and fill it up with the following lines.
    module.exports = {
      purge: ['./index.html', './src/**/*.{vue,js,ts,jsx,tsx}'],
      darkMode: false, // or 'media' or 'class'
      theme: {
        extend: {
          fontFamily: {
            'pacifico': ['Pacifico'],
            'montserrat': ['Montserrat'],
            'roboto': ['Roboto'],
            'righteous': ['Righteous'],
            'lato': ['Lato'],
            'raleway': ['Raleway'],
          }
        },
      },
      variants: {
        extend: {},
      },
      plugins: [],
    }
We've extended the components of the font by adding some fonts which we will use. These fonts have to be installed in your local machine to work appropriately but feel free to use whatever fonts you like.
Finally, create a index.css file in your src folder and add the following lines
    /* ./src/main.css */
    @tailwind base;
    @tailwind components;
    @tailwind utilities;
Installing Vue-fontawesome with vue.js
Font-awesome is a package that we’ll use for getting and rendering icons in our application. Execute the following commands to install vue-fontawesome on your machine
    npm i --save @fortawesome/fontawesome-svg-core
    npm i --save @fortawesome/free-solid-svg-icons
    npm i --save @fortawesome/vue-fontawesome

    or

    yarn add @fortawesome/fontawesome-svg-core
    yarn add @fortawesome/vue-fontawesome
    yarn add @fortawesome/vue-fontawesome
Installing Vue-Axios
We need a package for making API calls to our Strapi backend, and we'll be using the Vue-Axios package for that purpose.
Run the following command to install Vue-Axios in your machine
    npm install --save axios vue-axios vue-router vuex

    or

    yarn add axios vue-axios vue-router vuex
Installing Vue-progress-path
Next, we need a way to show our users that data is being fetched from an API. We'll do that using the Vue-progress-path package.
Execute the following commands to install Vue-progress-path in your machine
    npm i -S vue-progress-path
    yarn add vue-progress-path
Integrating all the installed packages into our vue.js application
What've we've done above is to install the packages. Vue.js has no idea what to do with the installed packages, so we're going to tell Vue.js what to do with the packages.
Open up the main.js file that is located in the src folder and replace the contents of the file with the following code
    import Vue from 'vue'
    import App from './views/Home.vue'
    //import './registerServiceWorker'
    import router from './router'
    import store from './store'
    import axios from 'axios'
    import vueAxios from 'vue-axios'
    import './index.css'
    import { library } from '@fortawesome/fontawesome-svg-core'
    import { faArrowRight, faArrowLeft, faSearch, faBookmark, faShare, faClock, faCheck, faUserCircle, faTrash, faBars, faTimes } from '@fortawesome/free-solid-svg-icons'
    import { FontAwesomeIcon } from '@fortawesome/vue-fontawesome'
    import 'vue-progress-path/dist/vue-progress-path.css'
    import VueProgress from 'vue-progress-path'

    library.add(faArrowRight, faArrowLeft, faSearch, faBookmark, faShare, faClock, faCheck, faUserCircle, faTrash, faBars, faTimes)
    Vue.component('font-awesome-icon', FontAwesomeIcon)
    Vue.use(vueAxios, axios)
    Vue.use(VueProgress, {
      // defaultShape: 'circle',
    })
    Vue.config.productionTip = false
    new Vue({
      router,
      store,
      render: h => h(App)
    }).$mount('#app')
Next, open the App.vue file in src and replace it with the following codes.
    <template>
      <div id="app">
        <router-view />
      </div>
    </template>
    <script>
    export default {
      name: "App",
    };
    </script>
Building the Front-end
Let’s begin building the front-end of our application.
Building the Homepage
Create an Home.vue file located in the src/views folder, and add the following lines of code to the file.
    <template>
      <div class="overflow-x-hidden">
        <Nav class="z-20" />

        <!-- Hero section -->
        <HeroSection />
        <!-- featured section -->
        <FeaturedSection />
      </div>
    </template>
    <script>
    // @ is an alias to /src
    import Nav from '@/components/Nav.vue'
    import HeroSection from '@/components/HeroSection.vue'
    import FeaturedSection from '@/components/FeaturedSection.vue'
    export default {
      name: 'Home',
      components: {
        Nav,
        HeroSection,
        FeaturedSection
      }
    }
    </script>
Building our Nav component
Execute the commands in other to create a Nav.vue file in the components folder
    cd components
    touch Nav.vue
Open up the Nav.vue file and fill it up with the following lines of code.
    <template>
        <div class="w-full bg-white fixed top-0 shadow-lg">

            <div class="w-11/12 mx-auto flex justify-between justify-center items-center px-5 py-7">
                <div class="text-black sm:text-left text-center text-4xl font-bold font-pacifico">
                    <h1>Recipee</h1>
                </div>
                <div @click="toggleMobileMenu" class="md:hidden">
                    <font-awesome-icon v-if='!mobileMenu' class="text-xl" :icon="['fas', 'bars']" />
                    <font-awesome-icon v-if='mobileMenu' class="text-xl" :icon="['fas', 'times']" />
                </div>
                <!-- desktop view -->
                <div class="flex bg-white space-x-12 hidden sm:block text-black-200 font-raleway tracking-wide items-center">
                    <router-link to="/">HOME</router-link>
                    <router-link to="/explore">SEARCH RECIPES</router-link>
                    <router-link to="/register" v-if="!user">SIGN UP</router-link>
                    <router-link to="/login" v-if="!user">LOGIN</router-link>
                    <router-link to="/bookmarks" v-if="user">
                        <font-awesome-icon class="text-xl" :icon="['fas', 'bookmark']" /> BOOKMARKS
                    </router-link>
                    <router-link to="" v-if="user">
                        <font-awesome-icon class="text-xl" :icon="['fas', 'user-circle']" /> {{ user.username }}
                    </router-link>
                    <span @click="logout">
                      <router-link to="" v-if="user">LOGOUT</router-link>
                    </span>

                </div>
            </div>
             <!-- mobile view -->
            <div v-if="mobileMenu" class="h-screen md:hidden text-2xl text-left font-raleway p-10">
                <router-link to="/" class="block my-7">HOME</router-link>
                <hr>
                <router-link to="/explore" class="block my-7">SEARCH RECIPES</router-link>
                <hr>
                <router-link to="/register" v-if="!user" class="block my-7">SIGN UP</router-link>
                <hr>
                <router-link to="/login" v-if="!user"  class="block my-7">LOGIN</router-link>
                <hr>
                <router-link to="/bookmarks" v-if="user"  class="block my-7">
                    <font-awesome-icon class="text-xl" :icon="['fas', 'bookmark']" /> BOOKMARKS
                </router-link>
                <hr>
                <router-link to="" v-if="user"  class="block my-7">
                    <font-awesome-icon class="text-xl" :icon="['fas', 'user-circle']" /> {{ user.username }}
                </router-link>
                <hr>
                <span @click="logout"  class="block my-7">
                    <router-link to="" v-if="user">LOGOUT</router-link>
                </span>
            </div>
        </div>
    </template>
    <script>
        // import { mapGetters } from 'vuex'
        export default {
            name: 'Nav',
            data() {
                return {
                    user: {},
                    mobileMenu: false
                }
            },
            mounted() {
                this.user = JSON.parse(window.localStorage.getItem('userData'))
            },
            methods: {
                logout() {
                    window.localStorage.removeItem('jwt')
                    window.localStorage.removeItem('userData')
                    window.localStorage.removeItem('bookmarks')
                    this.$router.push('/login')
                },
                toggleMobileMenu() {
                    this.mobileMenu = !this.mobileMenu
                }
            }
        }
    </script>
    <style scoped>
    </style>
Building the HeroSection component
Execute the commands in other to create a HeroSection.vue file in the components folder
    cd components
    touch HeroSection.vue
Open up the HeroSection.vue file and fill it up with the following lines of code.
    <template>
        <div>
            <section>
                <div class=" h-screen bg-cover" style="background: url(newFood.png)">
                    <div class="bg-blue-800 bg-opacity-50">
                        <div class="mx-auto h-screen flex text-white justify-left sm:w-4/5 items-center">
                            <div class="text-left font-montserrat mx-5 z-10">
                                <h1 class="text-6xl font-black my-10 z-10">
                                    FIND THE
                                    <br>
                                    WORLD'S BEST
                                    <br>
                                    RECIPES ONLINE
                                </h1>
                                <router-link to='/explore' class="py-5 px-10 text-xl bg-green-600 z-10">
                                    Search Recipes
                                    <font-awesome-icon class="ml-3" :icon="['fas', 'arrow-right']" />
                                </router-link>
                            </div>
                            <div class="text-8xl absolute right-0 font-lato hidden sm:block font-bold overflow-y-hidden w-1/2">
                            <img src="../assets/undraw_breakfast-removebg-preview.png" alt="" class="w-full">
                            </div>
                        </div>
                    </div>
                </div>
            </section>
        </div>
    </template>
    <script>
        export default {
            name: 'HeroSection'
        }
    </script>
    <style scoped>
    </style>
Building the FeaturedSection component
Execute the commands in other to create a FeaturedSection.vue file in the components folder
    cd components
    touch FeaturedSection.vue
Open up the FeaturedSection.vue file and fill it up with the following lines of code.
    <template>
        <div>
            <section>
                <div class="relative">
                    <div class="sm:flex block mx-auto my-20 justify-center items-center">
                    <div class="z-10">
                        <div class="mx-auto mb-5 sm:mb-0 w-4/5 bg-pink-300 p-20">
                        <img src="../assets/burger.png" alt="" class="">
                        </div>
                    </div>

                    <div class="absolute top-0 right-0">
                        <img src="../assets/watercolor_stain.png" alt="" class="opacity-40 sm:opacity-70">
                    </div>
                    <div class="z-10">
                        <div class="mx-auto w-4/5 text-left font-raleway z-10">
                        <h1 class="font-bold text-black text-6xl mb-10">
                            THE BEST MEALS
                            <br>
                            IN THE UNIVERSE AWAITS
                        </h1>
                        <p class="text-sm tracking-wide font-montserrat mb-10">
                            Lorem ipsum dolor sit amet consectetur adipisicing elit.
                            <br>
                            Facilis ex iure rem vero voluptate, sint praesentium quidem,
                            <br>
                            eius sequi, officia itaque? Eveniet quaerat eos qui sunt suscipit nisi sequi? Soluta.
                        </p>
                        <p class="text-xl text-black font-bold font-raleway">
                            EXPLORE
                            <font-awesome-icon class="" :icon="['fas', 'arrow-right']" />
                        </p>
                        </div>
                    </div>
                    </div>
                </div>
                <div class="relative">
                    <div class="block sm:flex my-20 justify-center items-center">
                    <div class="absolute top-0 left-0">
                        <img src="../assets/watercolor_drops.png" alt="" class="opacity-70">
                    </div>

                    <div class="z-10">
                        <div class="w-4/5 mx-auto text-left font-raleway z-10">
                        <h1 class="font-bold text-black text-6xl mb-10">
                            LEARN HOW
                            <br>
                            TO PREPARE MEALS YOU LOVE
                        </h1>
                        <p class="text-sm tracking-wide font-montserrat mb-10">
                            Lorem ipsum dolor sit amet consectetur adipisicing elit.
                            <br>
                            Facilis ex iure rem vero voluptate, sint praesentium quidem,
                            <br>
                            eius sequi, officia itaque? Eveniet quaerat eos qui sunt suscipit nisi sequi? Soluta.
                        </p>
                        <p class="text-xl mb-5 sm:mb-0 text-black font-bold font-raleway">
                            EXPLORE
                            <font-awesome-icon class="" :icon="['fas', 'arrow-right']" />
                        </p>
                        </div>
                    </div>
                    <div class="">
                        <div class="mx-auto w-4/5 bg-green-300 p-20">
                        <img src="../assets/barbercue.png" alt="" class="">
                        </div>
                    </div>
                    </div>
                </div>
            </section>
        </div>
    </template>
    <script>
        export default {
            name: 'FeaturedSection'
        }
    </script>
    <style scoped>
    </style>
Configuring Vue-router
We need routing functionality in our Application. Luckily for us, we installed the Vue-router package when creating our project.
Create a router/index.js file, and fill it up with the following lines of codes
    import Vue from 'vue'
    import VueRouter from 'vue-router'
    import Home from '../views/Home.vue'
    import Register from '../views/Register.vue'
    import Login from '../views/Login.vue'
    import Explore from '../views/Explore.vue'
    import Recipe from '../views/Recipe.vue'
    import Bookmarks from '../views/Bookmarks.vue'
    import BookmarkId from '../views/BookmarkId.vue'
    import ForgotPassword from '../views/ForgottenPassword.vue'
    import ResetPassword from '../views/ResetPassword.vue'
    Vue.use(VueRouter)
    const routes = [
      {
        path: '/',
        name: 'Home',
        component: Home
      },
      {
        path: '/register',
        name: 'Register',
        component: Register
      },
      {
        path: '/login',
        name: 'Login',
        component: Login
      },
      {
        path: '/explore',
        name: 'Explore',
        component: Explore
      },
      {
        path: '/recipe/:id',
        name: 'Recipe',
        component: Recipe
      },
      {
        path: '/bookmarks',
        name: 'Bookmarks',
        component: Bookmarks
      },
      {
        path: '/bookmark/:id',
        name: 'BookmarkId',
        component: BookmarkId
      },
      {
        path: '/forgotpassword',
        name: 'ForgotPassword',
        component: ForgotPassword
      },
      {
        path: '/resetpassword',
        name: 'ResetPassword',
        component: ResetPassword
      }
    ]
    const router = new VueRouter({
      mode: 'history',
      base: process.env.BASE_URL,
      routes
    })
    export default router
Now we have router functionalities in our application, next we’ll setup our vuex store
Configuring vuex store
Create a store folder in src folder, and create a new index.js file with the following code.
    import Vue from "vue";
    import Vuex from "vuex";
    import Results from "./results.js";
    Vue.use(Vuex);
    export default new Vuex.Store({
      modules: {
        Results
      }
    });
Execute the following command to create a results.js file in the src/store directory
    cd store
    touch results.js
Open up the results.js file and fill it up with the following code.
    import Vue from "vue";
    const state = {
        searchParam: '',
        searchResults: [],
        bookmarks: JSON.parse(window.localStorage.getItem('bookmarks'))
    }
    const getters = {
        getSearchResults: state => state.searchResults,
        getSearchParam: state => state.searchParam,
        getBookmarks: state => {
            return state.bookmarks
        }
    }
    const actions = {
        async fetchSearchResult ({ commit }, searchItem) {

            const res = await Vue.axios.get(`https://api.edamam.com/search?q=${searchItem}&app_id=${APP_ID}&app_key=${APP_KEY}&from=0&to=20`)
            const results = res.data.hits
            commit('updateSearchResults', results)
        },
        async fetchSearchItem ({ commit }, item) {
            commit('updateSearchItem', item)
        }
    }
    const mutations = {
        updateSearchResults: (state, results) => {
            state.searchResults = results
        },
        updateSearchItem: (state, item) => {
            state.searchParam = item
        }
    }
    export default {
        state,
        getters,
        actions,
        mutations
    }
Here we've created our store. On line 17, we make an API call to the Edamam recipe API using the Vue-Axios package we installed earlier, and then we commit the results to the store. Replace ${APP_ID} and ${APP_KEY} with your Edamam Application ID and Application key, respectively.
Let’s build the other routes of our application.
Building the Explore page
Execute the commands in other to create a Explore.vue file in the views folder
    cd views
    touch Explore.vue
Open up the Explore.vue file and fill it up with the following lines of code.
    <template>
        <div>
            <Nav class="z-20" />
            <section>
                <div class="h-sreen w-full bg-cover" style="background: url(newFood.png)">
                    <div class="bg-blue-800 w-full bg-opacity-50">
                        <div class="mx-auto flex h-screen w-full justify-center items-center">
                            <div class="font-montserrat w-full text-white mx-5 z-10">
                                <h1 class="font-pacifico hidden sm:block text-6xl mb-10">Recipee</h1>
                                <!-- <h1 class="text-4xl mb-10 font-raleway">Search for whatsoever recipe you want</h1> -->
                                <form @submit="getRecipes">
                                    <input type="text" name="search" v-model="search" placeholder="Search Recipe" class="p-10 focus:outline-none w-4/5 sm:w-3/5 text-black">
                                    <button class="p-5 cursor-pointer bg-green-400">
                                        <font-awesome-icon class="text-2xl" :icon="['fas', 'search']" />
                                    </button>
                                </form>
                            </div>

                            <!-- <div v-if="loading" class="rounded-full absolute bottom-20 bg-blue-300 w-10 h-10">
                            </div> -->
                            <loading-progress class="absolute bottom-20" v-if="loading"
                                :progress="50"
                                :indeterminate='true'
                                :counter-clockwise="true"
                                :hide-background="false"
                                size="50"
                                rotate
                                fillDuration="2"
                                rotationDuration="1"
                            />
                        </div>

                    </div>
                </div>

            </section>
            <SearchResults />
        </div>
    </template>
    <script>
        import Nav from '@/components/Nav.vue'
        import SearchResults from '@/components/SearchResults.vue'
        import { mapActions } from 'vuex'
        export default {
            components: {
                Nav,
                SearchResults
            },

            data() {
                return {
                    data : [],
                    search: '',
                    loading: false
                }
            },
            methods: {
                ...mapActions(['fetchSearchResult']),
                async getRecipes(e) {
                    this.loading = true
                    e.preventDefault()
                    this.fetchSearchResult(this.search).then(result => {
                        result;
                        this.loading = false
                    })
                }
            },
            filters: {
                capitalize(word) {
                    return word.toUpperCase()
                }
            },
            async mounted() {}
        }
    </script>
    <style scoped>
    </style>
Building the SearchResults component
Execute the commands in other to create a SearchResults.vue file in the components folder
    cd views
    touch SearchResults.vue
Open up the SearchResults.vue file and fill it up with the following lines of code.
    <template>
        <div>
            <section>
                <div v-if="getSearchResults.length > 1">
                    <h1 class="my-10 font-montserrat font-bold text-4xl">RESULTS</h1>
                    <div class="sm:grid sm:grid-cols-3 gap-5 w-4/5 sm:w-3/5 my-5 mx-auto">
                        <div  class="mb-5 cursor-pointer" v-for="(item, i) in getSearchResults" :key="i">
                            <router-link :to='`/recipe/${item.recipe.label}`'>
                                <img :src='`${item.recipe.image}`' class="w-full" alt="">
                            </router-link>


                            <div class="p-5 shadow-lg">
                                <div class="flex space-x-4">
                                    <button @click="addItemToBookmark(item.recipe)" class="click:text-yellow-400 rounded-full mb-5 h-10 bg-white w-10 flex justify-center items-center shadow-lg">
                                        <font-awesome-icon class="text-xl hover:text-yellow-400" :icon="['fas', 'bookmark']" />
                                    </button>
                                    <div class="rounded-full mb-5 h-10 bg-white w-10 flex justify-center items-center shadow-lg">
                                        <font-awesome-icon class="text-xl" :icon="['fas', 'share']" />
                                    </div>
                                </div>
                                <router-link :to='`/recipe/${item.recipe.label}`'>
                                    <h1 class="text-2xl font-bold font-montserrat mb-5">
                                        {{ item.recipe.label }}
                                    </h1>
                                </router-link>
                                <div class="text-md font-raleway tracking-wide">
                                    <p>
                                        {{ item.recipe.yield }} Servings | {{ item.recipe.ingredientLines.length }} Ingredients
                                    </p>
                                    <p v-if="item.recipe.totalTime > 0">
                                        <font-awesome-icon class="text-lg" :icon="['fas', 'clock']" /> {{ item.recipe.totalTime }} Minutes
                                    </p>
                                </div>
                            </div>

                        </div>
                    </div>
                </div>
            </section>
        </div>
    </template>
    <script>
        import { mapGetters } from 'vuex'
        export default {
            name: 'searchResult',
            data() {
                return {
                    bookmarks: JSON.parse(window.localStorage.getItem('bookmarks'))
                }
            },
            methods: {
                // ...mapActions(['addBookmark']),
                async addItemToBookmark(item) {

                    if(window.localStorage.getItem('userData')) {
                        const { label, ingredientLines, totaltime, image, source, yeild: servings, url } = item
                        let bookmarkItem
                        if(this.bookmarks.findIndex(recipe => recipe.label === item.label) === -1){
                            bookmarkItem = {
                                label,
                                ingredientLines,
                                totaltime,
                                image,
                                url,
                                source,
                                servings,
                                users_permissions_user: JSON.parse(window.localStorage.getItem('userData')).id
                            }
                            this.bookmarks.push(bookmarkItem)
                            //set to localstorage
                            window.localStorage.setItem('bookmarks', JSON.stringify(this.bookmarks))
                            await this.axios.post(`https://strapi-recipee-app.herokuapp.com/bookmarks`, {
                                ...bookmarkItem,
                            },
                            {
                                headers: {
                                    Authorization: `Bearer ${window.localStorage.getItem('jwt')}`,
                                },
                            })
                            const res = await this.axios.get(`http://localhost:1337/users/${bookmarkItem.users_permissions_user}`, {
                                headers: {
                                    Authorization: `Bearer ${window.localStorage.getItem('jwt')}`,
                                }
                            })
                            const user  = res.data
                            window.localStorage.setItem('userData', JSON.stringify(user))
                            window.localStorage.setItem('bookmarks', JSON.stringify(user.bookmarks))
                        }
                    }
                }
            },
            computed: {
                ...mapGetters(['getSearchResults', 'getBookmarks'])
            }
        }
    </script>
    <style scoped>
    </style>
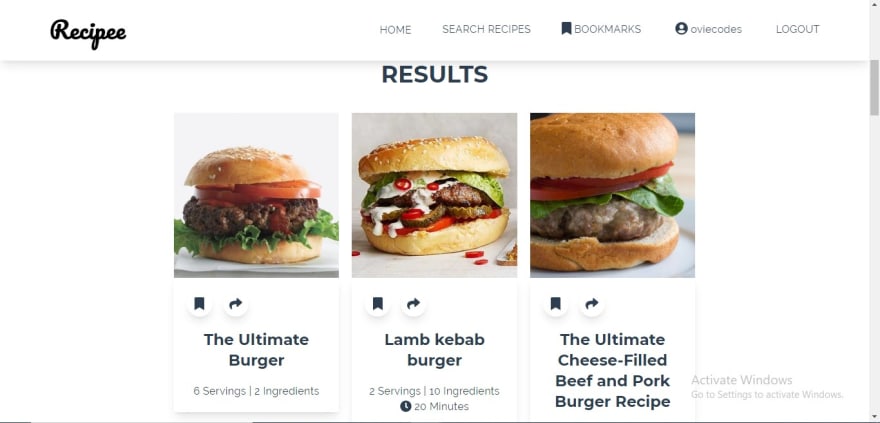
In this component, we display the User's search results and give the User the ability to create bookmarks.
Building the Recipe page
Execute the commands in other to create a Recipe.vue file in the views folder
    cd views
    touch Recipe.vue
Open up the Recipe.vue file and fill it up with the following lines of code.
    <template>
        <div>
            <Nav class="relative" />
            <div class="w-4/5 sm:w-3/5 mx-auto mt-10 text-left">
                <div class="sm:grid grid-cols-2 gap-2">
                    <div>
                        <img class="mb-10" :src="`${curRecipe.image}`" alt="">
                    </div>
                    <h1 class="text-4xl sm:text-8xl font-bold font-montserrat">{{ name }}</h1>
                </div>

                <div class="text-xl mt-5 sm:mt-0 font-raleway tracking-wide flex space-x-5">
                    <p>
                        {{ curRecipe.yield }} Servings
                    </p>
                    <p> | </p>
                    <p v-if="curRecipe.totalTime > 0">
                        <font-awesome-icon class="text-lg" :icon="['fas', 'clock']" /> {{ curRecipe.totalTime }} Minutes
                    </p>
                </div>
                <div class="mt-10">
                    <h1 class="text-2xl sm:text-4xl font-montserrat font-bold mb-10">
                        {{ curRecipe.ingredientLines.length }} Ingredients
                    </h1>
                    <div class="w-4/5 sm:grid font-raleway grid-cols-2 gap-2">
                        <div class="mb-5 mr-5" v-for="(Ingredients, i) in curRecipe.ingredientLines" :key="i">
                            <font-awesome-icon class="text-xl ml-3 text-green-300" :icon="['fas', 'check']" />
                            {{ Ingredients }}
                        </div>
                    </div>
                </div>
                <div class="mb-10 font-raleway">
                    <p class="mb-10"> Courtsey of <span class="text-2xl">{{ curRecipe.source }} </span></p>
                    <p >

                        <a  class="py-5 px-10 text-xl bg-green-600 z-10 text-left text-white" target="blank" :href='`${curRecipe.url}`'>
                            Preparation Steps <font-awesome-icon class="ml-3" :icon="['fas', 'arrow-right']" />
                        </a>
                    </p>
                </div>
            </div>

        </div>
    </template>
    <script>
        import Nav from '@/components/Nav.vue'
        import { mapGetters } from 'vuex'
        export default {
           components: {
               Nav
           },
            data() {
                return {
                    name: this.$route.params.id,
                    curRecipe: {}
                }
            },
            computed: {
                ...mapGetters(['getSearchResults'])
            },
            created() {
               const recipeItem =  this.getSearchResults.find(item => item.recipe.label === this.name)
               this.curRecipe = recipeItem.recipe
            }
        }
    </script>
    <style scoped>
    </style>
Here we just created the view for individual recipes, and this page displays the ingredients, name, and a link to the procedures for preparing the meal.
Building the Bookmarks page
Execute the commands in other to create a Bookmarks.vue file in the views folder
    cd views
    touch Bookmarks.vue
Open up the Bookmarks.vue file and fill it up with the following lines of code.
    <template>
        <div>
            <Nav />
            <section>
                <div v-if="bookmarks.length > 0">
                    <h1 class="mt-32 mb-4 font-montserrat font-bold text-4xl">Bookmarks</h1>
                    <div class="sm:grid sm:grid-cols-3 gap-5 w-4/5 sm:w-3/5 my-5 mx-auto">
                        <div  class="mb-5 cursor-pointer" v-for="(item, i) in bookmarks" :key="i">
                            <router-link :to='`/bookmark/${item.label}`'>
                                <img :src='`${item.image}`' class="w-full" alt="">
                            </router-link>


                            <div class="p-5 shadow-lg">
                                <div class="flex space-x-4">
                                    <button @click="removeItemFromBookmarks(item)" class="click:text-yellow-400 rounded-full mb-5 h-10 bg-white w-10 flex justify-center items-center shadow-lg">
                                        <font-awesome-icon class="text-xl hover:text-yellow-400" :icon="['fas', 'trash']" />
                                    </button>
                                    <div class="rounded-full mb-5 h-10 bg-white w-10 flex justify-center items-center shadow-lg">
                                        <font-awesome-icon class="text-xl" :icon="['fas', 'share']" />
                                    </div>
                                </div>
                                <router-link :to='`/bookmark/${item.label}`'>
                                    <h1 class="text-2xl font-bold font-montserrat mb-5">
                                        {{ item.label }}
                                    </h1>
                                </router-link>
                                <div class="text-md font-raleway tracking-wide">
                                    <p>
                                        {{ item.servings }} Servings | {{ item.ingredientLines.length }} Ingredients
                                    </p>
                                    <p v-if="item.totalTime > 0">
                                        <font-awesome-icon class="text-lg" :icon="['fas', 'clock']" /> {{ item.totalTime }} Minutes
                                    </p>
                                </div>
                            </div>

                        </div>
                    </div>
                </div>
            </section>
        </div>
    </template>
    <script>
        // import { mapGetters } from 'vuex';
        import Nav from '@/components/Nav.vue'
        export default {
            components: {
                Nav
            },
            data() {
                return {
                    bookmarks: []
                }
            },

            methods: {
                async removeItemFromBookmarks(item) {
                    const itemIndex = this.bookmarks.findIndex(bookmarkItem => bookmarkItem.label === item.label)

                    this.bookmarks.splice(itemIndex, 1)
                    window.localStorage.setItem('bookmarks', JSON.stringify(this.bookmarks))
                    await this.axios.delete(`http://localhost:1337/bookmarks/${item.id}`, {
                        headers: {
                            Authorization: `Bearer ${window.localStorage.getItem('jwt')}`,
                        },
                    })
                }
            },
            created() {
                this.bookmarks = JSON.parse(window.localStorage.getItem('bookmarks'))
            }
        }
    </script>
    <style scoped>
    </style>
Building the BookmarkID page
Execute the commands in other to create a BookmarkId.vue file in the views folder
    cd views
    touch BookmarkId.vue
Open up the BookmarkId.vue file and fill it up with the following lines of code.
    <template>
        <div>
            <Nav class="relative" />
            <div class="w-4/5 sm:w-3/5 mx-auto mt-10 text-left">
                <div class="sm:grid grid-cols-2 gap-2">
                    <div>
                        <img class="mb-10" :src="`${curRecipe.image}`" alt="">
                    </div>
                    <h1 class="text-4xl sm:text-8xl font-bold font-montserrat">{{ name }}</h1>
                </div>

                <div class="text-xl mt-5 sm:mt-0 font-raleway tracking-wide flex space-x-5">
                    <p>
                        {{ curRecipe.servings }} Servings
                    </p>
                    <p> | </p>
                    <p v-if="curRecipe.totalTime > 0">
                        <font-awesome-icon class="text-lg" :icon="['fas', 'clock']" /> {{ curRecipe.totalTime }} Minutes
                    </p>
                </div>
                <div class="mt-10">
                    <h1 class="text-2xl sm:text-4xl font-montserrat font-bold mb-10">
                        {{ curRecipe.ingredientLines.length }} Ingredients
                    </h1>
                    <div class="w-4/5 sm:grid font-raleway grid-cols-2 gap-2">
                        <div class="mb-5 mr-5" v-for="(Ingredients, i) in curRecipe.ingredientLines" :key="i">
                            <font-awesome-icon class="text-xl ml-3 text-green-300" :icon="['fas', 'check']" />
                            {{ Ingredients }}
                        </div>
                    </div>
                </div>
                <div class="mb-10 font-raleway">
                    <p class="mb-10"> Courtsey of <span class="text-2xl">{{ curRecipe.source }} </span></p>
                    <p >
                        <a  class="py-5 px-10 text-xl bg-green-600 z-10 text-left text-white" target="blank" :href='`${curRecipe.url}`'>
                            Preparation Steps <font-awesome-icon class="ml-3" :icon="['fas', 'arrow-right']" />
                        </a>
                    </p>
                </div>
            </div>

        </div>
    </template>
    <script>
        import Nav from '@/components/Nav.vue'
        // import { mapGetters } from 'vuex'
        export default {
           components: {
               Nav
           },
            data() {
                return {
                    name: this.$route.params.id,
                    curRecipe: {},
                    bookmarkRecipes: JSON.parse(window.localStorage.getItem('bookmarks'))
                }
            },

            created() {
               const recipeItem =  this.bookmarkRecipes.find(item => item.label === this.name)
               this.curRecipe = recipeItem
            }
        }
    </script>
    <style scoped>
    </style>
This page displays individual bookmarks. Users have the ability to delete bookmarked items.
User Registration
Let's see how we can add user registration to our site. Once users register, then they can create bookmarks.
Building the Registration page
Execute the commands in other to create a Register.vue file in the views folder
    cd views
    touch Register.vue
Open up the Register.vue file and fill it up with the following lines of code.
    <template>
        <div>
            <div class="flex items-center justify-center h-screen">
                <div class="hidden sm:block w-1/2 bg-cover h-screen" style='background: url(newFood.png)'>
                    <div class="bg-blue-800 w-full h-screen bg-opacity-20">
                    </div>
                </div>
                <div class="sm:w-1/2">
                    <div class="p-5 w-4/5 mx-auto text-left font-raleway">
                        <div class="text-left mb-7">
                            <router-link to="/">
                                <font-awesome-icon class="mr-5" :icon="['fas', 'arrow-left']" /> HOME
                            </router-link>
                        </div>
                        <h1 class="font-bold text-left font-montserrat text-4xl sm:text-6xl mb-7">
                            Sign Up. To. Join Recipee
                        </h1>
                        <p v-show="error" class="text-sm text-red-500">{{ errorMsg }}</p>
                        <form @submit="register">
                            <div class="my-4">
                                <h1 class="text-left font-bold mb-2 font-montserrat">Name</h1>
                                <input type="text" v-model="name" class="text-sm outline-none pb-2 w-4/5 bg-transparent border-b hover:border-blue-700 focus:border-blue-700">
                            </div>
                            <div class="my-4">
                                <h1 class="text-left font-bold mb-2 font-montserrat">Email</h1>
                                <input type="email" v-model="email" class="text-sm outline-none pb-2 w-4/5 bg-transparent border-b hover:border-blue-700 focus:border-blue-700">
                            </div>
                            <div class="my-4">
                                <h1 class="text-left font-bold mb-2 font-montserrat">Password</h1>
                                <input type="password" v-model="password" class="text-sm outline-none pb-2 w-4/5 bg-transparent border-b hover:border-blue-700 focus:border-blue-700">
                            </div>
                            <div class="my-4">
                                <h1 class="text-left font-bold mb-2 font-montserrat">Username</h1>
                                <input type="text" v-model="username" class="text-sm outline-none pb-2 w-4/5 bg-transparent border-b hover:border-blue-700 focus:border-blue-700">
                            </div>

                            <button type="submit" :disabled="name.length < 6 || password.length < 6 || username.length < 3" class="bg-green-400 p-5 text-white">
                                Sign Up <font-awesome-icon class="ml-3" :icon="['fas', 'arrow-right']" />
                            </button>
                        </form>
                    </div>
                </div>
            </div>
        </div>
    </template>
    <script>
        export default {
            name: 'Register',
            data() {
                return {
                    name: '',
                    email: '',
                    password: '',
                    username: '',
                    error: false,
                    errorMsg: `An Error occurred, please try again`
                }
            },
            methods: {
                async register(e) {
                    try {
                        e.preventDefault()
                            await this.axios.post(`http://localhost:1337/auth/local/register`, {
                            name: this.name,
                            password: this.password,
                            email: this.email,
                            username: this.username
                        })
                        this.$router.push('login')
                    } catch(e) {
                        this.error = true
                        this.email = ''
                    }
                }
            }
        }
    </script>
    <style scoped>
    </style>
In the code block above, we're integrating user signup and redirecting the users to the login page on successful registration.
User Login
Execute the commands in other to create a Login.vue file in the views folder
    cd views
    touch Login.vue
Open up the Login.vue file and fill it up with the following lines of code.
    <template>
        <div>
            <div class="flex items-center justify-center h-screen">
                <div class="hidden sm:block w-1/2 bg-cover h-screen" style='background: url(newFood.png)'>
                    <div class="bg-blue-800 w-full h-screen bg-opacity-20">
                    </div>
                </div>
                <div class="sm:w-1/2">
                    <div class="p-5 w-4/5 mx-auto text-left font-raleway">
                        <div class="text-left mb-10">
                            <router-link to="/">
                                <font-awesome-icon class="mr-5" :icon="['fas', 'arrow-left']" /> HOME
                            </router-link>
                        </div>

                        <h1 class="font-bold text-left font-montserrat text-4xl sm:text-6xl mb-10">
                            Login. To. Recipee
                        </h1>
                        <p v-show="error" class="text-sm text-red-500">{{ errorMsg }}</p>
                        <form @submit="login">
                            <div class="my-5">
                                <h1 class="text-left font-bold mb-5 font-montserrat">Email</h1>
                                <input type="email" v-model="email" class="text-sm outline-none pb-5 w-4/5 bg-transparent border-b hover:border-blue-700 focus:border-blue-700">
                            </div>
                            <div class="my-5">
                                <h1 class="text-left font-bold mb-5 font-montserrat">Password</h1>
                                <input type="password" v-model="password" class="text-sm outline-none pb-5 w-4/5 bg-transparent border-b hover:border-blue-700 focus:border-blue-700">
                            </div>

                            <button type="submit" :disabled="password.length < 3" class="bg-green-400 p-5 text-white">
                                Login <font-awesome-icon class="ml-3" :icon="['fas', 'arrow-right']" />
                            </button>
                            <p class="my-2">
                                <router-link to="/forgotpassword" >Forgot Password?</router-link>
                            </p>

                        </form>
                    </div>
                </div>
            </div>
        </div>
    </template>
    <script>

        export default {
            name: 'Login',

            data() {
                return {
                    email: '',
                    password: '',
                    error: false,
                    errorMsg: `An error occurred, please try again`
                }
            },
            methods: {
                async login(e) {
                    e.preventDefault()
                    try {
                        const res = await this.axios.post(`http://localhost:1337/auth/local`, {
                            identifier: this.email,
                            password: this.password
                        });

                        const { jwt, user } = res.data
                        window.localStorage.setItem('jwt', jwt)
                        window.localStorage.setItem('userData', JSON.stringify(user))
                        window.localStorage.setItem('bookmarks', JSON.stringify(user.bookmarks))
                        this.$router.push('/')
                    } catch(error) {
                        this.error = true
                        this.password = ''
                    }
                },
            }
        }
    </script>
    <style scoped>
    </style>
In the code block above, we're integrating user login and redirecting the users to the Homepage on successful Login. We're also storing user details and JWT in localStorage.
Forgotten Password
Execute the commands in other to create a ForgottenPassword.vue file in the views folder
    cd views
    touch ForgottenPassword.vue
Open up the ForgottenPassword.vue file and fill it up with the following lines of code.
    <template>
        <div>
            <div class="flex items-center justify-center h-screen">
                <div class="hidden sm:block w-1/2 bg-cover h-screen" style='background: url(newFood.png)'>
                    <div class="bg-blue-800 w-full h-screen bg-opacity-20">
                    </div>
                </div>
                <div class="sm:w-1/2">
                    <div class="p-5 w-4/5 mx-auto text-left font-raleway">
                        <div class="text-left mb-10">
                            <router-link to="/login">
                                <font-awesome-icon class="mr-5" :icon="['fas', 'arrow-left']" /> Login
                            </router-link>
                        </div>

                        <h1 class="font-bold text-left font-montserrat text-4xl sm:text-6xl mb-10">
                            Recover Your. Recipee. Password
                        </h1>
                        <p v-show="done" class="text-sm text-green-500">Password reset link has been sent to {{ email }}</p>
                        <p v-show="error" class="text-sm text-red-500">An error occurred</p>
                        <form @submit="forgotPassword">
                            <div class="my-5">
                                <h1 class="text-left font-bold mb-5 font-montserrat">Email</h1>
                                <input type="email" v-model="email" class="text-sm outline-none pb-5 w-4/5 bg-transparent border-b hover:border-blue-700 focus:border-blue-700">
                            </div>

                            <button type="submit" class="bg-green-400 p-5 text-white">
                                Send Email link <font-awesome-icon class="ml-3" :icon="['fas', 'arrow-right']" />
                            </button>
                        </form>
                    </div>
                </div>
            </div>
        </div>
    </template>
    <script>
        export default {
            name: 'ForgotPassword',

            data() {
                return {
                    email: '',
                    done: false,
                    error: false,
                }
            },
            methods: {
                async forgotPassword(e) {
                    e.preventDefault()
                    this.done = false;
                    this.error = false;
                    this.axios.post(`http://localhost:1337/auth/forgot-password`, {
                        email: this.email
                    })
                    .then(() => {
                        this.done = true
                    })
                    .catch(e => {
                        e;
                        this.error = true
                    })
                }
            }
        }
    </script>
    <style scoped>
    </style>
Here, users can request a password reset, and Strapi will send a message to the email address that the User enters on the page. The sent mail will possess a link that resembles the following:
http://localhost:8080/resetpassword?code=9d99862a974907c375988ed4727173d56983dbcfb7c400f006ca47958e07089f950de8979d0ae3a8fab684f1b73b55910b04fe448b77c92178cabf4b3c58e77f
Setting up e-mail with strapi-provider-email-nodemailer
We'll be using the Strapi-provider-email-nodemailer package to configure and send emails.
Open up your Strapi backend in your code editor and run the following command to install the Strapi-provider-email-nodemailer.
using yarn
yarn add strapi-provider-email-nodemailer
using npm
npm install strapi-provider-email-nodemailer --save
Navigate to the config directory and create a plugins.js file and fill it up with the following code
    module.exports = ({ env }) => ({
      email: {
        provider: 'nodemailer',
        providerOptions: {
          service: 'Gmail',
          host: 'smtp.gmail.com',
          port: 465,
          ssl: true,
          tls: true,

          auth: {
              user: env('GMAIL_USER'),
              pass: env('GMAIL_PASS'),
          },
          // ... any custom nodemailer options
        },
        settings: {
          defaultFrom: 'noreply@recipee.com',
          defaultReplyTo: 'nonreply@recipee.com',
        },
      },
    });
Open up your .env file and add the following line of code
    HOST=0.0.0.0
    PORT=1337
    GMAIL_USER = YOUR_GMAIL_ADDRESS
    GMAIL_PASS =YOUR_GMAIL_PASSWORD
Now we have email services configured, and we can finally create our reset password page and logic.
Reset Password
Execute the commands in other to create a ResetPassword.vue file in the views folder
    cd views
    touch ResetPassword.vue
Open up the ResetPassword.vue file and fill it up with the following lines of code.
    <template>
        <div>
            <div class="flex items-center justify-center h-screen">
                <div class="hidden sm:block w-1/2 bg-cover h-screen" style='background: url(newFood.png)'>
                    <div class="bg-blue-800 w-full h-screen bg-opacity-20">
                    </div>
                </div>
                <div class="sm:w-1/2">
                    <div class="p-5 w-4/5 mx-auto text-left font-raleway">
                        <div class="text-left mb-10">
                            <router-link to="/login">
                                <font-awesome-icon class="mr-5" :icon="['fas', 'arrow-left']" /> Login
                            </router-link>
                        </div>

                        <h1 class="font-bold text-left font-montserrat text-4xl sm:text-6xl mb-10">
                            Recover Your. Recipee. Password
                        </h1>
                        <p v-show="error" class="text-sm text-red-500">An Error Occurred, Please Try Again</p>
                        <form @submit="resetPassword">
                            <div class="my-5">
                                <h1 class="text-left font-bold mb-5 font-montserrat">Password</h1>
                                <input type="password" v-model="password" class="text-sm outline-none pb-5 w-4/5 bg-transparent border-b hover:border-blue-700 focus:border-blue-700">
                            </div>
                            <div class="my-5">
                                <h1 class="text-left font-bold mb-5 font-montserrat">Confirm Password</h1>
                                <input type="password" v-model="confirmPassword" class="text-sm outline-none pb-5 w-4/5 bg-transparent border-b hover:border-blue-700 focus:border-blue-700">
                            </div>

                            <button type="submit" :disabled="password.length < 3 || password !== confirmPassword" class="bg-green-400 p-5 text-white">
                                Reset Password <font-awesome-icon class="ml-3" :icon="['fas', 'arrow-right']" />
                            </button>
                        </form>
                    </div>
                </div>
            </div>
        </div>
    </template>
    <script>

        export default {
            name: 'ResetPassword',
            data() {
                return {
                    password: '',
                    confirmPassword: '',
                    done: false,
                    error: false,
                }
            },
            methods: {
                async resetPassword(e) {
                    e.preventDefault()
                    this.axios.post(`http://localhost:1337/auth/reset-password`, {
                        code: this.$route.query.code,
                        password: this.password,
                        passwordConfirmation: this.confirmPassword
                    })
                    .then(() => {
                        this.done = true
                        this.$router.push("login")
                    })
                    .catch(e => {
                        e;
                        this.error = true
                    })
                }
            },
        }
    </script>
    <style scoped>
    </style>
Now users can input a new password that will be used to access their accounts, after which they are redirected to the login page. Users who lost their passwords can now resume using our Application.
Conclusion
That's all for this article, and I hope you're well equipped to integrate user authentication into your Strapi Application.

Oldest comments (0)