
Introduction
Discord is a chat application that allows millions of users across the globe to message and voice chat online in communities called guilds or servers. Discord also provides an extensive API that developers can use to build powerful Discord bots. Bots can perform various actions such as sending messages to servers, DM-ing users, moderating servers, and playing audio in voice chats. This allows developers to craft powerful bots that include advanced, complex features like moderation tools or even games. For example, the utility bot Dyno serves millions of guilds and contains useful features such as spam protection, a music player, and other utility functions. Learning how to create Discord bots allows you to implement many possibilities, which thousands of people could interact with every day.
In this article, let's learn how to make a simple Discord bot with Node.js. This tutorial aims at beginners with zero knowledge on how to make a Discord bot.
Prerequisites
- Code editor (i.e. VS Code)
- Basic knowledge of JavaScript
- Node and npm installed in your machine
- A Discord account and server set up
Step 1: Create an App in Discord
First, we need to create a discord bot as an app in Discord. Go to https://discord.com/developers and sign in or create a developer account.
Once you're logged in, click on 'New Application' at the top right of the window.
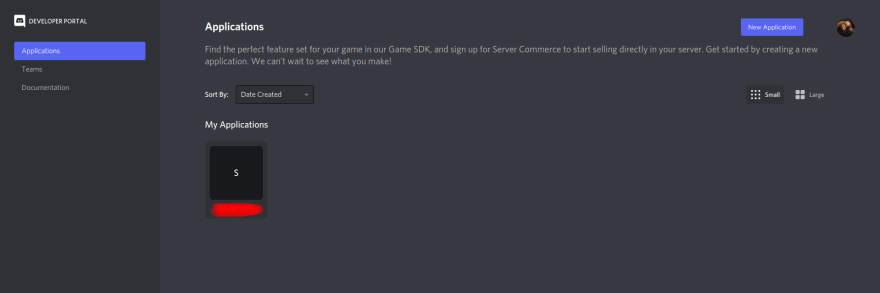
Then fill in the details of your app (i.e. name) and you will be taken to your app's dashboard. Navigate to 'Bot' and click 'Add Bot' to enable your app as a bot.
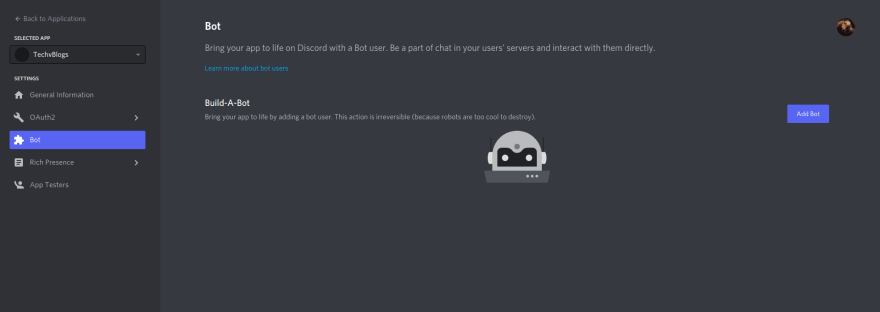
Now, you'll have your bot and see this section appear.

Click on 'Copy' to copy your token and save it somewhere, we'll need it for later.
Step 2: Install bot to the server
Create a new Discord server with your Discord account to install the bot.
Back at the App dashboard, navigate to 'OAuth2' and select 'bot' under the Scopes section.

You will see an URL being generated at the bottom. Copy this URL and paste it on a new tab. You will be redirected to the page as shown below:

Install this bot to your preferred Discord server. For example, mine is the MyBot server I just created.
If everything works correctly, your bot should now appear in your Discord server.
Step 3: Create Project Folder
Now let's make this bot work! Create a new project with the following terminal commands:
mkdir discord-bot
cd discord-bot
npm init
Checkout This Tool: Random Password Generator
Step 4: Install packages
Now we need to install the npm packages for this project. Run this command below:
npm install discord.js axios dotenv
The packages we have installed are:
- discord.js: a Node.js module to allow easy interactions with the Discord API.
- axios: allows making HTTP Promises easily with Node.js.
- dotenv: allows loading variables from process.env in Node apps.
Step 5: Create a server.js file
In our project directory, run:
touch server.js
This will create an server.js file, where our bot functions will be written at.
If you see the bot installed in your server, it is currently offline. The first thing we need to do to code our discord bot is to create a discord bot client and log our bot in.
Import the discord.js package and create a new client like so:
require('dotenv').config(); //initialize dotenv

const { Client, Intents } = require('discord.js');

const client = new Client({ intents: [Intents.FLAGS.GUILDS, Intents.FLAGS.GUILD_MESSAGES] });

client.on('ready', () => {
  console.log(`Logged in as ${client.user.tag}!`);
});

//make sure this line is the last line
client.login(process.env.CLIENT_TOKEN); //login bot using token
Remember the token we copied in Step 1? Create a .env file and store the token there.
The first line of code creates a new Discord.Client and assigns it to the constant client. This client is partly how you will interact with the Discord API and how Discord will notify you of events such as new messages. The client, in effect, represents the Discord bot. The object passed into the Client constructor specifies the gateway intents of your bot. This defines which WebSocket events your bot will listen to. Here you have specified GUILDS and GUILD_MESSAGES to enable the bot to receive message events in guilds.
In your .env file:
CLIENT_TOKEN='your token here'
Great, now if we run the command below, our bot should go online:
node server.js
Checkout This Tool: Campaign URL Builder
Step 6: Writing your first bot command
Let's write a very simple bot command: when we type ping, the bot will reply to us with "Pong!".
Now add the following line of code to your command-handling function:
client.on("messageCreate", message => {
  if (message.author.bot) return;
});
This line checks if the author of the message is a bot, and if so, stops processing the command. This is important as generally you don’t want to process, or respond to, bots’ messages. Bots usually don’t need to use information from other bots, so ignoring their messages saves processing power and helps prevent accidental replies.
Now you’ll write a command handler. To accomplish this, it’s good to understand the usual format of a Discord command. Typically, the structure of a Discord command contains three parts in the following order: a prefix, a command name, and (sometimes) command arguments.
To begin creating a command parser that handles this format, add the following lines of code to the message handling function:
const prefix = "!";

client.on("messageCreate", message => {
  if (message.author.bot) return;
  if (!message.content.startsWith(prefix)) return;
});
You add the first line of code to assign the value "!" to the constant prefix, which you will use as the bot’s prefix.
The second line of code you add checks if the content of the message the bot is processing begins with the prefix you set, and if it doesn’t, stops the message from continuing to process.
Now you must convert the rest of the message into a command name and any arguments that may exist in the message. Add the following highlighted lines:
client.on("messageCreate", message => {
  if (message.author.bot) return;
  if (!message.content.startsWith(prefix)) return;

  const commandBody = message.content.slice(prefix.length);
  const args = commandBody.split(' ');
  const command = args.shift().toLowerCase();
});
You use the first line here to remove the prefix from the message content and assign the result to the constant commandBody. This is necessary as you don’t want to include the prefix in the parsed command name.
The second line takes the message with the removed prefix and uses the split method on it, with a space as the separator. This splits it into an array of sub-strings, making a split wherever there is a space. This results in an array containing the command name, then, if included in the message, any arguments. You assign this array to the constant args.
The third line removes the first element from the args array (which will be the command name provided), converts it to lowercase, and then assigns it to the constant command. This allows you to isolate the command name and leave only arguments in the array. You also use the method toLowerCase as commands are typically case insensitive in Discord bots.
You’ve completed building a command parser, implementing a required prefix, and getting the command name and any arguments from messages. You will now implement and create the code for the specific commands.
Add the following code to start implementing the ping command:
client.on('messageCreate', message => {
    if (message.author.bot) return;
    if (!message.content.startsWith(prefix)) return;

    const commandBody = message.content.slice(prefix.length);
    const args = commandBody.split(' ');
    const command = args.shift().toLowerCase();

    if (command === "ping") {
        message.reply(`Pong`);
    }
});
Add this code block above your client.login(process.env.CLIENT_TOKEN); line and if you run node server.js again, your bot should reply to you when you type ping.

Thank you for reading this blog.

Top comments (0)