
The last major version of Flutter, Flutter 2, already offered official support for Android, iOS, web and Windows. Flutter 3 adds stable support for the remaining platforms, which are macOS and Linux. It also includes support for Apple's new M1 processors.
In this article I am going to delve into the official Flutter 3 support for macOS. I am going to build a very simple application using the macos_ui plugin, which is used to give our application a macOS-style look n' feel, and finally I am going to make a performance comparison between Flutter 2 and Flutter 3 regarding the performance of a macOS desktop application.
Performance improvements
In the previous article I discussed the performance improvements that the Flutter team and its contributors applied to image processing on the web, we saw a substantial performance increase in Chromium-based browsers.
As this is a major update, and considering that the new app will run natively on my M1 mac (as opposed to Flutter 2, which depends on the Rosseta translation layer); I expect to see a performance improvement in this new release of Flutter. To see if there is any improvement I am going to use the FPS indicator included in AndroidStudio while running the application in profile mode.
But first we need to create an application to test, let's see how it is to create a desktop application for macOS using Flutter 3:
macOS app creation
Let's start by creating a new project:
Note: If you want also to do the performance tests, you should create the project with Flutter 2. This is because if you create the project with Flutter 3 the CLI tool will set your minimum dart SDK to an incompatible version with Flutter 2; also it will use an incompatible version of
flutter_lints.
flutter create macos_test
We add the macosui_test dependency to pubspec.yaml, which looks like this:
name: macosui_test
description: A new Flutter project.
publish_to: 'none'
version: 1.0.0+1

environment:
   sdk: ">=2.16.2 <3.0.0"

dependencies:
   flutter:
     sdk:flutter
   cupertino_icons: ^1.0.2
   macos_ui: ^1.3.0

dev_dependencies:
   flutter_test:
     sdk:flutter
   flutter_lints: ^1.0.0

flutter:
   uses-material-design: true
Now replace the entire contents of main.dart with the following:
import 'package:flutter/material.dart';
import 'package:macos_ui/macos_ui.dart';

void main() {
  runApp(const App());
}

class App extends StatelessWidget {
  const App({Key? key}) : super(key: key);
  @override
  Widget build(BuildContext context) {
    return MacosApp(
      theme: MacosThemeData.light(),
      darkTheme: MacosThemeData.dark(),
      themeMode: ThemeMode.light,
    );
  }
}
The MacosApp widget acts in the same way as MaterialApp or CupertinoApp, it's a widget that should be at the root of the application and provides context and styles to the underlying widgets. Run the application, you will see an empty window appear; this is normal since we haven't added anything yet.
Now we are going to add a screen with two side tabs. Add the following widget:
class MainScreen extends StatefulWidget {
  const MainScreen({Key? key}) : super(key: key);
  @override
  State<MainScreen> createState() => _MainScreenState();
}

class _MainScreenState extends State<MainScreen> {
  int _pageIndex = 0;

  @override
  Widget build(BuildContext context) {
    return MacosWindow(
      sidebar: Sidebar(
        minWidth: 180,
        builder: (context, scrollController) {
          return SidebarItems(
            currentIndex: _pageIndex,
            onChanged: (index) {
              setState(() => _pageIndex = index);
            },
            items: const [
              SidebarItem(
                leading: MacosIcon(CupertinoIcons.macwindow),
                label: Text('Main'),
              ),
              SidebarItem(
                leading: MacosIcon(CupertinoIcons.graph_circle),
                label: Text('Performance'),
              ),
            ],
          );
        },
      ),
      child: IndexedStack(
        index: _pageIndex,
        children: [
          MacosScaffold(
            children: [
              ContentArea(
                builder: ((context, scrollController) {
                  return const Center(
                    child: Text('Main'),
                  );
                }),
              ),
            ],
          ),
          MacosScaffold(
            children: [
              ContentArea(
                builder: ((context, scrollController) {
                  return const Center(
                    child: Text('Performance'),
                  );
                }),
              ),
            ],
          ),
        ],
      ),
    );
  }
}
And don't forget to set it has the home of MacosApp:
class App extends StatelessWidget {
  const App({Key? key}) : super(key: key);
  @override
  Widget build(BuildContext context) {
    return MacosApp(
      theme: MacosThemeData.light(),
      darkTheme: MacosThemeData.dark(),
      themeMode: ThemeMode.light,
      home: const MainScreen(), // <= Add the screen here
    );
  }
}
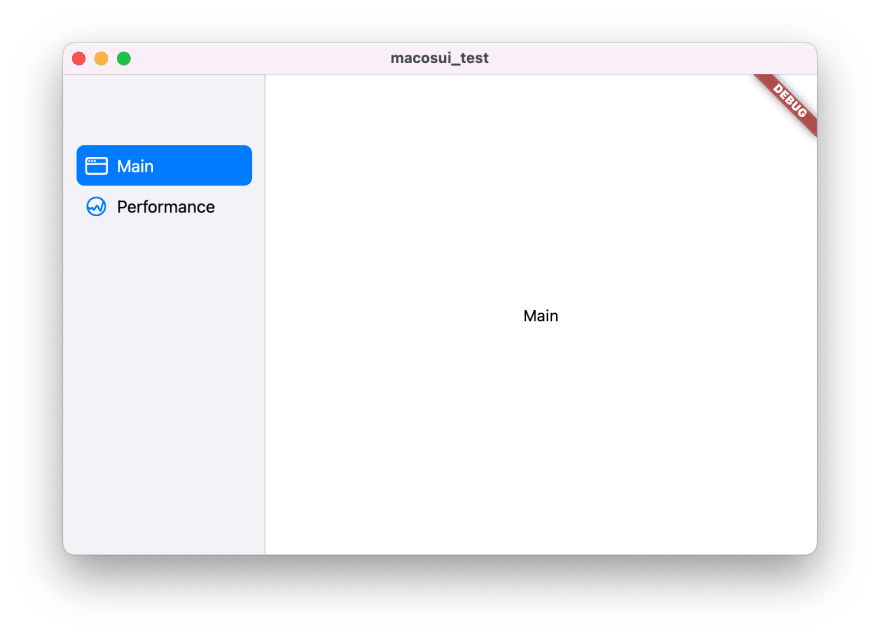
If you look at the content of the build() method, you will see that we are using the MacosWindow widget as the main display container. This container can have a resizable sidebar, items inside it, and a main content for each tab packed in MacosScaffold. If you are interested in learning more about each of these widgets, you can visit the official guide of macos_ui which offers a much more extensive and detailed explanation.
Run the app to see the final result.
Performance test
Now we are going to test the difference in performance of this same application between Flutter 2 and Flutter 3.
First, I'm going to make the following changes in the Performance tab to force Flutter to continually redraw its UI, so we'll be able to see more easily the performance differences:
class MainScreen extends StatefulWidget {
  const MainScreen({Key? key}) : super(key: key);
  @override
  State<MainScreen> createState() => _MainScreenState();
}

class _MainScreenState extends State<MainScreen> {
  int _pageIndex = 0;

  @override
  Widget build(BuildContext context) {
    // Create 1000 loading widgets. I use this widget because is
    // an infinite animation, so Flutter will be redrawing the UI
    // indefinitely.
    List<Widget> widgets = [];
    for (var i = 0; i < 1000; i++) {
      widgets.add(const CupertinoActivityIndicator(
        color: CupertinoColors.systemGrey,
      ));
    }

    return MacosWindow(
      sidebar: Sidebar(
        minWidth: 180,
        builder: (context, scrollController) {
          return SidebarItems(
            currentIndex: _pageIndex,
            onChanged: (index) {
              setState(() => _pageIndex = index);
            },
            items: const [
              SidebarItem(
                leading: MacosIcon(CupertinoIcons.macwindow),
                label: Text('Main'),
              ),
              SidebarItem(
                leading: MacosIcon(CupertinoIcons.graph_circle),
                label: Text('Performance'),
              ),
            ],
          );
        },
      ),
      child: IndexedStack(
        index: _pageIndex,
        children: [
          MacosScaffold(
            children: [
              ContentArea(
                builder: ((context, scrollController) {
                  return const Center(
                    child: Text('Main'),
                  );
                }),
              ),
            ],
          ),
          MacosScaffold(
            children: [
              ContentArea(
                builder: ((context, scrollController) {
                  // Draw in a grid all the loadings created before.
                  return Center(
                    child: GridView.count(
                      crossAxisCount: 25,
                      children: widgets,
                    ),
                  );
                }),
              ),
            ],
          ),
        ],
      ),
    );
  }
}
The result that you are going to see below has been executed on a 2020 MacBook PRO M1 with 16 GB of RAM. The application runs in profile mode:

With Flutter 2 we can see that the application runs with a stable 30 frames per second.
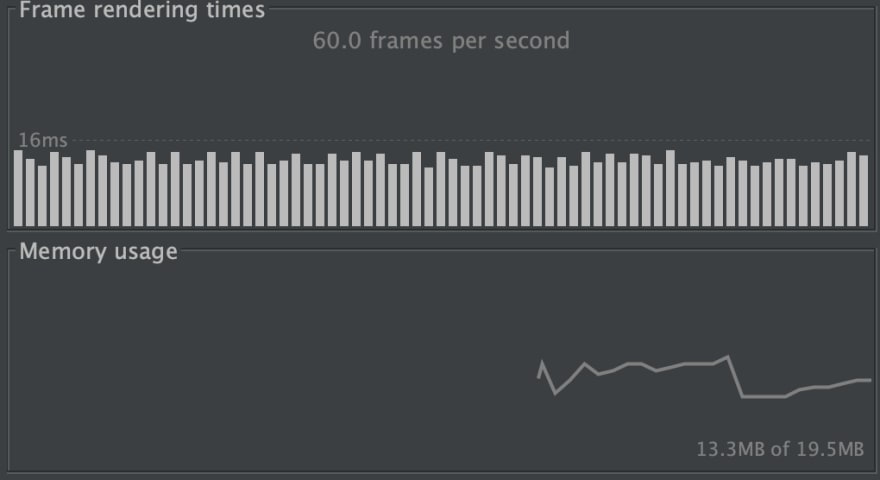
After upgrading to Flutter 3, the meter goes up to 60 FPS.
This test demonstrates the huge performance improvement that Flutter 3 brings. This is probably due to the fact that the app runs natively on my Apple Silicon processor, instead of relying on a translation layer of the old x86 architecture to the ARM architecture that the new M1 processors brings.
Conclusion
In this article we have created a very simple Flutter 3 application for macOS using the macos_ui package. I've also demonstrated the performance differences between Flutter 2 and Flutter 3 when it comes to running a desktop app.
This opens up a wide range of possibilities for using Flutter. As in my previous article, I have to congratulate the Flutter team and their contributors for the amazing work that they've done, as well as the developer of the macos_ui plugin for the incredible job of recreating the visual style of macOS in a Flutter plugin.
You can find the source code of this project here.
This is all for today, thank you very much for reading and have a great rest of your day.

Latest comments (0)