
Table of Content:
- Setup your Next.js project
- Configure Next.js for Static Export
- Install GitHub Pages Deployment Package
- Configure Deployment Script
- Build and Export the Next.js Application
- Deploy to GitHub Pages
- Configure GitHub Pages
- Access Your Deployed Site
Introduction
Deploying a Next.js application on GitHub Pages involves several steps since Next.js is designed to be a full-stack framework and GitHub Pages only supports static sites. To deploy your Next.js application as a static site, you will need to export it. Here’s a step-by-step guide:
Step 1: Setup your Next.js project
If you don't already have a Next.js project, you can create one using:
npx create-next-app@latest my-nextjs-app

cd my-nextjs-app

Step 2: Configure Next.js for Static Export
Next.js provides a built-in command to export your site to static HTML, which can then be hosted on GitHub Pages.
a) Open `next.config.js` and add the following configuration:

  /** @type {import('next').NextConfig} */
  const nextConfig = {
    output: 'export',
    basePath: '/my-nextjs-app', // Replace with your GitHub repository name
  }

  module.exports = nextConfig


b) Ensure your `package.json` scripts include the `export` command:

{
  "scripts": {
    "dev": "next dev",
    "build": "next build",
    "export": "next export",
    "start": "next start",

  }
}
Step 3: Install GitHub Pages Deployment Package
Install the gh-pages package to deploy your static site to GitHub Pages:
npm install --save-dev gh-pages
Step 4: Configure Deployment Script
Update your package.json to include the deploy script:
{
  "scripts": {
    "deploy": "next build && next export && gh-pages -d out"
  }
}
Step 5: Build and Export the Next.js Application
Run the following command to build and export your Next.js application:
npm run build


npm run export
Step 6: Deploy to GitHub Pages
Ensure your repository is initialized and has a remote repository set up on GitHub. Then, run the deployment script:
npm run deploy
The gh-pages package will push the contents of the out directory to the gh-pages branch of your repository.
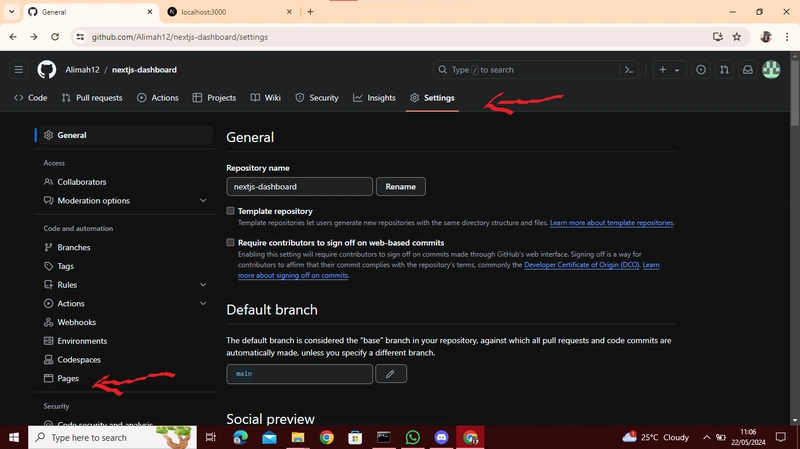
Step 7– Activate GitHub Pages for Your Repository
- Go to your repository on GitHub.
- Navigate to
Settings. - Scroll down to the
Pagessection. - In the
Sourcesection, select thegh-pagesbranch. - Save the settings.

Step 8: Access Your Deployed Site
Commit and Push
After committing and pushing your changes to the main branch, GitHub will automatically initiate the deployment to GitHub Pages.
Your site should now be accessible at https://<your-username>.github.io/<repository-name>/.
Further reading:
https://www.freecodecamp.org/news/how-to-deploy-next-js-app-to-github-pages/

Top comments (0)