
Overview
If you are new to Visual Studio or in the beginner stage of your developer career, here are 10 tips that will help you make effective use of Visual Studio:
- Debugging
- Breakpoints
- DataTips
- Watch window
- Immediate window
- IntelliSense
- Quick Navigation/Go To
- Bookmarks
- Code cleanup
- Customize fonts
Debugging
The difference between debugging and executing a program is that debugging can hold the execution at any instant. To debug your application, press F5, or select Debug > Start Debugging, or click the green arrow in the Visual Studio toolbar.

Note: To run your application without debugging, press CTRL + F5 or select Debug > Start Without Debugging. This will run your application by skipping all enabled breakpoints.
Breakpoints
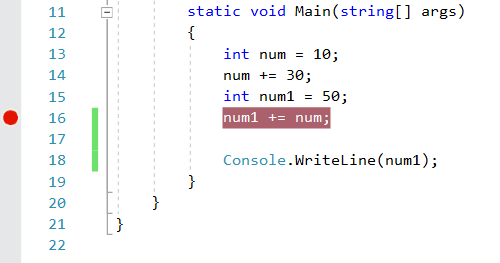
Breakpoints are checkpoints intentionally added to pause the execution of the program, allowing you to investigate the code. You can add breakpoints anywhere in the code except on lines of declaration. In the classical way of debugging code, we should start debugging from line 1 to the point where we think the problem resides.
Visual Studio provides several ways to include a breakpoint in your code:
- Click the far-left margin of the line of code.
- Place the cursor on the line where you want to add a breakpoint and press
- Select Debug > Toggle Breakpoint.
- Right-click and select Breakpoint > Insert Breakpoint.
In the following screenshot, the yellow highlight is where the program execution will stop because of a breakpoint.
Traverse through the code
There are two ways to traverse through code. They are:
- Step Into
- Step Over
The Step Into traverse navigates through every line of code. When an object is defined or a method is invoked, it traverses into the object/method definitions. Use Debug > Step Into or press F11 to use Step Into traversing.
The Step Over traverse bypasses object creation and method definition. Use Debug > Step Over or press F10 to use Step Over traversing.
DataTips
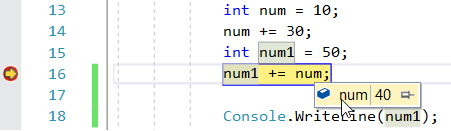
DataTips can be seen during runtime when the program execution hits a breakpoint. This can be used to examine the values of the variables that are in the scope of a breakpoint. Mouse over a variable in the scope to examine it. If the variable is a basic data type like int, float, string, and so on, you can find its value directly. If it is a complex type such as a list, dictionary, or a class object, then you can examine its direct values as well as the values of its children.
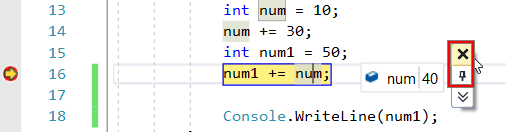
You can pin a DataTip so that it stays open by selecting the Pin to source pushpin icon.

To unpin or close the pinned DataTip, click the Unpin or Close icons respectively.
Watch window
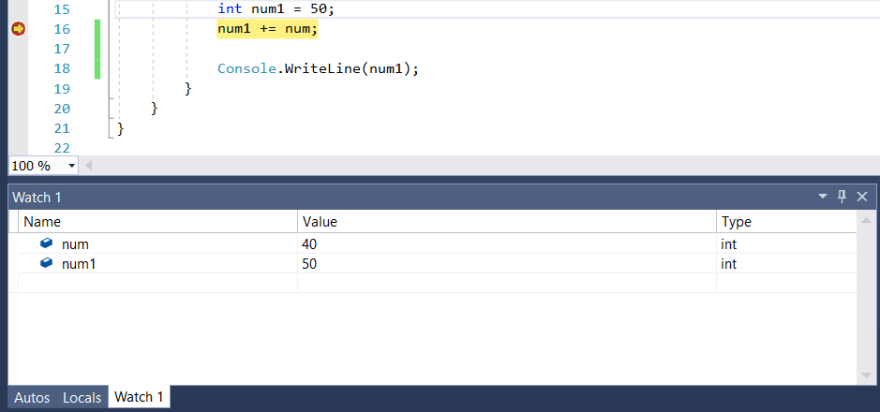
The Watch window provides an advanced way to examine a variable. To watch a variable while debugging, add it to the Watch window by right-clicking the variable or the DataTip and selecting Add Watch. The variable will appear in the Watch window.
The Watch window is primarily used to examine complex objects.
Immediate window
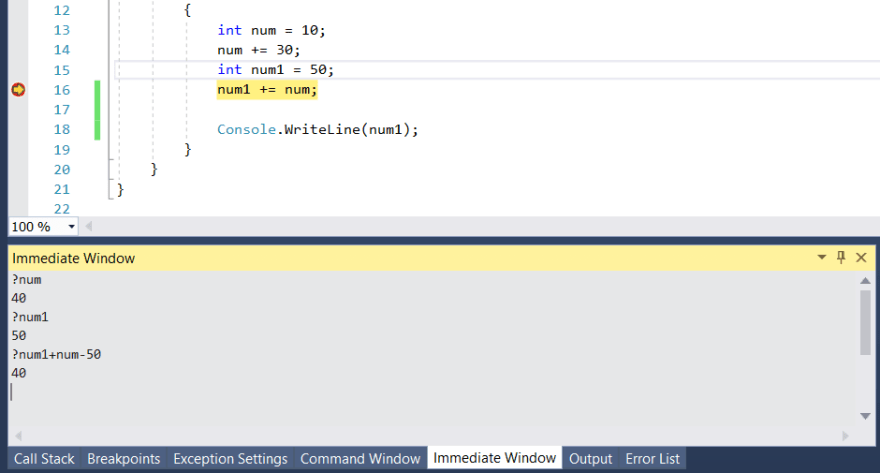
You can use the Immediate window to debug, evaluate expressions, execute statements, and print variable values. The Immediate window evaluates expressions by building and using the currently selected project. To display the Immediate window, select Debug > Windows > Immediate or press CTRL + ALT + I. The Immediate window also supports IntelliSense.
For example, to display the value of a variable *num *, you can use the following command:
? num
To display the value of an evaluated expression, you can use commands like:
? num + num1 – 50
? num = DateTime.Now.Day + num1
You can cut, copy, paste, and clear the content of the Immediate window by choosing the relevant options in the context menu that appears when right-clicking on it.

IntelliSense
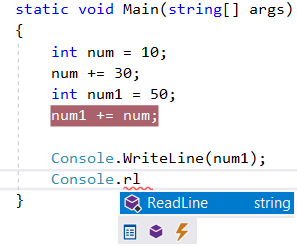
IntelliSense is a code-completion tool that helps you finish a line of code. This not only provides suggestions to complete a word, but also lists all the properties, methods, and events associated with an object. When invoking a method, IntelliSense will provide information about the type of parameter to be passed and the return type of the method.
The IntelliSense search results use fuzzy matching to provide suggestions. For example, the results list for List Members includes not only entries that start with the characters that you have entered, but also entries that contain the character combination anywhere in their names.
Quick Navigation or Go To
To open the Go To window, press CTRL + T or click Edit > Go To. Go to All enables you to jump to any file, type, member, or symbol declaration quickly.

Bookmarks
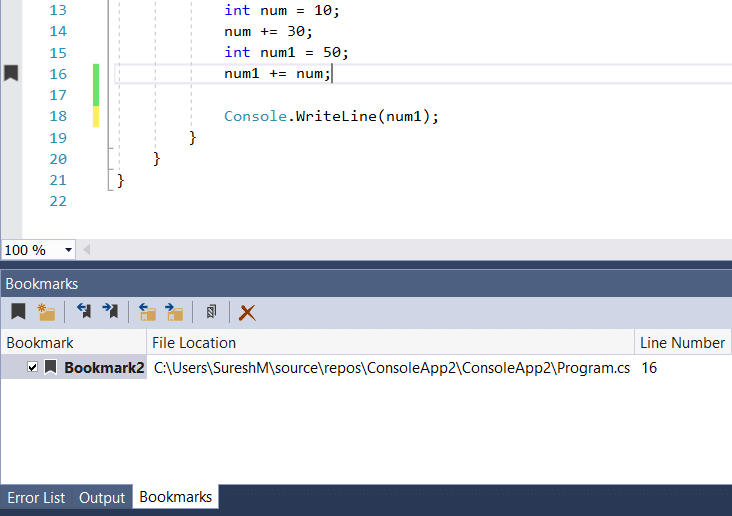
You can use bookmarks to navigate quickly to specific lines of code in a file.
To set a bookmark, choose Edit > Bookmarks > Toggle Bookmark or press CTRL+K, CTRL+K. You can view all the bookmarks for a solution in the Bookmarks window. To show the Bookmarks window, click View > Bookmark Window or press CTRL + K , CTRL + W.
Code Cleanup
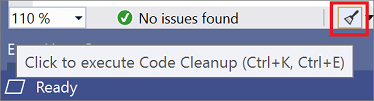
Visual Studio 2019 provides on-demand formatting of a code file, including code style preferences, through the Code Cleanup feature. To run Code Cleanup, click the broom icon at the bottom of the editor or press CTRL + K , CTRL + E.
Customize Fonts
You can change the font face, size, and color that is used for text in the IDE. For example, you can customize the color of specific code elements in the editor and the font face in tool windows or throughout the IDE.
To change the fonts, go to Tools > Options > Environment > Fonts and Colors.

Conclusion
In this blog, we have learned about using various tips and tricks in Visual Studio, that I wish I knew about when I was starting out as a developer! Hopefully, this has been useful for you or any new coders in Visual Studio. If there are any Visual Studio tools that you consider essential basics but weren’t mentioned in this blog, please post them in the comments below. We will compile and post them as another blog.
Happy coding!
The post 10 Tips and Tricks in Using Visual Studio for Junior Developers appeared first on Syncfusion Blogs.

Oldest comments (0)