
AWS #biginner #S3
In this workshop, you will learn how to process videos for web streaming using AWS services for storage and media transcoding.
This workshop is for developers, operators, or video engineers who want to learn the basics of processing file-based media with AWS Media Services. No prior experience is necessary, but familiarity with the AWS Console, Amazon S3, and AWS Lambda can help.
Steps
- We will create an S3(Simple Storage Service) bucket for storing media
- We will create an AWS Elemental MediaConvert Job to transcode videos into Apple HTTP Live Streaming (HLS) adaptive bitrate format (ABR) for delivery over the web
- We will configure the (Identity and Access Management)IAM policies required to grant service access to your content.
Hint
Costs for running this workshop in your own account, using our provided content (2m long), will be less than 1$.
Storage
In this section, you’ll use the console to create an S3 Bucket to store outputs from MediaConvert jobs. To enable access from the test player to your content, you must allow public read access and apply a Cross Origin Resource Sharing (CORS) policy. Typically, an origin server for content would be fronted by a Content Delivery Network like Amazon Cloudfront before going into production, but we will omit this step to keep the workshop shorter in length. A CDN improves performance to end users and reduces load on backend origin infrastructure.
Create Bucket
1- In the AWS Management Console choose Services then select S3 under Storage.
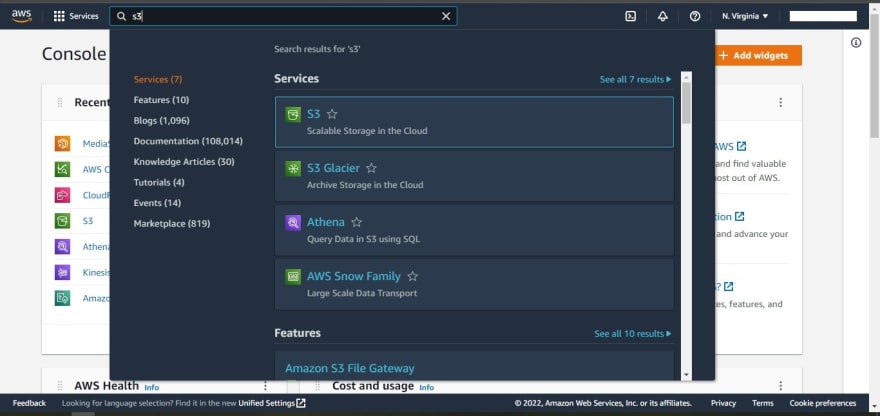
2- Choose +Create Bucket.

3- Provide a globally unique name for your bucket such as vod-YOURLASTNAME.

4- Select the Region you've chosen to use for this workshop from the dropdown.

5- Choose Create bucket in the lower right of the page.

6- From the S3 console select the bucket you just created.

7- Select the Properties tab and click edit on the Static website hosting tile.


8- Select Enable to use this bucket to host a static site.
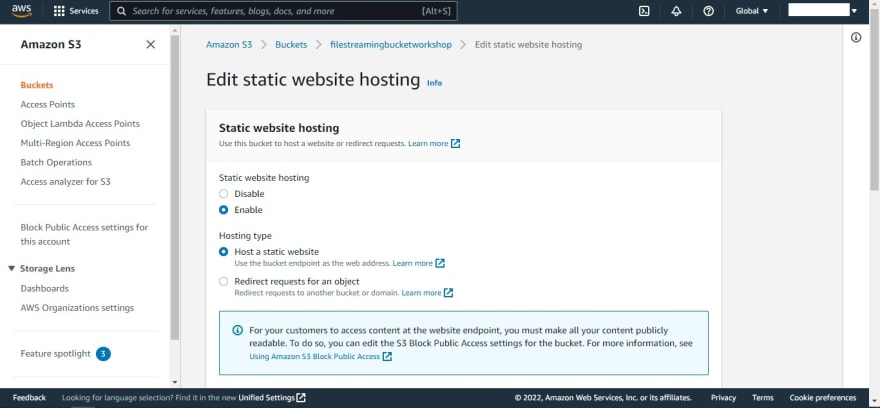
9- Enter index.html in the Index document box. Note: S3 requires an index document configuration even though we won’t be using it.

10- Select Save changes.

11- Under the Permissions tab click on CORS configuration and enter the following XML into the CORS configuration editor and click Save. This will allow a browser to request S3 content from any origin.


[
    {
        "AllowedHeaders": [
            "*"
        ],
        "AllowedMethods": [
            "GET"
        ],
        "AllowedOrigins": [
            "*"
        ],
        "ExposeHeaders": [],
        "MaxAgeSeconds": 3000
    }
]
Create an IAM Role
For MediaConvert to read and write from an S3 Bucket and emit status events to CloudWatch, we need to create an Identity and Access Management (IAM) role for MediaConvert to assume. An IAM Role defines a set of permissions to be assumed by a trusted entity, such as a user, service, or application.
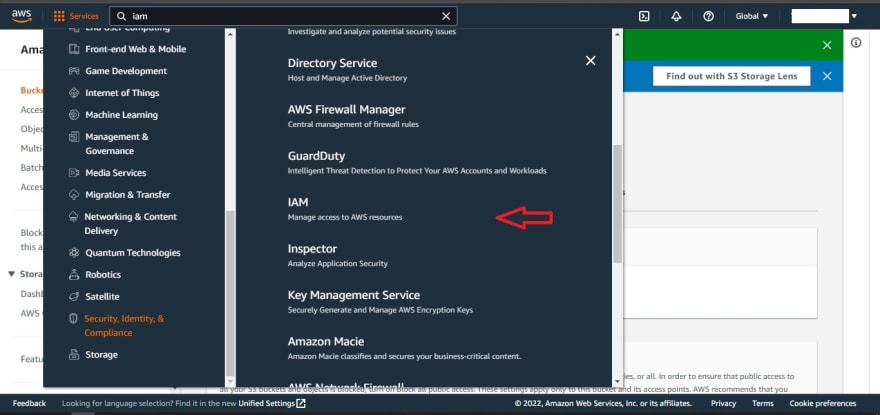
1-From the AWS Management Console, click on Services and then 2-select IAM in the Security, Identity & Compliance section.
2-Select Roles in the left navigation bar and then choose Create role.

3-Select AWS Service and MediaConvert for the role type, then click on the Next:Permissions button. Note: Selecting a role type automatically creates a trust policy for your role that allows AWS services to assume this role on your behalf. If you were creating this role using the CLI, AWS CloudFormation or another mechanism, you would specify a trust policy directly.


4-Choose Next:Tags
5-Choose Next:Review.

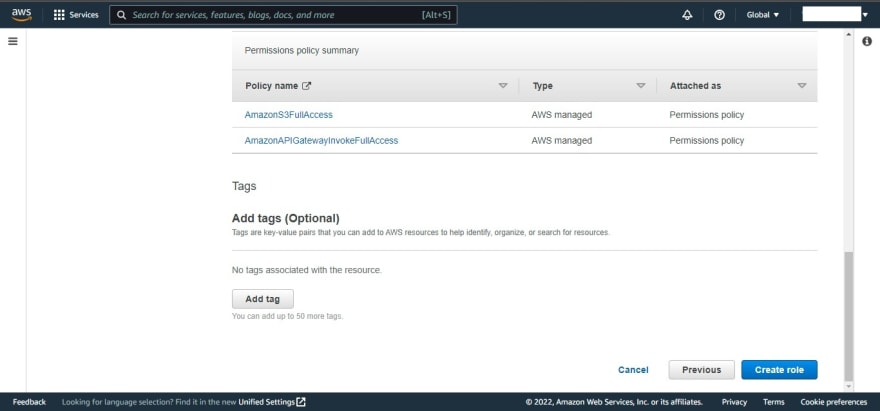
6-Enter vod-MediaConvertRole for the Role name.
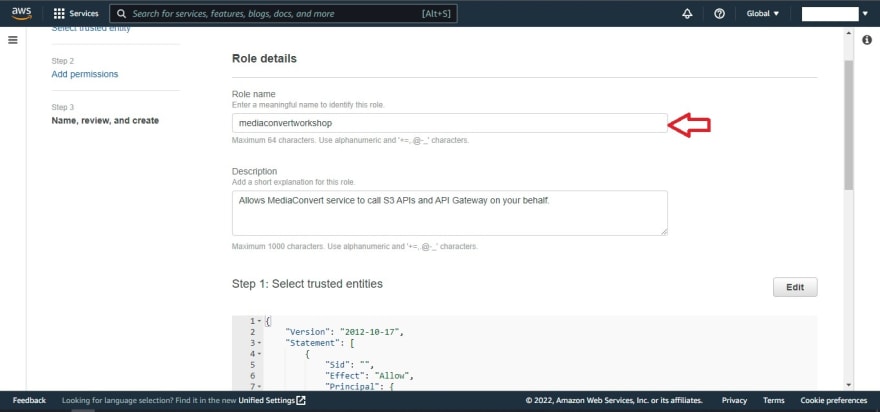
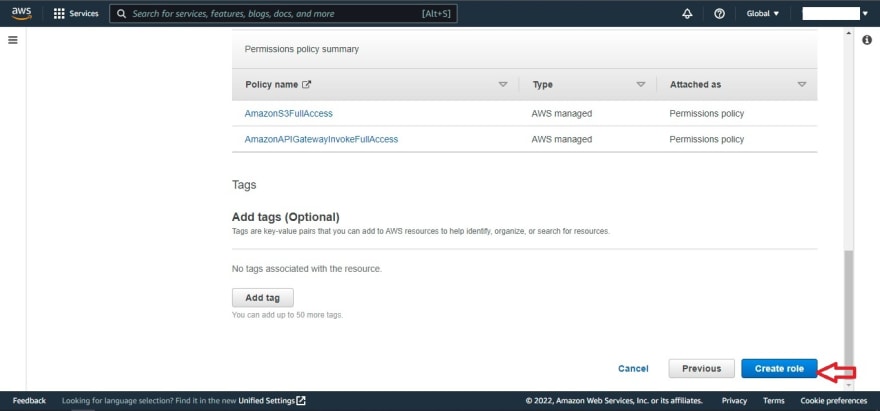
7-Choose Create role.
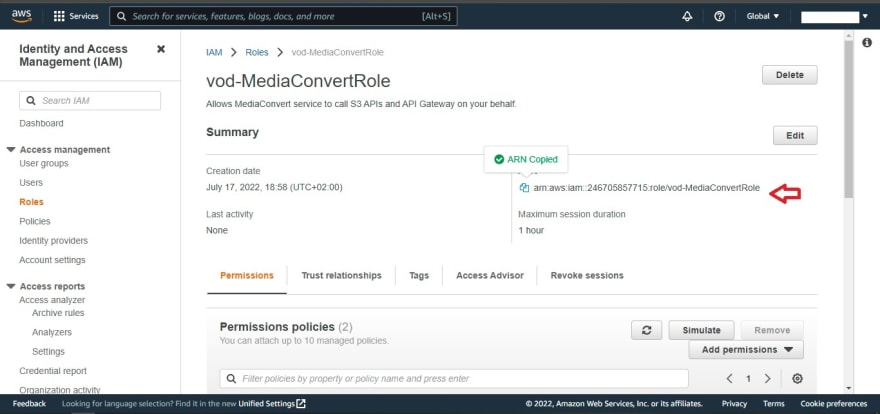
8-Type vod-MediaConvertRole into the filter box on the Roles page and choose the role you just created.

9-Scroll to the top of the page for your new Role and note down the ARN. You will use this in the following modules.
Transcoding
A MediaConvert job reads an input video from S3 and converts the video to output groups that in turn can have multiple outputs. A single media convert job can create multiple versions of the input video in different codecs and packages. For simplicity, in this module, you will create a MediaConvert job that takes a single input video and converts the video into an Apple HLS output group. This is an example of an adaptive bitrate stack that encodes the source into multiple files at different bit rates and divides them into short chunks, usually between 5-10 seconds long. Along with text-based manifest files, the media chunks for each of the encoded streams are hosted via an HTTP server (S3).
1-Open the MediaConvert console for the region you are completing the lab within

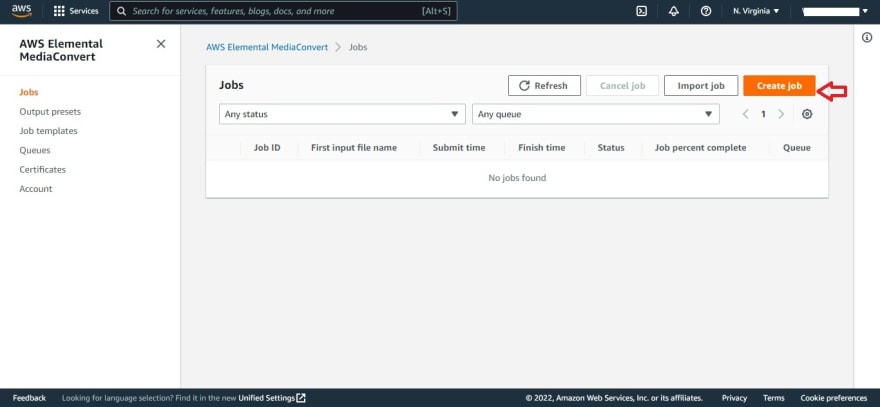
2-Select Jobs from the side bar menu.

3-Select Create job to open the Create job page.
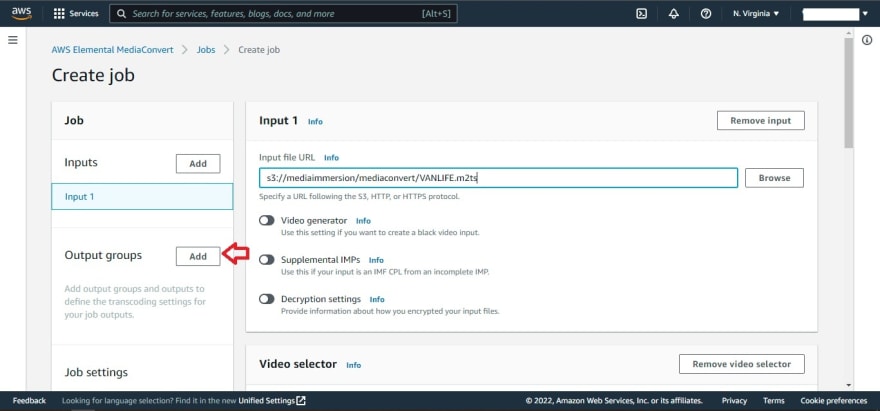
4-Select Input 1 on the Job panel to open the form for Input 1.
5-Enter the file name s3://mediaimmersion/mediaconvert/VANLIFE.m2ts in the box under Input 1.

Create Job
1-Under Output Groups on the Job panel, select Add.
2-Check the Apple HLS box then click on Select.

3-Make sure Apple HLS is selected in the Job panel in the Output groups section so that Apple HLS form is loaded.
4-Fill in HLS in the Custom group name box with any name, this helps you identify groups easily if you have many in a job or template.
5-In the Destination Browse for bucket name you created from the previous step to and/or construct the output S3 path as follows: s3://vod-YOURLASTNAME/assets/VANLIFE/HLS/

6-Leave the remaining settings as the default.
7-Scroll down to the Outputs panel and click on Add output two times so that there are a total of three outputs.

8-Select Output 1 from the Output Groups section Jobs panel to go to the Output settings form for Output 1.
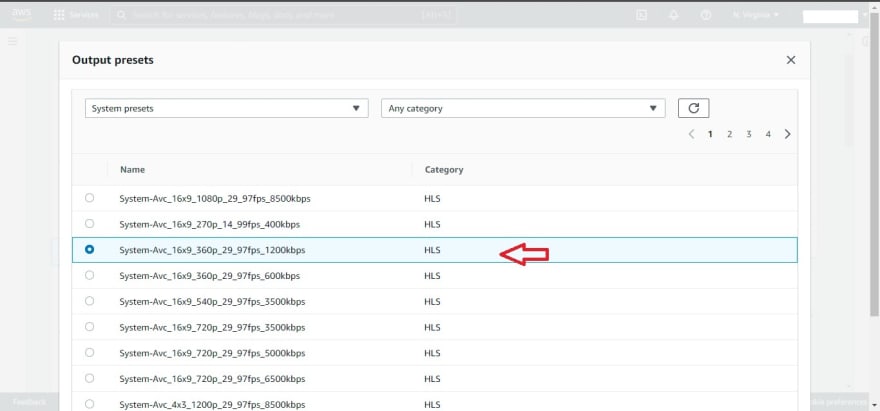
9-Select System-Avc_16x9_360p_29_97fps_1200kbps in the preset dropdown.
10-Enter _360 in the Name modifier box to append the resolution to the stream name.

11-Enter $dt$ in the Segment modifier box to append a datetime to each media segment to uniquely identify the media and prevent accidental overrwrites.

12-Select Output 2 from the Output Groups section Jobs panel to go to the Output settings form for Output 2.
13-Select System-Avc_16x9_540p_29_97fps_3500kbps in the preset dropdown.

14-Enter _540 in the Name modifier box
15-Enter $dt$ in the Segment modifier box.

16-Select Output 3 from the Output Groups section Jobs panel to go to the Output settings form for Output 3.
17-Select System-Avc_16x9_720p_29_97fps_5000kbps in the preset dropdown.
18-Enter _720 in the Name modifier box
19-Enter $dt$ in the Segment modifier box.

20-Select AWS Integration from the Job settings section of the Job panel to open the Job settings form.

21-Select the role you created in the previous section of this lab from the Service role dropdown.

22-Scroll to the bottom of the page and select Create

23-Wait for the job to complete. Monitor the status of the job by refreshing the Job details page using the refresh button.

Playback
To play the videos, you must make the manifest and segment files public. In order to do so, you need to remove the restrictions imposed by S3 that prevent accidental public objects, then make the MediaConvert output objects public.
1-Navigate to your Media Bucket and select Permissions, then Public access settings and edit.
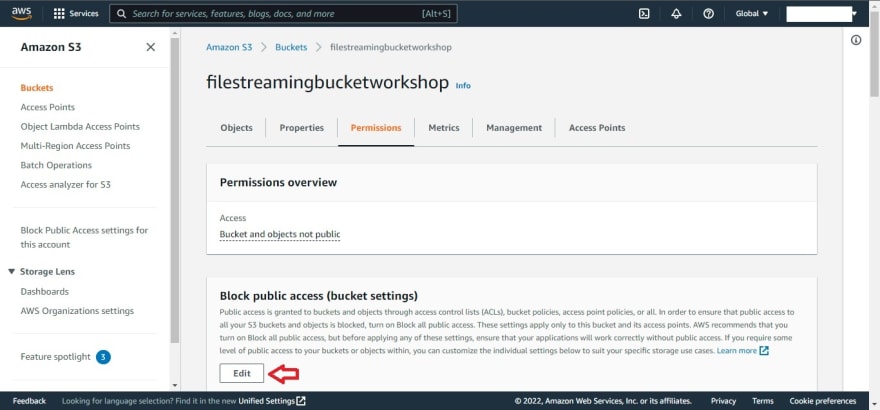
2-Uncheck the “Block new public ACLs…” and “Remove public access…” options as shown below

3-Save and type ‘confirm’
4-Now that you have permissions to make our object public, navigate to the root of your Media Bucket by selecting Overview.
5-Check the box next to the ‘assets’ folder, select Actions, and finally Make public
6-Get the Object URL for the manifest file located in /assets/VANLIFE/HLS/ it should look like:
https://s3.amazonaws.com//assets/VANLIFE/HLS/VANLIFE.m3u8
7-Play the stream using the Safari browser by clicking on the Link for the object or use the JW Player Stream Tester .

Congratulations! You have successfully created an adaptive bitrate video-on-demand stream using AWS Elemental MediaConvert and used S3 as an origin server.

Top comments (0)