Over the past year, my team have been steadily building a Developer Options screen for our app. It is a simple PreferenceScreen available on debug builds that aims to help us:
- figure out what’s going on without needing to be attached to a computer
- test various configurations without re-installing
- have a host for various experimentations we are trying to explore
In this series of posts, I will share what these various options are and how we made them.
(If you are not familiar with PreferenceFragmentCompat, I highly suggest to read about that first before proceeding. You can start with this AndroidX guide on Settings.)
At Woolworths, we use feature flags a lot. It helps us merge our code to master quicker, allows our QA team to provide feedback faster, and helps manage the risks when doing an important release.
We use Firebase Remote Config to manage our existing feature flags, which enable us and our product owners to control these flags very easily.
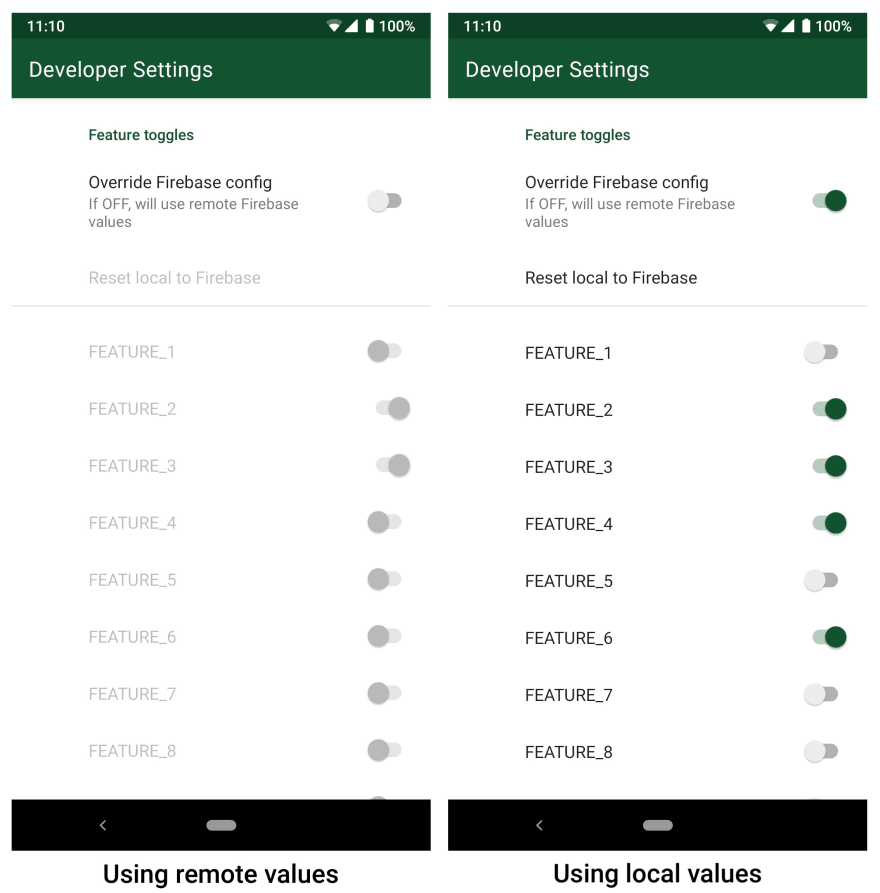
Although it is very convenient to have these flags configurable remotely, it also makes it difficult to do a quick test on something behind a feature flag for someone who doesn’t have access to the console. It might also disrupt someone’s work if somebody else changes the flags’ values remotely without them knowing it.
It is for this reason that we introduced local feature toggles. This gives anyone on a debug build the ability to turn as many features on or off as many times as they want without affecting anyone else’s builds.

Names changed to protect individuals 😅
On a fresh install, the app would use the in-app default values we have set and the override switch is OFF. The app would keep using the values provided by Firebase until the override switch is flipped.
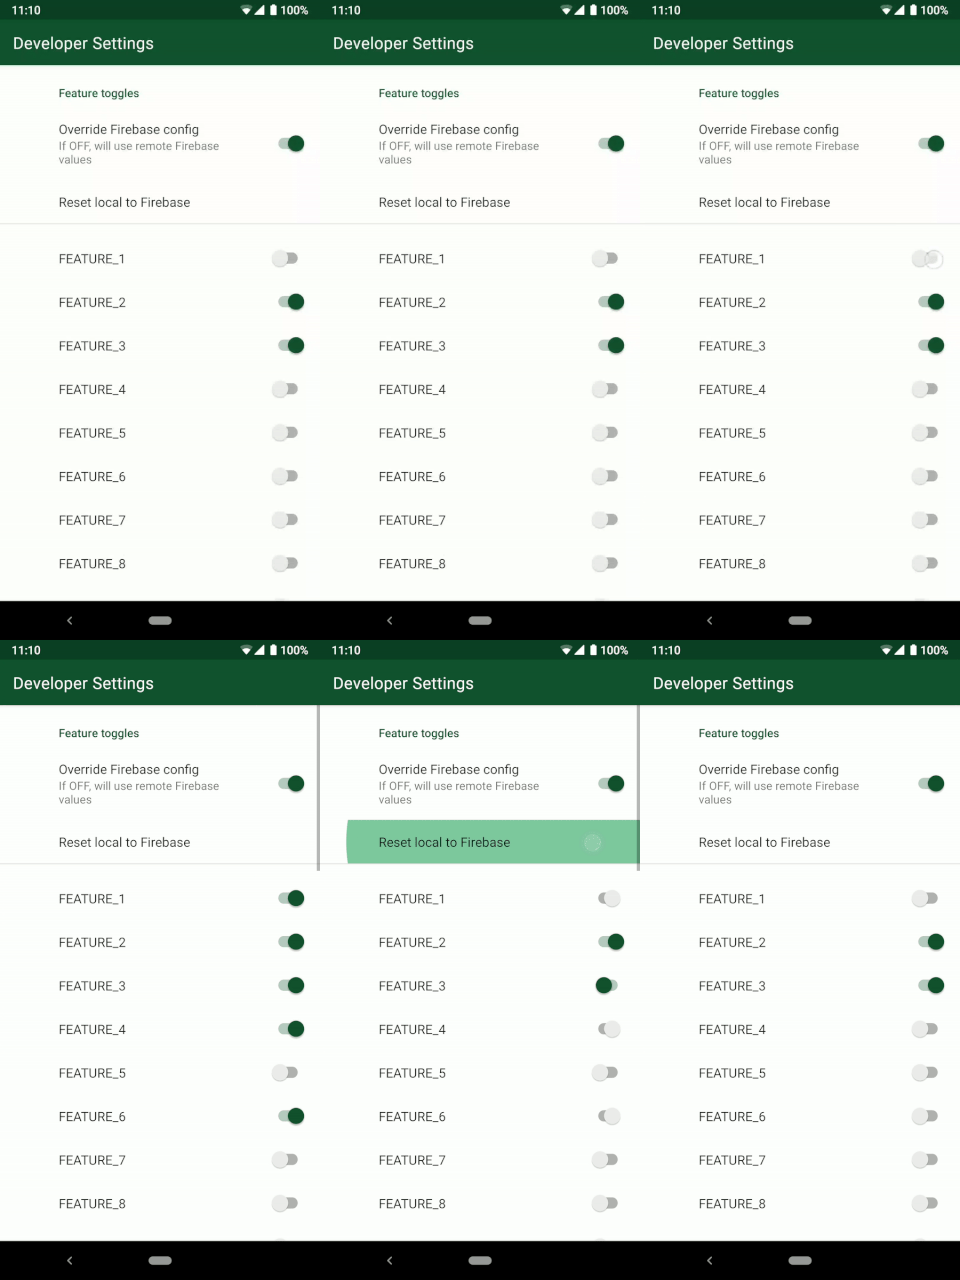
And when it gets confusing and we want a do-over, the “Reset local to Firebase” button would turn the flags back to what is provided by Firebase.

All the features in this list are added dynamically from an enum that holds all our feature flags:
There a few things at work to make all of this come together. First off, if the override button is OFF, we want everything related to feature flags to be disabled. This gives better clarity on what settings the app is using, and prevents the user from unwittingly changing a value.
To do this, we define the switch’s behaviour in our XML file:
The attribute disableDependentsState means that if this switch is OFF, any other value that depends on this preference gets disabled.
Next, we want to create a new category that will contain all of our feature toggles and belong to the same category as our override switch.
We can then add each of our features into this featureTogglesCategory:
For simplicity, we use the Feature enum’s name as the SharedPreference key for each feature toggle, as well as the label that appears beside the Switch.
What the function isFeatureEnabled() does is simply return Firebase-provided values for production builds, and figure out what the our preferences are for debug builds:
Now that we have prepared our feature flags PreferenceCategory, we can route our dependency on our override switch:
It may seem turned the other way around, but that is correct. ✅ To set this new category as dependent ON another preference, we need to call setDependency() and give it the name of that control preference.
As for our “Revert…” button, we also want it to be disabled if the override switch is off (because it doesn’t serve any real purpose in this case):
And to handle user clicks on this button, we set up a callback in our PreferenceFragment:
And that’s it! We have dynamically added a set of switches to our PreferenceScreen that would hopefully make testing our app much easier.
In the next post in the series, we will talk about more on-device debugging tools such as managing our SharedPreferences, and showing device information, among others.


Top comments (0)