
Dev Snacks is a series of short reads designed to introduce you to a new tech skill. Some are pulled directly from my Twitter threads with all the grammar and syntax issues that can entail. Have fun!
Y’all wanted more hardware so… today we’re going to play with the BBC micro:bit (https://amzn.to/2Ecs3XU ) We’re going to do some simple projects because ANYONE can do this stuff, even if you don’t know a lick of code.

This is dedicated to @joelatwar because he said I was a poor man’s @shanselman and I want to prove him right
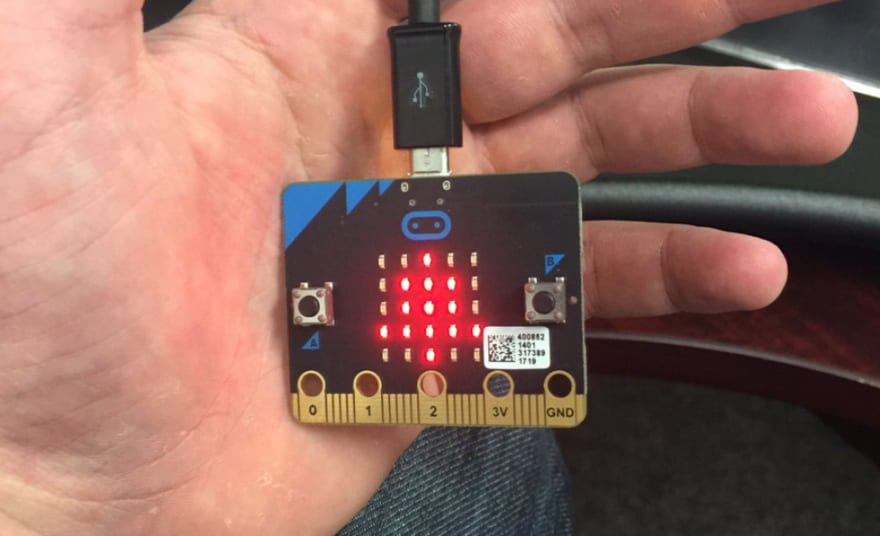
First up, the basics. The BBC micro:bit is the perfect starter for hardware hacking because it is SO DARN EASY. It connects to your computer with a standard micro USB cable.

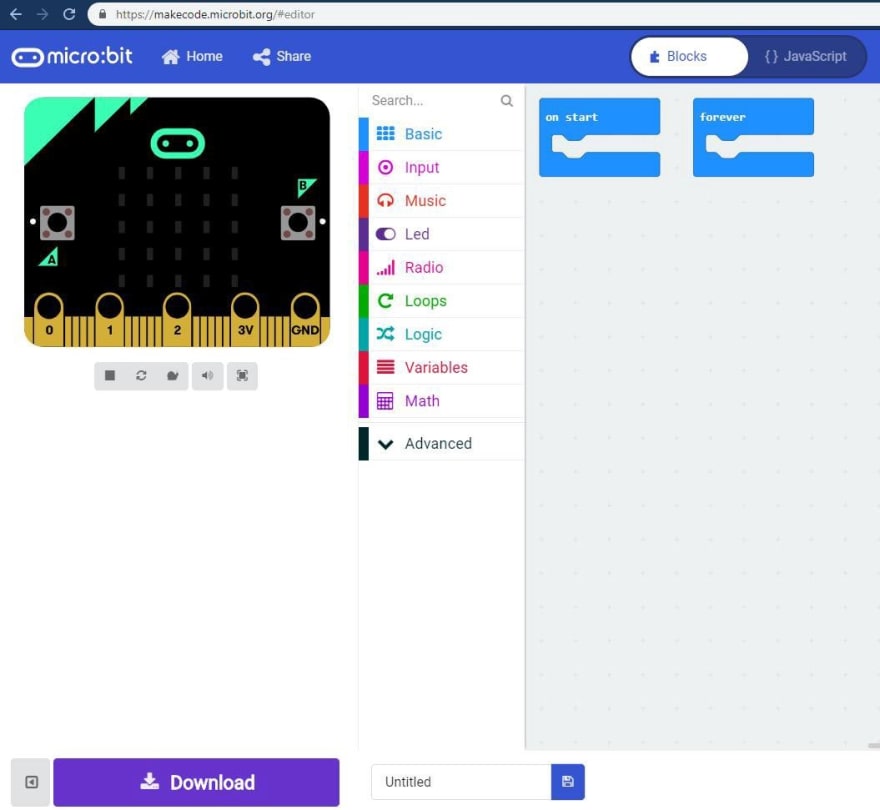
Writing code to this thing is very newb-friendly because you can do it from a browser without ever actually writing code using what @Microsoft calls “Blocks”. https://makecode.microbit.org/#editor
https://makecode.microbit.org/#editorhttps://makecode.microbit.org/#editor
The first little project we’re going to do is lighting up some LEDs on the front of this sucker. Lighting up LEDs is like the classic “Hello World” problem of hardware hacking.
In the editor, click “Basic”, grab “show leds”, and drag that son of gun right into the “Forever” slot.

Here’s the editor again: https://makecode.microbit.org/#editor
Dragging Blocks into the “Forever” slot makes any code in the slot run as long as the micro:bit is drawing power. Dragging it into the “On start” slot makes it run when the micro:bit fires up, and until all the instructions are completed.
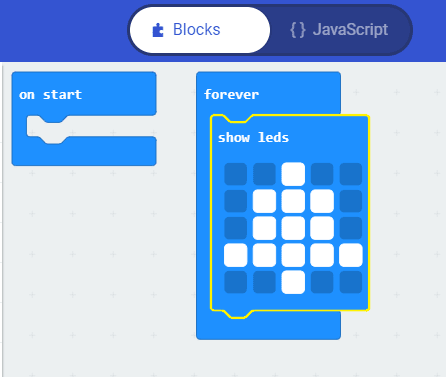
I made a little design that’s like a rocket ship, or a Christmas tree, or arrow or something IDK. I’m not an artist.

If you click “{ } JavaScript” at the top, it toggles between Blocks and JavaScript code. If you’re already familiar with JS, you will recognize that showLeds() is a prebuilt function that takes a template literal as an argument to send signals to the LED hardware.
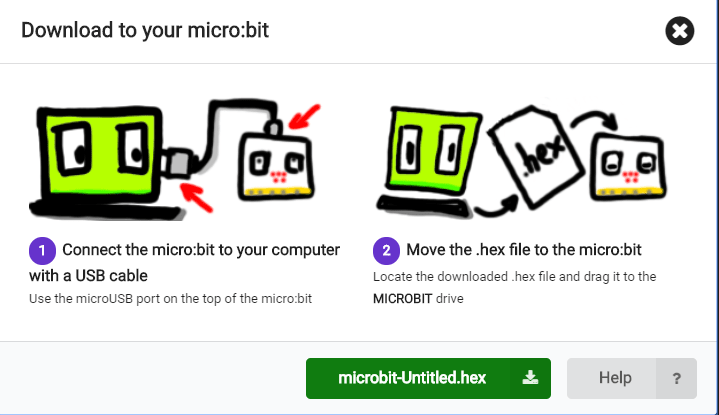
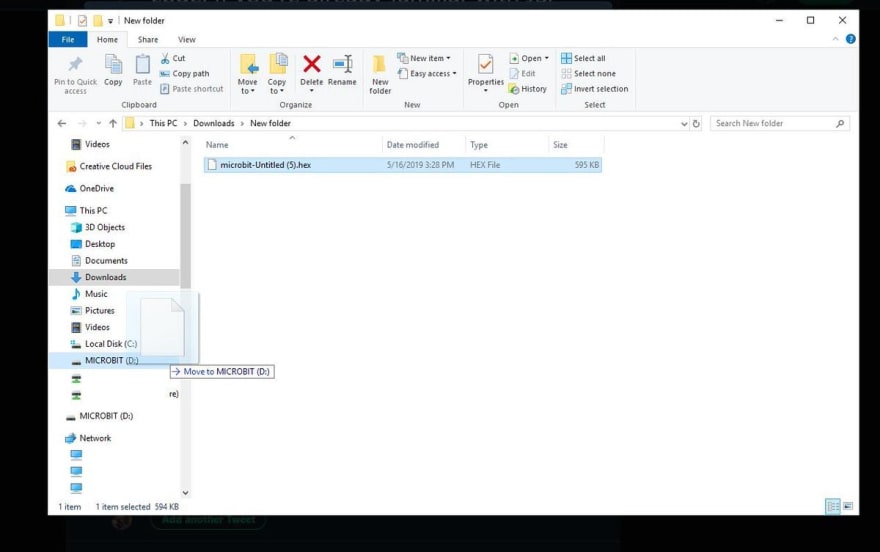
What else do we need to do to run this? Not much. The micro:bit just shows up as a USB drive on your computer, so just click “Download” in the editor, find the file in your downloads, and drag it to the MICROBIT drive.

THAT’S LITERALLY IT. We have done a thing. Neato.
Okay I hope you guys see how easy this is for a literal zero-code beginner to do this stuff. The only things you will need is $20 to buy the micro:bit, a computer with a USB slot, a browser, and the ability to follow the most basic of instructions.
YOU GOT THIS.
Zamioculcas zamiifolia
So let’s turn up the volume and do some! More! Interesting! Stuff!
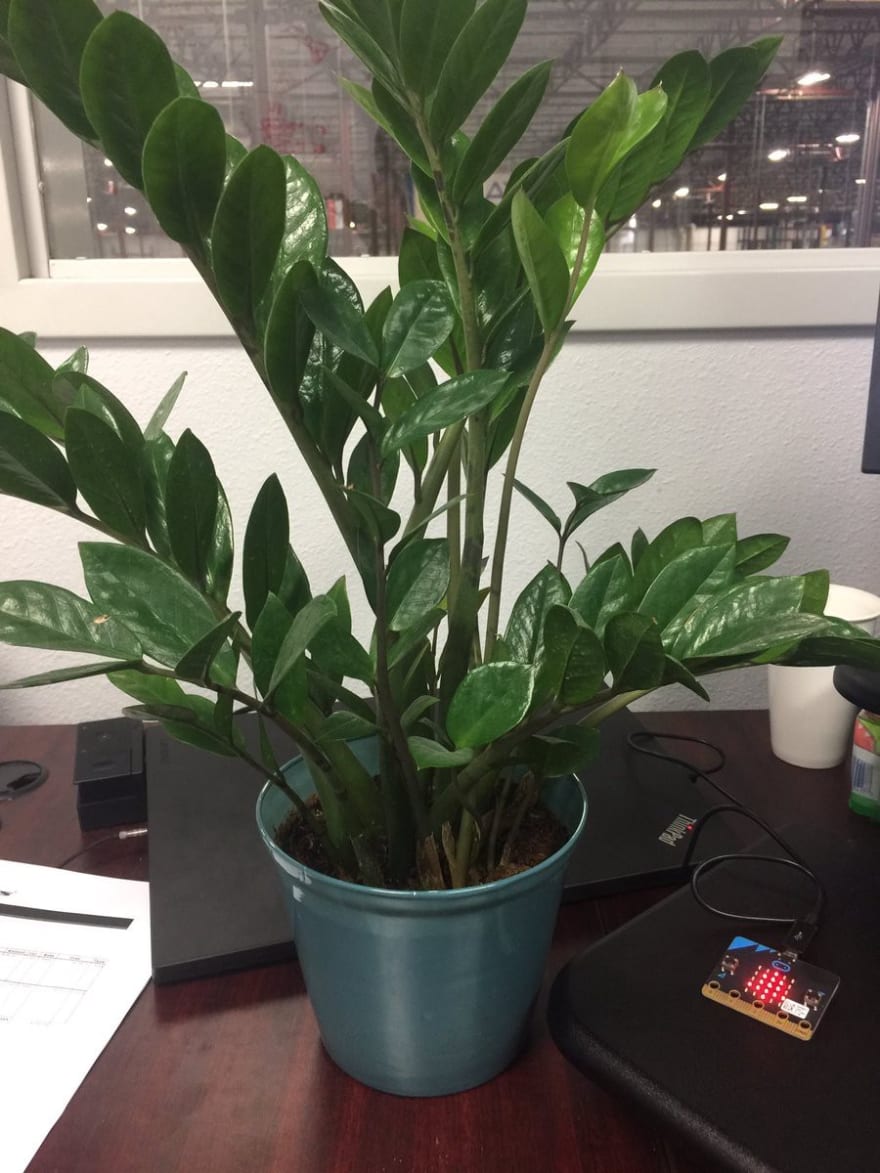
Enter Stage Right one of my office plants. Internet, please meet Juliet, my 3-year old Zamioculcas zamiifolia, native to Eastern Africa and dentist office waiting rooms.
The Zamio… whatever it’s called, needs to be watered approximately every 2 weeks, but because of the dry climate, knowing when to water it is tricky. I am going to write a little program for the BBC micro:bit that checks the water moisture so I can see when to water!
For this little project, we need Juliet, the micro:bit, one of those little black metal binder clips, and two sets of alligator clips.
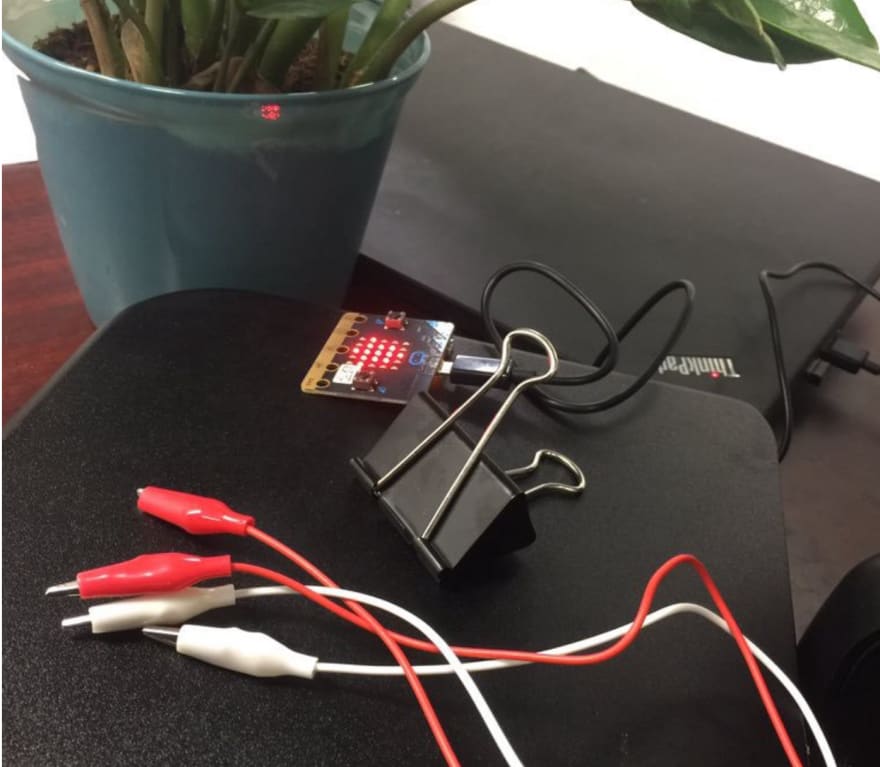
Pull the handles off the binder clip and just stick ’em right in the dirt. We’re going send a little electricity into these dudes, and the electrical resistance created by the water in the soil will tell us how much moisture is in there.

binder clips in a potted plant
Clip one of the alligator clip ends to the tab labeled “3V” and the other to the tab labeled “0”. Clip the opposite ends of the clips to the binder clip handles in the plant.

When you plug the micro:bit into the computer again, it will still be running the arrow/tree LED light code. It will keep whatever the latest code was in memory. So let’s write the code that makes it test the soil moisture. Back to the editor! https://makecode.microbit.org/#editor

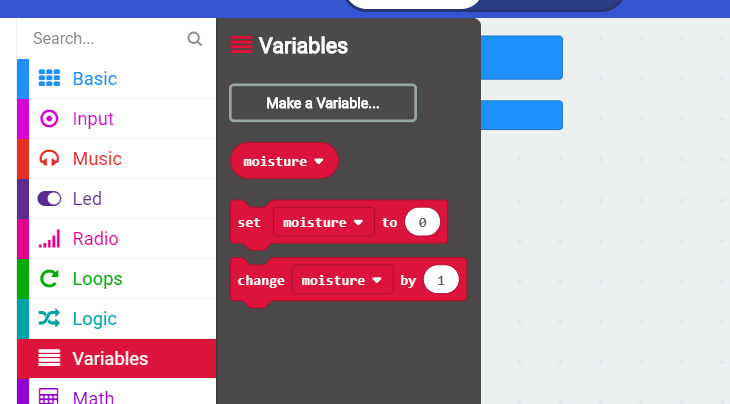
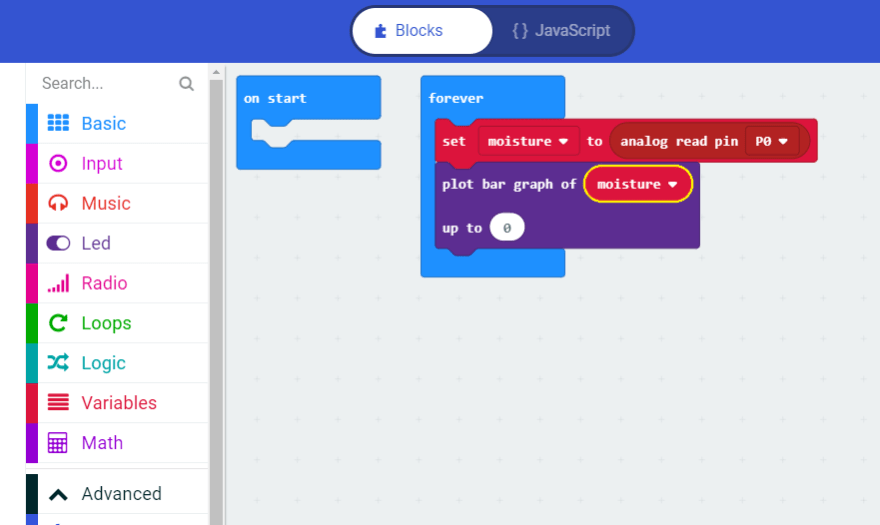
First thing we’ll do is make a variable to hold the moisture data. Click Variables, Make a Variable, and name it something Extremely Creative, like “moisture”.

Grab “Set moisture to 0” and drag it into the “Forever” block.
Then go to “Advanced”, “Pins”, and “analog read pin”. Drag THAT into the “0” in the “Set moisture to 0” block.
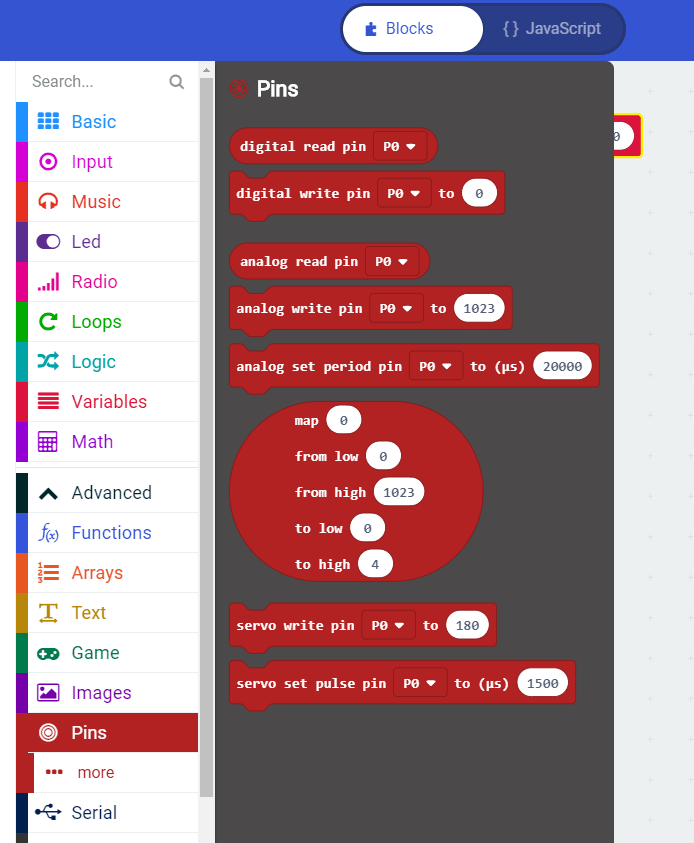
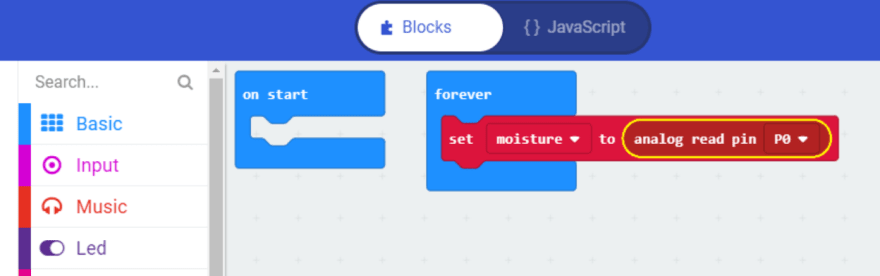
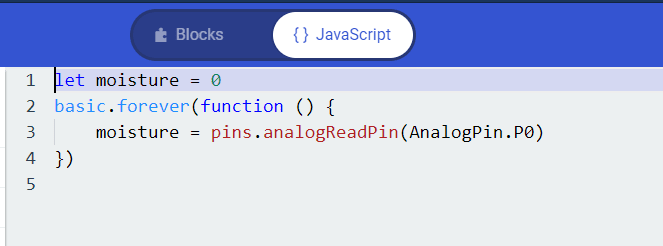
In JavaScript, we just declared a variable named “moisture”, and set moisture equal to the return value from a function that takes a reading from Pin 0.
Cool right?
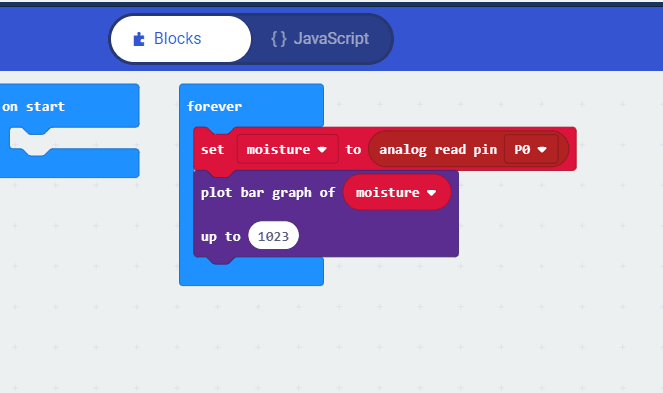
Now go to LED blocks, and choose “plot bar graph of 0 up to 0”, drag it under our variable, then go back to Variable blocks, grab “moisture”, and set it as the input. This will make the LED receive signals from that variable.
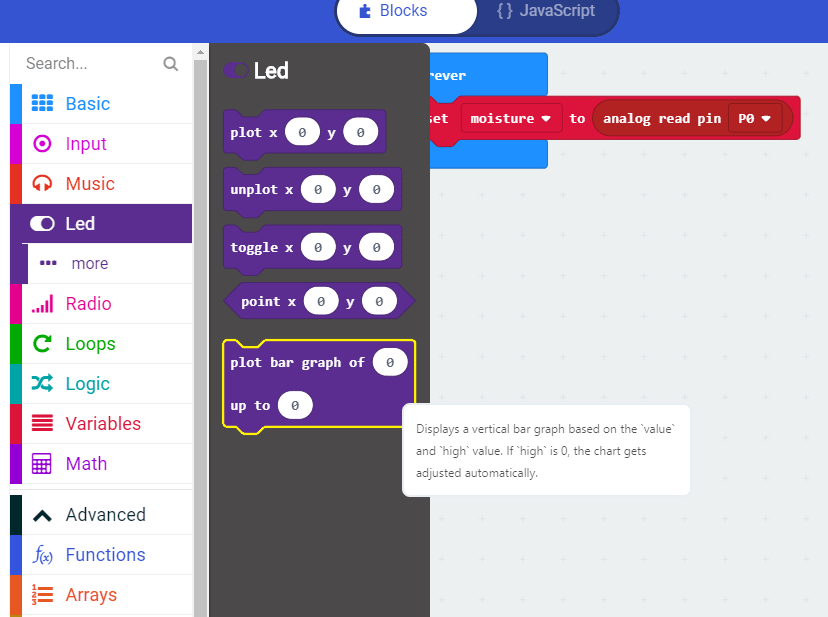
Set the “Up to” number to 1023, the highest it will go. Now let’s get some conditional logic in here.
Click Logic blocks and select “If true then” and drop it right under. We’re going to make a button do stuff.
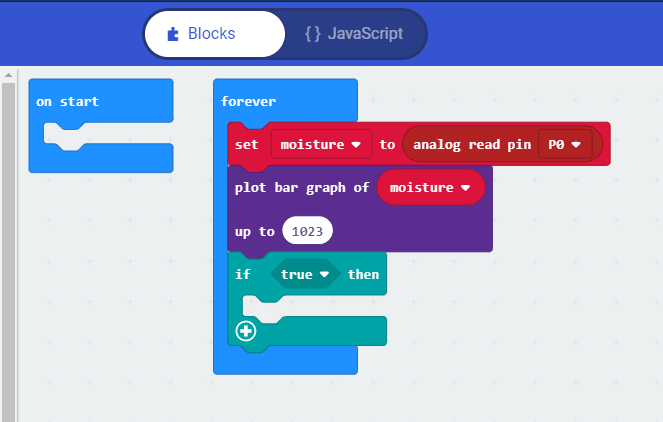
Click Input blocks, and drag “button A is pressed” into the space where “true” was in the conditional block.

Click Basic blocks, grab “show number” and put it as the output block in the conditional logic. Then go to Variables blocks, grab “moisture”, and drop it in where “0” was. We maek butan.

Download the code, drop it in the MICROBIT folder and…..
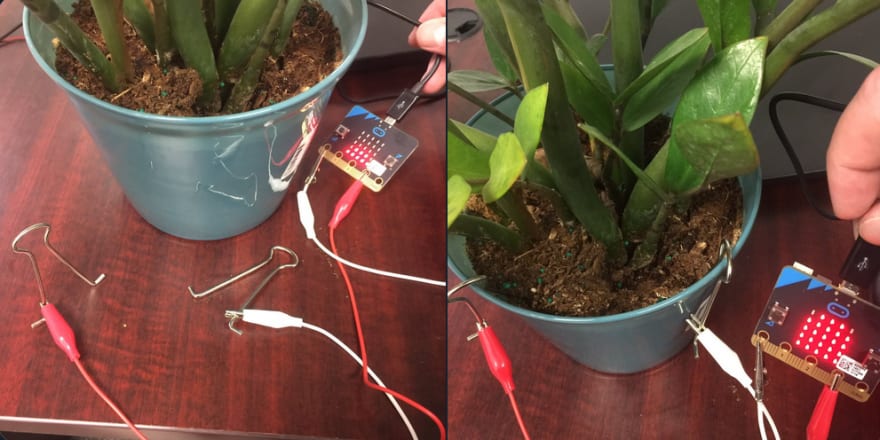
EXTREMELY MOIST

We did the entire darn thing y'all. We wrote code that sends power through the dirt in a flower pot, testing the resistance of said dirt, storing that resistance as a variable, and printing the output of that variable to LED screens on a microcontroller

Oldest comments (0)