Hello coders!! In this article, we'll discuss the important concept of Event Delegation in Javascript.
Introduction
In many cases, we need to add events to our webpage so to improve our webpage performance we use Event Delegation which provides us an awesome technique to handle these event handlers.
Event Delegation is a technique of handling events on our webpage in a better way. It is only possible because of how events propagate up to the hierarchy on the DOM tree.
Event Delegation depends upon Event Bubbling. You can read more about Event Bubbling in the previous article of this series.
So let's dive deep into these concepts:
Event Delegation
Event delegation allows us to attach a single event listener, to a parent element, that will fire for all descendants matching a selector, whether those descendants exist now or are added in the future.
The idea is that if we have a lot of elements handled in a similar way, then instead of assigning a handler to each of them – we put a single handler on their common ancestor.
Let's try to understand this using an example:
<!DOCTYPE html>
<html lang="en">

<head>
    <meta charset="UTF-8">
    <meta http-equiv="X-UA-Compatible" content="IE=edge">
    <meta name="viewport" content="width=device-width, initial-scale=1.0">
    <title>Document</title>
</head>

<body>
    <ul id="category">
        <li id="books">Books</li>
        <li id="camera">Camera</li>
        <li id="sports">Sports</li>
    </ul>

    <script src="index.js"></script>

</body>

</html>
In the above code snippet, we want to perform some specific actions whenever the user clicks on any of the li elements. Let's say we want to print that specific li element in the console.
One way to do this is to attach an event listener to each of the li element like the below code snippet:
document.querySelector('#books').addEventListener('click', (e)=>{
    console.log(e.target.id);
})

document.querySelector('#camera').addEventListener('click', (e)=>{
    console.log(e.target.id);
})

document.querySelector('#sports').addEventListener('click', (e)=>{
    console.log(e.target.id);
})
As you already noticed, it is not an optimized way to implement this functionality. There may be a possibility that there are more li elements in the future which leads to more code addition & violates the rule: Don't repeat yourself :(
Let's take a look at how we can implement the same using Event Delegation.
document.querySelector('#category').addEventListener('click', (e) => {
    if (e.target.tagName == 'LI') {
        console.log(e.target.id);
    }
})
In the above code snippet, instead of attaching a handler to each of the li elements – we put a single handler on their common parent ul and it implements the same functionality using the concept of Event Bubbling under the hood.
The “behavior” pattern
We can also use event delegation to add “behaviors” to elements declaratively, with special attributes and classes.
The pattern has two parts:
- We add a custom attribute to an element that describes its behavior.
- A document-wide handler tracks events, and if an event happens on an attributed element – performs the action.
Now look at the following example:
<!DOCTYPE html>
<html lang="en">

<head>
    <meta charset="UTF-8">
    <meta http-equiv="X-UA-Compatible" content="IE=edge">
    <meta name="viewport" content="width=device-width, initial-scale=1.0">
    <title>Document</title>
</head>

<body>
    <div id="operation">
        <input type="text" value="10" data-action="increase">
        <input type="text" value="10" data-action="decrease">
    </div>

    <script src="index.js"></script>

</body>
</html>
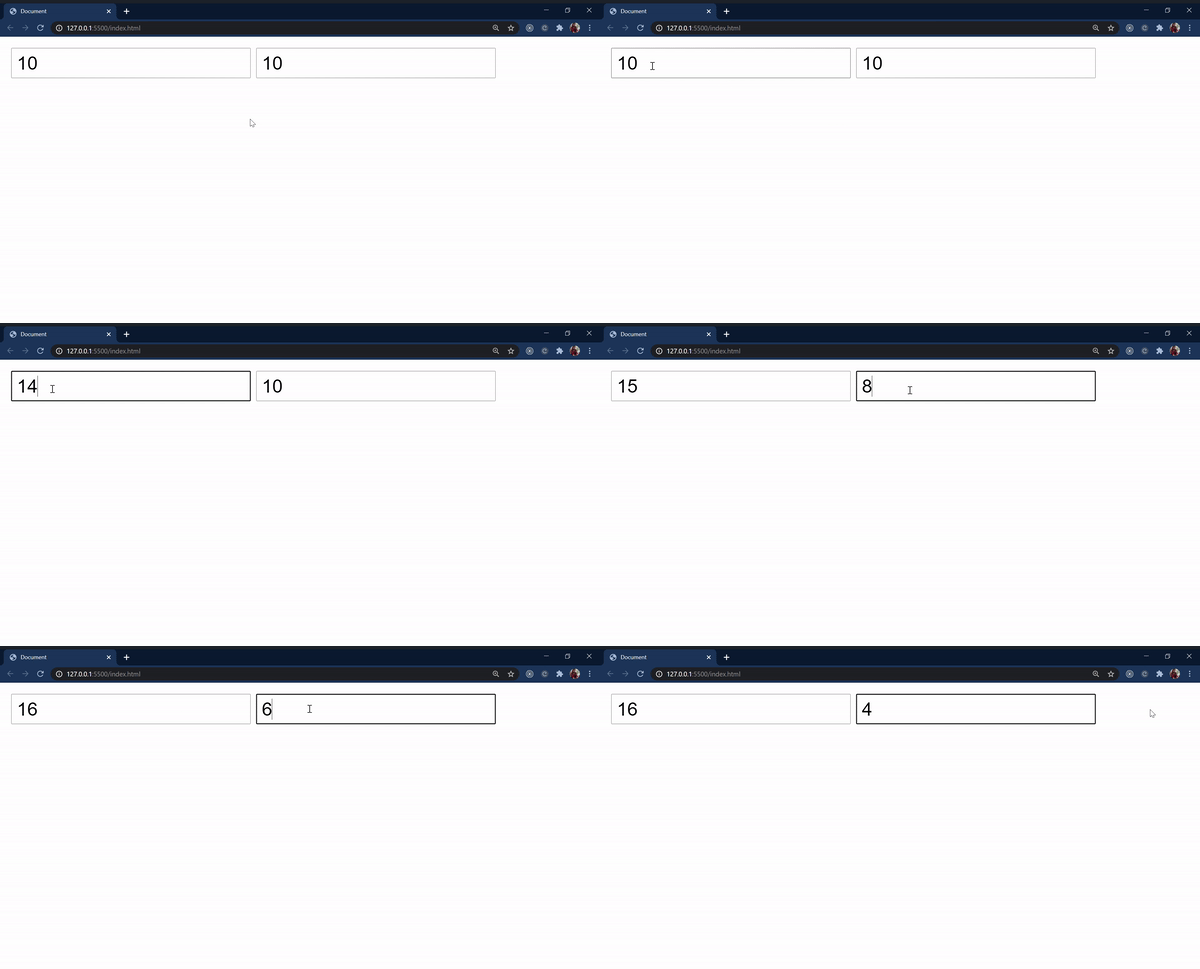
For instance, here the attribute data-action adds a behavior: “increase/decrease value on click” to inputs:
document.querySelector('#operation').addEventListener('click', (e) => {
    let action = e.target.dataset.action;
    switch (action) {
        case "increase":
            e.target.value++;
            break;
        case "decrease":
            e.target.value--;
            break;
    }
})
There can be as many attributes with data-action as we want. We can add new ones to HTML at any moment. Using the event delegation we “extended” HTML & added an attribute that describes a new behavior.
Advantages of Event Delegation
- Saves a lot of memory
- Mitigates the risk of performance bottleneck
- Write less code
Important Points To Remember
There are some points to note down before implementing Event Delegation:
- Not all events are bubbled up like blur, scroll, etc.
- If you are using
stopPropagation()in your code anytime then events are not bubbled up and event delegation won't work.
Wrap Up!!
Thank you for your time!! Let's connect to learn and grow together.


Oldest comments (0)