
Written by Maciej Cieślar✏️
NestJS is a back-end framework for creating scalable applications. It works as an abstraction over the underlying HTTP server library. Currently, it supports two libraries — Express and Fastify — while still enabling developers to use their own APIs when needed.
More importantly, it forces developers to use a specific architecture by introducing Angular-like modules, services, and controllers, ensuring the application is scalable, highly testable, and loosely coupled.
Express, Koa, and hapi don’t enforce any particular architecture. They provide a set of lower-level tools, sure, but still leave a lot up to the developers. A mistake early on in the project regarding the architecture may cost a lot in terms of time spent refactoring the codebase later.
Conversely, Nest is strict when it comes to the codebase — its modules, services, and controllers — and you can’t really go wrong with it.

Architecture
Working on a project as a team means there are a lot of preferences floating around regarding how an application should be structured. All these preferences forced into one codebase won’t provide any enhancements. Instead, it will cause a mess and overall poor code quality.
To combat this, Nest provides a standardized set of guidelines by defining an opinionated architecture that each developer in the team has to follow. The result is an easily maintainable codebase.
Nest abstracts away all the dealings with underlying libraries such as Express or Fastify by introducing a few simple building blocks, the most important among them being modules, services, and controllers.

Modules encapsulate all the logic pertaining to a given domain. Say we needed to implement user-related logic. We could create a UserModule that would contain UserService, UserController.
The module itself is just a class decorated with the @Module decorator, in which we provide all the necessary metadata. If we wanted to access a given part of the module from other modules, we could export that part in the exports array.
Here’s the CatModule from the official documentation:
import { Module } from '@nestjs/common';
import { CatsController } from './cats.controller';
import { CatsService } from './cats.service';

@Module({
  controllers: [CatsController],
  providers: [CatsService],
  exports: [CatsService]
})
export class CatsModule {}
A typical application will have modules such as ApplicationModule (the root module), SharedModule (which would further encapsulate all the underlying reusable, across-the-application modules), and, like the one provided above, modules that will encapsulate the logic of the public API.
Read more about NestJS modules here.
Controllers
A controller is a class annotated with the @Controller decorator. Controllers act as a layer between incoming HTTP request and the corresponding logic handling it. We can think of a controller as a middleman: it checks what request comes in and calls the appropriate service’s method.
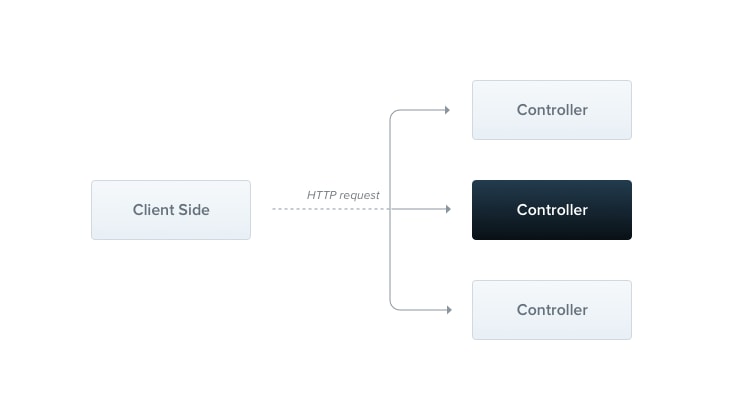
Controllers define the routing paths, arguments, responses, and everything else there is related to an HTTP request. They don’t care about what’s going on between the request and the response.
@Controller('cats')
export class CatsController {
  @Post()
  create(@Body() createCatDto: CreateCatDto) {
    return 'This action adds a new cat';
  }

  @Get()
  findAll(@Query() query: ListAllEntities) {
    return `This action returns all cats (limit: ${query.limit} items)`;
  }

  @Get(':id')
  findOne(@Param('id') id: string) {
    return `This action returns a #${id} cat`;
  }

  @Put(':id')
  update(@Param('id') id: string, @Body() updateCatDto: UpdateCatDto) {
    return `This action updates a #${id} cat`;
  }

  @Delete(':id')
  remove(@Param('id') id: string) {
    return `This action removes a #${id} cat`;
  }
}
In the example above, there is a controller listening on the application_url/cats path. Each method is decorated with the @Get, @Post, @Put, or @Delete to indicate what HTTP method they are interested in. We can also provide an additional path inside the decorator.
Instead of using the request object directly to access the body or a query (as we would in Express), each argument can be decorated with @Param, @Query, or @Body, and thus the underlying access layer can be abstracted.
Although each method in the example above works synchronously, methods may return asynchronous values with promises and observables.
Read more about controllers here.
Services
A service is a class annotated with the @Injectable decorator. It contains domain (business) logic. By separating the access layer (controllers) and logic layer (services), we have a clear separation of concerns.
@Injectable()
export class CatsService {
  private readonly cats: Cat[] = [];

  create(cat: Cat) {
    this.cats.push(cat);
  }

  findAll(): Cat[] {
    return this.cats;
  }
}
By using the @Injectable decorator, we are telling Nest that this class may be injected into other parts of the application.
Read more about services.
Dependency injection
Dependency injection is one of the most important aspects of Nest. By providing the support out of the box, Nest allows us to write loosely coupled code, which, in turn, is also easily testable.
Thanks to Nest being written in TypeScript, the dependencies are resolved just by type — there’s no need to inject them by hand!
@Controller('cats')
export class CatsController {
  constructor(private readonly catsService: CatsService) {}

  @Post()
  async create(@Body() createCatDto: CreateCatDto) {
    this.catsService.create(createCatDto);
  }

  @Get()
  async findAll(): Promise<Cat[]> {
    return this.catsService.findAll();
  }
}
Instead of providing each of our classes that depends on the CatsService with new CatsService(...deps), we are telling Nest, “Should someone ask for an instance of this class in their dependencies, create it for them.”
By default, the provided instances are singletons and are shared between each requesting entity, but that can be changed by specifying the injection scope. Our dependencies are usually defined in the constructor by using the private readonly name: type syntax.
Read more about dependency injection in Angular’s dependency injection guide.
File structure
It is highly recommended that the structure of the codebase be reflected in the folder structure. A module should have its own separate folder in which all of its internal building blocks reside.
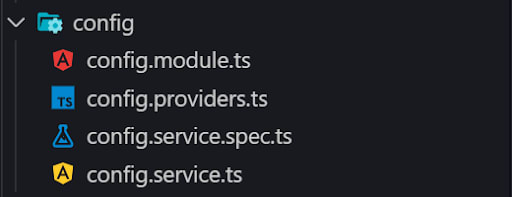
Nest, following in the steps of Angular, also has a naming convention to include the appropriate file ending such as .controller, .service, and .module. This way, the project’s folder structure is easily readable and gives the developer a good overview of the codebase.
CLI
Nest comes with its own CLI.
npm i -g @nestjs/cli
The most important commands are new and generate.
The new command lets us create a whole starting application’s boilerplate with Nest in a matter of seconds.
nest new application-name
The generate command generates a set of files for a requested feature. It might also modify the existing ones if necessary.
nest generate service cat
In the example above, there would be two files generated: cat.service.ts and cat.service.spec.ts. Also, if there was a cat module specified in the directory, the service would be automatically imported.
The CLI really increases developers’ productivity by reducing the amount of boilerplate that needs to be written for each building block and by generating a .spec file that has some very basic tests written in it.
Testing
Tests are very important to ensure that an application keeps working correctly once some changes are made. Nest takes testing very seriously and provides testing utilities in order to make the process as smooth as possible. By using dependency injection, it is very easy to mock out the modules we are not currently testing thanks to Nest’s custom providers feature.
Here’s an example of unit testing the CatsController:
import { Test } from '@nestjs/testing';
import { CatsController } from './cats.controller';
import { CatsService } from './cats.service';

describe('CatsController', () => {
  let catsController: CatsController;
  let catsService: CatsService;

  beforeEach(async () => {
    const module = await Test.createTestingModule({
        controllers: [CatsController],
        providers: [CatsService],
      }).compile();

    catsService = module.get<CatsService>(CatsService);
    catsController = module.get<CatsController>(CatsController);
  });

  describe('findAll', () => {
    it('should return an array of cats', async () => {
      const result = ['test'];
      jest.spyOn(catsService, 'findAll').mockImplementation(() => result);

      expect(await catsController.findAll()).toBe(result);
    });
  });
});
As we mentioned before, Nest’s CLI generates basic tests for each service, controller, filter, etc. By doing so, Nest gives us not only the necessary tools, but also a reminder that we should test each of our application’s features.
If you would like to see some more complicated cases (i.e., mocking a database connection), I have created an application you can see here.
Summary
Nest stays on top of the new trends and makes it very easy to write an application based on the microservices architecture.
Although by default Nest is used for building REST APIs, thanks to its platform-agnostic approach, the architecture can be used to create a GraphQL API as well. When it comes to documenting our REST API, there’s a great integration with the Swagger library that lets us generate the documentation effortlessly.
There are also many packages in the Nest ecosystem that integrate the existing packages into the Nest architecture. The most popular packages include typeorm, passport, and mongoose. If a given library is not supported, we could always create our own service/provider that would encapsulate said library in a Nest-accessible way.
Nest is not a be-all and end-all, of course, and does fall short in some cases, or the steps necessary to achieve expected results are unclear. But with its ever-growing community (more than 20,000 stars on GitHub), it becomes easier and easier to get a response to the burning questions quickly.
Editor's note: Seeing something wrong with this post? You can find the correct version here.
Plug: LogRocket, a DVR for web apps

LogRocket is a frontend logging tool that lets you replay problems as if they happened in your own browser. Instead of guessing why errors happen, or asking users for screenshots and log dumps, LogRocket lets you replay the session to quickly understand what went wrong. It works perfectly with any app, regardless of framework, and has plugins to log additional context from Redux, Vuex, and @ngrx/store.
In addition to logging Redux actions and state, LogRocket records console logs, JavaScript errors, stacktraces, network requests/responses with headers + bodies, browser metadata, and custom logs. It also instruments the DOM to record the HTML and CSS on the page, recreating pixel-perfect videos of even the most complex single-page apps.
Try it for free.
The post Take your Node back end to the next level with NestJS appeared first on LogRocket Blog.

Top comments (3)
It would have been great if you didn't get all the code examples from the official documentation. There isn't anything significant here than the official docs. Sorry to say but somehow it looks like a plug for LogRocket.
We've used the official code samples from the documentation to make it easier for people interested in Nest to deep dive. This article is meant as an overview, not one that offers "tips and tricks."
Thanks... I ll try this and I find it quite interesting