Unlock the potential of Trino and DbVisualizer in our latest blog post. Explore Trino's distributed SQL query capabilities and harness DbVisualizer's intuitive interface for data exploration, visualization, and optimization. Read now to unleash the power of the Trino-DbVisualizer connection!
In today's data-driven world, organizations face the challenge of handling massive volumes of data across various systems. To extract valuable insights, powerful tools are needed. Enter Trino - an open-source distributed SQL query engine that empowers organizations to process and query large datasets from multiple sources.
But to unleash Trino's full potential, you need a trusty sidekick like DbVisualizer. This superhero of database management and development tools offers a user-friendly interface and a complete platform for working with different databases. DbVisualizer acts as a centralized hub, effortlessly connecting you to Trino and other data stores like Hadoop, Cassandra, and MySQL.
With DbVisualizer, exploring databases, building queries, and visualizing data becomes a breeze. Its query builder tool simplifies query construction, making it easy to manipulate data visually. Moreover, DbVisualizer's data visualization powers are truly impressive, allowing you to create stunning charts, graphs, and dashboards. By connecting DbVisualizer with Trino, you seamlessly blend data from various sources into these visualizations, revealing a world of insights.
Prerequisites
- Basic knowledge of databases and SQL.
- Docker
- DbVisualizer
What is Trino?
Trino, formerly known as PrestoSQL, is a powerful open-source distributed SQL query engine designed for large-scale data processing and analysis. It offers a unified interface to query data from various sources, including traditional databases and distributed storage systems. With its distributed architecture, Trino scales horizontally and processes queries in parallel, enabling efficient handling of massive datasets. It supports standard SQL syntax and provides advanced functions for complex data manipulation. Trino can push down query execution to data sources, reducing data movement and improving performance. Widely adopted by organizations, Trino is valued for its flexibility, speed, and ease of use, making it an indispensable tool for data analytics and real-time insights.
What is Trino SQL?
Trino SQL is a powerful language used to query data in Trino, the distributed SQL query engine. It follows the SQL standard and provides a familiar syntax for data analysis tasks. Trino SQL supports a wide range of operations, including querying, filtering, joining, aggregating, and transforming datasets. It includes advanced features such as subqueries and a rich set of functions for data manipulation. Trino SQL leverages the distributed nature of Trino for fast and scalable query execution. It supports various data sources and formats, making it versatile for heterogeneous environments. Overall, Trino SQL offers a robust and efficient solution for querying and analyzing data in Trino.
Setting Up Trino
For this tutorial, we will be running Trino locally on a docker container. Follow these steps to install Trino on your docker container:
Step 1: Pull the Trino Docker Image
The Trino project provides the "trinodb/trino" Docker image, which includes the Trino server and a default configuration. Pull the image from Docker Hub using the following command:
docker pull trinodb/trino
This command will download the latest version of the Trino Docker image.
Step 2: Run the Trino Container
Create a container from the Trino image using the following command:
docker run --name trino -d -p 8080:8080 trinodb/trino
This command creates a container named "trino" from the "trinodb/trino" image. The container runs in the background and maps the default Trino port, 8080, from inside the container to port 8080 on your workstation.
Step 3: Verify the Container
To verify that the Trino container is running, use the following command:
docker ps
This command displays all the running containers. Look for the "trino" container and ensure that it is listed with the appropriate status and port mapping.
Step 4: Wait for Trino to Start
When the Trino container starts, it might take a few moments for it to become fully ready. You can check its status using the following command:
docker logs trino
This command displays the container logs. Look for the "health: starting" status initially, and once it becomes ready, it should display "(healthy)".
Congratulations! You have successfully installed Trino on a Docker container. You can now access Trino by visiting http://localhost:8080 in your web browser and start running SQL queries against your Trino cluster.
Setting up the Trino Connection in DbVisualizer
Setting up the Trino connection in DbVisualizer is a straightforward process that allows you to unleash the power of Trino's distributed SQL query capabilities within the user-friendly environment of DbVisualizer. Here's how you can get started:
Now that we have a running Trino database in docker, we can connect DbVisualizer to it by following the steps below:
- Go to the Connection tab. Click the "Create a Connection" button to create a new connection.
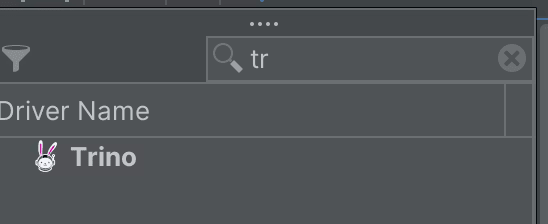
- Select your server type. For this tutorial, we will be choosing Trino as the driver.
- In the Driver Connection tab, enter the following information:
Database server: localhost
Database Port: 8080
UseId: “user_name”
- Click the "Connect" button to test the connection.
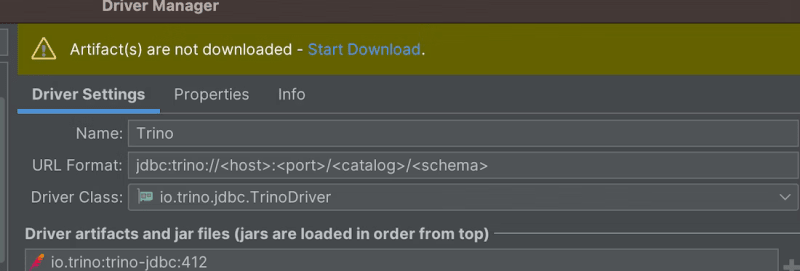
If you haven't updated your Trino driver, you will receive a prompt to do so. 
Open the Driver Manager tab and update the driver to connect to your Trino database.
Click on “Connect” again to test your connection. If the connection is successful, you should see a message indicating that the connection was established. You can now browse the database using DbVisualizer.
- Explore and Query Trino Data
With the Trino connection established in DbVisualizer, you are now ready to explore and query your Trino data. Utilize DbVisualizer's intuitive interface, query builder, and visualization tools to interact with Trino and extract valuable insights from your distributed datasets.
Now follow along as we walk you through the CLI capabilities of Trino as well!
Trino CLI
Trino CLI is your go-to command-line buddy for seamless interaction with Trino. The command-line interface allows interaction with Trino, providing capabilities to execute queries, manage connections, and retrieve results directly from your terminal. With its SQL prowess, you can write queries with ease, thanks to nifty features like auto-completion and syntax highlighting. Trino CLI goes the extra mile by allowing you to fine-tune your query experience through configurable session properties and optimized performance options. And guess what? It offers a plethora of output formats to jazz up your query results!
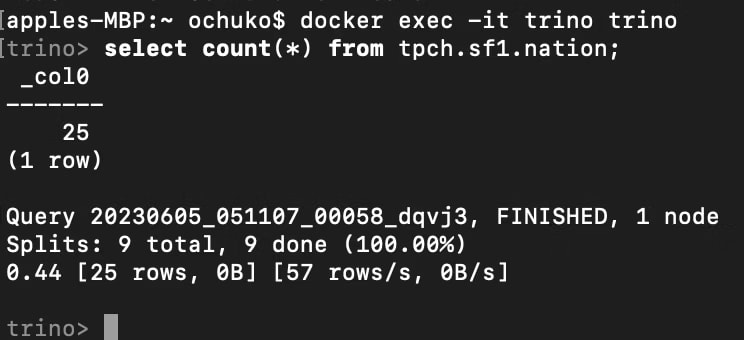
To run Trino CLI on your docker container, use the following command:
docker exec -it trino trino
Then enter your Trino SQL query in the terminal and run it to execute the query on your Trino server.
But hold on! There's an exciting alternative that takes your Trino journey to the next level. Imagine stepping into a world of graphical interfaces and advanced visualization wonders. That's where tools like DbVisualizer enter the scene. By harnessing the power of a JDBC driver, you can connect with Trino in DbVisualizer and unlock a universe of interactive exploration, query building, and mind-blowing visualizations. It's like adding a touch of magic to your Trino experience.
So, whether you're a command-line aficionado or prefer the captivating realm of graphical tools, Trino CLI and DbVisualizer offer you the best of both worlds. Get ready to embark on an exhilarating data exploration journey, fueled by the boundless potential of Trino and the seamless connectivity of DbVisualizer.
Executing Queries in DbVisualizer with Trino
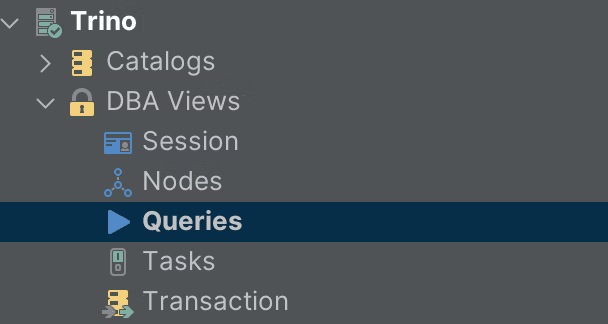
DbVisualizer provides a powerful interface for writing and executing SQL queries against Trino. You can leverage its user-friendly query editor to compose SQL statements efficiently. Simply expand the Trino server tree, pick any catalog from the list, and create an SQL query commander by clicking on the play icon with a plus next to it.
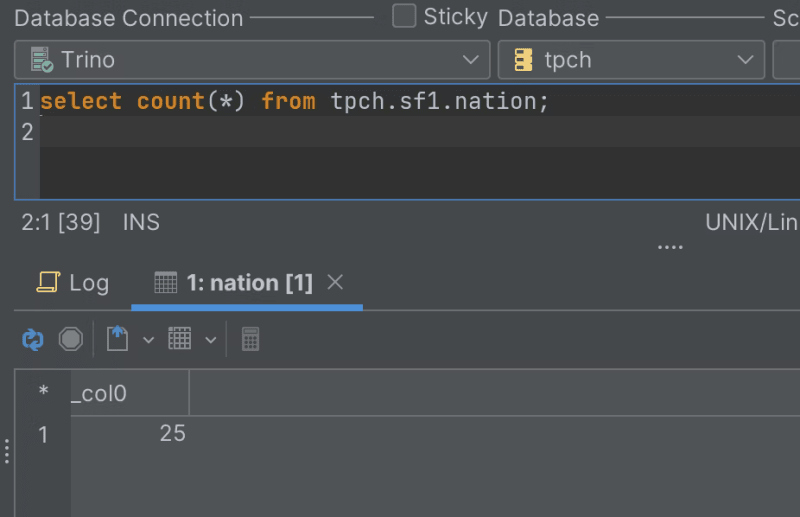
You can start writing SQL queries in the SQL commander editor. A good query example is one to count the number of nations in the nation table:
select count(\*) from tpch.sf1.nation;
Click on the play button above the SQL commander to execute the query. You would get a result as in the image below:
Now we’ll visualize the queries in Trino with DbVisualizer. Follow along!
Visualizing Trino Queries with DbVisualier
By using SQL, we have the power to create a wide range of analytical queries on this table. For example, let's calculate the average length of the nation names across all regions:
SELECT

  regionkey,

  AVG(LENGTH(name)) AS avg_name_length

FROM

  tpch.sf1.nation

GROUP BY

  regionkey;
The modified query retrieves data from the nations table in Trino and calculates the average length of nation names (avg_name_length) for each region (regionkey). By grouping the results based on the regionkey column, the query provides a summary of the average name length for nations within each specific region.
Running the query above will provide you with the results seen in the table below:
You can use this statistic to create a visualization such as a line chart, bar chart or area chart. To create a visualization for this table, click on the rightmost button in the result tab toolbar.
Then select the values for the x and y axis of your chart by clicking on the select button above the chart panel. Select the avg_name_length as the x axis and the regionkey as the y axis.
Great! We have successfully created a line chart visualization of our Trino query data.
By default, the visualization displays a line chart, but don't let that limit you. Get creative and explore the various customization options available to you. You can try out options like line chart, point chart, area chart, stacked area chart, bar chart, stacked bar chart and pie chart by clicking on the chart icon above the chart panel to reveal a dropdown menu of various chart types.
Impressive, isn't it? DbVisualizer offers a range of customizable features. To explore these options, simply click on the tool button located at the top of the chart tab. From there, you have the freedom to fine-tune your charts according to your preferences. Once you've crafted the ideal chart, it's a breeze to export it as an image – just click on the document icon situated at the top of the chart tab.
Conclusion
In this tutorial, we've uncovered the power of Trino and DbVisualizer by unleashing the capabilities of distributed SQL queries for data analysis. Trino, the open-source SQL query engine, offers the muscle to handle massive data volumes across various systems.
With DbVisualizer as our trusty sidekick, we effortlessly connect to Trino and other data stores. Its user-friendly interface and comprehensive tools make exploring and querying data a breeze.
We've learned how to establish the Trino connection in DbVisualizer, executing SQL queries and retrieving results with ease. But the excitement doesn't stop there!
DbVisualizer's visualization capabilities let us create stunning charts to bring our data to life. We can customize these visualizations to suit our needs, and with a simple click, export them as image masterpieces.
By mastering the Trino connection with DbVisualizer, we can gain valuable insights and supercharge our data analysis. So, don't stop here—explore, experiment, and unlock the full potential of Trino and DbVisualizer using their documentation and blog in your data-driven journey, and until next time!
FAQ (Frequently Asked Questions)
Q: How do I install Trino on a Docker container?
To install Trino on a Docker container, use the command docker pull trinodb/trino to download the Trino Docker image. Then, create a container from the image using docker run --name trino -d -p 8080:8080 trinodb/trino. Verify the container status with docker ps and ensure it is running.
Q: How do I connect DbVisualizer to Trino?
In DbVisualizer, go to the Connection tab and click "Create a Connection." Choose Trino as the driver and enter the connection details such as localhost for the Database server and 8080 for the Database Port. Click "Connect" to establish the connection.
Q: How can I execute SQL queries in DbVisualizer with Trino?
To execute SQL queries in DbVisualizer with Trino, expand the Trino server tree, create an SQL commander, and write your SQL query in the editor. Click the play button to execute the query and view the results.
Q: How can I visualize Trino queries using DbVisualizer?
DbVisualizer allows you to visualize Trino queries by creating charts. After executing a query, click on the rightmost button in the result tab toolbar to show the chart panel. Select the desired values for the x and y axes, and customize the chart type and appearance as needed.
Q: Can I export the charts created in DbVisualizer as images?
Yes, you can export charts created in DbVisualizer as images. In the chart tab, click on the document icon located at the top to export the chart as an image file.







Top comments (0)