
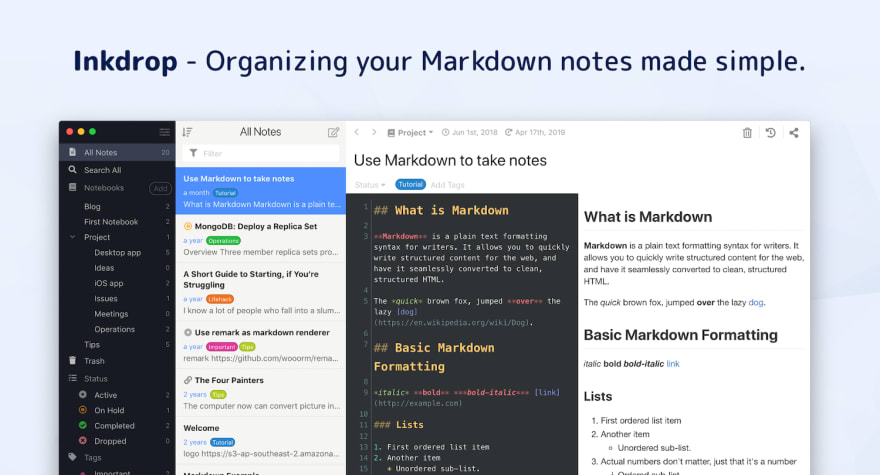
I’m developing a Markdown note-taking app called Inkdrop, and I’ve recently released a new mobile app for iOS and Android. It’s built using React Native, a framework for building native mobile apps using JavaScript and React.
I’ve learned a lot from this project about how to create high quality mobile apps with React Native, and I would like to share my tips in this article.
I hope this article will be helpful for those who’ve already developed or are in the process of developing a React Native mobile app.
Here is a summary of what we’ll be covering
Choose Third-party Libraries Carefully
Avoid Using Native Extensions when Possible
Support UI Themes
Add Tablet Support
Keep It Performant
Make A Perfect Splash Screen
Don’t Use CodePush
Choose Third-party Libraries Carefully
Unlike UIKit on iOS, React Native doesn’t provide much for building cool UIs or navigations. Because it focuses on providing basic UI rendering and device API access with React and JavaScript. So you have to do a lot of things to make it look like what you want. Honestly, it would not have been possible to build it without using the great modules for React Native out there. I’ll tell you which libraries I used for my app.
Navigation
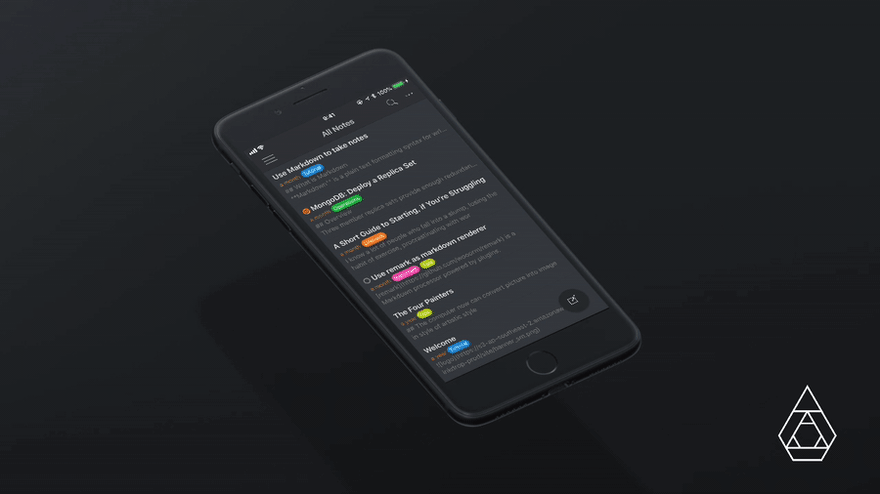
As you can see above, my app has a side bar that can be activated by swiping from the left edge of the screen or by tapping a toolbar button, stack screens, and modal screens.
To accomplish this routing and navigation, my app adopts react-navigation. You can implement flexible routing and smooth screen transitions with ease. But note that it doesn’t provide modal screens. You should use react-native-modal, which provides enhanced, animated and customizable react-native modal screens.
I highly recommend that you use them if you don’t need very special routing patterns. If you do, check out this great article.
Rich Cross-Platform UI Components
iOS and Android have different UI guidelines. It is hard and time-consuming to implement buttons, tables, and headers that conform to each platform. There are tons of nice looking third-party components out there, but you have to have many modules installed into your app and that will eventually cause your app to bloat and get buggy.
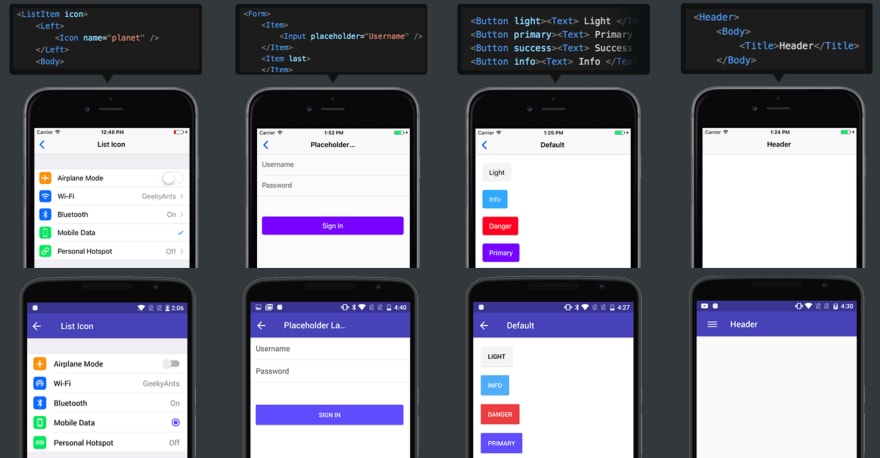
NativeBase, a collection of essential cross-platform UI components for React Native, solves this problem. It is something like Twitter Bootstrap for React Native. It provides not only a well-designed basic set of components out of the box, but also some layout components. You don’t need to worry about which platform your app is on, because component styles are automatically switched.
Avoid Using Native Extensions as much as Possible
As React Native is a cutting-edge technology, the API frequently changes. That often breaks third-party libraries. If a problem resides on the native side, solving it is going to be hell. It is always hard for library authors because:
We found that most React Native Open source projects were written by people who had experience with only one or two - Airbnb
They are not always professionals of all platforms. I have made a SQLite3 native plugin for React Native, and I also found that maintaining both platforms is quite hard.
If you decide to install a library with native bridges, you have to keep that in mind. I often had to look into native code to debug problems, so you need some experience with iOS and Android. Avoiding those native bridge libraries would be good to reduce this pain.
Here are all libraries with native bridges used in my app:
react-native-wkwebview-reborn - WKWebView for iOS
react-native-image-picker - It allows you to use native UI to select media from the device library or directly from the camera
react-native-japanese-tokenizer (made by myself) - Japanese Tokenizer
react-native-sqlite-2 (made by myself) - SQLite3 bridge
Fewer dependencies on native extensions would make your app easy to maintain for the future versions of React Native.
Support UI Themes
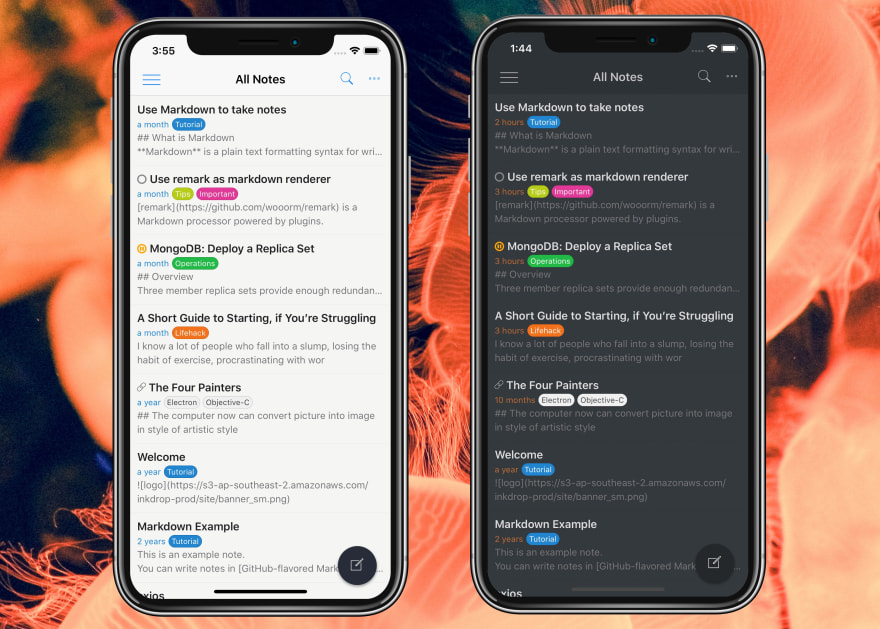
Supporting themes is challenging for React Native apps, because it all depends on how you render views. Unlike iOS UIKit, React Native doesn’t provide any appearance proxies, so you need an equivalent one for React Native.
Fortunately, NativeBase supports theming. You can easily customize the appearance of NativeBase components by just defining variables as follows:
const $defaultBgColor = '#2E3235'
const $defaultFgColor = 'rgba(255, 255, 255, 0.7)'

const nativeBaseTheme = {
    toolbarBtnColor: $defaultFgColor,
    toolbarBtnTextColor: $defaultFgColor,
    toolbarDefaultBg: $defaultBgColor,
    toolbarDefaultBorder: 'rgba(0, 0, 0, 0.3)',
}

<StyleProvider variables={nativeBaseTheme}>
  <View>...</View>
</StyleProvider>
But it’s not enough, because it doesn’t work for components not based on NativeBase. So I used react-native-extended-stylesheet, which allows you to use variables in your StyleSheets as under:
// app entry: set global variables and calc styles
EStyleSheet.build({
  $bgColor: '#0275d8'
});

// component: use global variables
const styles = EStyleSheet.create({
  container: {
    backgroundColor: '$bgColor'
  }
});

<View style={styles.container}>
...
</View>
Very easy. Now you can define the appearance for all your components!
Note: It needs relaunching to apply a new theme, because NativeBase StyleProvider caches styles and currently there is no way to flush.
Add Tablet Support
If you would like to make a two-clumn layout for tablets, it’s easy:
const styles = StyleSheet.create({
  container: {
    flex: 1,
    flexDirection: 'row'
  },
  leftViewContainer: {
    flexShrink: 0,
    flexGrow: 0,
    width: 200
  },
  rightViewContainer: {
    flex: 1
  }
})

<View style={styles.container}>
  <View style={styles.leftViewContainer}>
    ...
  </View>
  <View style={styles.rightViewContainer}>
    ...
  </View>
</View>
However, it needs some hacks to support switching layouts based on screen size, because there is a problem where Dimensions doesn't support it. You always get the same dimensions from Dimensions.get even if the app is in "Split View" or "Slide Over" on an iPad.
console.log(Dimensions.get('screen')) // {fontScale: 1, width: 768, height: 1024, scale: 2}
console.log(Dimensions.get('window')) // {fontScale: 1, width: 768, height: 1024, scale: 2}
So you need to get an actual window size somehow. To accomplish this, you need to have a view that is the outermost of your views with style flex: 1. And set the onLayout event to get its size, and remember it somewhere like within a Redux store.
Here is my code snippet for this:
Keep It Performant
Use PureComponents
As apps evolve, you will eventually need to boost the performance of your app. In React Native, you can use many performance tips for React apps out there like the following:
A common basic tip for keeping your app fast is to use shouldComponentUpdate() in order for components to avoid unnecessary duplicated renderings. React.PureComponent comes in handy for this because it automatically skips rendering if its props are not changed. I personally prefer to use recompose’s pure for a higher-order components (HOC) pattern.
Don’t Make Callback Functions in Render()
Now you have PureComponents, but it doesn’t make sense if you have a render() method like this:
function CommentList(props) {
  return (
    <div>
      {props.comments.map((comment) => (
        <Comment comment={comment} key={comment.id} onPress={() => props.handlePressCommentItem(comment)} />
      ))}
    </div>
  );
}
Because a function passed to onPress is created every time a CommentList is being rendered, Comment (PureComponent) determines its props are always changed. So rendering a comment list costs a lot, as all comments are re-rendered. To avoid this, don’t create callbacks:
function CommentList(props) {
  return (
    <div>
      {props.comments.map((comment) => (
        <Comment comment={comment} key={comment.id} onPress={props.handlePressCommentItem} />
      ))}
    </div>
  );
}
If your list could be long, FlatList is highly recommended.
Make A Perfect Splash Screen

Fig. Avoid a white blank screen while JS loading
If you’ve tried to set up a splash screen in React Native, then you may have experienced a white screen flash before your content loads. If your app has a white background this is often not very noticeable, but it’s still a pain.
I’ll refer you to this article, which gives a walkthrough on how to build a perfect splash screen for iOS and Android. Very helpful.
Don’t Use CodePush
CodePush allows you to easily add a dynamic update experience to your apps. With CodePush, you don’t need to release a patched version via the store every time, so you can fix issues quickly.
But I don’t recommend you to use it. Firstly, the App Store’s review time is very short now. It requires only 2 days on an average at the time of writing, which is usually fast enough for your business. Second, it makes your app complicated, because CodePush library is a native module. As I mentioned above, you have to avoid adopting native extensions in order to keep your app simple and clean.
I hope you found this helpful!
Thanks for reading this article! I’m Takuya Matsuyama, a freelance developer based in Tokyo, Japan. I’m trying to build a profitable product alone and blogging about my journey. Please check it out!


Latest comments (2)
currently learning react native. thank you for sharing the great tools. Thank you
Thanks for the advises. They will be so helpful in my personal journey with React Native