What is a Chatbot? Why it's important?
A chatbot is an artificial intelligence software that can simulate a conversation (or a chat) with a user in natural language through messaging applications, websites, mobile apps or through the telephone. It's more like a replacement of the human services to a bot which can understand the user requirement and provide assistance at any time with very low cost.
A chatbot is often described as one of the most advanced and promising expressions of interaction between humans and machines. However, from a technological point of view, a chatbot only represents the natural evolution of a Question Answering system leveraging Natural Language Processing (NLP). Formulating responses to questions in natural language is one of the most typical Examples of Natural Language Processing applied in various enterprises’ end-use applications.
Now a days we are seeing that social media platforms are becomes a crucial part in our lives and also beneficial for business perceptive. So today we are going to discuss regarding the How we can create our own Facebook messenger chatbot using Dialogflow CX.
Step 1: Create Facebook App
First, we need to create a developer app for the Facebook.
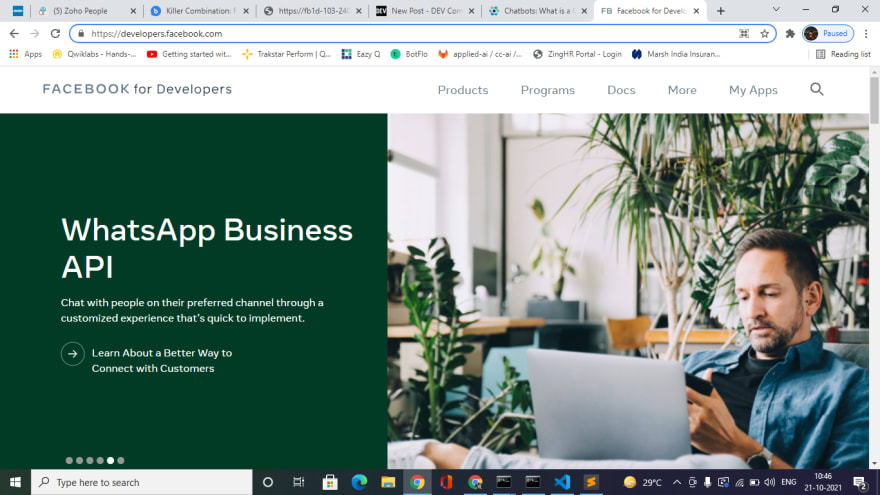
Go to https://developers.facebook.com/ and login using your Facebook credential.
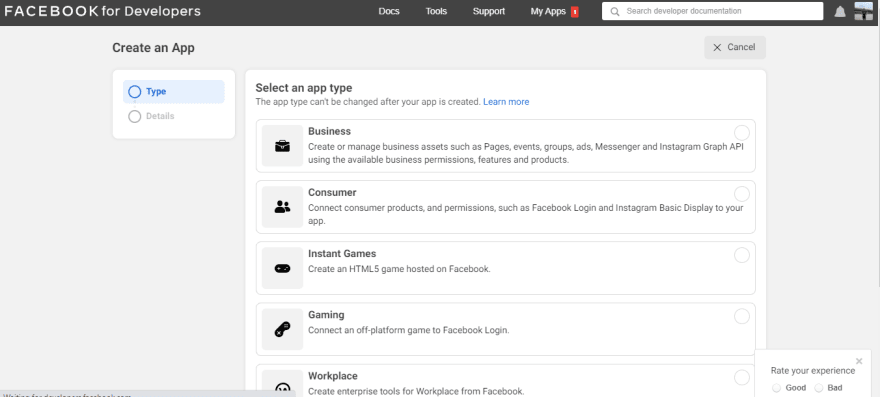
Click on My Apps and then you will redirect to the Developer console. Now we need to create a new app for this demo. Click on the Create App button on top right corner of the console. One you click that you can see the below screen.
Select App type based on your requirement. For this I'll go with the Business option. Click on the Next and you'll redirect to below screen.
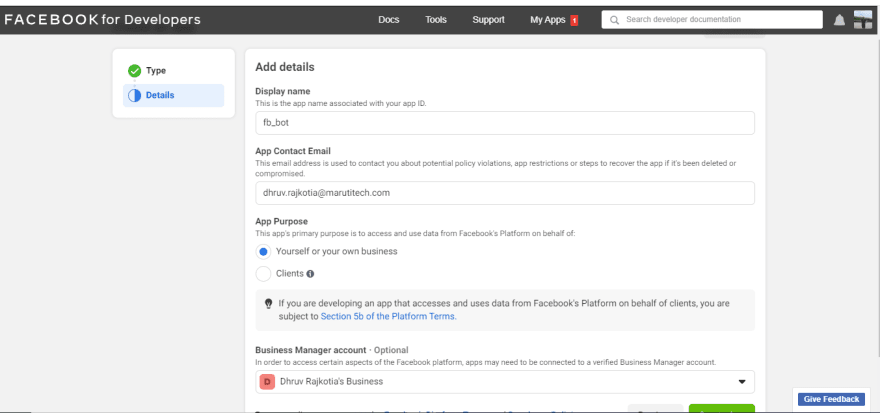
Provide the below details:
- App Name: (I have provided as a Claudio)
- App Purpose: (I have selected Yourself or your own business)
- Business Manager Account: If you have created any business account then you can use that or you can ignore this one.
Click on Create App button. App will be created and you will redirect to the App Dashboard.
Step 2: Create Facebook page
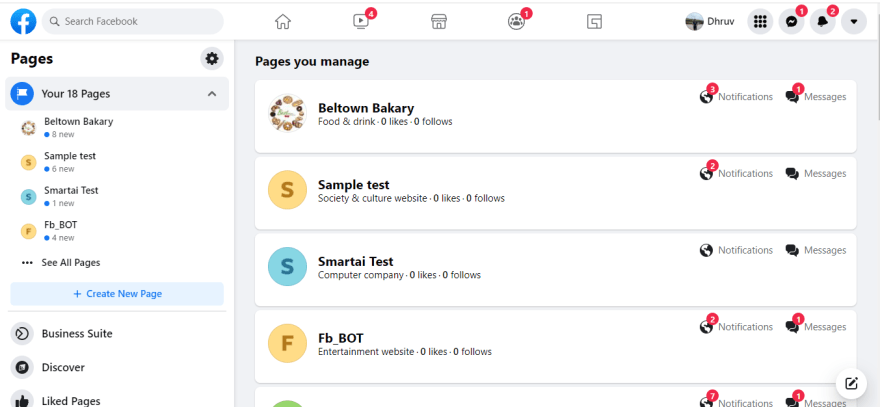
Go to https://www.facebook.com/ and click on the Pages tab from left panel. Now click on the create New Page from left panel.
Provide the page name and the category:
Page name: Claudio ChatBot
Category: Entertainment website (You can choose whatever you want)
Click on the Create Page button.
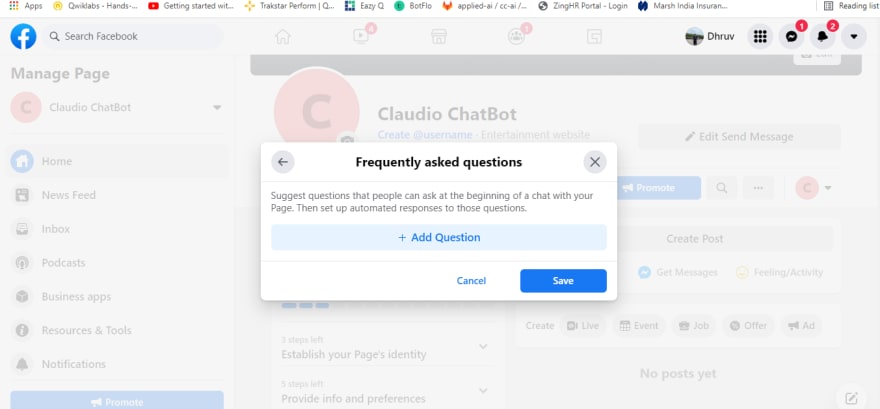
Now click on the Add action button and select the Send Message Action button. Remove the pre-prompted question and click on Save.
Now we are all set regarding the Facebook Page setup. Now let's move on to setup Dialogflow bot.
Step 3: Create Dialogflow CX Agent
Here, We are going to create a Dialogflow Agent for our Facebook bot. For the demo purpose we are going to develop very simple flow in which bot will ask the Name and Phone number to user. Here you create a Dialogflow Agent based on your requirements.
Please download the agent blob file from here. https://drive.google.com/file/d/1AMID0_v4Qa2oUoQYYilLL5N5jT5mwGA-/view?usp=sharing
Import Agent file using the Dialogflow console. https://cloud.google.com/dialogflow/cx/docs/concept/agent?hl=en#export
Step 4: Connect Dialogflow CX Agent with Messenger
Click on the Manage tab in Dialogflow CX Console.
Click on the Integration option from the Menu list.
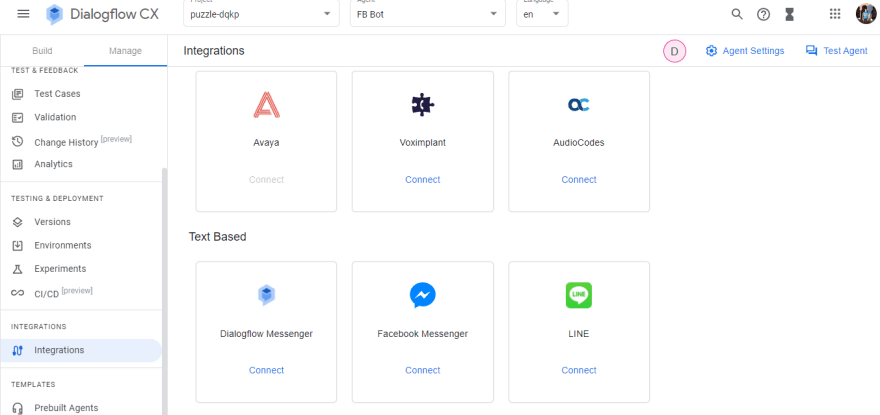
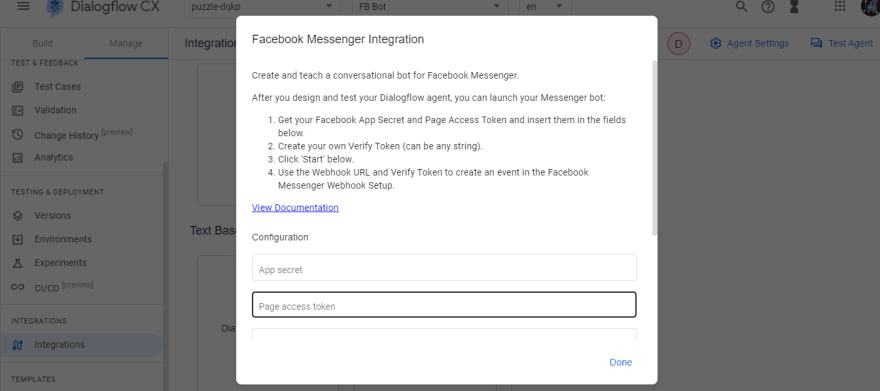
Now Click on the connect button for the Facebook Messenger card. You'll see the below screen as a popup.
Add below details in the popup.
- App Secret: Go to the Facebook developer console and then go to Settings -> Basic option.
Get the App secret and add the value here.
- Page Access Token:
Go to Messenger -> Settings -> Access Tokens section.
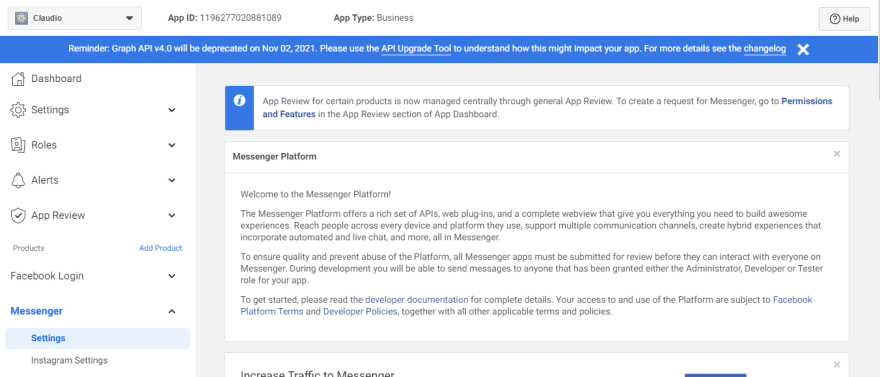
Click on the Add or Remove Pages
Select your page (Cloudio Chatbot) and then save changes.
You can see the below screen after performing the above steps.
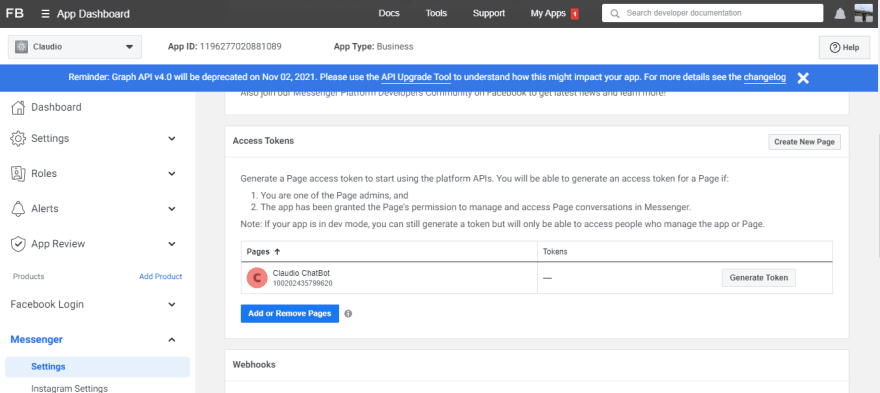
Now click on the generate token and copy the page access tokens from popup.
Paste page access token in you dialogflow messenger bot connect popup.
- Verify token: Add verify token as a random string which will help us in the next step for the webhook verification.(I have added as a dhruv123.)
Now click on the start button so you'll see the below screen on the same popup window.
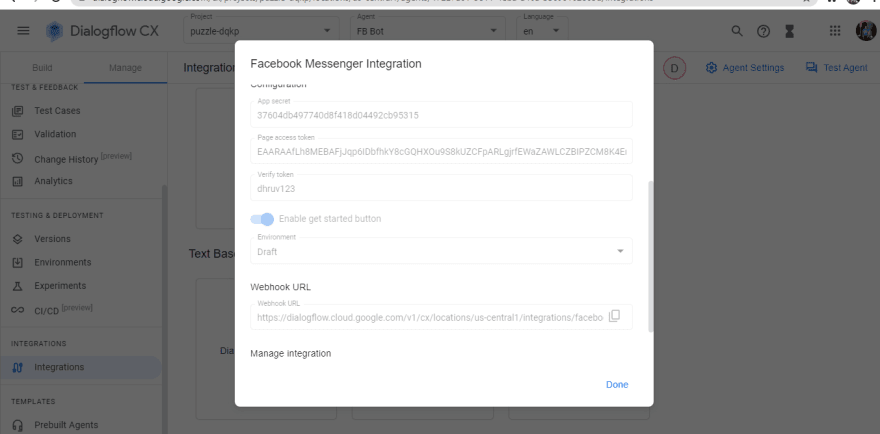
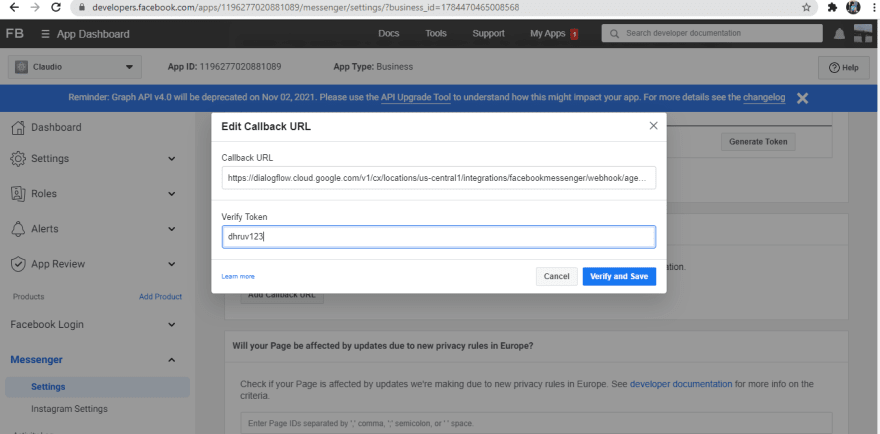
Copy the Webhook URL and go to the Developer Console -> Messenger -> Settings -> Webhooks section.
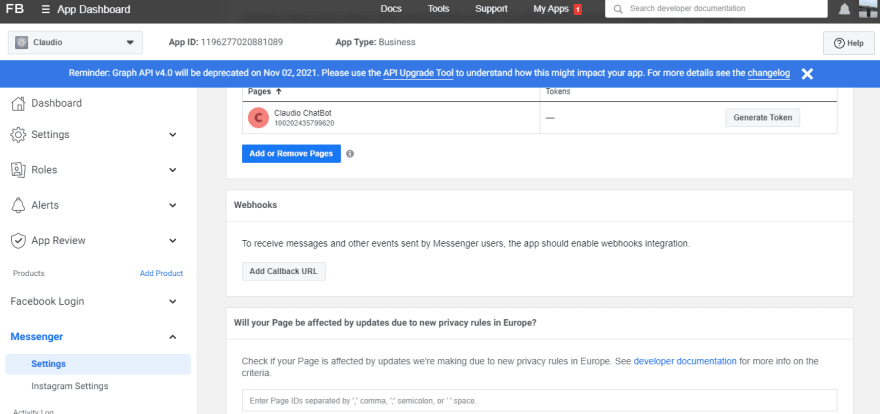
Paste Webhook URL as a Callback URL value and along with that add the verification token that we have added in the previous step. (dhruv123).
Click on the verify and save.
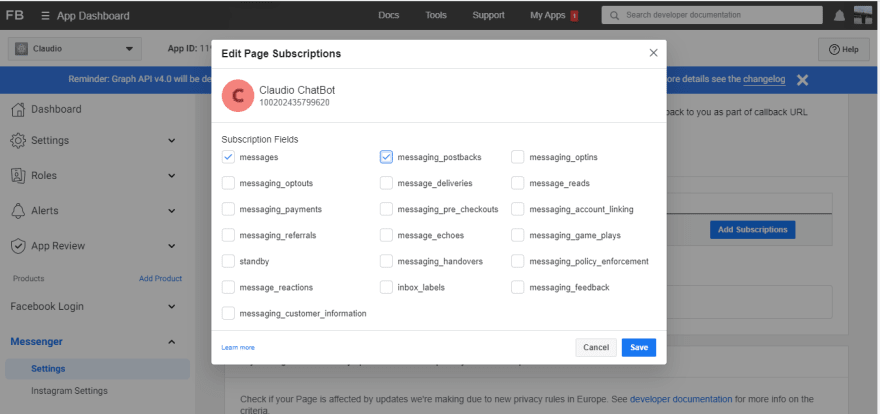
After that Click on the Add Subscriptions option and checkmark messages and messaging_postbacks options.
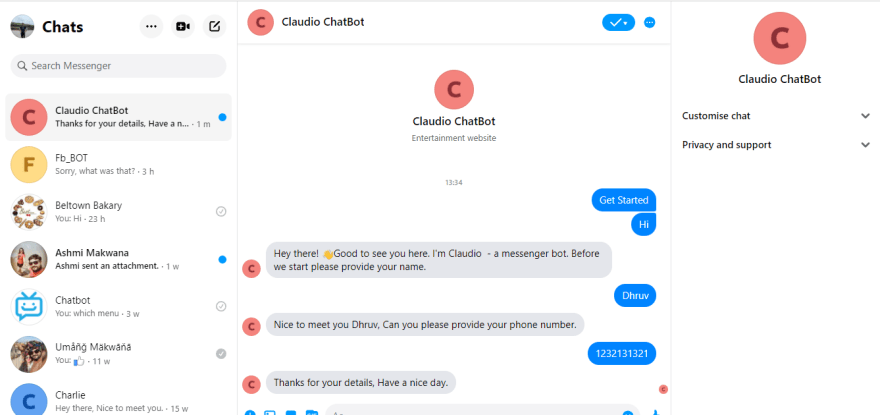
That's it. Now your Facebook Messenger bot is up and running. Go to the messenger and search for your page (Claudio-ChatBot) and start conversation by sending hi message.
You can see the bot will send you welcome message and conversation is started as per expectation.
Thanks for reading this blog and Hope🤞 you liked it.
Please FOLLOW me on twitter to get notify for my upcoming blogs regarding Deeper Dive into Dialogflow CX.





Top comments (0)