
This is an article which describes the process of making an animation from Openclipart's SVG.

Openclipart library is a collection of 100% license-free art that you can use for any purpose.

What is 9VAe ?
- Free 2D animation software which can export SVG SMIL animation .
- It can export alternative movie such as Animated GIF / APNG or QuickTime (9va-mac).
- Based on 2D keyframe animation such as Synfig Studio.
- Lightweight and stable. It can work well even on RaspberryPi a board computer.
Step1 Download '9VAe'
You can download 9VAe from the links as follows;
- 9va-win (Windows)
- 9va-mac (Macintosh)
- 9va-pi (Raspberry Pi)
- 9va-pi (Ubuntu/Linux Mint (LinuxX86-32bit))
See 9VAe Download and Install.
Step2 Extract ZIP, Run '9VAe' '9va-win' or '9va-pi'
Macintosh: '9VAe.app' is not an App Store application. You have to regist it to Gatekeeper at first.
Click > System Preferences > Security & Privacy > General.
See "Allow applications download from:". Click [Open Anyway]. Then '9VAe.app' will be registed to Gatekeeper.9VAe's screen is as follows

Step3 Download Openclipart (barrelFish.svg) to Desktop
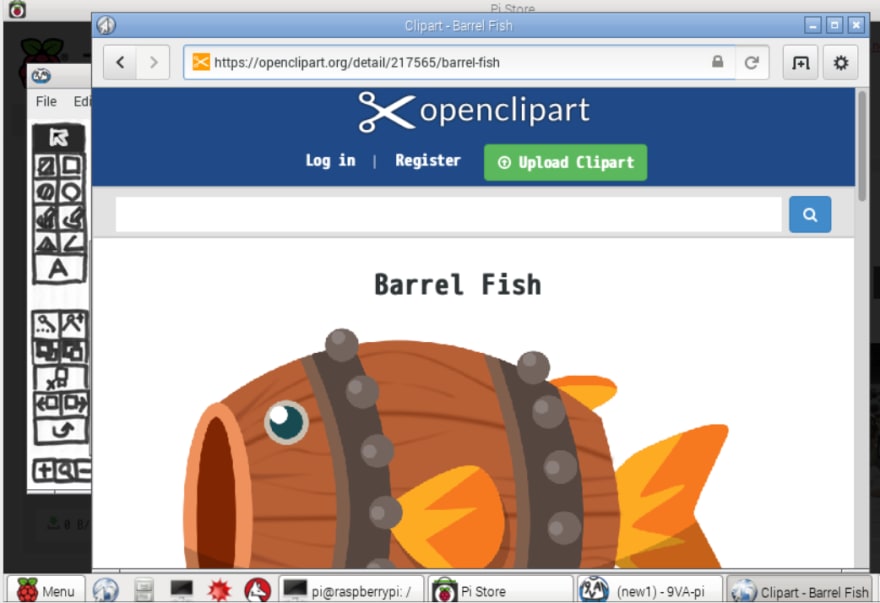
- Open https://openclipart.org/detail/217565/barrel-fish with your favorite browser.
- Download "barrelFish.svg" to your desktop as follows.
Click your right mouse button on [DOWNLOAD] button.

- Click [Save Link As] in the right button menu. (The menu item will be different according to your browser.)
- Select [Desktop]. Click [Save] button. Now SVG file "barrelFish.svg" will be saved on your desktop.
SVG (Scalable Vector Graphics) is the vector graphics format and you can modify the shape by using SVG editor like 'Inkscape'.
Step4 Open barrelFish.svg with '9VAe'

Click '9VAe' window and open the barrelFish.svg on the desktop as follows.
- Click [File] on the menu bar > Click [Open]. Now Open File Dialog Box will appear.
- Select [Desktop] > Click on [barrelFish.svg].
- Click [Open].
Step5 The message "Data couldn't be converted"
The message "Some Data couldn't be converted. (Filter)" will appear.
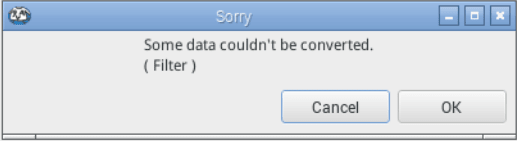
This message occurs because '9va-pi' doesn't have a filter operation.
- Click [OK] button.
Step6 Ungroup barrelFish 4 times
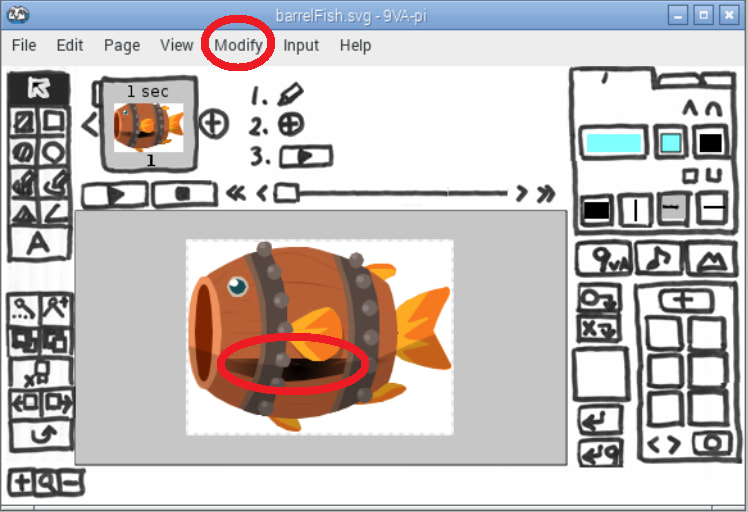
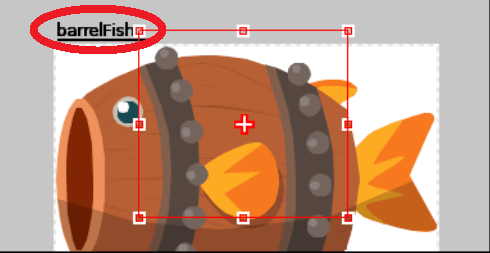
A dark brown plate of the barrelFish is a filter conversion error.
- In order to get rid of it, click the barrelFish. Now the selection frame will appear around the barrelFish.
- Click [Object] on the menu bar > Click [Ungroup]. This will ungroup the barrelFish. Do the same operation 4 times. Now we are ready to select the dark brown plate.
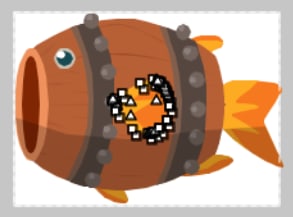
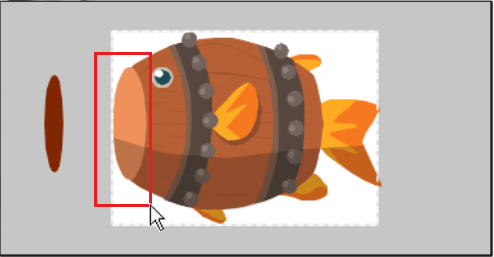
Step7 Select dark brown plate of the barrelFish by using hide option of Registered button

I will explain how to select a shape from the complex objects.
- To deselect the objects, click anywhere on the page away from the shape.
- Click on the dark brown plate of the barrelFish first. It may be difficult to select it correctly at once, but it's OK.
- Click [+] button of the Time Control panel on the right side of the window. Now the selected object will be registered in one of the blank buttons of the time control panel.
- Click on the registered button > Click [Hide].
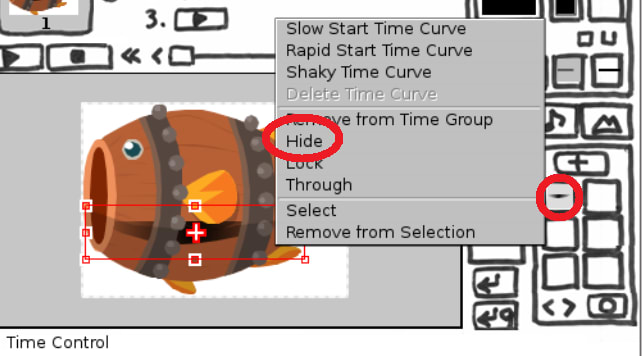 Now the selected object will be hide.
Repeat the same operation until selecting the dark plate in the barrelFish.
If you failed to select the dark plate, click [+] > Click registered button > [Hide] again.
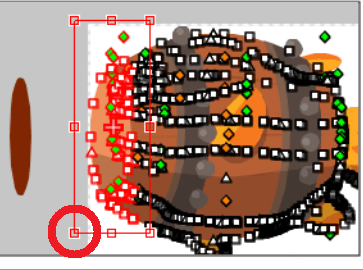
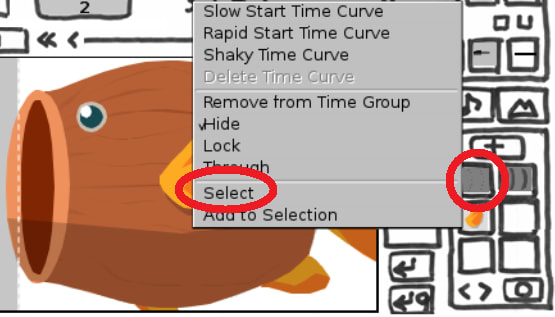
Step8 Select dark brown plate of the barrelFish and delete it

- If you succeed to hide the dark brown plate, Click the registered button of the dark brown plate > Click [Select]. Now the dark brown plate of the barrelFish will be selected.
- Click the [Eraser] button on the lower tool palette on the left side of the window. Now the filter conversion error will be deleted.
Step9 Add the second page

- Click the [+] button at the end of the page bar on the top of the window. > Click [Add Next Page]. Now the second page will appear on the page bar.
Step10 Select the tail of the barrelFish

- Drag a rectangle around the tail of the barrelFish and select the tail.
- Click on the [Edit points] button on the lower tool palette on the left side of the window.
Now control points will appear.
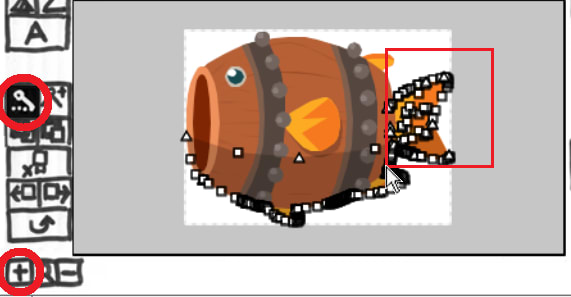
- Drag a rectangle around the control points of the tail and select them.
- Click on the [+] button on the lower left corner of the window several times.
Now the tail will be zoomed in.
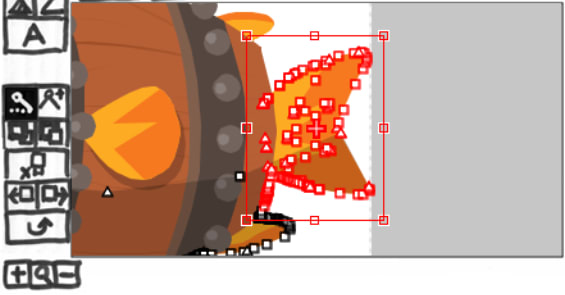
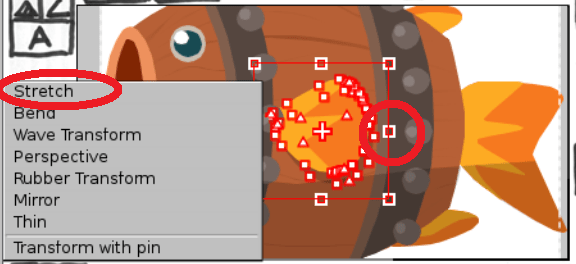
Step11 Transform the tail of the barrelFish

The transform menu places each handles (little squares) of the selection frame, one in each corner and one on the top, bottom, left, and right. We can modify the shape by clicking on any of the handles or dragging them.
- Click the right side handle of the selection frame > Click [Stretch]. Now the shape will be changed according to your mouse movement.
- Click the mouse button when the shape becomes desired shape.
- Click the [Magnifying glass] button on the lower left corner of the window.
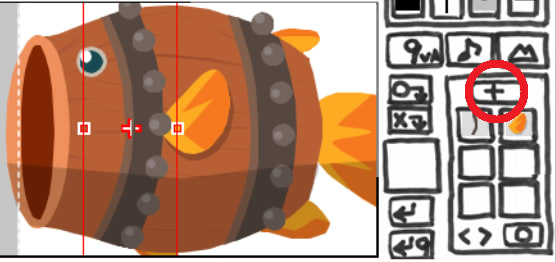
Step12 Register the side fin of the barrelFish

To deselect the control points, click several times anywhere on the page away from the shape.
- Click on the side fin of the barrelFish.
- Click [+] button of the Time Control panel on the right side of the window.
Now the selected object will be registered in one of the button of the time control panel.

- Click on the registered button > Click [Hide]. Now the registered object will be hide.
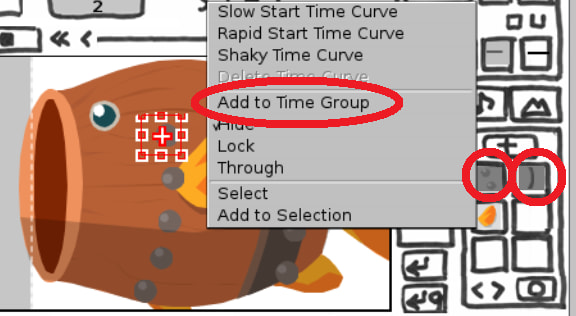
- Click on another part of the side fin of the barrelFish.
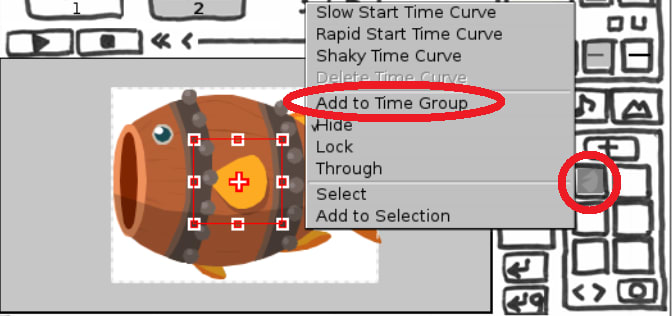
- Click on the registered button > Click [Add to Time Group]. Now the selected shape will be hide.
- Repeat the same operation until selecting all parts of the side fin of the barrelFish.
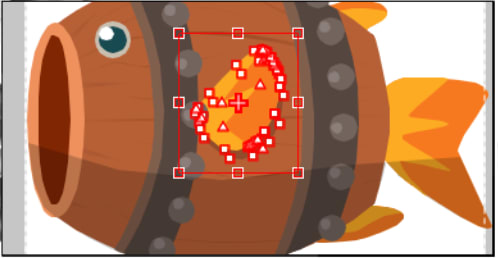
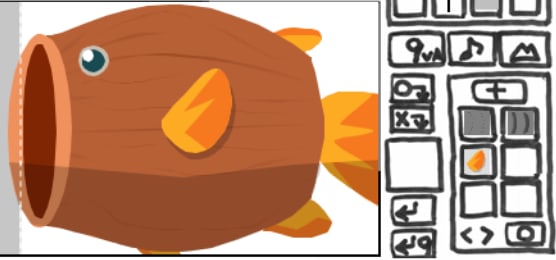
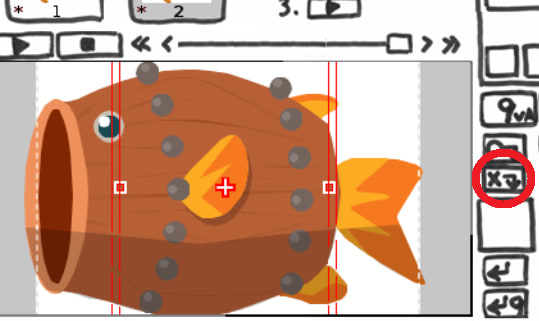
Step13 Select and Transform the side fin of the barrelFish

- Click on the registered button > Click [Select]. Now the side fin will be selected.
- Click on the [Edit points] button on the lower tool palette on the left side of the window.
- Drag a rectangle around the control points of the side fin.
- Click the right side handle of the selection frame > Click [Stretch]. Now the shape will be changed according to your mouse movement.
- Click the mouse button when the shape becomes desired shape.
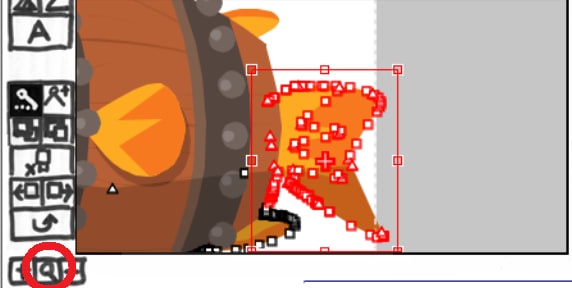
Step14 Zoom in the anal fin of the barrelFish

- To deselect the control points, click several times anywhere on the page away from the shape.
- Drag a rectangle around the anal fin of the barrelFish and select the anal fin.
- Click on the [Edit points] button on the lower tool palette on the left side of the window. Now control points will appear.
- Drag a rectangle around the control points of the anal fin.
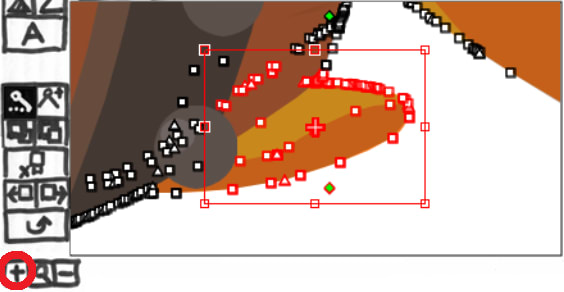
- Click on the [+] button on the lower left corner of the window several times.
Now the anal fin will be zoomed in.
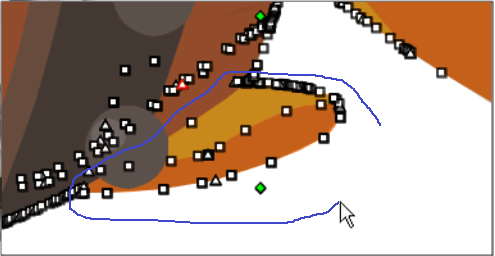
- Use the Lasso select tool to select the anal fin. Hold down the Ctrl key on the keyboard, drag and draw a blue line around the control points of the anal fin. (If you are a Macintosh user use Command key.) The selection frame will appear around the anal fin.
Step15 Transform the anal fin of the barrelFish by using soft pin

- Click the right side handle of the selection frame > Click [Transform with pin] twice.
The menu item will change to [Transform with soft pin].
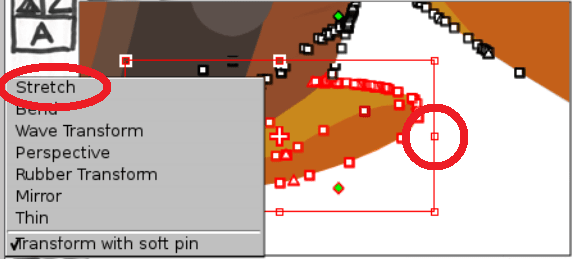
- Click [Stretch]. Now the shape will be changed according to your mouse movement. Click the mouse button when the shape becomes desired shape.
When the [Transform with pin] is active, the control points near the edge of selection won't move so much. The transformation result will be smooth.
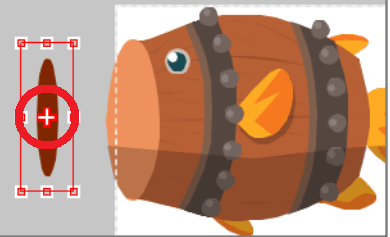
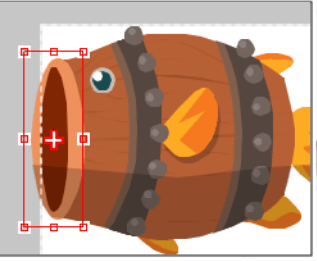
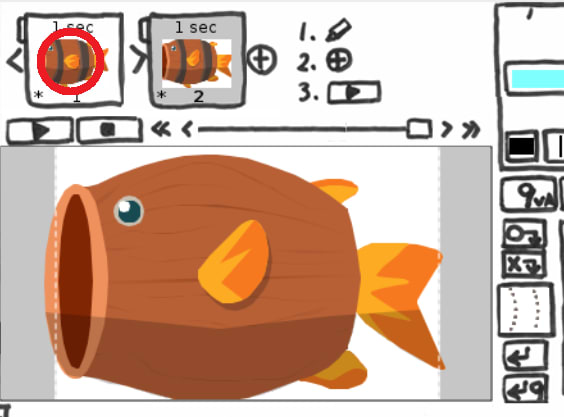
Step16 Enlarge the mouth of the barrelFish
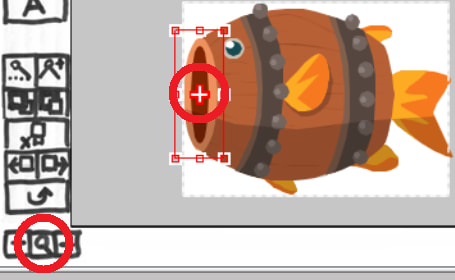
- Click the [Magnifying glass] button on the lower left corner of the window.
- To deselect the control points, click several times anywhere on the page away from the shape.
- Click the mouth of the barrelFish. The selection frame will appear around the mouth.
- Drag the center handle [+] of the selection frame toward the left.
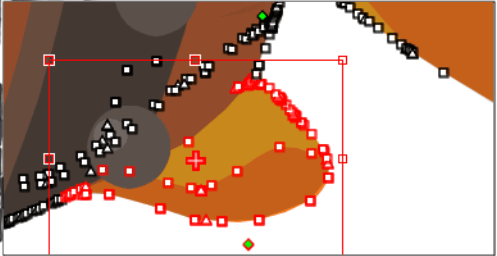
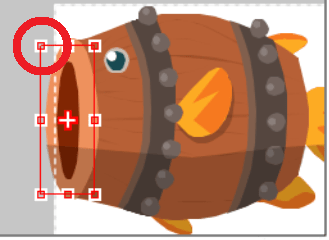
- Drag a rectangle around the head of the barrelFish and select the head.
- Click on the [Edit points] button on the lower tool palette on the left side of the window.
Now control points will appear.
- Drag a rectangle around the control points of the mouth.
- Drag the corner handle of the selection frame outward.
Now the head will become larger by using Transform with soft pin.

- Click and select the mouth of the barrelFish.
- Drag the center handle [+] of the selection frame toward the mouth's original position.
- Drag the corner handle of the selection frame outward. Now the mouth will become larger.
Step17 Group iron balls and iron rings in 2 registered buttons
In order to make iron balls' animation, we should group all iron balls together.
- Click an iron ball or an iron ring and select it.
- Click [+] button of the Time Control panel on the right side of the window. Now the selected object will be registered to a button of the time control panel.
- Click on the registered button > Click [Hide].
Now the registered shape will be hide.
- Click another iron ball or a ring and select it.
- If the selected object is the same kind of the registered button , Click the same registered button > Click [Add to Time Group]. Now the selected shape will be hide.
- If the selected object is not the same kind of the registered object, Click [+] button to make a new registered button. Click the new registered button > Click [Hide].
Now the new registered shape will be also hide.
- Finally iron balls and iron rings will be hide. They are grouped in the iron ball or the iron ring.
Step18 Cut the iron balls of the first page and the second page into the Clip memory
- Click on the iron ball's registered button > Click [Select].
Now the iron balls will be selected.

- Click the center handle [+] of the selection frame > Click [Select Connected Objects].
Now the iron balls of the first page and the second page will be selected together. The line type of the selection frame will be changed to double-line.
- Click the [Cut] button on the upper side of the Clipboard on the right side of the window. Now the iron balls of the first page and the second page will be cut into the Clip memory.
Step19 Go to the first page
- Click on the first page and go to the first page.
Step20 Create Animecast from Clip memory
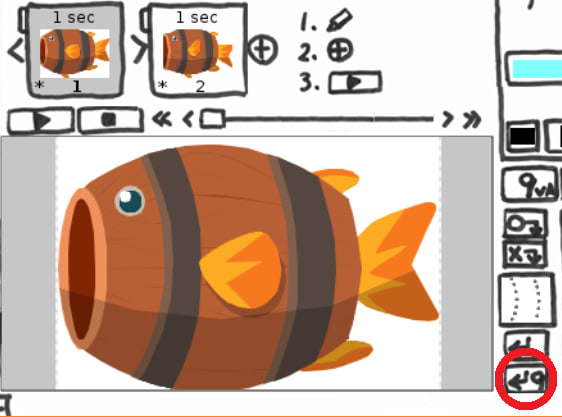
- Click the [9] button on the lower side of the Clip memory on the right side of the window.
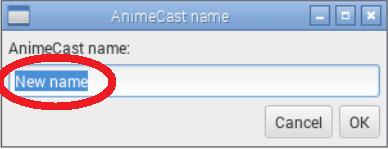
- A dialog box will appear. Enter the Animecast's name, for example - “rotating ring”, into the text field.
- Click [OK].
 Animecast is a graphics object which includes iron balls in the Clip memory.
The bold file name "barrelFish" will appear.
Animecast is a graphics object which includes iron balls in the Clip memory.
The bold file name "barrelFish" will appear.
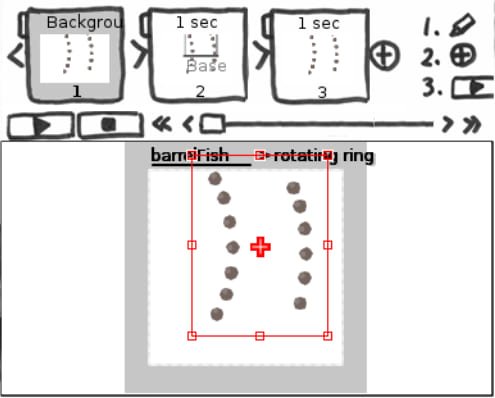
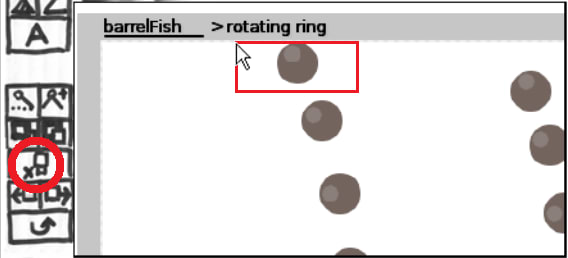
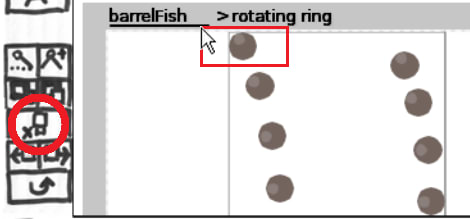
Step21 Open the content of AnimeCast
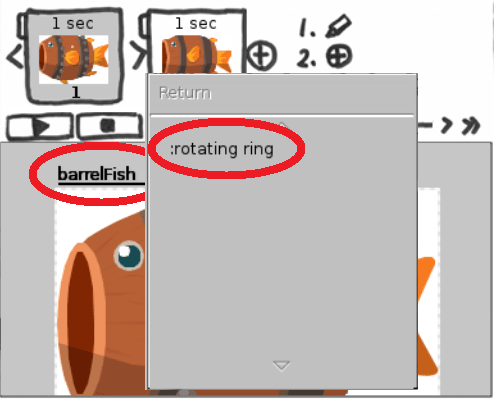
- Click on the bold text "barrelFish" > Click [:rotating ring]
Now the content of the animecast will appear.
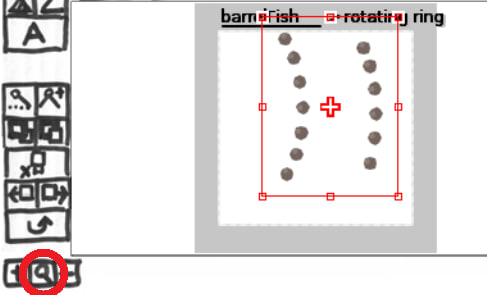
- Click the [Magnifying glass] button on the lower left corner of the window.
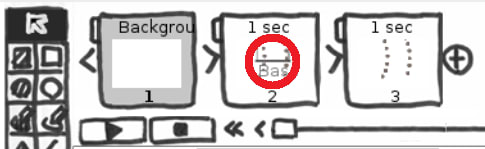
Step22 Add Background Page
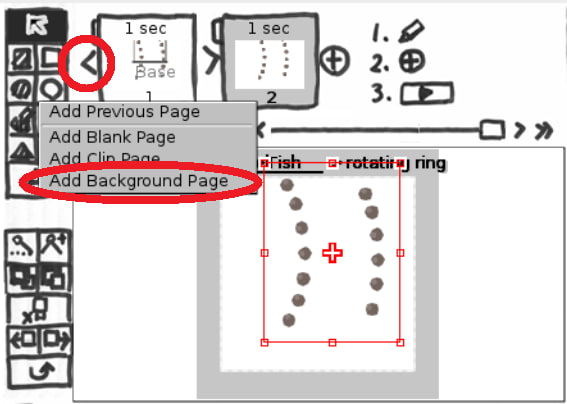
- Click the [<] button on the left end of the page bar > Click [Add Background Page].
The blank background page will be added.
- Click on the second page and go to the second page.

- Drag a rectangle around iron balls to select all of them.
- Click on the [Copy to previous page] button on the lower tool palette on the left side of the window.
Now the contents of the second page will be copied to the background page.
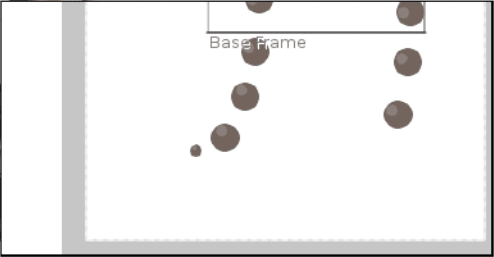
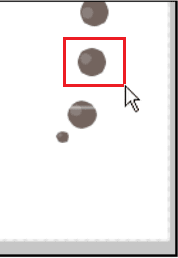
Step23 Delete the first ball on the top left

- Click on the third page and go to the third page.
- Drag a rectangle around the top 3 balls on the left balls.
- Click the [+] button on the lower left corner of the window several times.
Now 3 balls are displayed in the center of the window.
- Drag a rectangle around the first ball to select it.
- Click the [Eraser] button on the lower tool palette on the left side of the window. Now the first ball will be deleted but the first ball on the background page will still appear.
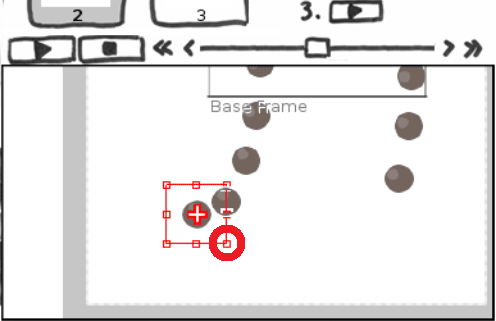
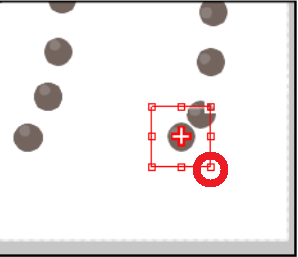
Step24 Select the second ball and snap the [+] handle to the bottom of it

- Drag a rectangle around the second ball to select it.
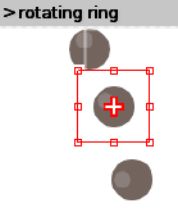
- Holding down Ctrl key (If you are a Macintosh user, holding down command key), drag the center handle [+] of the selection frame toward the bottom of the second ball.
- Only the [+] handle will move. The [+] handle will be snapped to each control point of the ball.
- Move and snap the [+] handle to the bottom of the second ball.
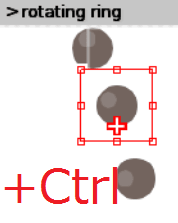
- Release Ctrl key.
- Drag the handle [+] of the selection frame toward the position of the first ball.
- Hold down Ctrl key, then the handle [+] will be snapped to the control points of the background ball.
- Snap it to the bottom of the first ball, then you can move the second ball to the position of the first ball precisely.

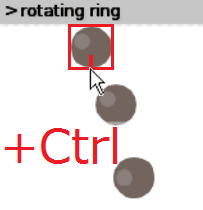
Step25 Move the other balls to the previous ball's position
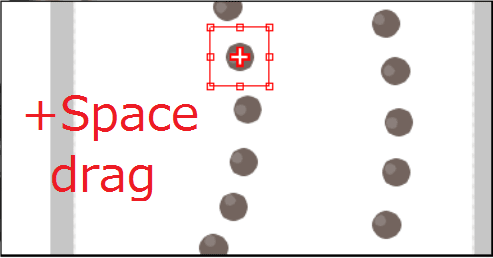
Press space key, and drag the canvas toward the top. The area displayed can be changed.
Repeat as follows
- Select the next ball.
- Hold down Ctrl (or Command) Key
- Drag [+] handle and snap it to the bottom of the ball.
- Drag [+] handle without Ctrl Key to start dragging the ball upward.
- Hold down Ctrl Key.
- Drag and snap the ball to the position of the previous ball.
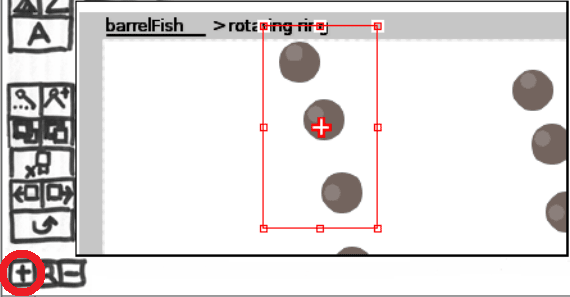
Step26 Duplicate the bottom ball and copy it to the second page

- After you finish moving the bottom ball, Click the center handle [+] of the selection frame > Click [Duplicate].
Now the new ball will appear.

- Drag the center handle [+] of the new ball and move it toward the lower left a little.
- Click on the [Copy to previous page] button on the lower tool palette on the left side of the window. Now the new ball will be copied to the second page.
- Drag the corner handle of the selection frame inward.
Now the size of the ball will be small.
Step27 Move the bottom ball of the right balls and resize it

- Click on the third page and go to the third page.
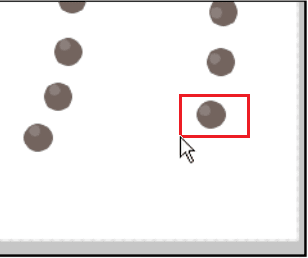
- Drag a rectangle around the bottom ball of the right balls to select it.
- Drag the center handle [+] of the bottom ball and move it toward the lower left a little.
- Drag the corner handle of the selection frame inward. Now the size of the bottom ball will be small.
Step28 Move the other balls of the right balls to the previous ball's position
Press space key, and drag the canvas toward the bottom. The area displayed can be changed.
Move the right balls toward the lower as follows
- Select the next ball.
- Hold down Ctrl (or Command) Key
- Drag [+] handle and snap it to the bottom of the ball.
- Drag [+] handle without Ctrl Key to start dragging the ball toward the lower.
- Hold down Ctrl Key. Drag and snap the ball to the previous ball's position.
Step29 Delete the background page and the top left ball of the first page

- Click [<<] button on the bottom of the page bar and go to the first page.

- Click on the page number [1] of the first page. > Click [Cut Page]
Now the first background page will be deleted.
- Drag a rectangle around the top left ball to select it.
- Click the [Eraser] button on the lower tool palette on the left side of the window. Now the top left ball will be deleted.
Step30 Input Loop button on the first page
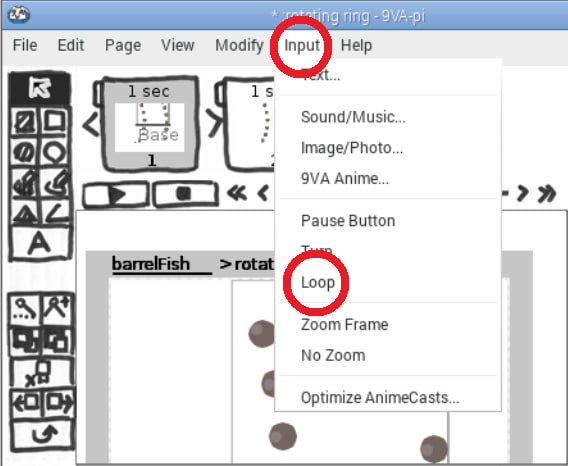
- Click [Input] on the menu bar > Click [Loop] Now the Loop button will appear.
Step31 Play iron ball's animation
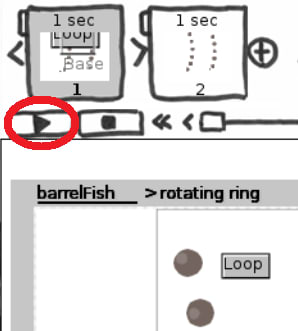
- Click [Play] button on the bottom of the page bar. You will see the rotating iron ball's animation.
- Click [Stop] button or ESC key to stop the animation.
Step32 Return to barrelFish

- Click on the bold text "barrelFish" > Click [Return] Now the barrelFish will appear.
Step33 Input Turn button on the first page
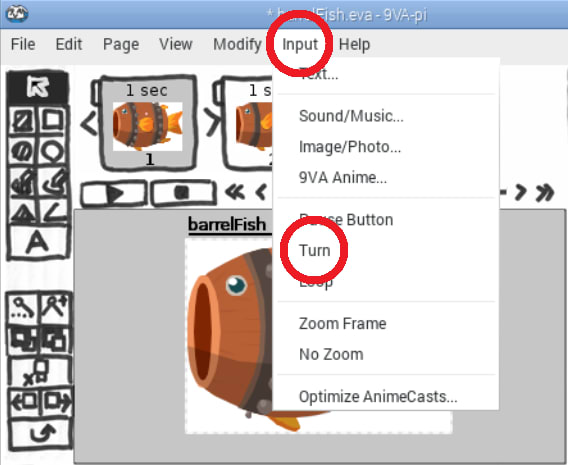
- Click [Input] on the menu bar > Click [Turn] Now the Turn button will appear.
Step34 Play barrelFish's animation

- Click [Play] button on the bottom of the page bar. You will see the barrelFishl's animation.
- Click [Stop] button or ESC key to stop the animation.
Step35 Modify animation
You can modify animation by selecting the shape and move the control point of it.
Edit your animation to feel better. In the case of the sample animation you saw first, the animation was modified as the eye is moving and all fins are moving.
Step36 Export animated SVG
- Click [File] on the menu bar > Click [Save as]
- Click the file type [9VA/EVA] > Click [SVG] Select the folder to export SVG.
- Click [Save]. Now the animated SVG (SMIL(Synchronized Multimedia Integration Language)) file will be exported.
- If you're a Macintosh user, Click [File] on the menu bar > Click [Export Animated SVG].
Step37 Export animated GIF
- Click [File] on the menu bar > Click [Export Animated GIF].
- Select the folder to export Animated GIF.
- Enter the name of GIF file.
- Click [Save]. Animated GIF setting dialog will appear.
- Enter 2 (sec) into the [Time Limit] field.
- Click [Start]. Now the animated GIF file will be exported.
Step38 Export APNG
- Click [File] on the menu bar > Click 'Sequential images/APNG export'
- Enter the name of APNG file. Click [Save]. Now the APNG setting panel will appear.
- Enter 2 (sec) into the [Time Limit] field.
- Click [Start]. Now the animated GIF file will be exported.
- The question "Do you want to combine PNGs to an APNG file" will appear. Click [Yes]. The APNG file will be exported.
- If you click [No], the sequential PNG images will be exported.
Final Words
This article shows how to make an animation from Openclipart's SVG by using '9VAe' a free 2D vector animation editor.
I hope this article will help you to make SVG / GIF / APNG animation. Thank you for reading!
Thanks for Openclipart and TheJChaps the writer of Barrel Fish.
Related article
9VAe Introduction
9VAe Beginner Tutorials
- 9VAe Beginner Tutorial 0 - Overview
- 9VAe Beginner Tutorial 1 - Input, Select, Move, Resize...
- 9VAe Beginner Tutorial 2 - AnimeCast, Time
- 9VAe Beginner Tutorial 3 - Edit AnimeCast, Loop
- 9VAe Beginner Tutorial 4 - Time Curve, Copy Pages, GIF
- How to make a long animation with 9VAe
9VAe Next Step Tutorials
- How to make APNG from SVG for LINE animated Stickers?
- Make Barrel Fish animation from Openclipart SVG
- Six steps to make SVG Animation from Openclipart
- How to make Animated GIF from Openclipart?

Top comments (0)