
This post is done on a special request from one of our thousands readers. If you have more requests, let me know in the comments
In this post, you will learn how to implement AdMob functionality, i.e. Google advertisements, in Ionic React Capacitor apps. We will implement this in a simple Ionic App and test on iOS simulator and Android device.
What is Admob?
As we all know, advertisements are the major source of income for all tech giants like Google, Facebook, Twitter etc. Google ads are one of the most popular ads out there, and the mobile version of Google ads is what they call AdMob.
Type of AdMob ads
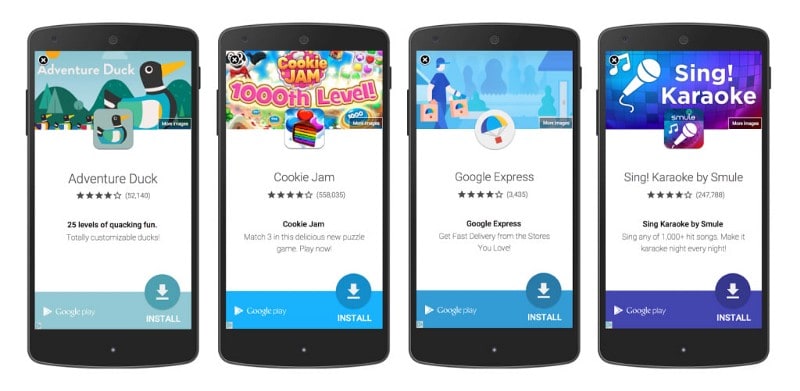
Banner: A basic ad format that appears at the top & bottom of the device screen.
Interstitial: Full-page ads appear at natural breaks & transitions, such as level completion. Supports video content.
Rewarded: Full page Ads reward users for watching short videos and interacting with playable ads and surveys. Good for monetizing free-to-play users. Supports video content.
Native: Customizable ad format that matches the look & feel of your app. Ads appear inline with app content. Supports video content. For now, Native ads are only possible in Native apps, not in hybrid apps like the ones based on Ionic or React Native.
Let us look at the underlying frameworks for this post. If you are conversant with Ionic and Capacitor, skip these sections and go to the code segment of the post.
Disclaimer
Since this post is a mix of three frameworks, it is possible you landed here by mistake. If you are looking for AdMob login in
- React Native — Please check this post
- Ionic React (Capacitor) apps — Continue reading 😎
As you can see from above, there are more than one options available for Hybrid app development these days, and it is easy to get confused between them. This post is focussed on Ionic framework with React as the front-end framework, and Capacitor as runtime and build environment.
Code for this tutorial is available on Github repo ionic-react-capacitor-admob
Let’s see a brief intro to each of the included frameworks:
- Ionic
- Capacitor
What is Ionic ?
You probably already know about Ionic, but I’m putting it here just for the sake of beginners. Ionic is a hybrid mobile app development SDK. It provides tools and services for developing hybrid mobile apps using Web technologies like CSS, HTML5, and Sass. In other words — If you create Native apps in Android, you code in Java. If you create Native apps in iOS, you code in Obj-C or Swift. Both of these are powerful but complex languages. With Cordova (and Ionic) you can write a single piece of code for your app that can run on both iOS and Android (and windows!), that too with the simplicity of HTML, CSS, and JS.
It is important to note the contribution of Cordova/Capacitor in this. Ionic is only a UI wrapper made up of HTML, CSS and JS. So, by default, Ionic cannot run as an app in an iOS or Android device. Cordova/Capacitor is the build environment that containerizes (sort of) this Ionic web app and converts it into a device installable app, along with providing this app access to native APIs like Camera etc.
Capacitor — How is it different from Cordova ?
This section is relevant to only those who have been working with Ionic / Cordova for some time. Cordova has been the only choice available for Ionic app developers for quite some time. Cordova helps build Ionic web app into a device installable app.
Capacitor is very similar to Cordova, but with some key differences in the app workflow
Here are the differences between Cordova and Capacitor (You’ll appreciate these only if you have been using Cordova earlier, otherwise you can just skip)
- Capacitor considers each platform project a source asset instead of a build time asset. That means, Capacitor wants you to keep the platform source code in the repository, unlike Cordova which always assumes that you will generate the platform code on build time
- Because of the above, Capacitor does not use
config.xmlor a similar custom configuration for platform settings. Instead, configuration changes are made by editingAndroidManifest.xmlfor Android andInfo.plistfor Xcode - Capacitor does not “run on device” or emulate through the command line. Instead, such operations occur through the platform-specific IDE. So you cannot run an Ionic-capacitor app using a command like
ionic run ios. You will have to run iOS apps using Xcode, and Android apps using Android studio - Since platform code is not a source asset, you can directly change the native code using Xcode or Android Studio. This give more flexibility to developers
In essence, Capacitor is like a fresh, more flexible version of Cordova.
Plugins
Cordova and Ionic Native plugins can be used in Capacitor environment. However, there are certain Cordova plugins which are known to be incompatible with Capacitor. For Admob functionality, we’ll use the Capacitor Admob plugin
Post structure
We will go in a step-by-step manner to explore the AdMob feature implementation. This is my break-down of the blog
STEPS
- Create a basic Ionic Capacitor app with React
- Build the app in Android with Capacitor
- Setup your AdMob account
- Setup AdMob plugin
- Implement different types of Ads in your App
- Build the app on iOS simulator and test
- Build the app on Android device and test
So let’s dive right in!

Step 1 — Create a basic Ionic Capacitor app with React
Create a basic app from Ionic starters itself.
$ ionic start ionic-react-admob tabs --type=react
This will create a basic Ionic app in React. I have chosen tabs starter so I can use different tabs for different Ad types.
We’ll create a simple UI with few buttons that will trigger Ads. For interstitial ads, these triggers are generally completion of a level in a game app etc. Banner ads are generally triggered on page load itself. Reward ads are shown where user can earn a reward by watching the ads.
My basic UI for the ad pages looks like this

Step 2 — Build the app in Android with Capacitor
To build the apps for device / emulator, we need to attach capacitor to the app. Run
$ ionic integrations enable capacitor
At the time of this post, I have node 12.14.0 and I have opted for Capacitor 1.x, although Capacitor 2.0 is also released. The reason is to avoid updating Xcode to read apps made by Capacitor 2.0. Although I have tested the functionality in Capacitor 2.0 with Android and it works
By default if you run the above command, it will install Capacitor 2.0. Apps built with Capacitor 2.0 will require latest Android Studio and latest Xcode. If you have these, perfect ! But if you don’t, stick to Capacitor 1.x for the tutorial and you can update later. I have used “@capacitor/core”: “1.2.0”, and “@capacitor/cli”: “1.2.0” for this post.
Add platforms and build the app in device as a test
// Add android platform
$ npx cap add android
// Add iOS platform
$ npx cap add ios
// Build web assets to copy to platforms
$ ionic build
// copy the build assets to platforms
$ npx cap copy
// open android studio to build app
$ npx cap open android
// open xcode to build app
$ npx cap open ios
At this point, you can run the app in either iOS / Android device or simulator using Xcode / Android Studio . You’ll see the UI running fine in the device.
Step 3 — Setup your Admob account
This step is common for any app. Since Admob is a Google service, independent of app platform, you can have one account and use it in every type of app. I use the same AdMob app in every AdMob example post.
Follow these steps to create your Admob account and Admob app
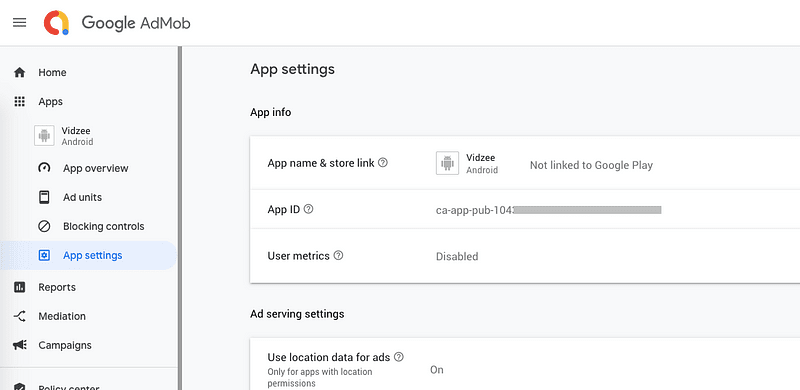
- Signup then Sign in to your AdMob account at https://apps.admob.com.
- Click Apps in the sidebar.
- Click Add app to add a new app or click View all apps to search a list of all of the apps you’ve added to AdMob.
- In the App Settings options, you can see your App ID. This is the ID you will need to connect your app to Google AdMob in your app.
- In the Ad Units section, you can add multiple types of Ad units. For more details on adding Ad Units, check out the following detailed step-by-step instructions for
AdMob has a ton of other settings for how, when and where your ads should show up, but all that for later. In this post, we’ll limit the discussion to “How to display basic ad units in a Ionic React Capacitor app”
Step 4 — Setup AdMob plugin
For this post, as I explained earlier, we are using Capacitor Admob plugin. Also, since capacitor does not inject necessary platform specific variables while building the app, we’ll have to make small changes when we build apps
4.1 Install Capacitor AdMob plugin
In your existing app, add the plugin using
$ npm install --save capacitor-admob
4.2 Build in Android
Since we have only added a plugin, just sync the dependencies using
// copy the build assets to platforms
$ npx cap sync
In Android Studio, open your AndroidManifest.xml file and add this meta-data line and replace the value by the actual App ID of your app
<application>
  <!-- this line needs to be added (replace the value!) -->
  <meta-data android:name="com.google.android.gms.ads.APPLICATION_ID" android:value="ca-app-pub-3940256099942544~3347511713" />
  <activity>.....</activity>
</application>
Open your Ionic Capacitor App in Android Studio, Now open MainActivity.java of your app and Register AdMob Capacitor Plugin.
// Other imports...
import app.xplatform.capacitor.plugins.AdMob;
public class MainActivity extends BridgeActivity {
@Override
public void onCreate(Bundle savedInstanceState) {
super.onCreate(savedInstanceState);
this.init(savedInstanceState, new ArrayList<Class<? extends Plugin>>(){{<br> <strong class="markup--strong markup--pre-strong">add(AdMob.class);</strong> // Add AdMob as a Capacitor Plugin<br> }});
}
}
Build the app once on device. If there is no error, your Android app is ready to show ads
4.3 Build in iOS
Once again, just sync the dependencies using
// copy the build assets to platforms
$ npx cap sync
Open your App/App/Info.plist file and add this plist value line and replace the value by the actual App ID of your app
<key>GADIsAdManagerApp</key>
<true/>
<key>GADApplicationIdentifier</key>
<!-- replace this value with your App ID key-->
<string>ca-app-pub-6564742920318187~7217030993</string>
Build the app once on device/simulator. If there is no error, your iOS app is ready to show ads.
Step 5 — Implement different types of Ads in the app
Once everything is setup, let us implement different types of Ads in the app. For all types of Ads, you’ll need to import the plugin and initialize.
import { AdOptions, AdSize, AdPosition } from 'capacitor-admob';
const { AdMob, Toast } = Plugins;
In the constructor, initialize AdMob using
// replace with your own App ID
AdMob.initialize('ca-app-pub-3940256099942544~3347511713');
Banner Ad
Banner ads are implemented in Tab1. You’ll also need an Ad Unit ID for the banner ad from your AdMob account.
Once you have the UI in Tab1.tsx file, we’ll implement four methods
- showBanner
- pauseBanner
- resumeBanner
- removeBanner
The names of the methods are self-explanatory. The code for the full page will look like this
You can get test ad IDs from Google for testing as well. DO NOT use a test ID in your production app, and DO NOT use your production Ad Unit ID while developing the app
Interstitial Ad
Interstitial Ads work on a trigger. Because these are full page ads, they are not always visible as Banner Ads.
To implement interstitial ads, import the plugin, initialize and follow the code below
Interstitial ads need to load before they can be shown. In you productions apps, it would be a good practice to load these ads on page load itself, and then show whenever required.
Reward Ad
Again, reward Ads are similar to interstitial ads in the trigger mechanism. To implement, import the required dependency and follow the code below
Again, TestIds.REWARDED is a test ID. Replace it with production Ad ID when releasing the app.
.prepareRewardVideoAd() method loads the ad. This ad takes some time in loading. That is why .showRewardVideoAd() should be called after a delay, or on success of loading.
Step 6: Testing the app on an iOS simulator
To build the code on iOS, just run these
$ ionic build
$ npx cap copy
Once done, build your app from Xcode, and run the app. Let’s see how the ads will look in iOS.
Banner Ad
The resulting ad looks like this on iOS

Interstitial Ad
The ad on full screen looks like following on iOS

Reward Ad
The reward ad will look like this on iOS

Step 7: Testing the app on an Android device
Just like iOS, the same code will show ads in Android as well. This video link here will show how the ads will show up on android device (just for the sake of completion of the post)
Tada ! You have learnt how to implement AdMob ads in your Ionic React Capacitor app. 🎉
Conclusion
In this blog, we learned how to implement Google AdMob functionality in Ionic React Capacitor app. AdMob functionality is a must for an app where user wants to earn some revenue from ad clicks. This comes in handy when your app has a large number of users, and you do not charge users for anything in the app. So ads become your direct revenue source. You can also combine the interstitial ads and rewards ads with in-app rewards like a level up in a game, extra lives etc.
Code for this tutorial is available on Github repo ionic-react-capacitor-admob
Next Steps
Now that you have learnt about setting up AdMob in Ionic React Capacitor apps, here are some other topics you can look into
Ionic React Capacitor
- Facebook Login in Ionic React Capacitor apps
- Twitter Login in Ionic React Capacitor apps
- Google Login in Ionic React Capacitor apps
- How to make basic apps in ionic-react-capacitor
- Camera and Image gallery in Ionic-React-Capacitor
- Push notification in Ionic-React-Capacitor apps
- Adding Icon and Splash in Ionic React Capacitor apps
If you need a base to start your next Ionic 4 React app, you can make your next awesome app using Ionic React Full App

Ionic Angular Capacitor
- Music Player
- Create HTML5 games in Ionic Capacitor apps using Phaser
- Barcode and QR code scanning in Ionic Capacitor apps
If you need a base to start your next Capacitor app, you can make your next awesome app using Capacitor Full App

Ionic Angular Cordova
- Ionic Payment Gateways — Stripe | PayPal | Apple Pay | RazorPay
- Ionic Charts with — Google Charts | HighCharts | d3.js | Chart.js
- Ionic Social Logins — Facebook | Google | Twitter
- Ionic Authentications — Via Email | Anonymous
- Ionic Features — Geolocation | QR Code reader | Pedometer
- Media in Ionic — Audio | Video | Image Picker | Image Cropper
- Ionic Essentials — Native Storage | Translations | RTL
- Ionic messaging — Firebase Push | Reading SMS
- Ionic with Firebase — Basics | Hosting and DB | Cloud functions
If you need a base to start your next Ionic 5 Angular app, you can make your next awesome app using Ionic 5 Full App


Top comments (0)