In modern application development, having a reusable and scalable backend is crucial for efficiency and maintainability. With the Liberty Framework, you can create a backend that serves multiple applications seamlessly. This guide will walk you through setting up your backend and integrating it with your frontend.
Step 1: Install the Framework
You can install the Liberty Framework using either Python or Docker, depending on your preference.
Requirements
A PostgreSQL 16 database is required. You can either:
- Create a Docker image based on postgres:16, or
- Install PostgreSQL 16 directly on your host system.
Install with Python
pip install liberty-framework
After installation, you can start the framework with:
liberty-start
Install with Docker
docker pull ghcr.io/fblettner/liberty-framework:latest
docker run -p 8000:8000 ghcr.io/fblettner/liberty-framework
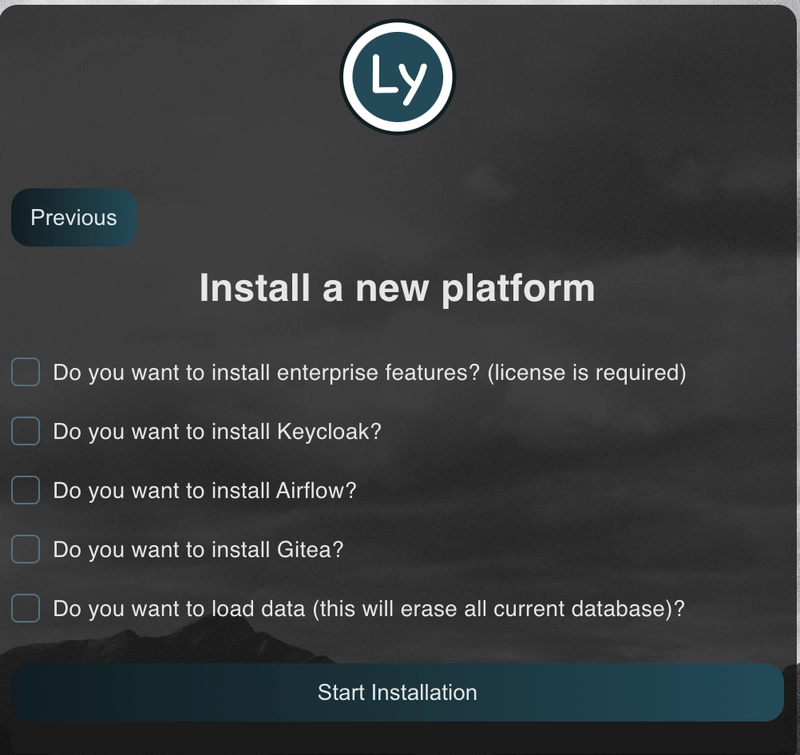
Installation URL
- Setup:
http://<your_host>:<your_port>/setupFollow the wizard to configure your backend

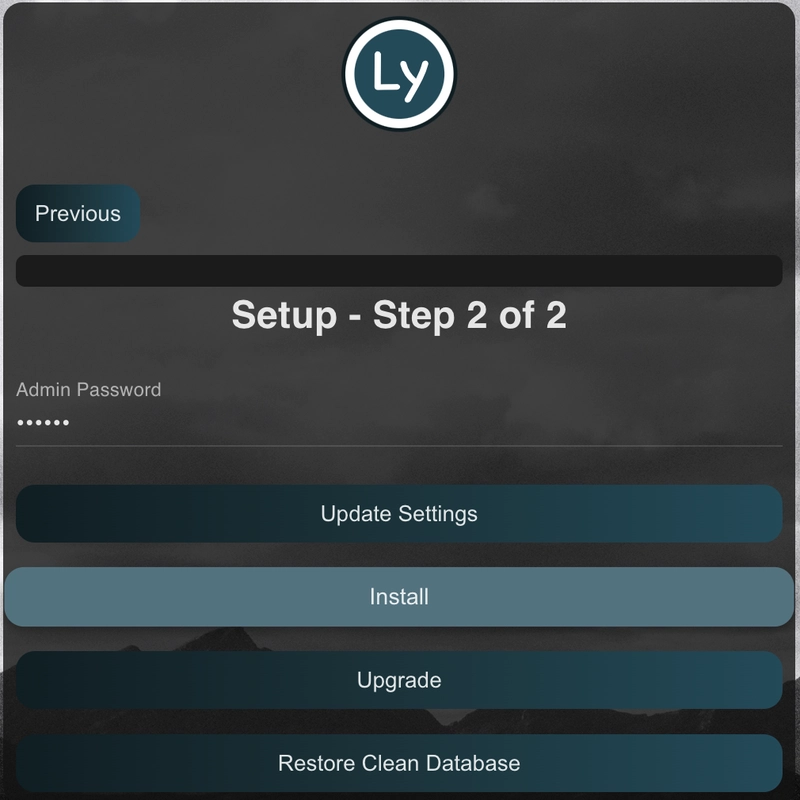
Step 2: Configure the framework
- Application:
http://<your_host>:<your_port>
Connect to liberty with admin account and password set during the installation
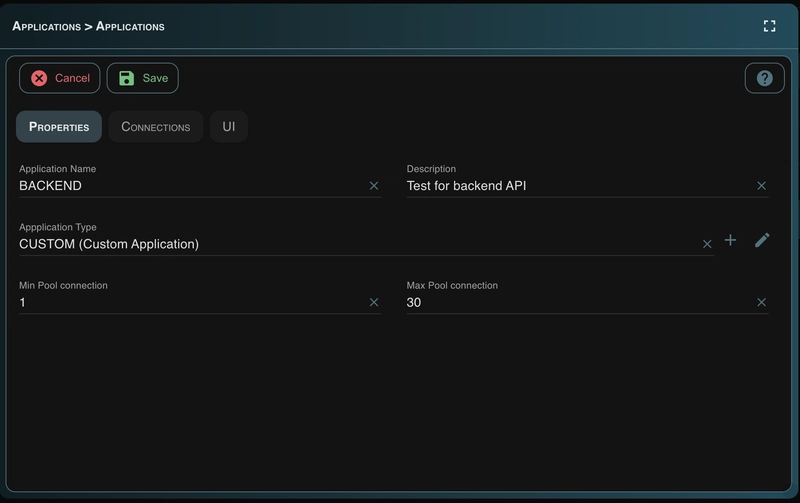
Create a New Application
- Go to the Menu.
- Navigate to Settings > Applications.
- Click Create a New Application.
- Fill in the necessary Properties.
- Configure the Connection settings.
- Use the UI to set your application theme

Create the Database
After saving the new application you can create the database repository using button Create Database
Create a User
Right click on the application and select Display Users
Create a new user with the required permissions.


Step 3: Configure your Backend
Disconnect and reconnect to the BACKEND.
- Go to the Menu.
- Click on
Frameworkto display the development menus - Create a new applications as you did in the first step for your database (Database that contains your application data)
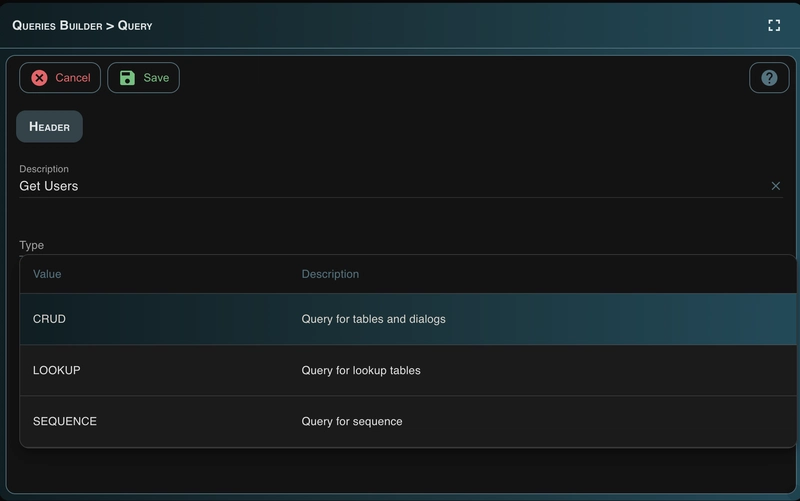
Set Up Queries
Now that your backend is configured, you can create database queries.
- Go to the Menu.
- Queries Builder
- Create your queries
Create query is easy, you will describe your query, add method for SELECT, UPDATE, INSERT or DELETE depending on your database type, and set your SQL
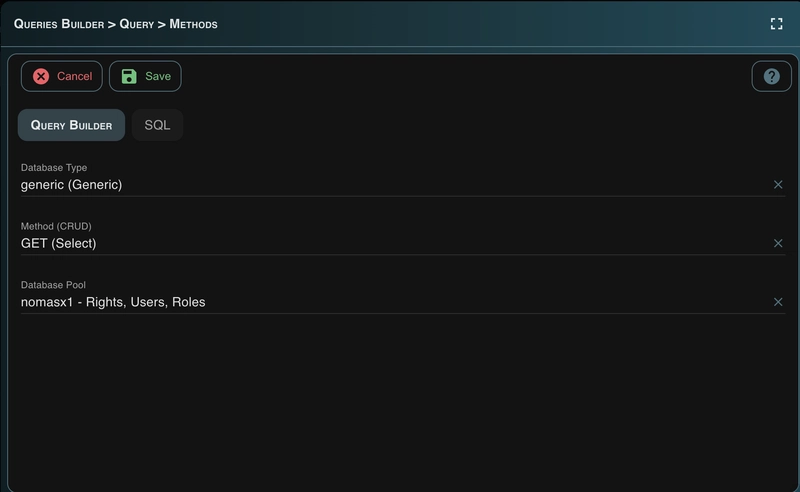
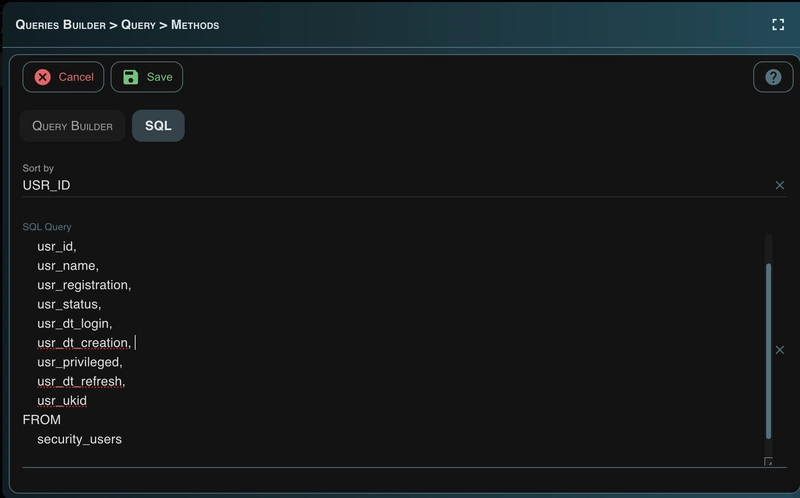
That's it ! You are now able to use your query in your frontend or simply as an API call.
Step 4: Usage example
Encrypt your password
Endpoint: POST /api/fmw/encrypt
{
    "plain_text": "your_password"
}
Get a token for your API user / password
Endpoint: POST /api/auth/token?pool=backend&mode=session&type=database
{
  "user": "admin",
  "password": "return_from_encrypt_endpoint"
}
Call your query
Endpoint: GET /api/db/query?source=query&type=table&pool=backend&mode=session&query=query_id
{
    "items": [
        {
            "ROW_ID": 1,
            "USR_APPS_ID": 10,
            "USR_ID": "APPLEAD",
            "USR_NAME": "Financial/Distribution Company",
            "USR_REGISTRATION": "430788490",
            "USR_STATUS": null,
            "USR_DT_LOGIN": null,
            "USR_DT_CREATION": null,
            "USR_PRIVILEGED": "N",
            "USR_DT_REFRESH": "2025-02-27",
            "USR_UKID": 2
        },
        {
            "ROW_ID": 2,
            "USR_APPS_ID": 10,
            "USR_ID": "CRPCTL",
            "USR_NAME": null,
            "USR_REGISTRATION": null,
            "USR_STATUS": null,
            "USR_DT_LOGIN": null,
            "USR_DT_CREATION": null,
            "USR_PRIVILEGED": "N",
            "USR_DT_REFRESH": "2025-02-27",
            "USR_UKID": 2
        },
        {
            "ROW_ID": 3,
            "USR_APPS_ID": 10,
            "USR_ID": "CRPDTA",
            "USR_NAME": null,
            "USR_REGISTRATION": null,
            "USR_STATUS": null,
            "USR_DT_LOGIN": null,
            "USR_DT_CREATION": null,
            "USR_PRIVILEGED": "N",
            "USR_DT_REFRESH": "2025-02-27",
            "USR_UKID": 2
        }
    ],
    "status": "success",
    "metadata": [
        {
            "headerName": "ROW_ID",
            "field": "ROW_ID",
            "type": "text",
            "operator": "like",
            "rules": null,
            "rules_values": null,
            "default": null
        },
        {
            "headerName": "USR_APPS_ID",
            "field": "USR_APPS_ID",
            "type": "text",
            "operator": "like",
            "rules": null,
            "rules_values": null,
            "default": null
        },
        {
            "headerName": "USR_ID",
            "field": "USR_ID",
            "type": "text",
            "operator": "like",
            "rules": null,
            "rules_values": null,
            "default": null
        },
        {
            "headerName": "USR_NAME",
            "field": "USR_NAME",
            "type": "text",
            "operator": "like",
            "rules": null,
            "rules_values": null,
            "default": null
        },
        {
            "headerName": "USR_REGISTRATION",
            "field": "USR_REGISTRATION",
            "type": "text",
            "operator": "like",
            "rules": null,
            "rules_values": null,
            "default": null
        },
        {
            "headerName": "USR_STATUS",
            "field": "USR_STATUS",
            "type": "text",
            "operator": "like",
            "rules": null,
            "rules_values": null,
            "default": null
        },
        {
            "headerName": "USR_DT_LOGIN",
            "field": "USR_DT_LOGIN",
            "type": "text",
            "operator": "like",
            "rules": null,
            "rules_values": null,
            "default": null
        },
        {
            "headerName": "USR_DT_CREATION",
            "field": "USR_DT_CREATION",
            "type": "text",
            "operator": "like",
            "rules": null,
            "rules_values": null,
            "default": null
        },
        {
            "headerName": "USR_PRIVILEGED",
            "field": "USR_PRIVILEGED",
            "type": "text",
            "operator": "like",
            "rules": null,
            "rules_values": null,
            "default": null
        },
        {
            "headerName": "USR_DT_REFRESH",
            "field": "USR_DT_REFRESH",
            "type": "text",
            "operator": "like",
            "rules": null,
            "rules_values": null,
            "default": null
        },
        {
            "headerName": "USR_UKID",
            "field": "USR_UKID",
            "type": "text",
            "operator": "like",
            "rules": null,
            "rules_values": null,
            "default": null
        }
    ],
    "hasMore": false,
    "limit": 1000,
    "offset": 0,
    "count": 3
}
The Added Value of Liberty Framework
The Liberty Framework provides a structured and scalable backend solution that simplifies application development. It allows you to create and manage applications, configure databases, and delivers API endpoints for all your queries. The flexibility of Liberty Framework enables seamless integration with any frontend, whether you choose to use Liberty-Core or any other custom application. Its API-first approach ensures that your backend remains reusable, scalable, and adaptable to various use cases, making it an excellent choice for modern application development.
Instead of hardcoding your queries, you can manage them through a database with authentication and JWT security to prevent SQL injection.
Edit:
A socket dashboard is also available to display current connection to the database

Useful Links
- 🔗 GitHub Repository (Framework): Liberty Framework
- 📖 API Documentation: Liberty API Docs
- 🔗 GitHub Repository (Core): Liberty Core
- 🔗 GitHub Repository (Test Project): Liberty Test
- 📖 Live Documentation: Liberty Core Docs
- 💖 Sponsor & Support: Sponsor Liberty Core

Top comments (0)