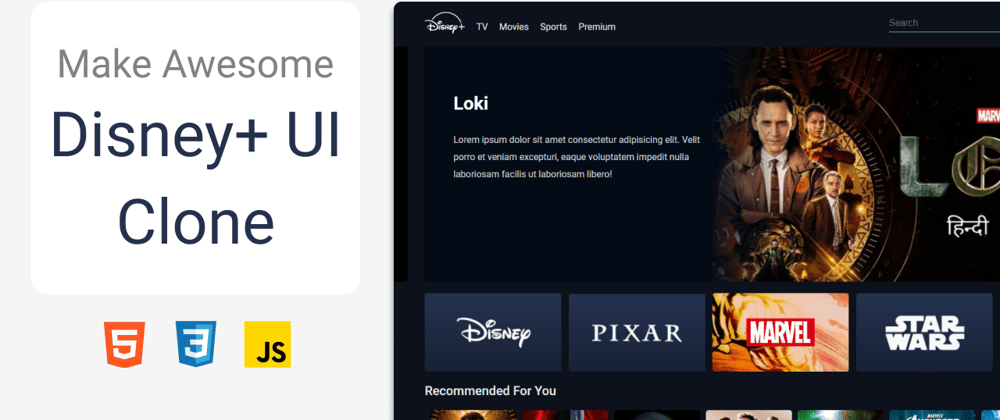
Hello, Today we'll see, how we can easily create a disney plus UI clone using HTML, CSS and JS only. No other library. We'll also see how we can make an endless slider effect. Which took me 2-3 hrs to code.
Our clone is very similar to the original disney plus website. It is only one page(homepage) website. It has navbar and search box with cool click effect same as disney+ and it also has a slider or carousel with infinity or endless effect. Which was very hard for me to make at first. And after that we also have movie cards. With awesome card hover effect. And we have much more.
To see demo or you want full coding tutorial video with explanation. You can watch the tutorial below.
Video Tutorial
I appreciate if you can support me by subscribing my youtube channel.
So, without wasting more time let's see how to code this.
Code
Before we start writing our code. Although it's not a Node app but we should see it folder structure at least to with.
You can see we have a file named data.js. This file contain our movie slider data. You can see below.
let movies = [
    {
        name: 'falcon and the winter soldier',
        des: 'Lorem ipsum dolor sit amet consectetur adipisicing elit. Velit porro et veniam excepturi, eaque voluptatem impedit nulla laboriosam facilis ut laboriosam libero!',
        image: 'images/slider 2.PNG'
    },
    {
        name: 'loki',
        des: 'Lorem ipsum dolor sit amet consectetur adipisicing elit. Velit porro et veniam excepturi, eaque voluptatem impedit nulla laboriosam facilis ut laboriosam libero!',
        image: 'images/slider 1.PNG'
    },
    {
        name: 'wanda vision',
        des: 'Lorem ipsum dolor sit amet consectetur adipisicing elit. Velit porro et veniam excepturi, eaque voluptatem impedit nulla laboriosam facilis ut laboriosam libero!',
        image: 'images/slider 3.PNG'
    },
/// and so on
]
If you see the starting data. You'll notice that our slide-1 is on second number on the list. Why is that. That is because. Our slider will have 3 slides at a time and we want the active slide to be in center. Which means when we first start with slide data. our active slide or first slide will be in middle. I hope this make sense. If not then watch it video tutorial for more better understanding.
Now let's code the webpage.
Webpage.
Start with index.html. Write basic HTML structure and link CSS and JS files. Make sure you add data.js file before app.js. So that we can access the data in app.js file.
Now first create Navbar.
<nav class="navbar">
    <img src="images/logo.png" class="brand-logo" alt="">
    <ul class="nav-links">
        <li class="nav-items"><a href="#">TV</a></li>
        <li class="nav-items"><a href="#">movies</a></li>
        <li class="nav-items"><a href="#">sports</a></li>
        <li class="nav-items"><a href="#">premium</a></li>
    </ul>

    <div class="right-container">
        <input type="text" class="search-box" placeholder="search">
        <button class="sub-btn">subscribe</button>
        <a href="#" class="login-link">login</a>
    </div>
</nav>
*{
    margin: 0;
    padding: 0;
    box-sizing: border-box;
}

body{
    width: 100%;
    background: #0c111b;
    position: relative;
    font-family: roboto, sans-serif;
}

.navbar{
    width: 100%;
    height: 80px;
    position: fixed;
    top: 0;
    left: 0;
    padding: 0 4%;
    background: #0c111b;
    z-index: 9;
    display: flex;
    align-items: center;
}

.brand-logo{
    height: 70px;
}

.nav-links{
    margin-top: 10px;
    display: flex;
    list-style:none;
}

.nav-items a{
    text-decoration: none;
    margin-left: 20px;
    text-transform: capitalize;
    color: #fff;
    opacity: 0.9;
}

.right-container{
    display: block;
    margin-left: auto;
}

.search-box{
    border: none;
    border-bottom: 1px solid #aaa;
    background: transparent;
    outline: none;
    height: 30px;
    color:#fff;
    width: 250px;
    text-transform: capitalize;
    font-size: 16px;
    font-weight: 500;
    transition: .5s;
}

.search-box:focus{
    width: 400px;
    border-color: #1f80e0;
}

.sub-btn{
    background: #1f80e0;
    height: 30px;
    padding: 0 20px;
    color: #fff;
    border-radius: 5px;
    border: none;
    outline: none;
    text-transform: uppercase;
    font-weight: 700;
    font-size: 12px;
    margin: 0 10px;
}

.login-link{
    color: #fff;
    opacity: 0.9;
    text-transform: uppercase;
    font-size: 15px;
    font-weight: 700;
    text-decoration: none;
}
Output
Now let's make slider. We'll create these slides with JS but for styling purpose just create one for now in HTML.
div class="carousel-container">
    <div class="carousel">
        <div class="slider">
            <div class="slide-content">
                <h1 class="movie-title">loki</h1>
                <p class="movie-des">Lorem ipsum dolor sit, amet consectetur adipisicing elit. Suscipit saepe eius ratione nostrum mollitia explicabo quae nam pariatur. Sint, odit?</p>
            </div>
            <img src="images/slider 1.PNG" alt="">
        </div>
    </div>
</div>
.carousel-container{
    position: relative;
    width: 100%;
    height: 450px;
    padding: 20px 0;
    overflow-x: hidden;
    margin-top: 80px;
}

.carousel{
    display: flex;
    width: 92%;
    height: 100%;
    position: relative;
    margin: auto;
}

.slider{
    flex: 0 0 auto;
    margin-right: 30px;
    position: relative;
    background: rgba(0, 0, 0,0.5);
    border-radius: 5px;
    width: 100%;
    height: 100%;
    left: 0;
    transition: 1s;
    overflow: hidden;
}

.slider img{
    width: 70%;
    min-height: 100%;
    object-fit: cover;
    display: block;
    margin-left: auto;
}

.slide-content{
    position: absolute;
    width: 50%;
    height: 100%;
    z-index: 2;
    background: linear-gradient(to right, #030b17 80%, #0c111b00);
    color: #fff;
}

.movie-title{
    padding-left: 50px;
    text-transform: capitalize;
    margin-top: 80px;
}

.movie-des{
    width: 80%;
    line-height: 30px;
    padding-left: 50px;
    margin-top: 30px;
    opacity: 0.8;
}
Output
YOu can comment the slide now. As we are done styling it.
And create this slider working. Watch this to understand the working concept of this slider.
Inside app.js . Select our Carousel element and create an empty array to store all slides.
const carousel = document.querySelector('.carousel');
let sliders = [];

let slideIndex = 0; // to track current slide index.
Now create a function createSlide for creating a slide.
const createSlide = () => {
    if(slideIndex >= movies.length){
        slideIndex = 0;
    }

    // creating DOM element
    let slide = document.createElement('div');
    let imgElement = document.createElement('img');
    let content = document.createElement('div');
    let h1 = document.createElement('h1');
    let p = document.createElement('p');
}
In this function. In the start we are increasing or setting our next slideIndex with some if/else condition. And after that we are creating DOM element that we need for our slide. These all elements are exactly same as we had in our index.html.
After creating all these elements. Append/attach these elements to one another to form the HTML strucuture.
{
    // attaching all elements
    imgElement.appendChild(document.createTextNode(''));
    h1.appendChild(document.createTextNode(movies[slideIndex].name));
    p.appendChild(document.createTextNode(movies[slideIndex].des));
    content.appendChild(h1);
    content.appendChild(p);
    slide.appendChild(content);
    slide.appendChild(imgElement);
    carousel.appendChild(slide);
}
this code is inside
createSlidefunction.
After done appending elements to each other. Now set their class names and set image's source.
{
    // setting up image
    imgElement.src = movies[slideIndex].image;
    slideIndex++;

    // setting elements classname
    slide.className = 'slider';
    content.className = 'slide-content';
    h1.className = 'movie-title';
    p.className = 'movie-des';

    sliders.push(slide);
}
And last remember to push the slide inside sliders array.
We are done creating sliders. But our slider won't work why because we have to shift our first slide to the left. For that add this at the end of the function.
{
    if(sliders.length){
        sliders[0].style.marginLeft = `calc(-${100 * (sliders.length - 2)}% - ${30 * (sliders.length - 2)}px)`;
    }
}
And now if you create slides. You'll see our slider works or not.
for(let i = 0; i < 3; i++){
    createSlide();
}

setInterval(() => {
    createSlide();
}, 3000);
We are done with Sliders. Now create video cards.
<div class="video-card-container">
    <div class="video-card">
        <img src="images/disney.PNG" class="video-card-image" alt="">
        <video src="videos/disney.mp4" mute loop class="card-video"></video>
    </div>
    <div class="video-card">
        <img src="images/pixar.PNG" class="video-card-image" alt="">
        <video src="videos/pixar.mp4" mute loop class="card-video"></video>
    </div>
    <div class="video-card">
        <img src="images/marvel.PNG" class="video-card-image" alt="">
        <video src="videos/marvel.mp4" mute loop class="card-video"></video>
    </div>
    <div class="video-card">
        <img src="images/star-wars.PNG" class="video-card-image" alt="">
        <video src="videos/star-war.mp4" mute loop class="card-video"></video>
    </div>
    <div class="video-card">
        <img src="images/geographic.PNG" class="video-card-image" alt="">
        <video src="videos/geographic.mp4" mute loop class="card-video"></video>
    </div>
</div>
.video-card-container{
    position: relative;
    width: 92%;
    margin: auto;
    height: 10vw;
    display: flex;
    margin-bottom: 20px;
    justify-content: space-between;
}

.video-card{
    position: relative;
    min-width: calc(100%/5 - 10px);
    width: calc(100%/5 - 10px);
    height: 100%;
    border-radius: 5px;
    overflow: hidden;
    background: #030b17;
}

.video-card-image,
.card-video{
    width: 100%;
    height: 100%;
    object-fit: cover;
}

.card-video{
    position: absolute;
}

.video-card:hover .video-card-image{
    display: none;
}
Output
And to make video play on hover card. Code this.
/// video cards

const videoCards = [...document.querySelectorAll('.video-card')];

videoCards.forEach(item => {
    item.addEventListener('mouseover', () => {
        let video = item.children[1];
        video.play();
    })
    item.addEventListener('mouseleave', () => {
        let video = item.children[1];
        video.pause();
    })
})
This effect will only work if user click on your site first. If use did not click on your page first then the video will not play because of the google chrome policy.
And the last thing. Let's create cards.
    <h1 class="title">recommended for you</h1>
    <div class="movies-list">
        <button class="pre-btn"><img src="images/pre.png" alt=""></button>
        <button class="nxt-btn"><img src="images/nxt.png" alt=""></button>
        <div class="card-container">
            <div class="card">
                <img src="images/poster 1.png" class="card-img" alt="">
                <div class="card-body">
                    <h2 class="name">movie name</h2>
                    <h6 class="des">Lorem ipsum dolor sit amet consectetur.</h6>
                    <button class="watchlist-btn">add to watchlist</button>
                </div>
            </div>
            ...20+ more cards
        </div>
   </div>
.. repeat this whole block 3-4 times with different card content
.title{
    color: #fff;
    opacity: 0.9;
    padding-left: 4%;
    text-transform: capitalize;
    font-size: 22px;
    font-weight: 500;
}

.movies-list{
    width: 100%;
    height: 220px;
    position: relative;
    margin: 10px 0 20px;
}

.card-container{
    position: relative;
    width: 92%;
    padding-left: 10px;
    height: 220px;
    display: flex;
    margin: 0 auto;
    align-items: center;
    overflow-x: auto;
    overflow-y: visible;
    scroll-behavior: smooth;
}

.card-container::-webkit-scrollbar{
    display: none;
}

.card{
    position: relative;
    min-width: 150px;
    width: 150px;
    height: 200px;
    border-radius: 5px;
    overflow: hidden;
    margin-right: 10px;
    transition: .5s;
}

.card-img{
    width: 100%;
    height: 100%;
    object-fit: cover;
}

.card:hover{
    transform: scale(1.1);
}

.card:hover .card-body{
    opacity: 1;
}

.card-body{
    opacity: 0;
    width: 100%;
    height: 100%;
    position: absolute;
    top: 0;
    left: 0;
    z-index: 2;
    background: linear-gradient(to bottom, rgba(4, 8, 15, 0), #192133 90%);
    padding: 10px;
    transition: 0.5s;
}

.name{
    color: #fff;
    font-size: 15px;
    font-weight: 500;
    text-transform: capitalize;
    margin-top: 60%;
}

.des{
    color: #fff;
    opacity: 0.8;
    margin: 5px 0;
    font-weight: 500;
    font-size: 12px;
}

.watchlist-btn{
    position: relative;
    width: 100%;
    text-transform: capitalize;
    background: none;
    border: none;
    font-weight: 500;
    text-align: right;
    color: rgba(255, 255, 255, 0.5);
    margin: 5px 0;
    cursor: pointer;
    padding: 10px 5px;
    border-radius: 5px;
}

.watchlist-btn::before{
    content: '';
    position: absolute;
    top: 0;
    left: -5px;
    height: 35px;
    width: 35px;
    background-image: url(images/add.png);
    background-size: cover;
    transform: scale(0.4);
}

.watchlist-btn:hover{
    color: #fff;
    background: rgba(255, 255, 255, 0.1);
}

.pre-btn,
.nxt-btn{
    position: absolute;
    top: 0;
    width: 5%;
    height: 100%;
    z-index: 2;
    border: none;
    cursor: pointer;
    outline: none;
}

.pre-btn{
    left: 0;
    background: linear-gradient(to right, #0c111b 0%, #0c111b00);
}

.nxt-btn{
    right: 0;
    background: linear-gradient(to left, #0c111b 0%, #0c111b00);
}

.pre-btn img,
.nxt-btn img{
    width: 15px;
    height: 20px;
    opacity: 0;
}

.pre-btn:hover img,
.nxt-btn:hover img{
    opacity: 1;
}
Output
We are almost done. The last thing we have to do is make this card slider working. For that open app.js again.
// card sliders

let cardContainers = [...document.querySelectorAll('.card-container')];
let preBtns = [...document.querySelectorAll('.pre-btn')];
let nxtBtns = [...document.querySelectorAll('.nxt-btn')];

cardContainers.forEach((item, i) => {
    let containerDimensions = item.getBoundingClientRect();
    let containerWidth = containerDimensions.width;

    nxtBtns[i].addEventListener('click', () => {
        item.scrollLeft += containerWidth - 200;
    })

    preBtns[i].addEventListener('click', () => {
        item.scrollLeft -= containerWidth + 200;
    })
})
And we are done.
So, that's it. I hope you understood each and everything. If you have doubt or I missed something let me know in the comments.
Articles you may find Useful
- Infinte CSS loader
- Best CSS Effect
- Wave Button Hover Effect
- Youtube API - Youtube Clone
- TMDB - Netflix Clone
I really appreciate if you can subscribe my youtube channel. I create awesome web contents.
Thanks For reading.


Top comments (10)
Who said JavaScript is not pure😅. If i used any library here then maybe its not pure but i don't think so that i am using any sort of library here
Muy buen tutorial !!! gracias
Thanks😄
That's awesome
Thanks
Good job.
Now I think about building my own Disney Plus clone for my portfolio. :D
That sounds great 👍
Check out my projects.
I hope you like this
Wow! Good Content
Nice primer on working with DOM using vanilla JS. I might have missed it, but what CSS methodology are you using/recommend?
Some comments have been hidden by the post's author - find out more