
Introduction
Windows Server is a powerful operating system designed by Microsoft specifically for server-based operations. It provides a range of features and functionalities to support various enterprise-level tasks, services, and applications.
It is widely used as the backbone for enterprise IT infrastructures, supporting various tasks like file sharing, user authentication, domain management, and network services.
It serves as a platform for hosting and managing various applications and services, providing a secure and scalable environment.
It is used to create and manage domains, users, group policies, and permissions in an organization's network.
Windows Server can act as a web server hosting ASP.NET applications or other web-based services.
A web server is a software or hardware system that stores, processes, and delivers web content to users over the internet or an intranet. It handles HTTP requests from clients (such as web browsers) and serves web pages, applications, or files in response.
Both play crucial roles in providing a robust infrastructure and services for businesses and individuals looking to establish an online presence, host applications, manage data, and facilitate secure communications over the internet or within organizational networks.
How can one create one on Azure Portal?
This article shows stepwise creation of Window server and also install Web browser into it.
Step 1:
Signing in to the Azure portal
Go to the Azure portal at https://portal.azure.com in a web browser.
Enter your Azure account email address.
Type in your password and log in. If you don't have account, create one.
Step 2:
To create a Virtual machine, Search for virtual machines on the web browser.


Step 3:
We have now come to the display where we work with the following taps:
Basics, Disks, Networking, Management, Monitoring, Advanced, Tags, Review + create
First, we work on the Basics
a. Project Details: This contains the Subscription and Resource group. Leave the Subscription on default and create the Resource group. Existing resource group can be used if they are similar items or project.
In this case, NovemberWorkload is selected, since it has been created.
b. Instance details: The Name of the Window Server, Region to be deployed, Availability zone are shown in the picture below:


c. Administrator account: Choose User ID and Password to log in to this server.

d. Inbound port rules: On the Public inbound ports, click on Selected Ports and Open Ports HTTP(80) and RDP(3389)
Note: Port 80 is the default port for unencrypted web traffic using HTTP. Opening this port allows users to access web services or host web applications on the Windows Server VM. It facilitates the delivery of web content, such as websites or web-based applications.
RDP is a proprietary protocol developed by Microsoft that allows users to remotely access and control a Windows-based computer over a network. Port 3389 is the default port used by RDP for remote desktop connections to Windows Server VMs.

Step 4:
Keep the rest of the setting, but on Monitoring, Disable the Boot Diagnostics.

Step 5:
On the Review and Create Tab, make sure validation is passed before you click on create:

Step 6:
Deployment of the machine


Step 7:
Click on Go to Resource to access the Webserver created

Step 8:
Connect to the Window Server and Download the RDP


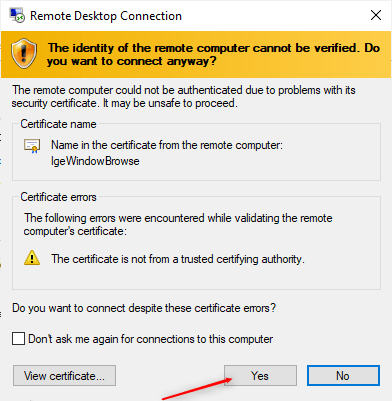
Click on Yes to continue

Step 9:
Installation of Web Server


Top comments (0)