
Hello DEV community!
SEO optimization is a creative process that requires ongoing effort. "How does the search engine see my site? Does it understand the area I'm focusing on?" – these are important questions to ask. Remember, before real people see your content, search engines look at and sort it first. This is like how a librarian puts a Harry Potter book in the fantasy section, making sure readers find it easily.
It's interesting to note that Google sorts content by looking at the whole meaning of the text, not just separate words. So, when you're adding content to your site, it's important to understand how search engines read your content and where they think it belongs.
Instead of trying different things and waiting to see results, you can talk to these search engines directly today. To help with this, in the next 3 minutes, you'll learn how to use a free tool on the Latenode platform to improve your SEO adventure.
Google NLP
There are many cloud services out there, but Google has a special system for reading and analyzing text: Google NLP (natural language processing). This tool can:
- Understand if the text feels positive, negative, or neutral
- Recognize names of people, places, and organizations, and their specifics
- Analyze the structure of the text (like sentences and words)
- And most importantly for us – classify text into content categories
With this tool, we can understand how search engines see our website's content and where they think it belongs. If you want to use the power of Google NLP now and not wait to see slow results, here's a step-by-step guide. Using it, by just entering a website address, you can see your website the way Google does.

Step-by-step Guide
1. Get the API Key
You probably have a Google account. Log in to the Google Cloud Platform console,start a new project by going to the “Resource Management” page. Click on CREATE PROJECT

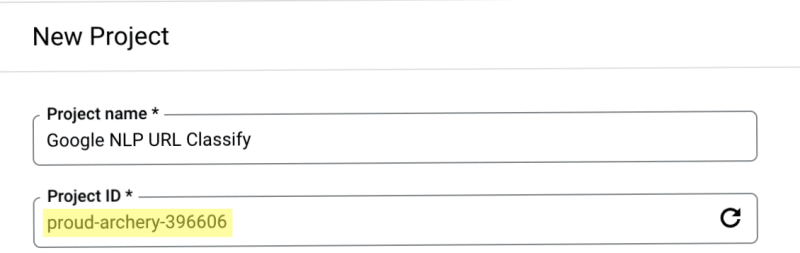
Name your project and generate an ID (highlighted in the screenshot above). If you're new to the Google Cloud Platform, there's a generous $300 bonus awaiting you. With the content classification service, it's quite a hard to deplete this bonus. Make sure to set up payment settings for your account.
When the account and project configurations are ready, turn on the Google Cloud Natural Language API. In the API and Services tab, click on ENABLE API AND SERVICES.

Find the Cloud Natural Language API in the search bar. Click **ENABLE **to activate the API.


Now, you need to make the API key because we'll use curl to send info to the Natural Language API. Go to the API and Services Credentials part of your Google Cloud console. Click on the "Create credentials" and choose API key.

A popup will show your new API key. Save this by copying and keeping it safe.

2. Copy Template
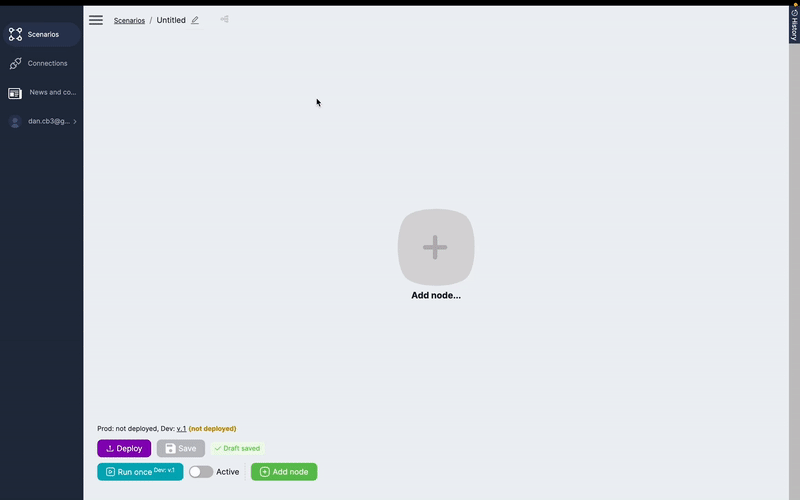
Now, go to the Latenode platform. It's quick and easy here.
First, copy the code from this link:https://latenode.notion.site/Google-NLP-URL-Classify-Latenode-com. This code has a special script that takes text from a website, sends it to Google Cloud, and gets the sorted result.
After copying, put this code into the script editor on the platform (app.latenode.com). Everything will set up by itself.
Our script is a chain of 6 modules, each doing its own job:
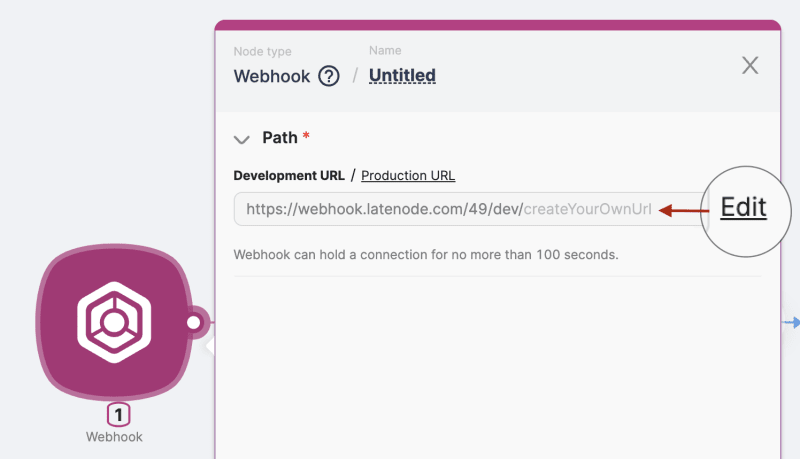
- Webhook: Starts the script and sends the website link with the ?url= parameter.
- Convert Website to Text: Parses the site's content from HTML.
- JavaScript: Cleans the HTML text, removes special symbols, and limits text size.
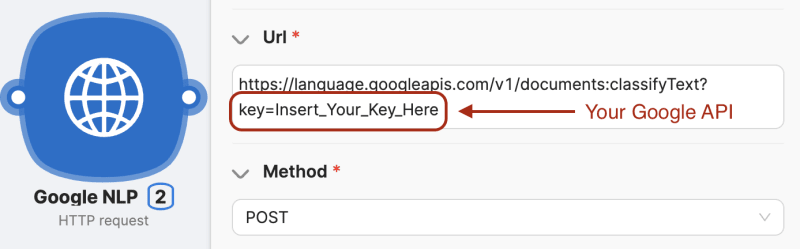
- HTTP request: Sends the clean text to Google NLP and gets the result.
- JavaScript: Makes the data into an HTML table showing Confidence and Name columns.
- Webhook response: Shows the table with categories (Name) and how sure it is about each category (Confidence)
3. Modify Values
Soon you can use this tool. But first, you need to change some things in the code. Right now, you just copied the template.
In the first Webhook part, change the URL, so the code knows to start.
Next, put your API key in the HTTP request section. After that, save and turn on the code.

And there you have it! Classify myriad websites from your browser's address bar. Just use the Webhook URL and add the website you want to sort. Visually, it will look like:
https://webhook.latenode.com/49/dev/CreateYourOwnUrl + ?url=https://apple.com

Join our low-code enthusiast Discord channel. We'll answer any questions about the Latenode platform (app.latenode.com) and how to automate things on it.

Top comments (0)