
Over time, one of the most tiresome and non-rewarding tasks to some developers I know is the setup, maintenance and scaling of servers. Something often goes wrong.
Don't get me wrong, some developers like me enjoy that process.
However, it doesn't scale well and the repetition of tasks can get tiring.
Doing all of this on your own can take some time:
- Operating system maintenance
- Capacity Provisioning - increase or reduce servers(or capacity) to handle different traffic
- Availability and fault tolerance
- Load balancing
- Networking
It's not a wonder that many companies like Netflix, Uber, CodePen, etc are using Serverless technology.
This article will cover the basics of deploying a basic Django(Python) application to Azure App Service, a serverless offering by Microsoft Azure. This will allow you to stop stressing or even stop thinking about servers in your development lifecycle.
What we'll cover:
- What is Serverless anyway? 👀
- Azure App Service
- Django Application setup
- Setting up a basic Django application
- Pushing the code to GitHub
- Deploying to Azure App Service
- Provisioning the target Azure App Service
- Deploy to App Service from GitHub
- Your App is now Deployed!
- What Next?
- Shameless Plug 😭😭
Prerequisites:
- Basic web development understanding.
- Experience with git and GitHub. Here's a simple guide.
- Basic Python and Django experience. (If you'll follow the exact steps under the app setup)
- An Azure Account. (If you'll deploy)

What is Serverless anyway? 👀
Serverless is a cloud systems architecture that involves no servers, virtual machines, or containers to provision or manage.
Your cloud provider dynamically manages the allocation and provisioning of servers.
This allows you to build and run applications and services without thinking about servers.
This reduces the time and money spent on DevOps, allowing developers to focus on the actual coding. Sweet 👌
“Focus on your application, not the infrastructure”
PS, the application will still be running on servers, it's just that you are not the one managing them.
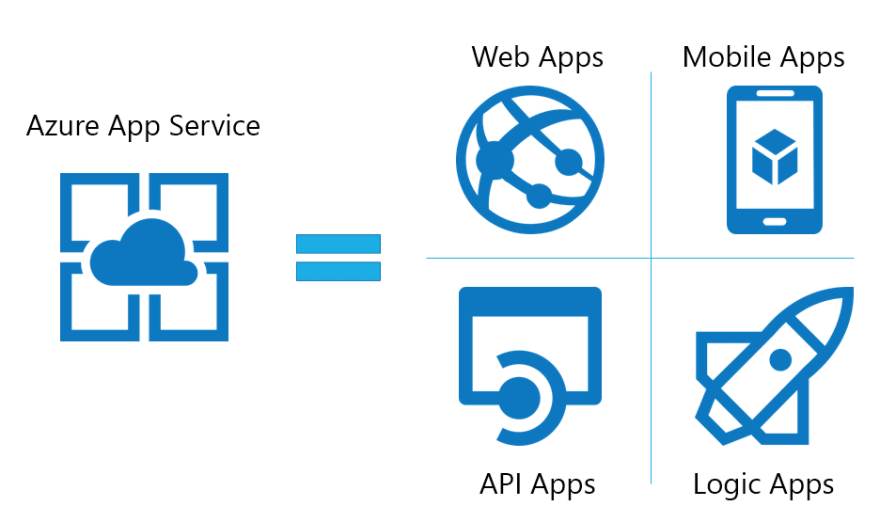
Azure App Service
Azure App Service is a service for hosting web applications, REST APIs, and mobile back ends. You can develop in your favourite language, be it Python, Node.js, .NET, etc without managing infrastructure. Applications run and scale with ease on both Windows and Linux-based environments.
In English, it basically a hosting service that allowing you to host your app or backend without thinking about the server(s).
Find out more here.
Django Application setup
You can skip this step by cloning the code from here:
 paulonteri
/
django_azure
paulonteri
/
django_azure
Serverless Python on Azure: Django hosted on Azure App Service
Django on Azure
The web application used as an example in my writing of the article on Serverless Python on Azure: Django hosted on Azure App Service
Tech
Written in Python3 and Django 3.1.1.
Setup
- First, clone the repository:
git clone https://github.com/django_azure/core.git
cd django_azure
- Create a virtual environment to install dependencies in and activate it:
mkvirtualenv <envname>
source <envname>/bin/activate
- Install requirements in the virtual environment created:
pip install -r requirements.txt
- Run database migrations with this command
python3 manage.py migrate
- Run server to ensure everything is working properly.
python3 manage.py runserver
Article Introduction
Over time, one of the most tiresome and non-rewarding tasks to some developers I know is the setup, maintenance and scaling of servers. Something often goes wrong.
Don't get me wrong, some developers like me enjoy that process However, it doesn't scale well and the repetition of tasks can get tiring.
Doing all…
Basic Application Setup
We are going to use the basic Django starter for this.
If you have Django installed, create a new project with the command: django-admin startproject <yourprojectname>
In my case:
$ django-admin startproject django_azure
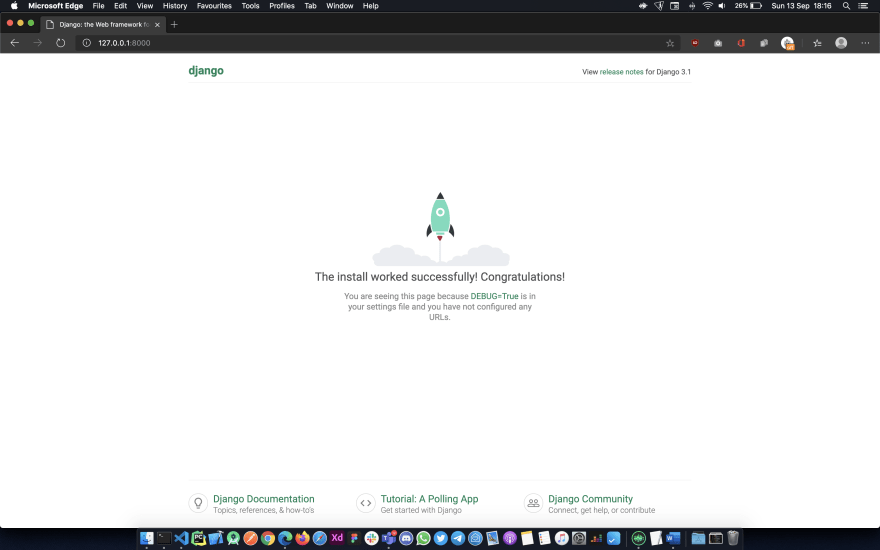
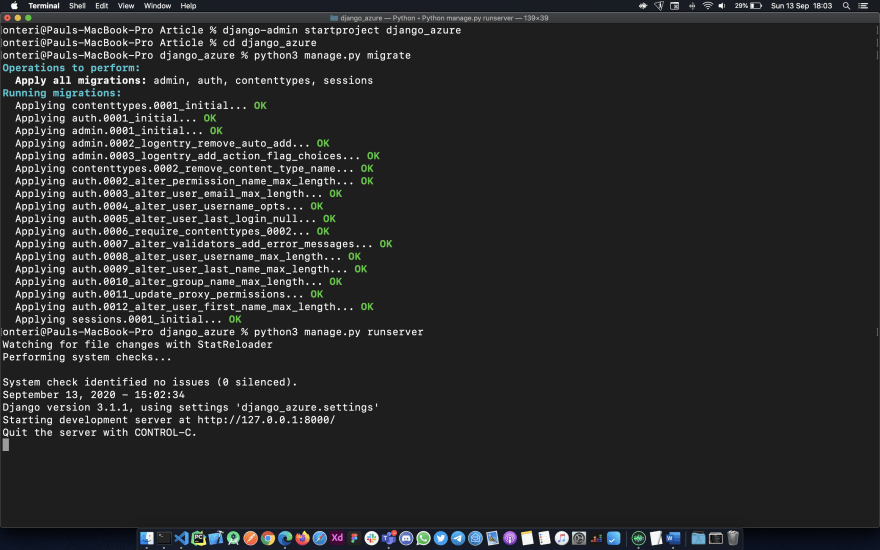
Test that your application is ok by starting the application by running migrations and running the server(from your app's directory):
$ python3 manage.py migrate
$ python3 manage.py runserver
That should give you the default Django starter page running by default on port 8000 of localhost:
The commands I ran:
For the purposes of this, change your ALLOWED_HOSTS setting to allow all hosts:
ALLOWED_HOSTS = ['*']
A more secure way of doing this is to add the following host to your allowed hosts: <instance-name>.azurewebsites.net
In my case:
ALLOWED_HOSTS = ['django-on-azure.azurewebsites.net']
We should also create a requirements file that will be used to list our python dependencies. By convention, it's named requirements.txt
In the root of the project directory create a new file called requirements.txt and add the dependencies your Django app is using in my case (Django default):
asgiref==3.2.10
Django==3.1.1
pytz==2020.1
sqlparse==0.3.1
If you are running your app in a virtual environment, just run the following command instead:
$ pip freeze > requirements.txt
Pushing the Code to GitHub
We are going to initialize our repository, make a commit(s) and push the code to GitHub. This will help in the deployment process.
If you aren't well familiar with git and GitHub kindly use this article as a guide.
Start by creating a new GitHub repo.
Set up the git repo locally
Initialize the project directory as a git repository:
$ git init
Add all the files in your new local repository. This stages them for a commit.
$ git add *
Commit the files that you've staged in your local repository.
$ git commit -m "first commit"
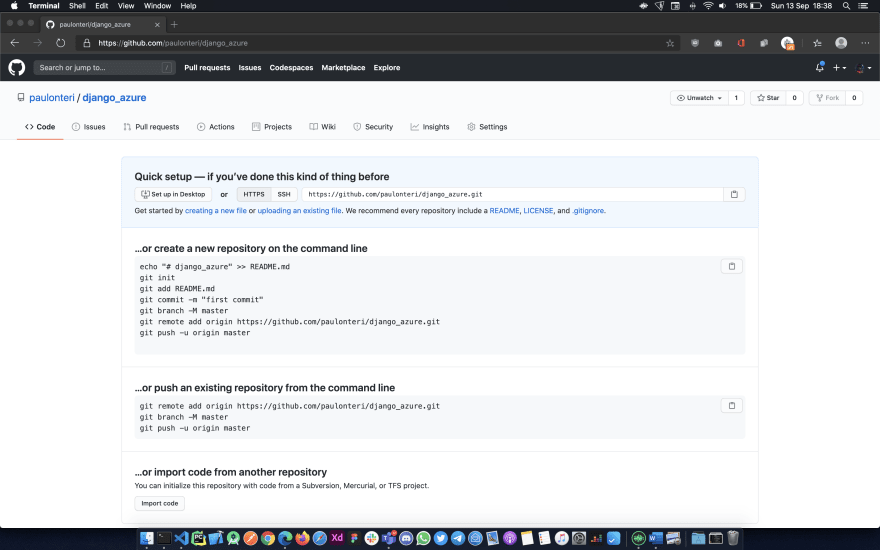
In Terminal, add the URL for the remote(GitHub) repository where your local repository will be pushed in the next step with the command: git remote add origin <remote
Repository Url>
$ git remote add origin <remoterepositoryURL>
In my case:
$ git remote add origin https://github.com/paulonteri/django_azure.git
The remote Repository Url can be found from the GitHub repo you created as shown below:
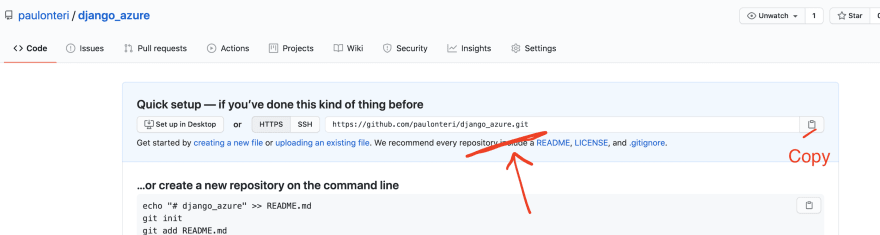
Push the changes in your local repository to GitHub.
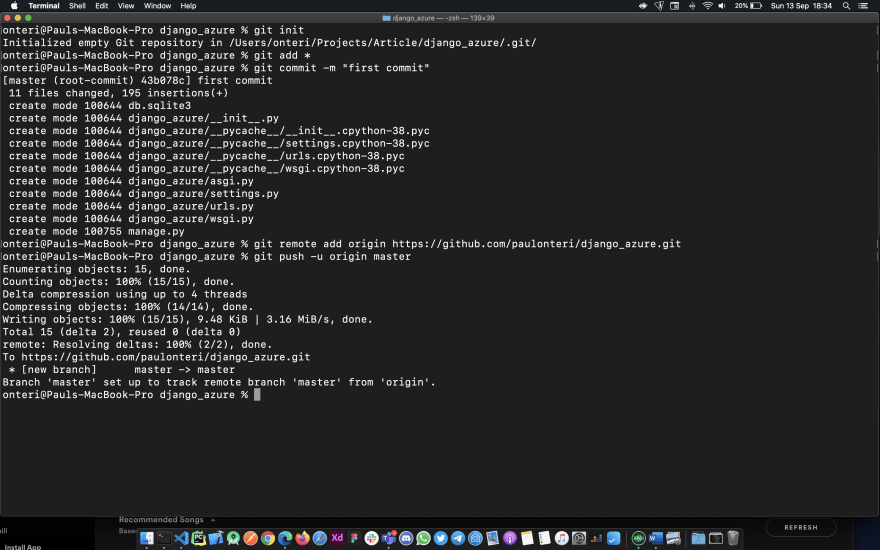
$ git push -u origin master
The commands I ran:
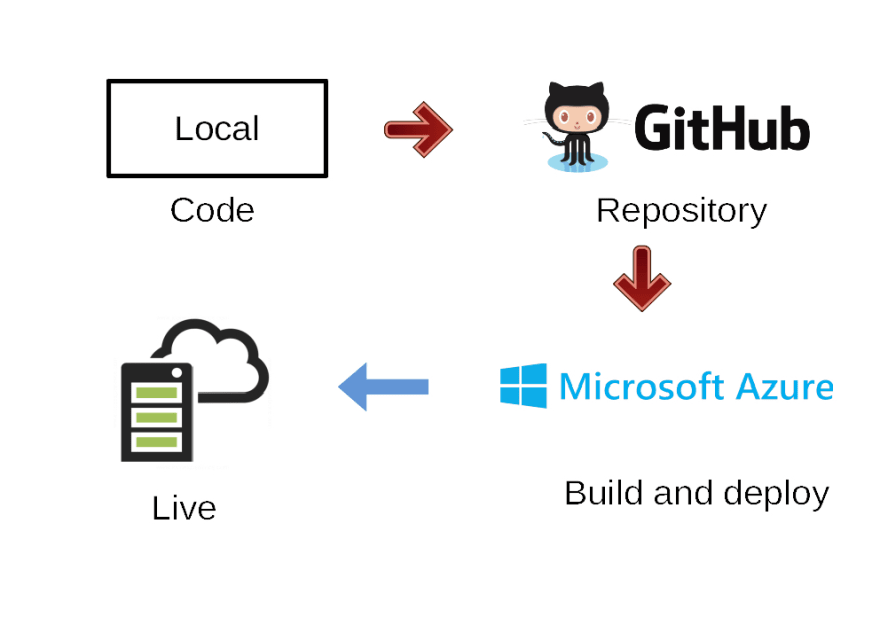
Deploying to Azure App Service
FYI, this 2-5 minute process is a one-time thing.
You set it up once and your website/app will be updated automatically whenever you push code to GitHub.
Provision the target Azure App Service
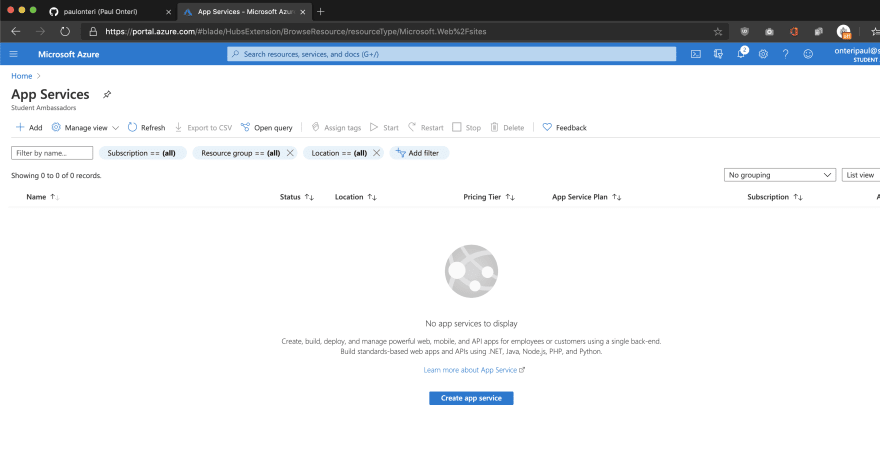
Navigate to your Azure Portal then search for the term 'App Services' then click on the App Services item.
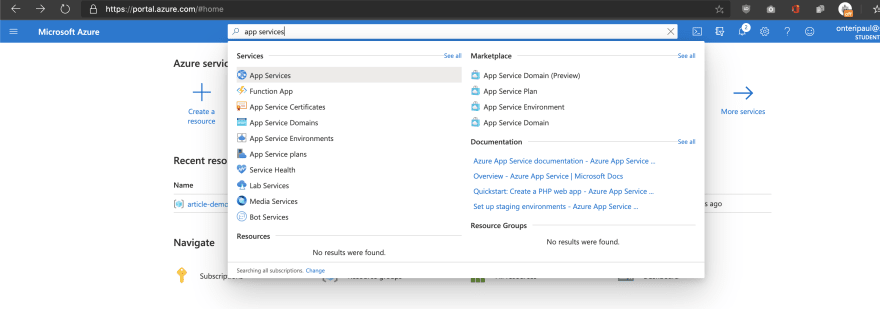
Once in the App Services section, click on the 'Create app service' button. Then create your web app.
Configuration:
The following is the configuration I used:

Subscription
This lets you manage deployed resources and costs.
A resource group is a collection of resources that share the same lifecycle, permissions, and policies. Use resource groups like folders to organize and manage all your resources.
Configuration:
Subscription: default
Resource Group: created a new one
Instance Details
The name is basically a name. What you'd like to name your app.
Under publish you decide whether you are going to push code or a docker image. in our case it's code.
The runtime stack lets you define the underlying programming language for your app, in our case, Python.
The region is the geographic location where your app will be hosted.
Name: django-on-azure
Publish: Code
Runtime stack: Python 3.7
Operating System: Linux
Region: Central US
App Service Plan
This lets you define the compute resources, features and costs that will be associated with your app.
Be careful to choose an appropriate Sku and size as some of them might get pretty expensive.
I would suggest starting with the 'Dev / Test' packages to find the Free option. To change the Sku and size, click on 'Change size' to bring the 'Spec Picker', like so;
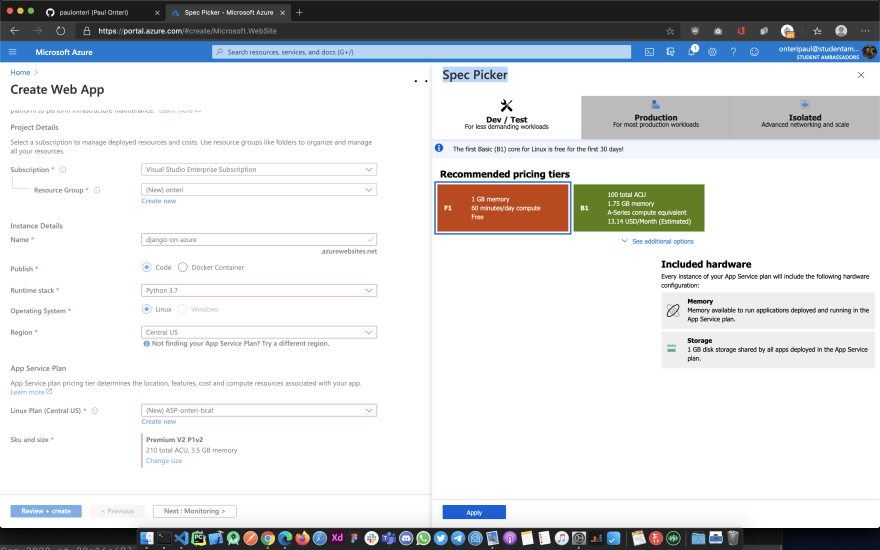
Configuration:
Linux Plan <Region> : created a new one

Sku and size: Free F1, 1 GB memory
Once done, click on the 'Review + Create' button.
Then click create.

That will lead you to such a page:

Under the next steps, click on 'Go to resource' to manage your service.
Deploy to Azure App Service from GitHub
From your resource's dashboard search for the term 'Deployment' then click the 'Deployment Center' button from the sidebar(menu).

You'll see a list of Source Control services that can be used.
Since our code is hosted on GitHub, click GitHub then continue. This might ask you to connect your GitHub account.

Next, we'll see a bunch of build providers
These are the services we can use to automatically build and deploy our web app code. In my opinion, the easiest method, that is also free, is by setting up continuous integration(CI) with GitHub Actions.
Continuous Integration (CI) is a development practice where developers integrate code frequently, preferably several times a day. Each integration can then be verified by an automated build and automated tests then deployed.
Let's select GitHub Actions and click continue.
GitHub Actions are workflows that can handle common build tasks, like continuous delivery and continuous integration. That means that you can use an action to compress images, test your code, and push the code to your hosting platform, etc. Learn more here. In this case, we'll use GitHub actions to automatically deploy our code to Azure App Engine.
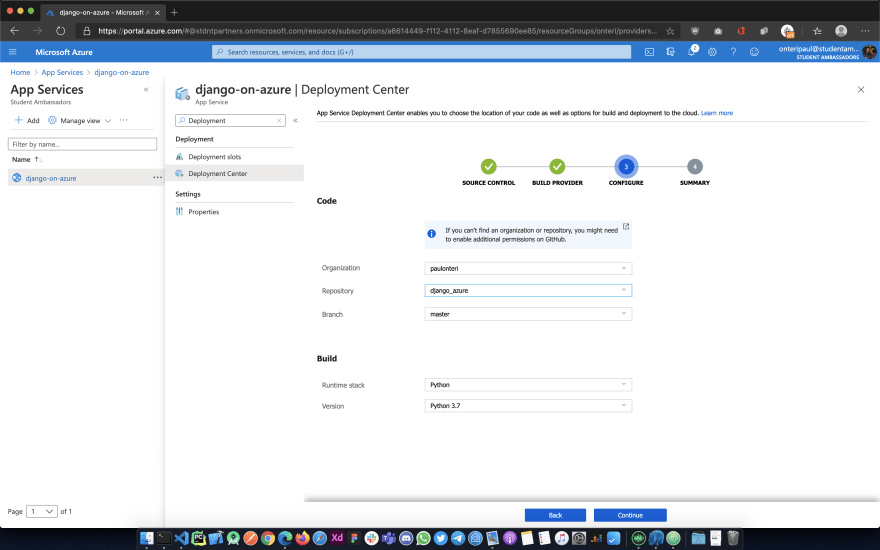
The next step will involve configuring the details of the GitHub repository you set up for the web app. Fill in the details then go to the last step.
Under summary, you confirm that all the details you had provided are correct then click Finish
Your code is now automatically being deployed from GitHub to Azure App Service.
If you navigate to your GitHub repository, you'll notice that there is a new file that has been added under the '.github/workflows' folder. If you didn't manage to create a GitHub repo, you can check out the one I created here.
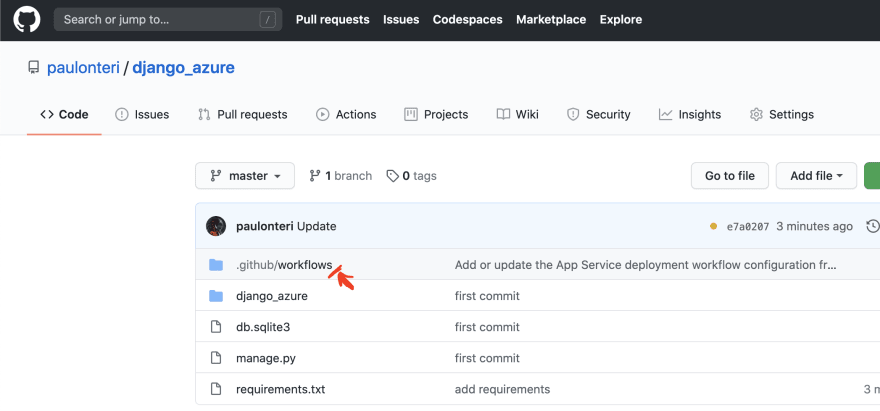
This is a GitHub Actions workflow file
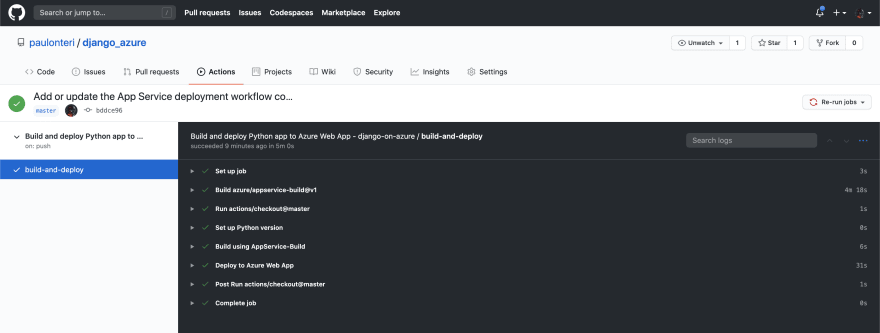
To see the workflow in action, got to the Actions tab in your Github Repository then click on it.
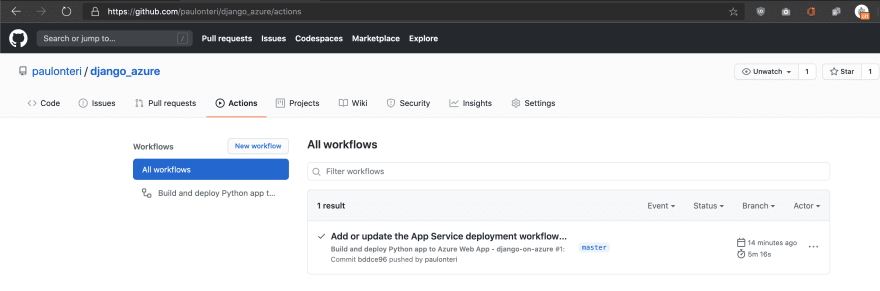
You will be able to see live logs of every workflow step/ job from there. Once it's done, your web app will be live.
Your App is now Deployed! 😎
Like a boss!
Navigate to https://<instance-name>.azurewebsites.net to see it.

Anytime you push code to your repo, this process will happen automatically and your live app will be updated. You set it up once and almost never worry about it again.
It's that easy!
What Next?
- Learn how to deploy to Azure App Service from VS Code 🔥
- Learn about some other Serverless technology like Azure Functions - it has a very generous monthly free tier
- Check out the Microsoft Student Ambassadors, Kenya page for more articles, events and generally anything tech!
- Last and definitely not least, Try to empower every person and every organization on the planet to achieve more!
Thank you for reaching the end of the article!
I hope you learned something.
Shameless Plug 😭
I ❤️ anything around Software Development.
I currently work as a Frontend Dev at a company called Inuua Tujenge, working with React, React Native and Django (Python & JavaScript) almost daily.
Feel free to connect with me. 👌
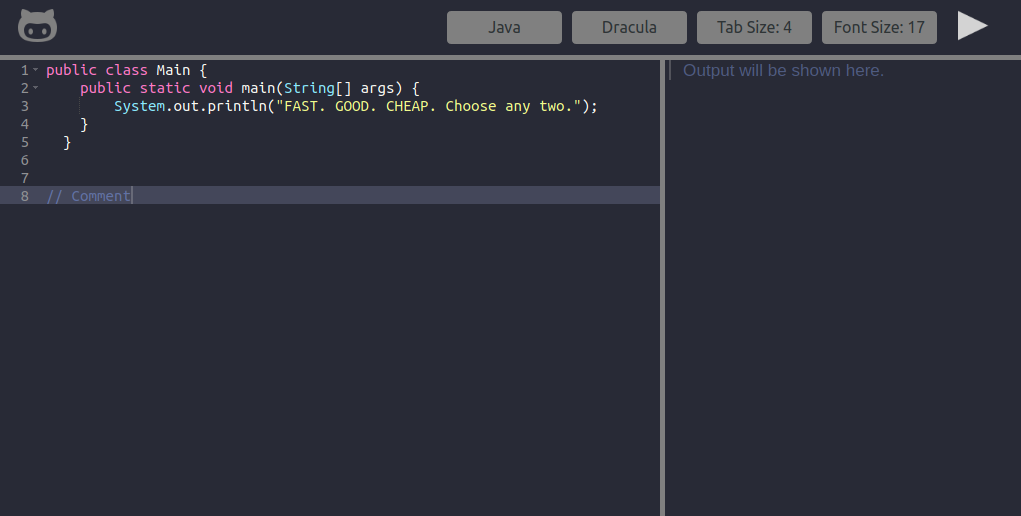
Check out my most recent project - a Remote Code Execution Engine, similar to the ones used for coding on HackerRank and Leetcode.
It currently supports Python, JavaScript, Java, Go, C#, etc.
paulonteri
/
remote-code-execution-environment
Have you ever wondered how code execution on competitive programming websites like leetcode works? Code that runs code. Tried implementing that.
Remote Code Execution App
Remote code execution app built with JavaScript (React, NodeJS & Express).
Try out the live system here.
Have you ever wondered how Remote Code Execution works?
This happens on sites like HackerRank & competitive programming websites. You write some code then it's executed on another computer(server). The results are then shown to you.
I tried implementing that.
Feel free to go through the code, fix bugs, add new features, e.t.c
Local Setup
Requirements
For development, you will only need Node.js and a node global package, Yarn, installed in your environement.
Node
Just go on official Node.js website and follow the installation instructions
Also, be sure to have git available in your PATH, npm might need it (You can find git here).
If the installation was successful, you should be able to run the following command.
$ node --version
v8.11.3
$ npm --version
6.1.0
If…
Thanks for your valuable time.
Peace!

Top comments (6)
Hi Velda, Thanks! 😁
I really hope it will be helpful.
This is very informative. Have really learnt a lot. Is this similar to hosting on Heroku?
Thanks for your feedback! 🔥
They are similar in many ways. Like the deployment process(In some way).
However, I find Azure App service to be more flexible especially around areas involving scaling, security, CDNs and more...
Learn more about Heroku here and Azure App Service here.
Good stuff!
Thanks man!