Postman is a powerful tool for API testing and development. However, one common pain point developers face is the need to manually copy and paste access tokens for each authenticated request. This becomes especially cumbersome when tokens expire or need to be refreshed frequently.
Fortunately, Postman allows you to automate this process using Environments and Pre-request Scripts. By setting up these features, you can automatically capture the access_token from your login response and inject it into subsequent API requests. This streamlines your workflow and eliminates the repetitive task of manually updating tokens.
Here’s how you can set this up:
Steps to Automate Access Token Handling in Postman
1. Create a Postman Environment:
The first step is to create a Postman environment where you will store your access_token.
- In Postman, click on the Environments tab (the gear icon located at the top-right corner).
- Click Create Environment.
- Name your environment and add a variable called
access_token. Leave its value blank for now because the token will be captured later. - Save the environment.
This environment will hold your access token, and you can refer to it dynamically in your requests.
2. Modify the Login Request to Capture the Access Token:
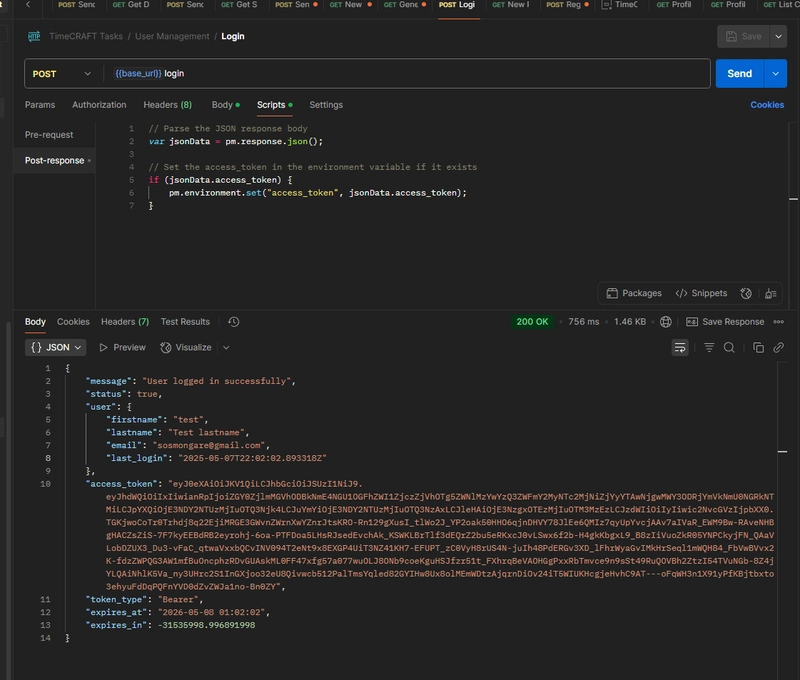
When you make a request to your authentication endpoint (e.g., /login), the server returns an access_token as part of the response. To avoid manually copying this token, you can write a Test script in Postman to capture it and store it in your environment.
Here’s how to do it:
- Open your login request in Postman.
- Go to the Tests/Scripts tab in the request editor.
- Add the following script to capture the token:
// Parse the JSON response body
var jsonData = pm.response.json();

// Set the access_token in the environment variable if it exists
if (jsonData.access_token) {
    pm.environment.set("access_token", jsonData.access_token);
}
This script will automatically extract the access_token from the login response and store it in the environment variable access_token. The token will now be available for all subsequent requests.
3. Use the Access Token in Your Requests:
Once the access token is saved in your environment, you can dynamically reference it in all requests that require authentication.
- Open any API request that requires a Bearer token for authentication.
- Go to the Authorization tab.
- Select Bearer Token as the Authorization type.
- In the token field, enter
{{access_token}}.
Postman will automatically replace {{access_token}} with the actual value stored in the environment, making the process seamless and avoiding manual token insertion.
4. Automate the Workflow:
Once set up, the workflow becomes automated:
- Every time you log in and receive a new token, Postman will capture it and save it in the environment.
- All subsequent requests will automatically use the latest token, without requiring you to manually update it.
This automation ensures that you can focus on testing the API functionality without worrying about token management.
Example Postman Workflow:
Here’s how this workflow plays out in practice:
Step 1: Send a Login Request
- Make a request to your
/loginendpoint to authenticate the user. - The response contains an
access_token. - The
Testsscript captures the token and stores it in the environment variableaccess_token.
Step 2: Send Requests That Require Authentication
- In any subsequent requests that require the access token, simply use
{{access_token}}in the Authorization tab. - Postman will automatically inject the token into the Authorization header.
Conclusion:
You can fully automate token management for authenticated API requests. This approach saves time, reduces manual effort, and ensures that you’re always using the latest token. It’s a simple yet powerful feature that enhances your API testing efficiency.
Happy Coding


Top comments (1)
Thanks!