Having your project stored on GitHub is sweetest and easiest way to backup your project for future purpose.
In this content, I will be reviewing different methods of publishing projects to GitHub.
Before we start, we assume you already have created a GitHub Account, but if you don’t, kindly click here to see how to create a fresh GitHub Account.
Method 1: The Create and Upload Method
This is the method I recommend if you are just trying to backup any project or documented files in GitHub, also this method is best recommended to beginners.
Step 1
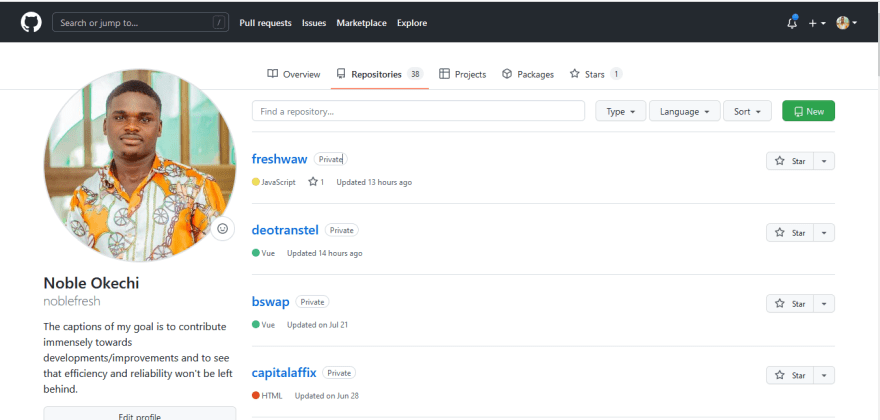
If you are under your Repositories Tab, you should be having a similar screen just like mine above.
Click on the New green button as directed on the snapshot above to start the process.
Step 2

Choose a preferred repository name to suit your project, but for this content, we’ll be using testproject as our repository name.

Complete this process by clicking Create repository button as demonstrated on the snapshot above.
Step 3
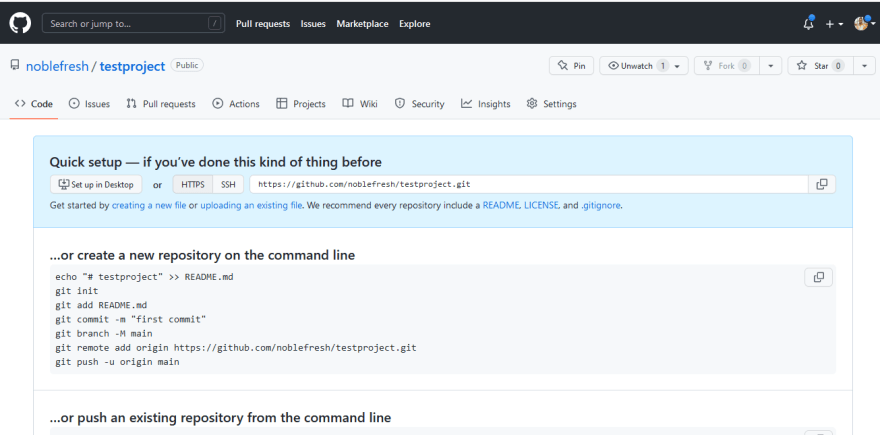
Once your repository has been created successfully according to to Step 2, you should have the above snapshot on your screen.
Click on “uploading an existing file” to continue the process.
Step 4
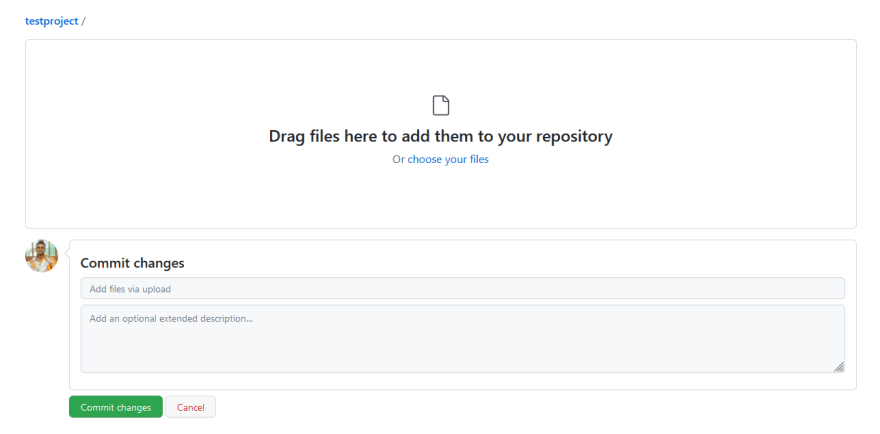
Drag your Project and drop them or choose your files as demonstrated on the snapshot above.
You are free to add statement as commit and lastly, click on commit changes button to complete this method.
Method 2: Publishing from Visual Studio Code Editor
This is the best method I recommend for every software developer.
To start the process, make sure you have written at least “a line of code” in your project and also sign in your GitHub account your VS Code Editor.

To Sign In, click the above icon on your Visual Studio Code Editor
Step 1

Click on “Publish to GitHub” button to continue.
Step 2

Select your repository visibility by clicking on it.
Private: Anyone on the internet can see this repository. You choose who can commit.
Public: You choose who can see and commit to this repository.
Step 3
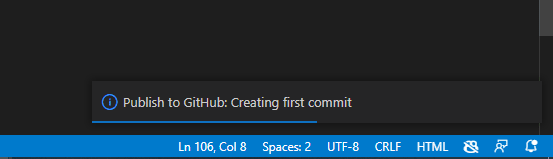
Your project is been published to GitHub and creating its first commit.
Step 4
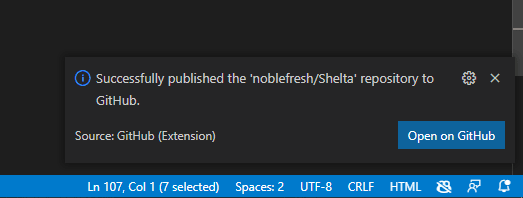
This what you see once your project has published successfully.
Step 5

We can now check our GitHub Repositories to know if the project really completed.
Bravos!!! our project completed successfully.

Top comments (0)