
This is a simple, and beginner-friendly demo to analyze and visualize the data on running containers and where actually the data on the running containers go
We first need to create an image in order to build it and run it.
It can be any simple image. If you are new to Docker and Docker Images, you can refer to here for the meanwhile and use the files provided if you face issues in creating a docker image or writing a docker file.
Now, the motto is to check where does the data go after a running container is killed.
Note: I am on Ubuntu 20.04.
The source code for the files that I am using is here
Here, we will be covering three cases-
- mysql, no mount, no volume ---> data is lost after killing the container
- mysql, mount ---> data is kept in the local file
- mysql, volume ---> data is reserved in the volume
Open up your terminal and navigate to your working directory, i.e, the folder where a Dockerfile exists, so you can run it.
1. No mount, No volume
Expected:
Data is lost after killing the containerExecution:
Run the following command in your terminal-
docker run -d -e MYSQL_ALLOW_EMPTY_PASSWORD=true mysql

As we can see, the necessary files are being downloaded and the image is getting build.
Next, we need to get the container-id of the running container.
Use docker -ps to list all the running containers on your system.
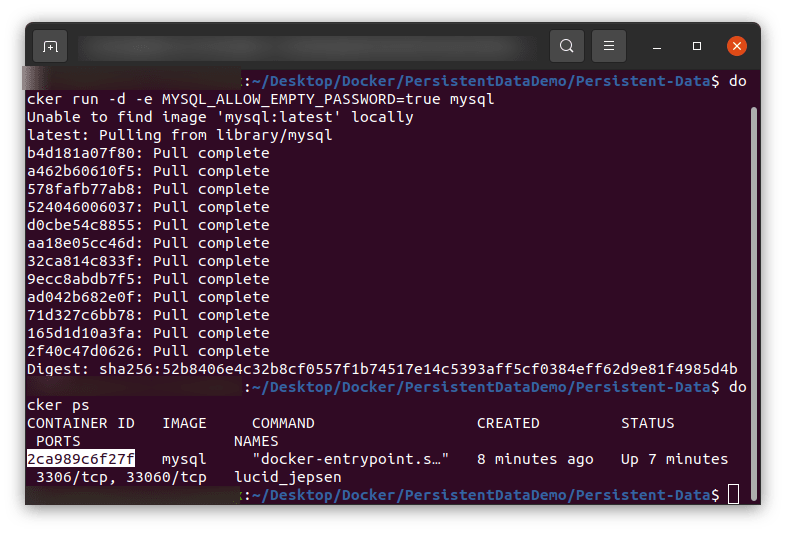
Here, I just have a single container so the output shows the id of a single running container.
Now that we have our container up and running, we can run the following command in order to attach the image to the container:
docker exec -it CONTAINER-ID mysql
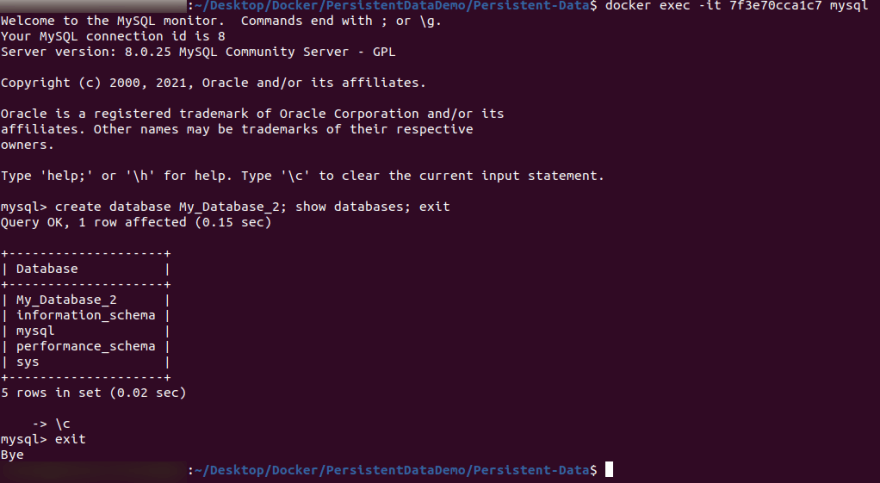
Once we are into mysql, we can create a database, and list it by using-
create database DB_NAME; show databases; exit

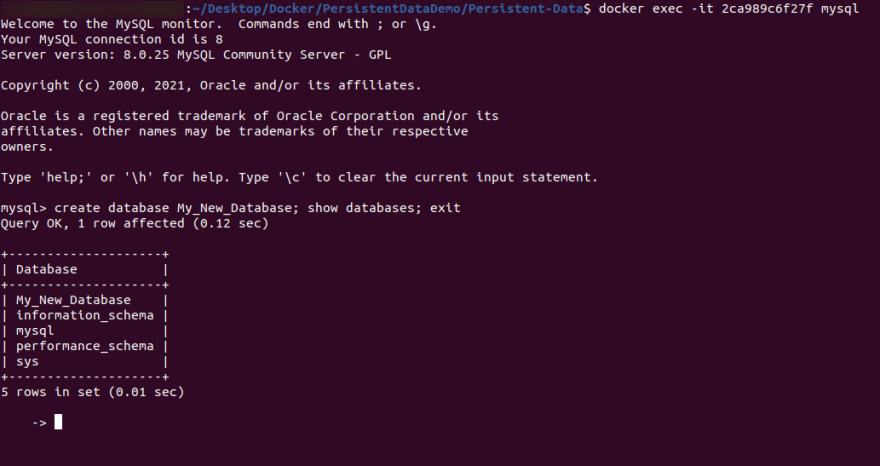
Now you will see that a database is created.
Inside mysql, you can type /c to clear out the inputs and exit in order to exit from mysql.
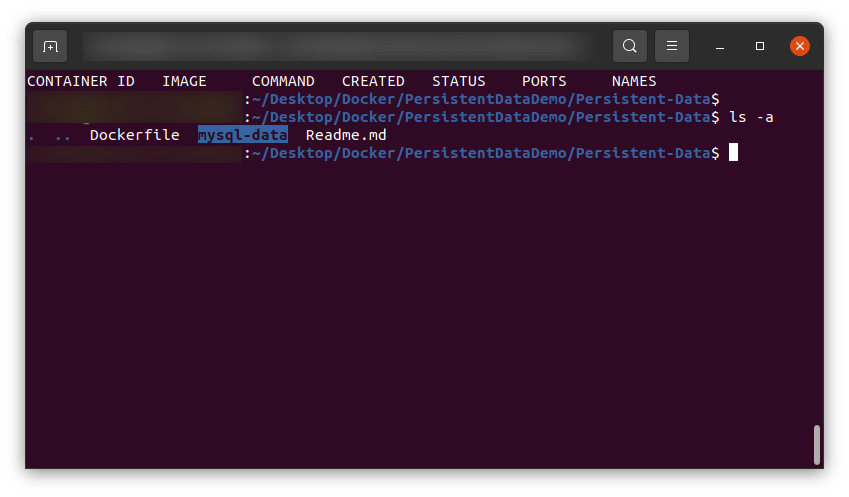
To check whether the database is actually created or not, just ls -a in your working directory, and it will show you your created database.
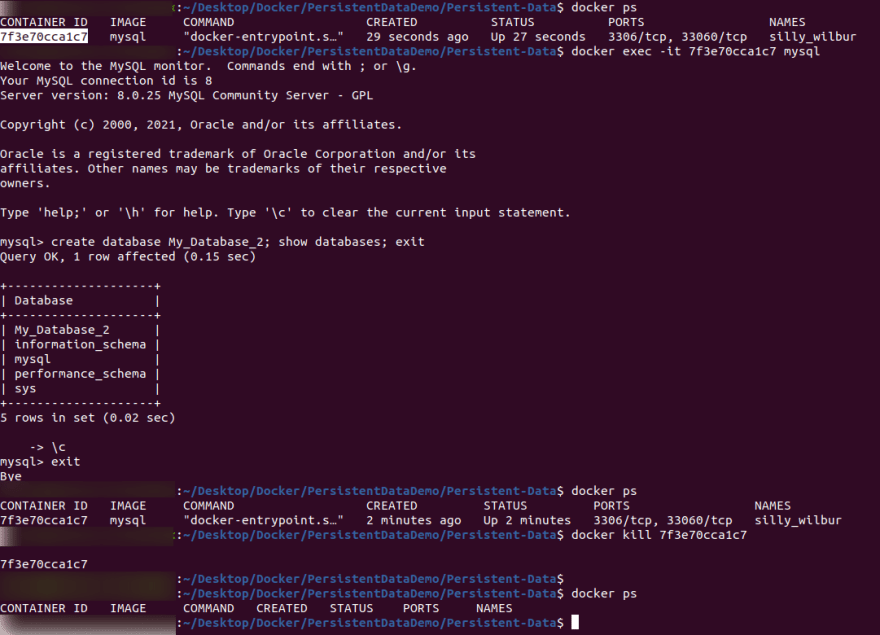
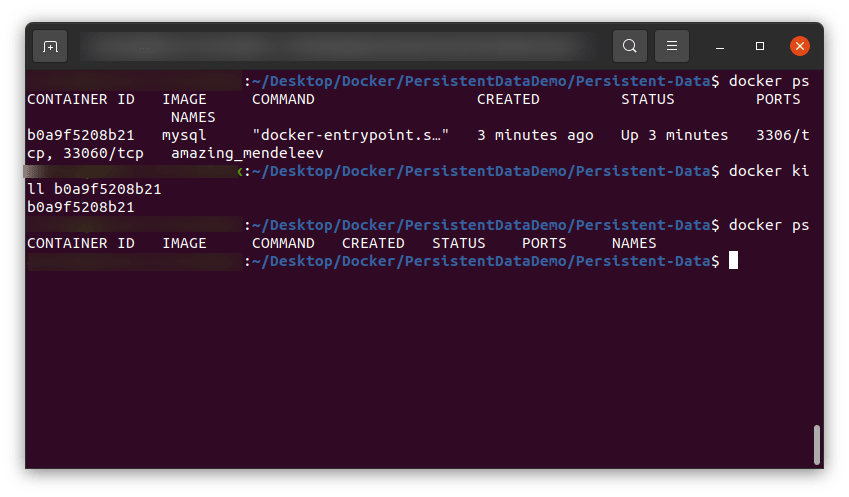
Next, for checking where does the data go, we need to delete the container. Use the container-id by executing docker -ps and kill the running container by executing docker kill CONTAINER_ID.
The container is now killed. This can also be verified by executing docker -ps on the terminal, which shows that no container is up at the current moment.

Now, if you execute ls -a in your working directory, you will not be able to see the database or any other file that you might have created.

Hence, by using No mount, No volume, all the data is lost after killing the container.
2. Mount
Expected:
Data is kept inside of the local folder.Execution:
Run the following command in your terminal-
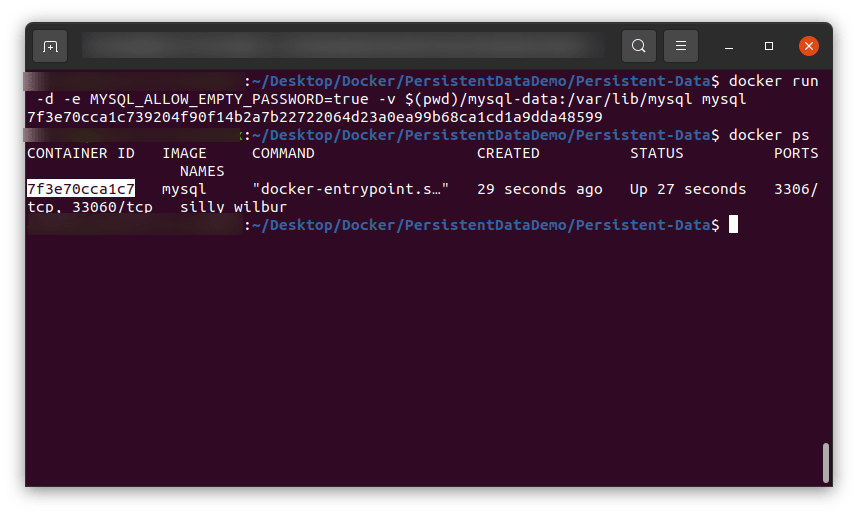
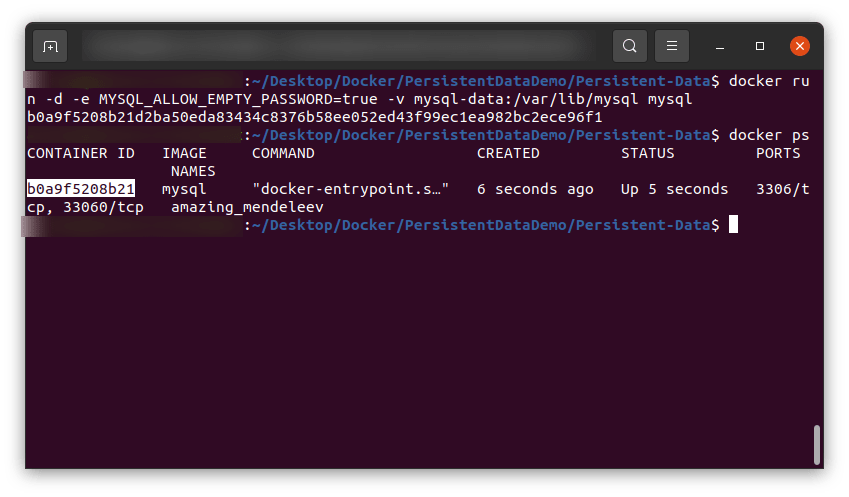
docker run -d -e MYSQL_ALLOW_EMPTY_PASSWORD=true -v$(pwd)/mysql-data:/var/lib/mysql mysql
Next step is the same- we need to get the container-id of the running container.
Use docker -ps to list all the running containers on your system.
Now that our container is up and running, we can run the following command in order to attach the image to the database:
docker exec -it CONTAINER-ID mysql
Basically the tag -it is used frequently to tag images in docker.
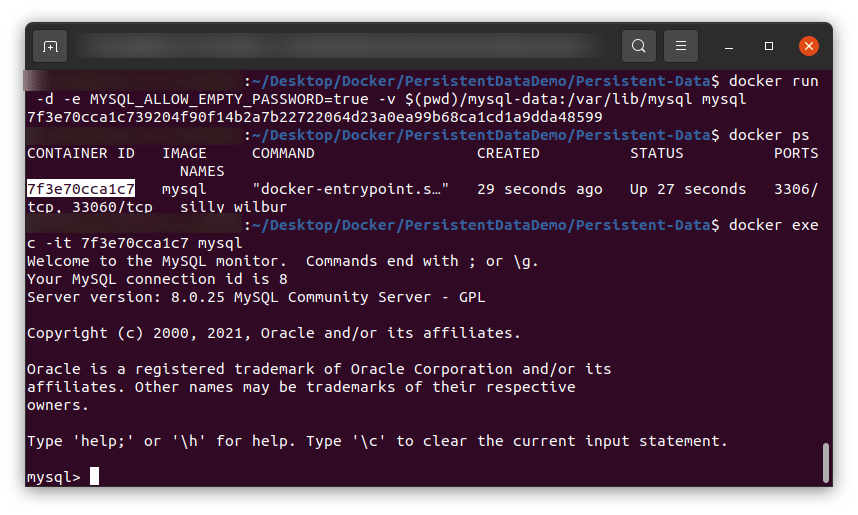
Once we are into mysql, we can create a database, and list the database by using-
create database DB_NAME; show databases; exit
To check whether the database is actually created or not, just ls -a in your working directory, and it will show you your created database.

In order to check for the data, we delete the container. Use the container-id by executing docker -ps and kill the running container by executing docker kill CONTAINER_ID.
The container is now killed. This can be verified by executing docker -ps on the terminal, which shows that no container is up at the current moment.
The full flow can be seen in the snippet below-
Now, if you execute ls -a in your working directory, you will notice that the created database still exits in the local folder.
Hence, by using Mount, the data is kept in the local folder even after the container has been killed.
3. Volume
Expected:
Data is preserved inside the volume.Execution:
Run the following command in your terminal-
docker run -d -e MYSQL_ALLOW_EMPTY_PASSWORD=true -v mysql/data:/var/lib/mysql mysqlin order to start up and run the container.
The next steps are the same as the above two, that is, to get the container-id of the running container using docker -ps and then attach to the database using the command-
docker exec -it CONTAINER-ID mysql

Now that we are into mysql, we can create a database, and list the database by using-
create database DB_NAME; show databases; exit

And the database is created.
You can type /c to clear out the inputs inside mysql and exit in order to exit from mysql.
Now we want to check for the data existence, so we delete the container. Use the container-id by using docker -ps and kill the running container by executing docker kill CONTAINER_ID.
The container is now killed. This can be verified by executing docker -ps on the terminal, which shows that no container is up at the current moment.
Now, if you will want to check for the data in the volume-
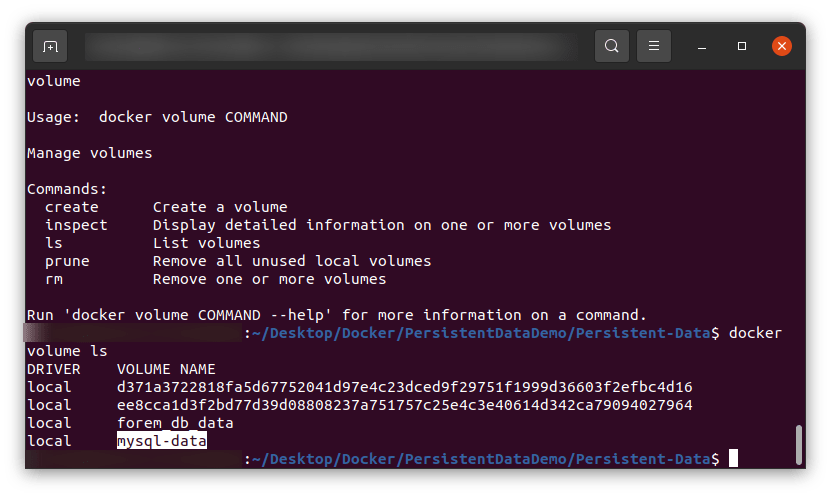
By simply typing volume on the terminal, we will see that there are a bunch of options provided for us in order to help use the volume command-
One of those is the volume ls. This command lists all the volumes present on our local machine.
We just execute volume ls on the terminal. In the output, we can see that our created database mysql-data still exists even after deleting the container.
Another command that can be used here is the volume inspect VOLUME-NAME
On executing the above command, it will display the details on the particular volume. It can be seen in the snippet below-
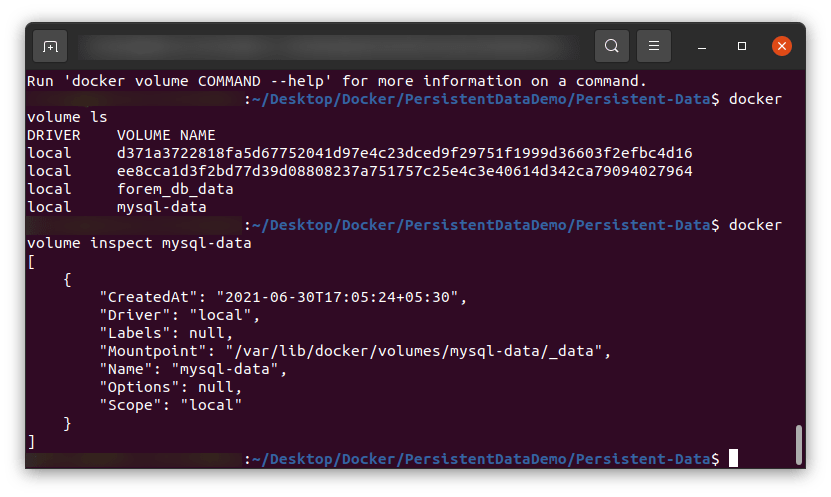
Hence, by using Volume, we can see that the data is kept preserved in the volume even after the container has been killed.
This was pretty much for analyzing and getting a basic idea of the persistent-data on running containers.
If you are new to the topic you can refer to -> Where does the data go
New to Docker and Containers? Refer to -> Beginner's guide to Docker
Some additional resources for help:
Inspect Docker Volume
Digital Ocean on Docker Volumes
Thanks for reading :)

Latest comments (1)
Readers feel free to contact in case of any doubts. 😄