
This post was originally published on my personal blog. Check it out!
👋 Introduction
Most of Temporal’s official deployment guides focus on Kubernetes. While Kubernetes is powerful and battle-tested for large-scale workloads, it also comes with significant overhead — both financially (AWS EKS clusters aren’t cheap 💸) and operationally (node upgrades, cluster maintenance, networking complexity).
For many teams, especially when just getting started, that’s more than you actually need.
This guide walks through deploying Temporal workers on AWS ECS with Terraform. Using ECS (especially with Fargate) can reduce infrastructure costs by ~70% while still providing elasticity, resilience, and production-ready reliability. 💪
📓 Note
Amazon Elastic Container Service (ECS) is a fully managed service for running Docker containers on AWS.
It allows you to deploy, manage, and scale containerized applications without manually handling servers or complex orchestrations.
ECS gives you two ways to run containers:
- ECS on EC2 — you manage the EC2 instances that run your containers.
- ECS on Fargate (The focus of this blog) — AWS manages the infrastructure; you just define your containers and how many to run. This gives you a completely serverless architecture.
ECS handles container scheduling, load balancing, scaling, and networking — so you can focus on your application, not the plumbing.
🏆 By the end, you’ll have:
- Auto-scaling Temporal workers on ECS (prioritizing Fargate Spot instances when available).
- Terraform-managed infrastructure with remote state in S3.
- Optionally, CI/CD pipelines via GitHub Actions to build, publish, and deploy.
- A working Temporal workflow with one activity.
In short: a reproducible, extensible setup you can grow into production just by adding your business logic.
🐦 Bird’s-Eye View
Before diving into the setup, let’s zoom out and see how all the pieces fit together.
You’re running Temporal Cloud or Self-hosting Temporal Server as the orchestration layer, while your workers live inside AWS ECS Fargate, and all of it is wrapped in infrastructure-as-code (IaC) through Terraform.
👉 Think of it like this:
Temporal → brain 🧠
ECS Fargate workers → muscles 💪
VPC + Terraform → skeleton 🦴 keeping everything in place.
From a networking perspective: your workers live in private subnets, they pull Docker images from Amazon ECR (Elastic Container Registry), talk to Temporal Cloud or a Self-hosted Temporal Server, and fetch secrets from Secrets Manager — all securely, with NAT and VPC endpoints handling connectivity.
Additionally, the Terraform state is safely stored in S3, so multiple developers or CI/CD pipelines can collaborate without fear of stepping-on each others changes.

📓 Note
In this blog, we’re focusing on how to connect Temporal Workers running in AWS private subnets to external orchestration endpoints — either Temporal Cloud or a self-hosted Temporal Server running locally (via Ngrok).
This design intentionally demonstrates how workers inside a VPC can securely reach internet-accessible resources while remaining isolated from inbound traffic.
In a production environment, you could alternatively host Temporal Server inside your AWS VPC — allowing internal-only communication between workers and the server.
We’ve omitted that configuration here for simplicity, since the focus is on showing how private Fargate tasks of Temporal workers connect outward safely and reliably.
🏗️ Architecture Components
💡 Tip
This section breaks down the core AWS architecture components we'll be using — perfect if you’re new to the cloud or need a refresher. 🍹
If you already know your way around VPCs, subnets, and gateways etc. feel free to skip ahead.
🦴 Virtual Private Cloud (VPC) - The Skeleton of Your AWS Neighborhood
A logically isolated virtual network in AWS where you define your own IP ranges, subnets, and routing.
Think of the VPC as both the framework (the skeleton) of your AWS environment and the private neighborhood where everything lives. 🏡
- You decide the street map (IP ranges).
- You layout the streets inside it (subnets).
- You choose where cars can drive (routing).
- It’s still inside the big city (AWS), but only you control who gets in, who gets out, and how things move around. 🚦
🛣️ Subnets — The Streets of Your Neighborhood
A subnet is a slice of your VPC’s IP range used to group resources.
Subnets can be:
- Public → A public street connects straight to the highway (Internet Gateway) — anyone can drive in and out. 🚗💨
- Private → A private street doesn’t connect to the highway. 🚧 To access external resources, cars must first pass through a special toll booth (NAT Gateway) or utilize secret tunnels (VPC endpoints) to reach specific AWS services. 🛣️✨
💡 Tip
Why bother with private subnets?
- Private subnets limit exposure of your temporal workers to the internet.
- Ensures all outbound traffic goes through the Internet Gateway for control and monitoring.
- Follows AWS best practices for ECS + Fargate workloads that consume external services.
🚇 VPC Endpoints — The Secret Tunnels
VPC endpoints provide private connections to AWS services without sending traffic over the public internet.
Think of them like secret tunnels 🕳️✨ from your neighborhood (VPC) straight to certain AWS stores like S3 or Secrets Manager.
This keeps your data inside AWS’s private network — safe, fast, and never exposed to the open internet.
🌐 Internet Gateway (IGW) — The Highway On-Ramp
An Internet Gateway is the VPC’s connection to the public internet. It provides two-way connectivity between your VPC and the outside world.
- It's directly attached to VPC.
- Only public subnets (with routes to the IGW) can use it directly.
- Private subnets can't talk to the Internet Gateway directly.
We added an Internet Gateway to enable public access and to allow private subnet resources (like Temporal workers) to reach the internet via the NAT Gateway when needed — for example, to connect to Temporal Cloud or a Self-hosted Temporal Server securely.
🚧 NAT Gateway — The Toll Booth
A NAT Gateway (Network Address Translation Gateway) is a managed AWS service that allows private subnets to reach the internet without being exposed to it.
Here's how it works:
It sits inside a public subnet.
Private subnets route their outbound internet traffic through the NAT Gateway.
The NAT then forwards it through the Internet Gateway.
In other words, private instances can reach the internet, but nothing can come in directly 🎉
Think of the NAT Gateway as a toll booth 🚧💳 at the edge of your private street. Cars (private subnet resources) can’t drive straight onto the highway 🛣️. Instead, they go through the toll booth (NAT Gateway), which gives them a special pass. 🎟️
This way, private cars can go out to the highway (e.g. download updates, reach Temporal Cloud) but no one from the highway can drive straight into your private neighborhood.
This again a crucial piece in the puzzle so our private Temporal workers can securely reach Temporal Cloud, a Self-hosted Temporal Server or any other external services.
🧠 Temporal — The Brain
Temporal acts as the control center for your workflows. It tracks workflow state, retries, timers, and execution history — ensuring everything runs in order and nothing slips through the cracks.
- It manages task scheduling and queues.
- Workers connect over the internet to Temporal Cloud’s or Self-hosted Temporal Server's endpoint to poll, fetch and execute tasks.
🚢 Amazon ECR — The Container Registry
-
Amazon Elastic Container Registry (ECR) stores your worker Docker images.
Every time you update your code, a GitHub Actions workflow (
.github/workflows/build-and-publish-ecr-dev.yaml) automatically builds and pushes a new image to ECR.
ECR act as the "warehouse" where your latest worker code packaged and stored, ready for ECS to pull and run.
🔐 AWS Secrets Manager — The Vault
AWS Secrets Manager securely stores sensitive connection details such as your Temporal endpoint, port, namespace, and API key.
At runtime, these secrets are injected directly into ECS tasks — no hardcoding, no plaintext configs. Your workers get exactly what they need to authenticate and connect, safely.
🏘️ ECS Cluster — The Control Room
The ECS cluster is where your Temporal workers live and operate, running as Fargate tasks.
- Autoscaling is configured via CloudWatch alarms on CPU usage:
- Scale-out policy adds workers when CPU > 30%.
- Scale-in policy removes idle workers when CPU < 20%.
- This setup delivers a secure, cost-efficient, self-managing and self-healing worker fleet — no need for Kubernetes overhead and maybe even enough savings 💰 to keep you stocked with more instant ramen. 🍜 😉
💪 ECS Fargate — The Muscle
AWS Fargate provides the compute power behind your ECS tasks — a serverless, container-based infrastructure that eliminates server management entirely.
- Containerized Workers → Temporal workers are packaged into Docker images and deployed as ECS services.
- Image Delivery → Images are built and published to Amazon ECR (can be manually or automatically via GitHub Actions), then pulled by ECS at deploy time.
- Networking → Tasks run inside private subnets, pull images from ECR, and connect outbound to Temporal Cloud or a Self-hosted Temporal Server through the NAT Gateway.
-
Capacity Providers → ECS can use both On-Demand and Spot capacity.
- In this setup, Spot is prioritized to reduce costs.
- On-Demand acts as a fallback for reliability.
- If a Spot instance is interrupted (2-minute warning), Temporal automatically retries tasks on other workers.
- Pay-as-you-go → Billing is only for CPU and memory actually used.
- Secrets & Config → Environment variables (namespace, API key, endpoint, etc.) are securely injected from AWS Secrets Manager at runtime, allowing workers to register and run workflows seamlessly.
🔍 Amazon CloudWatch — The Observability Dashboard
Observability is handled entirely through Amazon CloudWatch:
- CloudWatch Logs → all worker/container logs ship here and are centralized.
- CloudWatch Alarms → trigger autoscaling actions when thresholds are crossed
- CloudWatch Metrics → Track CPU, memory usage, scaling history to spot trends or issues.
CloudWatch ties it all together providing, monitoring, alerting, and scaling decisions in one place.
📈 Autoscaling — The Reflexes
Autoscaling keeps your worker fleet responsive and efficient.
- CloudWatch Alarms monitor CPU utilization in real time.
- When usage is high, ECS automatically scales-out more workers.
- When usage is consistently low, ECS scales-in to save costs automatically.
It’s the system’s built-in reflex — expanding under load and contracting when idle.
😎 Data flow
Now that we’ve covered the components, let’s quickly walk through how data actually moves through the system, as defined in the above diagram — step by step.
- Client Trigger → A client app (👩💻) calls the Temporal Cloud or Self-hosted Temporal Server API to trigger a workflow.
- Task Scheduling → Temporal Cloud or Self-hosted Temporal Server adds the workflow’s tasks to its internal queue.
- Worker Polling → ECS Fargate workers continuously poll the Temporal queue and pick up available tasks.
- Execution → Workers run the assigned activities — this is your business logic 👔 (in the linked demo example, we just simply save a text file to S3 bucket).
- Results & Updates → Workers send results and progress updates back to Temporal Cloud or a Self-hosted Temporal Server.
- Monitoring & Scaling → CloudWatch tracks performance metrics and automatically scales the number of workers based on load.

✨ Why this architecture works well:
- Resilient: Workflows survive worker crashes. Temporal guarantees retries & state persistence, which is super useful, as we use mainly Spot instances.
📓 Note
Spot instances are ephemeral and can be terminated with a 2-minute warning. If the worker simply "dies", the task will fail with a
TimeOutError, and Temporal will reschedule the task to be executed by another worker.
Secure: Workers live in private subnets, and secrets are injected securely at runtime - never hardcoded.
Cost-efficient: Fargate Spot + Auto-scaling means you only pay for what you use.
Scalable: Worker capacity can multiply within minutes when workflow volume spikes.
Maintainable: Infrastructure is managed via Terraform, with state stored securely in S3.
📝 Prerequisites
Before you begin, ensure you have:
-
Either:
- Temporal cloud account, if you're using Temporal Cloud
-
Sign up at Temporal Cloud and create a
namespace. - Run Temporal Server locally (see GitHub repo on how)
-
An AWS account with
AdministratorAccess- You’ll need permissions to create VPCs, ECS clusters, Secrets, IAM roles, and CloudWatch alarms.
Python 3.12
Terraform >= 1.13.3
-
GitHub
- A GitHub repo to store your code and Terraform configurations.
Some nice champagne to celebrate in 30 minutes, when we are done 🥂 (optional but recommended).
👉 Full code is available here: GitHub Repo.
💻 How to set it up
1. 🤫 Store Temporal secrets in AWS Secrets Manager
First, you’ll need to store your Temporal Cloud or a Self-hosted Temporal Server credentials in AWS Secrets Manager so that ECS tasks can fetch them securely at runtime.
These secrets allow your workers to authenticate and connect to Temporal without exposing credentials in your codebase.
⚠️ Warning
Never commit secrets to version control!
Create a new secret (for example, dev/sample-config) in the us-east-1 region — the same region where your ECS cluster will run — with the following key–value pairs:
{
"TEMPORAL_NAMESPACE": "default",
"TEMPORAL_SERVER_ENDPOINT": "temporal.cluster-xxxx.us-east-1.aws.cloud.temporal.io", // Ngrok url if you're self-hosting locally
"TEMPORAL_SERVER_PORT": "7233", // Not needed if tunneling through Ngrok
"TEMPORAL_API_KEY": "ey..." // Not needed if self-hosting locally
}
📓 Note
Replace the values above with the ones from your Temporal Cloud account. The API key should come from the Temporal Cloud console.
If you’re running a self-hosted Temporal Server locally, replace
TEMPORAL_SERVER_ENDPOINTwith your Ngrok URL, and omitTEMPORAL_API_KEY, it’s only needed for Temporal Cloud.
You can skip configuring rotation on AWS Secrets Manager for this demo.


2. 🦄 Terraform Infrastructure Setup
❗ Important
This section assumes you have a basic understanding of Terraform — how it works, and how a Terraform project is typically structured.
The layout we’ll use here is a hybrid of the official HashiCorp repository structure and the approach outlined in Yevgeniy Brikman’s excellent book, Terraform: Up & Running.
We’ll use four main folders in our Terraform repository:
-
terraform/bootstrap/- one-time setup to create the S3 bucket for remote state storage. -
terraform/global/- sources shared across all environments or needed before environment deployment (for example, ECR, IAM roles, or Route53 zones) -
terraform/live/- environment-specific configurations.- For this demo, we’ll create only a
devenvironment, but you can easily extend tostaging,production, or others later.
- For this demo, we’ll create only a
terraform/modules/- reusable building blocks such networking, ECS cluster and service definitions that are referenced by the live environment configurations.
📓 Note
If you’re new to Terraform, you might wonder: why do we need a separate setup just for the state files?
When you run Terraform, it generates a state file — basically a snapshot of everything Terraform has created and manages. That state file has to live somewhere safe.
Storing it only on your laptop is risky (imagine spilling coffee on it and suddenly losing all records of your infrastructure 🙃 — not exactly the ideal way to setup your new startup ☕💻🔥).
That’s why we store it in Amazon S3 as a remote backend: durable, centralized, and accessible to your whole team.
But here’s the catch: Terraform needs an S3 bucket to store state, but the bucket doesn’t exist until Terraform makes it — this is what’s often called IaC's classic chicken-and-egg problem. 🐥🥚
So the solution is to bootstrap:
1) Run a small, one-time Terraform setup that creates the S3 bucket and state locking.
2) Update your main Terraform project to use that remote S3 backend for storing state.
This way, the chicken (Terraform) has a safe place to lay its egg (the state file). 🐣🥚
An additional benefit: because Terraform state is stored in plain-text by default and may include secrets or config values, placing it in an encrypted S3 bucket (with proper access control) helps keep those values safe.
Ready? Let's do it! 🏁
i. 👯♂️ Clone the Repository
After setting up your AWS Secrets, clone or fork the repository so you can deploy the demo and build on top of it.
git clone https://github.com/papnori/temporal-ecs-terraform.git
cd temporal-ecs-terraform
ii. 👢 Bootstrap the Amazon S3 bucket for storing Terraform State
Next, we’ll create the S3 bucket that will hold the remote Terraform state for our infrastructure.
-
Change directory into
terraform/bootstrap/folder:
cd terraform/bootstrap/
-
Open
terraform/bootstrap/providers.tfand temporarily comment out thebackend "s3" {}block (line 8-14).
📓 Note
This code block responsible for using the state file from S3 bucket.
While commented out, Terraform fallsback to using a local state, as the S3 bucket does not exist yet.
It should look like this:
   #   backend "s3" {
   #     bucket       = "my-little-sample-terraform-state" # name of the bucket - globally unique
   #     key          = "bootstrap/terraform.tfstate"      # path to the state file in the bucket
   #     region       = "us-east-1"                        # region of the bucket
   #     use_lockfile = true                               # instead of dynamodb
   #     encrypt = true # encrypt the state file
   #   }
⚠️ Warning
Change the bucket name in
terraform/bootstrap/main.tf(line 2 in the file) andterraform/bootstrap/providers.tf(line 9) to your own, unique bucket name.⚠️ Warning
Important: S3 bucket names need to be *globally unique* i.e. your bucket name should be unique across all AWS accounts and regions. You need to change the bucket name above to be compliant of this requirement otherwise bucket creation will fail.
- Initialize the Terraform backend and download the AWS Provider:
terraform init
The output may look something like this:
   $ terraform init
   Initializing the backend...
   Initializing provider plugins...
   - Finding hashicorp/aws versions matching "~> 6.0"...
   - Installing hashicorp/aws v6.15.0...
   - Installed hashicorp/aws v6.15.0 (signed by HashiCorp)
   ...
   Terraform has been successfully initialized!
   ...
- Preview changes to make sure correct infrastructure will be provisioned.
terraform plan
Review the output, it should look something like this:
   $ terraform plan

   Terraform used the selected providers to generate the following execution plan. Resource actions are indicated with the following symbols:
     + create

   Terraform will perform the following actions:

     # aws_s3_bucket.terraform_state will be created
     + resource "aws_s3_bucket" "terraform_state" {
         + acceleration_status         = (known after apply)
         + acl                         = (known after apply)
         + arn                         = (known after apply)
         ...
      # aws_s3_bucket_public_access_block.block will be created
     + resource "aws_s3_bucket_public_access_block" "block" {
         + block_public_acls       = true
         ...
   Plan: 4 to add, 0 to change, 0 to destroy.

   Changes to Outputs:
     + s3_bucket_arn  = (known after apply)
     + s3_bucket_name = "my-little-sample-terraform-state"
- Finally, after a quick review we can apply to create the infrastructure.
terraform apply
It will again output the results of terraform plan and ask for a confirmation. Reply with a yes and the result should look like this:
   $ terraform apply

   Plan: 4 to add, 0 to change, 0 to destroy.
   ...
   Do you want to perform these actions?
     Terraform will perform the actions described above.
     Only 'yes' will be accepted to approve.

     Enter a value: yes

   aws_s3_bucket.terraform_state: Creating...
   aws_s3_bucket.terraform_state: Creation complete after 7s [id=my-little-sample-terraform-state]
   aws_s3_bucket_public_access_block.block: Creating...
   aws_s3_bucket_versioning.enabled: Creating...
   aws_s3_bucket_server_side_encryption_configuration.default: Creating...
   aws_s3_bucket_public_access_block.block: Creation complete after 1s [id=my-little-sample-terraform-state]
   aws_s3_bucket_server_side_encryption_configuration.default: Creation complete after 1s [id=my-little-sample-terraform-state]
   aws_s3_bucket_versioning.enabled: Creation complete after 2s [id=my-little-sample-terraform-state]

   Apply complete! Resources: 4 added, 0 changed, 0 destroyed.
   Outputs:

   s3_bucket_arn = "arn:aws:s3:::my-little-sample-terraform-state"               s3_bucket_name = "my-little-sample-terraform-state"
✅ Result:
You now have a remote S3 bucket ( in this demo: my-little-sample-terraform-state) ready to hold your Terraform state.

The Terraform state file from this bootstrap run is still local (terraform/bootstrap/terraform.tfstate) — so don’t spill your coffee yet ☕💻 — but the bucket now exists for future remote state storage.
iii. 📤 Update the setup to use the new S3 bucket for remote state.
Time to make it coffee-proof. ☕️
Now that the S3 bucket exists, we can switch Terraform to use it as the remote backend — so your state is stored safely in the cloud instead of locally.
-
Uncomment the
backend "s3" {}block (line 8-14) interraform/bootstrap/providers.tfso it looks like this, but with your own unique bucket name:
   backend "s3" {
     bucket       = "my-little-sample-terraform-state" # globally unique bucket name
     key          = "bootstrap/terraform.tfstate"      # path to the state file in the bucket
     region       = "us-east-1"                        # region of the bucket
     use_lockfile = true                               # replaces DynamoDB for this demo
     encrypt      = true                               # encrypt the state file
   }
- Re-initialize Terraform to reconfigure the backend:
terraform init -reconfigure
Terraform will detect your previous local state and prompt to migrate it:
   Do you want to copy existing state to the new backend?
     Pre-existing state was found while migrating the previous "local" backend to the
     newly configured "s3" backend. No existing state was found in the newly
     configured "s3" backend. Do you want to copy this state to the new "s3"
     backend? Enter "yes" to copy and "no" to start with an empty state.

     Enter a value: yes

     Successfully configured the backend "s3"! Terraform will automatically
     use this backend unless the backend configuration changes
     ...
-
Type
yesto confirm. Terraform will automatically move your local bootstrap state into the S3 bucket at:terraform/bootstrap/terraform.tfstate. 🙌
✅ Result:
Your Terraform state is now safely stored in Amazon S3 at terraform/bootstrap/terraform.tfstate.
No more local coffee hazards — your infrastructure state is centralized, versioned, and team-ready. ☕💪

iv. 🚢 Create ECR Repository
⚠️ Warning
Before you run anything below make sure to replace the S3 remote backend bucket name in
terraform/global/ecr/providers.tf(line 5) to the one you created above.
With our remote backend ready, the next step is to set up a container registry where we can store and version Docker images. This is where your Temporal Worker image will live — built either manually or automatically later via GitHub Actions. 🤖
We’ll use Amazon Elastic Container Registry (ECR) for this purpose.
You could create the repository manually in the AWS Console, but let’s go the Terraform route — it’s reproducible, version-controlled, and integrates seamlessly with CI/CD pipelines.
- Change directory to the ECR Terraform module.
cd terraform/global/ecr/
- Initialize Terraform to set up providers and backend.
terraform init
- Preview the plan to verify what will be created.
terraform plan
- Apply the configuration.
terraform apply
Confirm with yes when prompted.
You should see output similar to this:
   Changes to Outputs:
     + temporal_worker_dev_repository_url = (known after apply)

   Do you want to perform these actions?
     Terraform will perform the actions described above.
     Only 'yes' will be accepted to approve.

     Enter a value: yes

   aws_ecr_repository.temporal_worker_dev: Creating...
   aws_ecr_repository.temporal_worker_dev: Creation complete after 2s [id=temporal-worker-dev]
   aws_ecr_lifecycle_policy.temporal_worker_dev: Creating...
   aws_ecr_lifecycle_policy.temporal_worker_dev: Creation complete after 0s [id=temporal-worker-dev]

   Apply complete! Resources: 2 added, 0 changed, 0 destroyed.

   Outputs:

   temporal_worker_dev_repository_url = "012345678912.dkr.ecr.us-east-1.amazonaws.com/temporal-worker-dev"
Terraform will:
Create a new state file in your S3 remote state bucket specifically for managing the ECR repository.
(This modular pattern can be extended to other independent resources — for example, an S3 bucket or IAM role that you want managed separately from your main infrastructure.)Create an ECR repository named
temporal-worker-devin theus-east-1region.Attach a lifecycle policy that automatically deletes old images, keeping only the most recent five (again helping us save some money for ramen 🍜 😉 )
Output the repository URL — which you’ll use to push Docker images or reference in CI/CD pipelines.
✅ Result:
Your ECR repository is ready:

State file for managing ECR repository is in S3:

You can now push images to this registry manually, and later let your GitHub Actions workflow (build-and-publish-ecr-dev.yaml) handle it automatically whenever you push new code. 🤖
📓 Note
This setup bridges the gap between manual provisioning and automated pipelines — Terraform creates the infrastructure once, and CI/CD keeps it up to date.
v. 🫸 Pushing a Container to ECR
Before deploying our Temporal Worker, we need its Docker image available in a registry that ECS can pull from. In this step, we’ll build, tag, authenticate, and push our Temporal Worker image into Amazon Elastic Container Registry (ECR).
📓 Note
The ECR repository URL was output by Terraform in the previous step.temporal_worker_dev_repository_url = "xxxxxxxxxxxx.dkr.ecr.us-east-1.amazonaws.com/temporal-worker-dev"
For reference, here’s the official AWS guide on this process: AWS Documentation — Push a Docker Image to Amazon ECR
You can adapt these commands for your own AWS account ID, region, or repository name.
(Replace <AWS_ACCOUNT_ID> and <REGION> with your actual values — for region we've been using us-east-1.)
💡 Tip
Heads up! You can copy all the commands for steps 2 and beyond, below, from the
Push Commandsin AWS Console:

- Navigate to your project root.
cd temporal-ecs-terraform
-
Build the Docker image locally (don't forget the
.at the end of the statement).
docker build -t temporal-worker-dev:latest .
This builds a local image named temporal-worker-dev:latest, where temporal-worker-dev is the name of them Docker image and latest is the tag.
💡 Tip
In case you are building the image on an ARM machine like M-series Mac, use the following command to build for AMD64 platform:
docker buildx build --platform linux/amd64 -t temporal-worker-dev .
- Authenticate Docker with your ECR registry.
Use the AWS CLI to obtain a temporary login token and pass it to Docker:
   aws ecr get-login-password --region <REGION> | \
     docker login --username AWS --password-stdin <AWS_ACCOUNT_ID>.dkr.ecr.<REGION>.amazonaws.com/temporal-worker-dev
- Use your correct AWS account ID, region, and repository URI.
- The username should always be
AWSwhen authenticating viaget-login-password. AWS Documentation — Registry Authentication - The login token is valid for 12 hours.
- Tag the image for your ECR repository
docker tag temporal-worker-dev:latest <AWS_ACCOUNT_ID>.dkr.ecr.<REGION>.amazonaws.com/temporal-worker-dev:latest
This tells Docker which remote repository and tag to associate with your local image.
Example: 123456789012.dkr.ecr.us-east-1.amazonaws.com/temporal-worker-dev:latest
- Push the image to ECR
docker push <AWS_ACCOUNT_ID>.dkr.ecr.<REGION>.amazonaws.com/temporal-worker-dev:latest
Docker will upload image layers to ECR.
You should see output similar to this:
   The push refers to repository [012345678912.dkr.ecr.us-east-1.amazonaws.com/temporal-worker-dev]
   4112fcf261vf: Pushed
   f58ce7v94305: Pushed
   f64v6a759ca2: Pushed
   2ec442f83634: Pushed
   be33cd6b7vb5: Pushed
   d34v2bcfd62c: Pushed
   59d2ev8aa0a3: Pushed
   9ec25079v1a1: Pushed
   ffbd160b7v21: Pushed
   a16e5v119267: Pushed
   0v31e520412d: Pushed
   e9bcv8fab0a2: Pushed
   06d872a0v231: Pushed
   latest: digest: sha256:1b43...a006e75b6ff3 size: 856
✅ Result:
Once complete, you’ll see your image listed under the Images tab of your ECR repository in the AWS Console.

- Built the container with your Temporal Worker code.
- Authenticated your Docker client to ECR using AWS IAM credentials.
- Tagged the image so ECS knows which image to pull.
- Pushed it to ECR, uploading all layers.
- ECS will later pull this image automatically when deploying your Fargate tasks.
💡 Tip
Optional Best Practices
- Use versioned tags (e.g.
:v1.0.0,:commit-sha) instead of:latestin production to ensure reproducible deployments. For this demo, the current:latesttag will suffice.- If your build process runs in CI/CD, these steps will be automated — GitHub Actions will handle authentication, tagging, and pushing for each new commit.
- Confirm that your IAM user or role includes ECR permissions:
ecr:GetAuthorizationToken,ecr:BatchCheckLayerAvailability,ecr:PutImage, andecr:InitiateLayerUpload.
vi. 🌍 Main Terraform setup
⚠️ Warning
Before you run anything below make sure to:
Replace the S3 remote backend bucket name in
terraform/live/dev/providers.tf(line 5) to the one you created above.Uncomment and replace the variable
worker_container_imageinterraform/live/dev/terraform.tfvars(line 29) to the ECR image URI you pushed, above. It should look something like this:
```hcl
worker_container_image = "012345678912.dkr.ecr.us-east-1.amazonaws.com/temporal-worker-dev:latest"🤫 Copy URI from your ECR repository in the AWS Console: 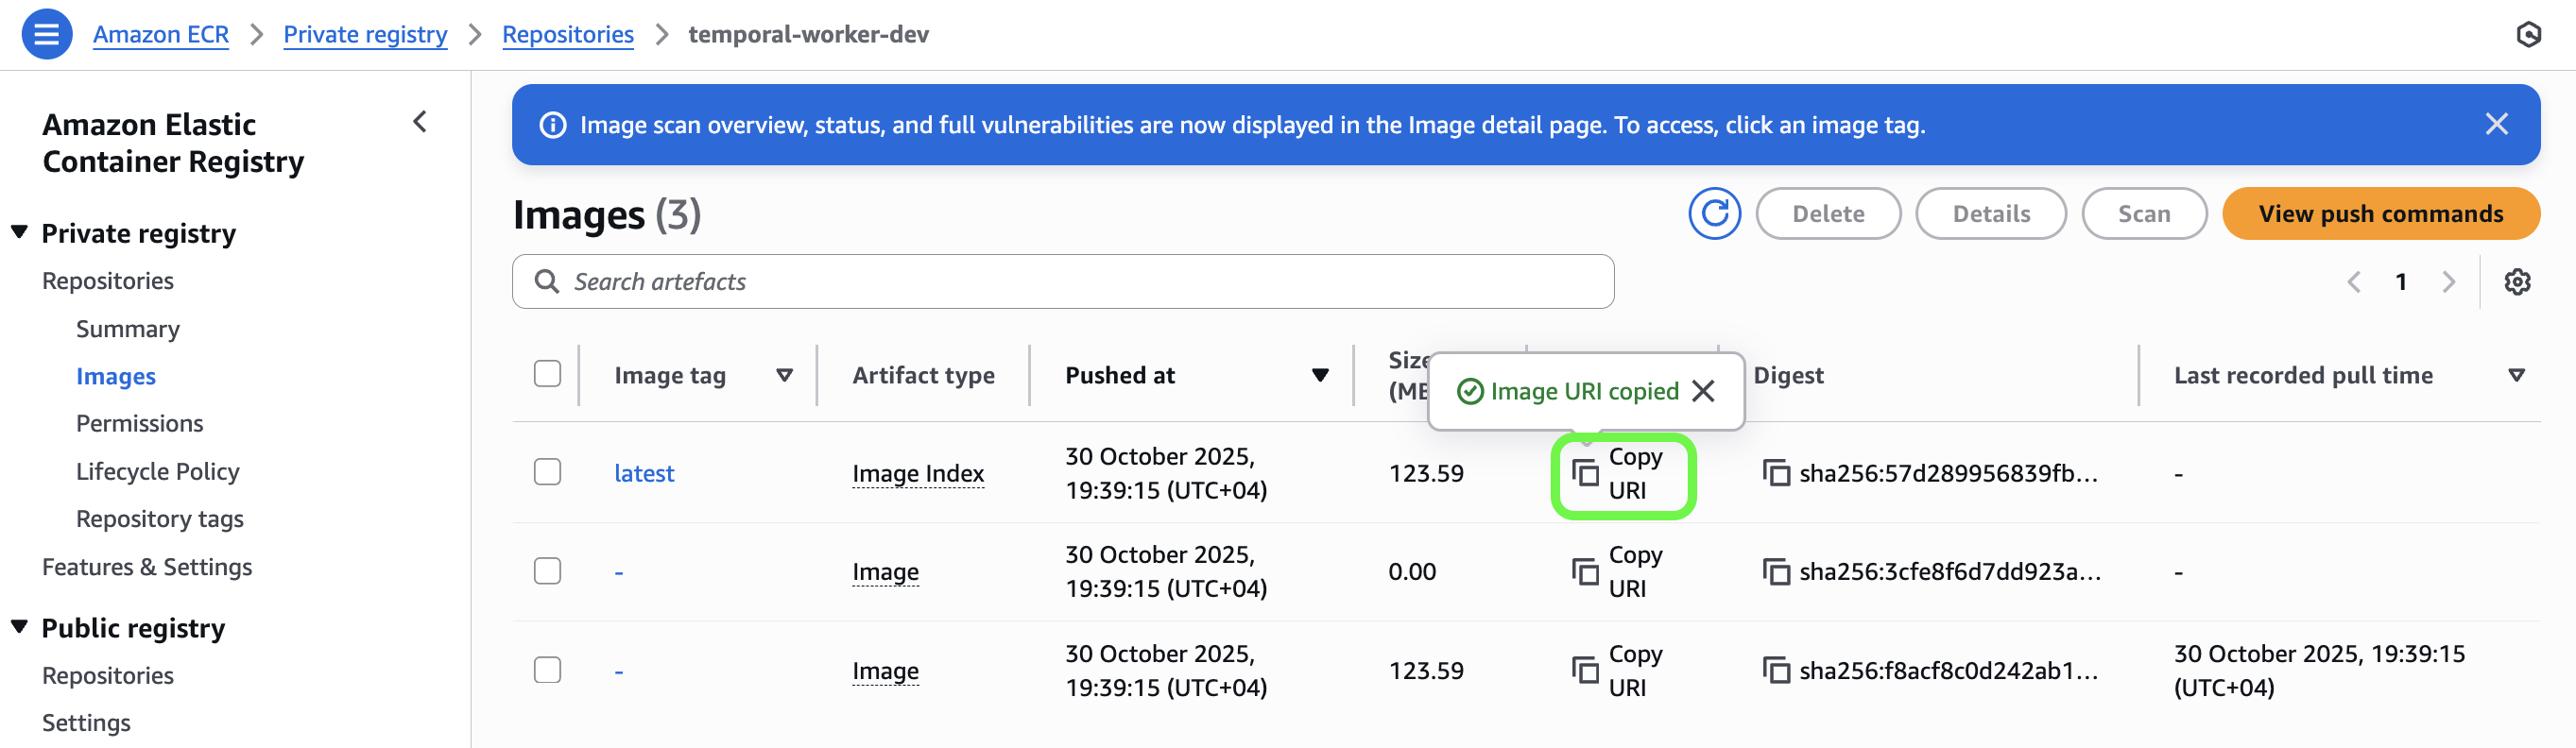 3. Uncomment and replace the variable `s3_data_bucket_name` in `terraform/live/dev/terraform.tfvars` (line 37) to your desired globally unique AWS S3 bucket name for storing your business logic (in our demo, saving messages).
Now that the container registry, secrets, and remote state backend are ready, this is where everything comes together.
We’ll scaffold the core infrastructure that hosts our worker fleet — networking, ECS cluster, auto-scaling, task definitions, S3 storage, and everything in between.
Before running Terraform, let’s quickly walk through how the code is structured.
The infrastructure is organized using a modular approach with the following structure:
🧩 Modules (terraform/modules)
Reusable components that encapsulate infrastructure patterns:
-
network/– wraps the Community VPC Module to provision:- A VPC with public and private subnets across multiple Availability Zones.
- Single NAT Gateway for cost optimization (suitable for dev/staging; production should use one NAT per AZ)
- An S3 VPC Gateway Endpoint so private subnet resources can access S3 without using the Internet Gateway.
-
ecs_cluster/– wraps the Community ECS Cluster Module to create an efficient ECS cluster that can:- Stream logs to CloudWatch with configurable retention.
- Use
FARGATE_SPOTorFARGATE(on-demand) capacity for flexible compute.
-
ecs_service/– wraps the Community ECS Service to provision:- Task definitions with container configuration.
- Security groups for network access control
- Auto-scaling policies.
🔴 Live Environment (terraform/live/dev/)
- Brings the modules together for a specific environment:
-
main.tf– the orchestration file, organized into logical sections:
-
1. **Local Variables (lines 5-22)** – define reusable values and decode secrets from AWS Secrets Manager.

   - Network configuration flags
   - Protocol constants for security group rules
   - Temporal server connection details pulled from Secrets Manager and marked as sensitive

2. **Secrets Manager Data Sources (lines 28-37)** – pulls Temporal credentials securely at runtime from Secrets Manger as we defined step-1.

3. **VPC Module (lines 43-63)** – creates isolated network environment.

   - Public subnets for internet facing resources such as NAT Gateway
   - Private subnets for ECS tasks (no direct internet access)
   - **Gateway VPC endpoint for S3** to *avoid* NAT Gateway data transfer costs

4. **ECS Cluster Module (lines 71-80)** – provisions the container management cluster

   That defines the logical grouping where all ECS tasks (i.e Temporal worker containers) will be housed along with the time period for ECS log retention (default 7 days).

5. **Worker Service Module (lines 87-147)** – defines the Temporal Worker tasks.

   - Container definitions (lines 96-140) with environment variables injected from Secrets Manager (environment variables that end up as `null` will not be passed to the container).
   - Port mappings for Temporal server communication (port `7233`).
   - Security group rules allowing outbound internet access for Temporal Cloud or a Self-hosted Temporal Server connectivity
   - Deployed in private subnets with internet access via NAT Gateway.

6. **Auto-Scaling Configuration (lines 173-257)** – CloudWatch alarms and scaling policies:

   - Scale out ≥ 30% CPU for 2 minutes.
   - Scale in ≤ 20% CPU for 10 minutes.
   - Step-scaling used for fine-grained control.

7. **S3 Bucket (lines 237-245)** – dev data bucket (`force_destroy = true` for convenience).

8. **IAM Permissions (lines 279-302)** – grants ECS tasks scoped S3 access.
variables.tf– declares inputs for environment configuration.terraform.tfvars– holds concrete values (region, CIDRs, image URI, etc.).providers.tf– sets AWS provider and S3 backend for remote state.
This separation follows Terraform best practices — modules define "how" infrastructure is built, while the live environment defines "what" gets built with environment-specific values. ✨
You can easily replicate this for staging or production by creating new directories under terraform/live/ with different variable values.
🚀 Deploying the Infrastructure
Make sure the previous steps are complete — secrets stored, image pushed to ECR, and Temporal Cloud or your self-hosted Temporal Server reachable.
- Navigate to the
live/devdirectory.
cd terraform/live/dev
- Initialize Terraform to set up providers and backend.
terraform init
- Preview
planto see what exactly will be deployed.
terraform plan
- Finally, hit
applyand deploy the infrastructure.
terraform apply
✅Result:
After these steps, you now have a production-ready foundation: private network, container registry, worker fleet with auto-scaling, and code deployed from your ECR image.
You can view the deployed infrastructure in AWS by navigating to the ECS console → Clusters → sample-dev-cluster.
There, you'll see one worker container sample-temporal-worker running.


🎯 Test it out
To check everything is working, you can start a sample workflow execution.
Open Temporal Cloud, and trigger a new workflow with the following values:
-
Task Queue:
test-queue- this is the queue our worker is listening to. -
Workflow Type:
MessageWorkflow- this is the workflow defined inworkflows/sample_workflow.py. -
Input/Data/JSON:
{"message": " 🐢 Hello, World!"}- this is the message the workflow will save in your S3 bucket.
Then, click "Start Workflow".


Additionally there is a run_workflow.py file provided in the GitHub repo. You can use that to trigger two new parallel workflows and accomplish the same thing as above from the terminal.
# Navigate to the project root directory
cd temporal-ecs-terraform

# Run the workflow file
python run_workflow.py
The terminal output will look something like this:
$ python run_workflow.py

...
Connecting to Temporal server at temporal.clusterX.aws.cloud.temporal.io:7233 ...
Connecting to Temporal server at temporal.clusterX.aws.cloud.temporal.io:7233 ...
Starting my workflow...
Starting my workflow...
Workflow completed: {'printed_message': '🦄 Hello, World!', 'status': 'completed'}
Workflow completed: {'printed_message': '🐰 Bye, World!', 'status': 'completed'}

3. 🐙 Optional: Configure GitHub Actions for Continuous Delivery
At this point, you can take it one step further by setting up a continuous delivery pipeline in GitHub.
This will automate the build and deployment of your Temporal Workers whenever you push new code.
i. 👯♂️🫸 Clone the Repo and Push to Your Own GitHub
After setting up AWS and secrets, it’s best to work from your own repository — this allows you to safely make changes, track versions, and run CI/CD workflows.
1) Clone the starter repo locally (if not done already):
git clone https://github.com/papnori/temporal-ecs-terraform.git
cd temporal-ecs-terraform
2) Create a new repository on GitHub (e.g. temporal-ecs-terraform) under your account or organization.
3) Push the code to your repository (make sure you're on the main branch before pushing):
git remote rename origin upstream
git remote add origin git@github.com:<your-username>/temporal-ecs-terraform.git
git push -u origin main
💡 Tip
Using your own repo allows GitHub Actions workflows to run with your secrets and makes it easier to customize the setup for your team or environment.
❗ Important
At this point all the GitHub actions will fail, and its alright we'll fix them in the next steps.
ii. 🔐 Setup AWS OIDC
GitHub uses OpenID Connect (OIDC) to allow workflows to assume IAM roles without long-lived credentials.
Let’s configure this in AWS so your CI/CD can deploy infrastructure and push Docker images securely.
- Create an Identity provider (IAM → Identity providers → Add provider)
Select Provider Type:
OpenID ConnectURL:
https://token.actions.githubusercontent.comAudience:
sts.amazonaws.com

- Create an IAM Role for GitHub Actions (IAM → Roles → Create role)
Trusted entity: Web identity
Provider:
token.actions.githubusercontent.comAudience:
sts.amazonaws.com-
GitHub org/repo:
<your-org>/<your-repo>(e.g.,papnori/temporal-ecs-terraform)📓 Note
No need to add permissions in the first setup.
Just skip to
Step 3 (Name, review, and create)and hit theCreate Rolebutton. We'll edit and add premissions later
-
Give your new role a name and a helpful description to identify later. You may use mine:
-
Role name:temporal-ecs-terraform-github-action-role -
Description:Role used in temporal-ecs-terraform demo project https://github.com/papnori/temporal-ecs-terraform

-
- Permissions (IAM → Roles → [Role you created in the previous step] → Add permissions → Create inline policy → JSON)
Your GitHub Actions workflows need access to manage ECS, ECR, S3, CloudWatch, and Terraform state.
You can start with this broad policy:
{
    "Version": "2012-10-17",
    "Statement": [
        {
            "Sid": "TerraformCorePermissions",
            "Effect": "Allow",
            "Action": [
                "iam:GetRole",
                "iam:GetRolePolicy",
                "iam:GetPolicy",
                "iam:GetPolicyVersion",
                "iam:ListRolePolicies",
                "iam:ListAttachedRolePolicies",
                "iam:ListRoleTags",
                "iam:CreateRole",
                "iam:DeleteRole",
                "iam:UpdateRole",
                "iam:TagRole",
                "iam:UntagRole",
                "iam:PutRolePolicy",
                "iam:DeleteRolePolicy",
                "iam:AttachRolePolicy",
                "iam:DetachRolePolicy",
                "iam:PassRole",
                "s3:CreateBucket",
                "s3:DeleteBucket",
                "s3:ListBucket",
                "s3:ListAllMyBuckets",
                "s3:GetBucketLocation",
                "s3:GetBucketVersioning",
                "s3:GetBucketTagging",
                "s3:GetBucketPolicy",
                "s3:GetBucketAcl",
                "s3:GetBucketCORS",
                "s3:GetBucketWebsite",
                "s3:GetBucketLogging",
                "s3:GetBucketRequestPayment",
                "s3:GetBucketPublicAccessBlock",
                "s3:GetReplicationConfiguration",
                "s3:GetLifecycleConfiguration",
                "s3:GetAccelerateConfiguration",
                "s3:GetEncryptionConfiguration",
                "s3:GetBucketObjectLockConfiguration",
                "s3:PutBucketTagging",
                "s3:PutBucketVersioning",
                "s3:PutBucketPolicy",
                "s3:DeleteBucketPolicy",
                "s3:PutObject",
                "ec2:*",
                "ecs:*",
                "ecr:*",
                "elasticloadbalancing:*",
                "application-autoscaling:*",
                "cloudwatch:*",
                "logs:*",
                "acm:ListCertificates",
                "acm:DescribeCertificate",
                "acm:RequestCertificate",
                "acm:DeleteCertificate",
                "acm:GetCertificate",
                "acm:AddTagsToCertificate",
                "acm:RemoveTagsFromCertificate",
                "acm:ListTagsForCertificate",
                "secretsmanager:GetSecretValue",
                "secretsmanager:GetResourcePolicy",
                "secretsmanager:DescribeSecret"
            ],
            "Resource": "*"
        },
        {
            "Sid": "TerraformStateAndECRAccess",
            "Effect": "Allow",
            "Action": [
                "s3:ListBucket",
                "s3:GetObject",
                "s3:PutObject",
                "ecr:CreateRepository",
                "ecr:DeleteRepository",
                "ecr:DescribeRepositories",
                "ecr:ListImages",
                "ecr:DescribeImages",
                "ecr:BatchDeleteImage",
                "ecr:GetDownloadUrlForLayer",
                "ecr:BatchCheckLayerAvailability",
                "ecr:PutImage",
                "ecr:InitiateLayerUpload",
                "ecr:UploadLayerPart",
                "ecr:CompleteLayerUpload",
                "ecr:GetLifecyclePolicy",
                "ecr:PutLifecyclePolicy",
                "ecr:PutImageTagMutability",
                "ecr:TagResource",
                "ecr:UntagResource",
                "ecr:ListTagsForResource"
            ],
            "Resource": [
                "arn:aws:s3:::<S3_REMOTE_BACKEND_BUCKET_NAME>",
                "arn:aws:s3:::<S3_REMOTE_BACKEND_BUCKET_NAME>/*",
                "arn:aws:ecr:us-east-1:012345678912:repository/temporal-worker-dev"
            ]
        }
    ]
}
⚠️ Warning
Make sure to replace the
<S3_REMOTE_BACKEND_BUCKET_NAME>placeholder, at the bottom, with the name of the remote S3 backend bucket you created during the bootstrap process.⚠️ Warning
Later adjust it for your own use case and follow the principle of least privilege for production use.

We can now finally, create a policy by giving it a name (e.g. temporal-ecs-terraform-github-action-policy)

📓 Note
After creating the role, copy its ARN as we will store it soon as a GitHub repository secret (e.g.,
AWS_GITHUB_ACTIONS_ROLE_ARN).

iii. 🛠️ GitHub Secrets Setup and Variables
Now that GitHub is connected to AWS via OIDC, you'll configure the repository’s secrets and variables so your workflows can deploy Temporal Workers automatically.
This step ensures your GitHub Actions pipeline can authenticate with AWS, fetch Docker images from ECR, and pass environment-specific parameters during deployment.
🤫 Repository Secrets
Navigate to:
Settings → Secrets and variables → Actions → Secrets → “New repository secret”
Add the following secret:
-
AWS_GITHUB_ACTIONS_ROLE_ARN- The ARN of the IAM you recently created in the OIDC setup.💡 Tip
Keep the secret name exactly as written — it will be referenced by your GitHub Actions workflow later for assuming the AWS IAM role.
✅ Result:
Your GitHub repository is now fully configured with the secrets required for CI/CD.


🪄 Repository variables
Navigate to:
Settings → Secrets and variables → Actions → Variables → New repository variable
Add:
-
AWS_ACCOUNT_ID- Your AWS account ID (you'll use this to fetch the latest image from ECR before deploying)-
Environment variables (environment:
dev)
-
Environment variables (environment:
As an additional layer of customization, let’s define a few GitHub environment variables for our dev setup.
💡 Tip
Environment variables are scoped per environment. This helps later when you extend to multiple environments (e.g.,
stagingorproduction) using the same workflow file.
For now, let’s create variables for the name of your S3 bucket and ECR repository under the dev environment:
Navigate to:
Settings → Environments → dev (create new environment) → Environment variables
Add:
-
WORKFLOW_ECR_REPO– The name of your ECR repository (temporal-worker-devthis is the same as you created in the ECR setup) -
S3_DATA_BUCKET_NAME— The name of your S3 bucket (for examplesample-temporal-data-dev). You can later assign this value to the Terraform variables3_data_bucket_nameinlive/dev/variables.tfby prefixing an Action-level environment variable withTF_VAR_which is a Terraform mechanism to assign values to variables — great for CI/CD automations.
✅ Result:
Your GitHub repository is now fully configured with the secrets and variables required for CI/CD.
In the next step, we’ll activate the GitHub Actions workflows defined in the repository —
build-and-publish-ecr-dev.yaml and terraform-live-dev-deploy.yaml — which tie everything together by automating Docker builds, ECR pushes, and Terraform deployments. 🚀
💡 Tip
You can even store environment variables and application secrets in GitHub and skip the Step 1, above, where we use AWS Secrets Manager to store Temporal secrets 😉.
iv. 🫸🚀 Push & Trigger
Finally, with everything in place, push the updated code base to your repository.
Comment out the worker_container_image and s3_data_bucket_name variables in terraform/live/dev/terraform.tfvars (lines 29 and 38). These values are now provided by the GitHub Actions workflows (either dynamically discovered or passed as environment-scoped variables).
git add .
git commit -m "Commented out container image and s3 bucket name"

# Finally push
git push origin main
This should trigger the Deploy to Dev 🚀 workflow, it will use the latest image in the ECR repository.
You can also build an updated image by triggering the Build & Push to ECR (Dev) 🗄️🚀 workflow which will not only build and push an updated image tagged with the latest commit hash but also then trigger the Deploy to Dev 🚀 workflow on completion. Try it out!

🧩 How the two workflows fit together
| Workflow | Purpose | Trigger | Key Steps |
|---|---|---|---|
| Build & Push to ECR (Dev)🗄️🚀 | Builds your Temporal Worker image and pushes it to ECR | On push to main or manual run |
Checkout → OIDC auth → Docker build → Push → Output image URI |
| Deploy to Dev🚀 | Applies Terraform changes with the new image | Triggered after successful build or on Terraform file changes | Terraform init → Plan → Apply → ECS service stability check |
📓 Note
You can view the full, production-ready workflow files in the GitHub repository:
✅ Result:
Your CI/CD pipeline is now fully automated — pushing code to main builds and deploys new workers to ECS.
In other words, you now have a continuous delivery setup for your Temporal Worker running on AWS Fargate. 🚀
📊 Scaling
Before we wrap up, let’s quickly chat about scaling — the magic that keeps your Temporal workers responsive without wasting compute.
Scaling works through three AWS services working together:
- CloudWatch Alarms – continuously monitor ECS service metrics (CPU utilization in this case).
- Application Auto Scaling Policies – define how to react (scale out/in, by how much, with what cooldowns).
- ECS Service – adjusts the number of running worker tasks based on those signals.
When CPU goes above or below the thresholds you’ve set, CloudWatch fires an alarm → the corresponding Auto Scaling Policy kicks in → ECS changes the desired task count.
📈 Scale-Out (Add Capacity)
terraform/live/dev/main.tf
threshold = 30 # Scale out when CPU > 30%
evaluation_periods = 2 # Require 2 sustained readings of high CPU before scaling out
cooldown  = 60 # Wait 60s before allowing another scale-out

# First scaling adjustment: 30% <= CPU utilization < 40%
scaling_adjustment = 1 # Add 1 worker tasks each time alarm fires

# Second scaling adjustment:  40% < CPU utilization
scaling_adjustment = 2 # Add 2 worker tasks each time alarm fires
➡️ How it works:
- CloudWatch checks the average CPU utilization across all running tasks.
- If it stays between 30% - 40% for 2 sustained readings, the high CPU alarm triggers.
- The scale-out policy adds 1 new worker task if we are over the cooldown period.
- The second, more aggressive, scale-out alarm triggers when average CPU is above 40%, adding 2 tasks.
- Cooldown (60s) prevents AWS from adding more tasks too quickly.
Tuning knobs:
threshold → Lowering (e.g. 20%) makes workers scale up earlier.
evaluation_periods → Longer = wait more time before scaling out (avoids flapping).
cooldown → Shorter = faster scaling, but risk overshooting.
scaling_adjustment → Higher = more tasks added per alarm.
📉 Scale-In (Remove Capacity)
threshold = 20 # Scale in when CPU < 20%
evaluation_periods = 10 # Require 10 sustained readings of low CPU before scaling in
cooldown  = 300 # Wait 5 minutes before another scale-in

# Only one scaling adjustment set for scale-in: CPU utilization <= 20%
scaling_adjustment = -1 # Remove 1 worker each time alarm fires
➡️ How it works:
- CloudWatch checks if the CPU stays below 20% for 10 sustained readings.
- If true, the low CPU alarm triggers.
- The scale-in policy removes 1 worker task if we are over the cooldown period.
- A 5-minute cooldown ensures ECS doesn’t scale in too aggressively.
Tuning knobs:
threshold → Higher (e.g., 25%) = scales in faster, lower = safer.
evaluation_periods → Longer = wait more time before scaling in (avoids flapping).
cooldown → Longer = fewer oscillations between scale-in/out.
scaling_adjustment → Can remove more tasks at once (e.g., 2).
👉 In summary, this setup ensures fast scale-out when workers are under pressure, but conservative scale-in, so you don’t accidentally kill capacity during brief idle periods.
🔮 In the future, you can also monitor the Temporal Cloud pipeline and scale based on workflow queue depth or task backlog.
💡 Tip
The type of scaling policy we’ve used here is a Step Scaling Policy — where scaling happens in defined steps based on metric thresholds.
AWS also offers other policy types worth exploring:
- Target Tracking Scaling Policy — automatically adjusts task count to maintain a target metric (like 50% CPU).
- Predictive Scaling Policy — uses historical data to forecast demand and scale ahead of time.
💥☢️ Destroy the infrastructure
Alright — we’ve built, deployed, scaled, and automated like champs. But unless you really want to sponsor Jeff Bezos’ next rocket launch, it’s time to tear it all down 😅.
Let’s go step-by-step — in reverse order:
-
Destroy the live
devenvironment:
cd terraform/live/dev
terraform destroy
Destroy the ECR repo:
   cd terraform/global/ecr
   terraform destroy
- Destroy the S3 remote backend:
This one’s a bit trickier — Terraform protects it by default so you don’t accidentally delete your state
First, set the prevent_destroy lifecycle policy to false , on line 11 in terraform/bootstrap/main.tf, otherwise Terraform will not let us destroy. This is a safety mechanism to prevent accidents. Then add new variable force_destory = true
It should look like this:
   force_destroy = true
   lifecycle {
      prevent_destroy = false
   }
Then re-apply the change so Terraform acknowledges the update.
   cd terraform/bootstrap
   terraform apply
Comment out the backend "s3" {} block (line 8-14) again in terraform/bootstrap/providers.tf.
It should look like this:
   #   backend "s3" {
   #     bucket       = "my-little-sample-terraform-state" # name of the bucket - globally unique
   #     key          = "bootstrap/terraform.tfstate"      # path to the state file in the bucket
   #     region       = "us-east-1"                        # region of the bucket
   #     use_lockfile = true                               # instead of dynamodb
   #     encrypt = true # encrypt the state file
   #   }
Migrate Terraform state to fall back to local state.
   cd terraform/bootstrap
   terraform init -migrate-state
The output may look something like this:
   $ terraform init -migrate-state
   Initializing the backend...
   Terraform has detected you're unconfiguring your previously set "s3" backend.
   Do you want to copy existing state to the new backend?
     Pre-existing state was found while migrating the previous "s3" backend to the
     newly configured "local" backend. No existing state was found in the newly
     configured "local" backend. Do you want to copy this state to the new "local"
     backend? Enter "yes" to copy and "no" to start with an empty state.

     Enter a value: yes
Then re-apply the change so Terraform acknowledges the update.
   cd terraform/bootstrap
   terraform apply
Now, we can destroy.
   cd terraform/bootstrap
   terraform destroy
Your AWS account is squeaky-clean again 🧼.
🎬 Wrapping up
And that’s a wrap!
If you’ve made it all the way here — congratulations, you’ve officially deployed, scaled, automated, and destroyed Temporal workers like a cloud wizard. 🧙♂️⚡ Time for that cold champagne! 🥂
I tried to leave no stone unturned (and no Terraform state file un-backend-ed 😅).
Hopefully this guide made your journey from “where do I even start?” to “oh wow, I just built production-ready infra” a little easier — and maybe even fun.
This article was never meant to exist — until we started building Skinsight.me 💜 Somewhere between spinning up servers and obsessing over skin types, we stumbled onto a few too many “wait, this is actually cool” moments. So here we are — turning late-night debugging and skincare debates into something worth sharing 💜 All while not breaking the bank 💰💵.
Because yes — you can optimize cloud costs and your skincare routine at the same time 😅💜
If you're curious what else we can spin up for nearly nothing, follow us on 🧠 Skinsight — where beauty meets brains (and budget). 💅💻💜
🙏 Acknowledgments
- Built with ❤️ for teams seeking cost-effective Temporal deployments
- Inspired by the need for simpler alternatives to Kubernetes
- Special thanks to the Temporal and AWS communities
- But most and foremost to Rafay - whose relentless drive, guidance, and hands-on contributions not only shaped this project but continue to inspire everyone around him 💪✨ None of this would’ve come together without him 😊💜
📧 Contact
If you found this useful or just want to geek out over Temporal, ECS, or Terraform setups, feel free to reach out on LinkedIn @norapap753 💌
Made with ☕️ and ✨ by Nora

Top comments (0)