During integration there is always a need to perform authentications with several systems/applications; in this blog we are interested in Dataverse and while you can create an Office 365 user with username/password and configure it in Dataverse; it will consume a license. And if multi-factor authentication (MFA) is setup for that particular user then authentication might be little difficult. That is why Microsoft enabled users to create an application user that uses service principal based authentication.
To create application user you need an active Azure subscription and a Dataverse license. The process is divided into two pieces: one register an App in Azure and second create user in Dataverse.
App Registration in Azure
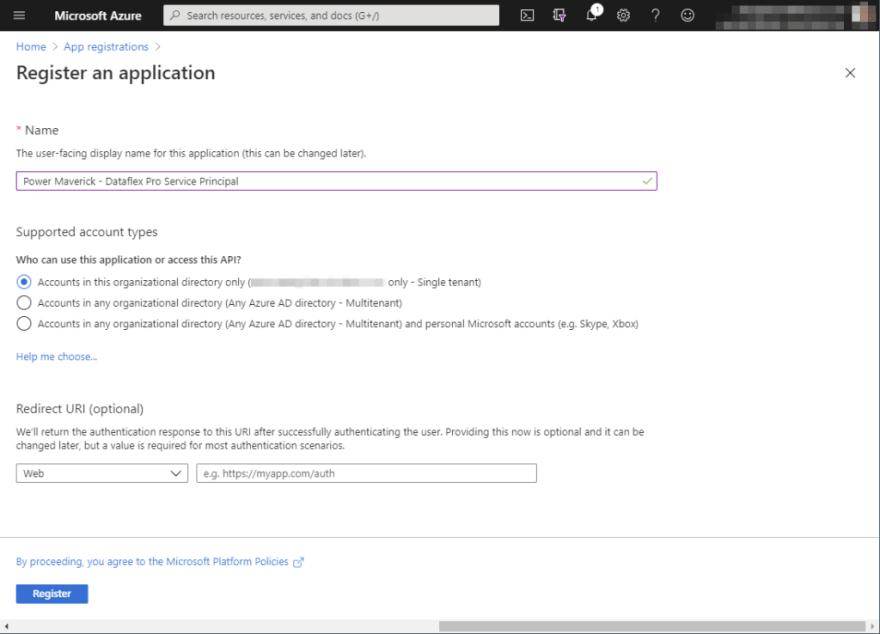
Once you log into Azure Portal, search “App registrations” in the search box. On the App Registrations page, click New from the menu bar and you will be taken the registration page. On this page provide the name of your name and keep all other options as default. Click Register; this will take you to the Overview page.
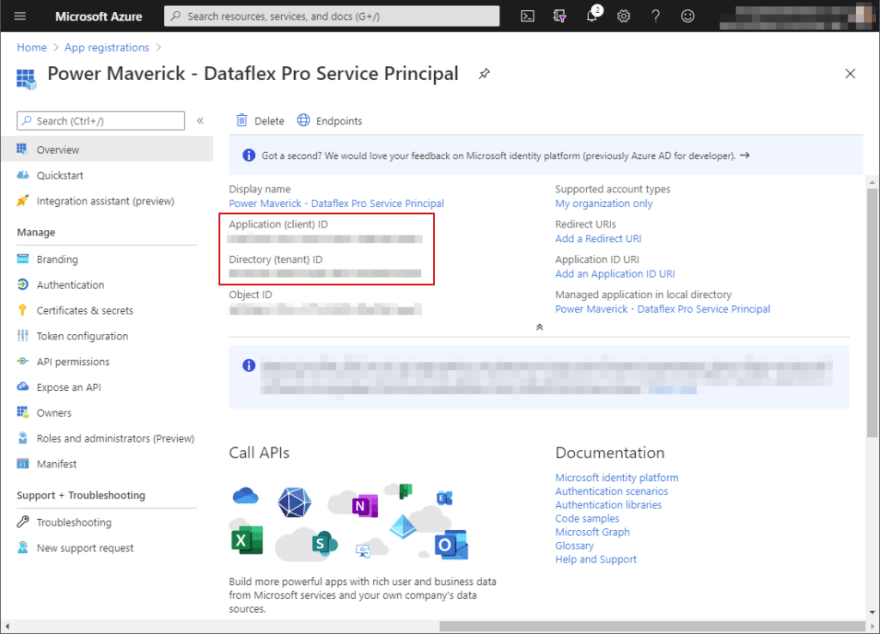
On the overview page, you can find the tenant id, application id. Copy these ids as we will be needing them later.
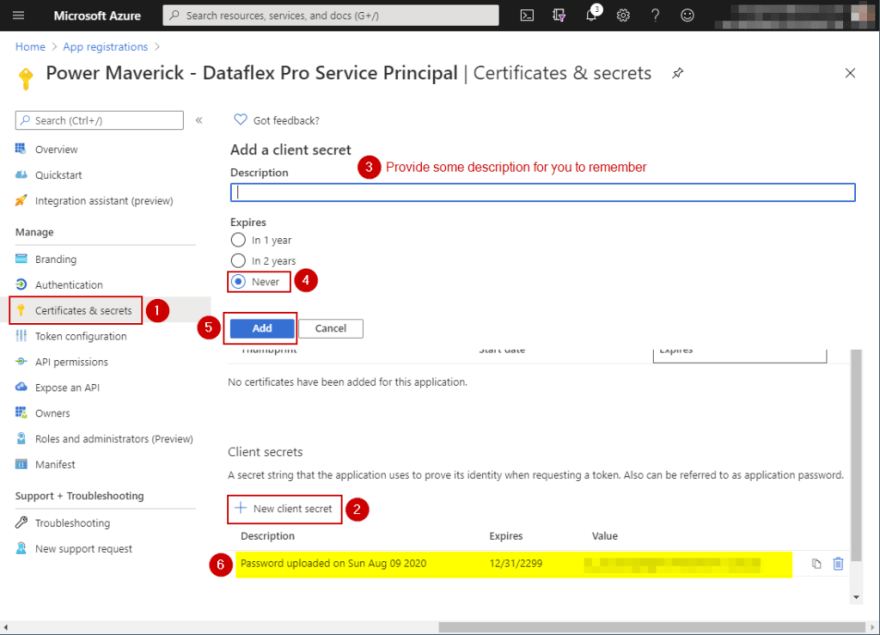
Now, we need to create a client secret which will be used during authentication. To create the client secret, click on “Certificates & secret” on the left blade, then under section “Client secrets” click on New client secret. This will pop-out a modal for you to enter your description and expiration. Enter a description that you can remember and choose “Never” for Expires. The system will create a random client secret for you. Please copy and save the secret as this will be the only time you will see it.
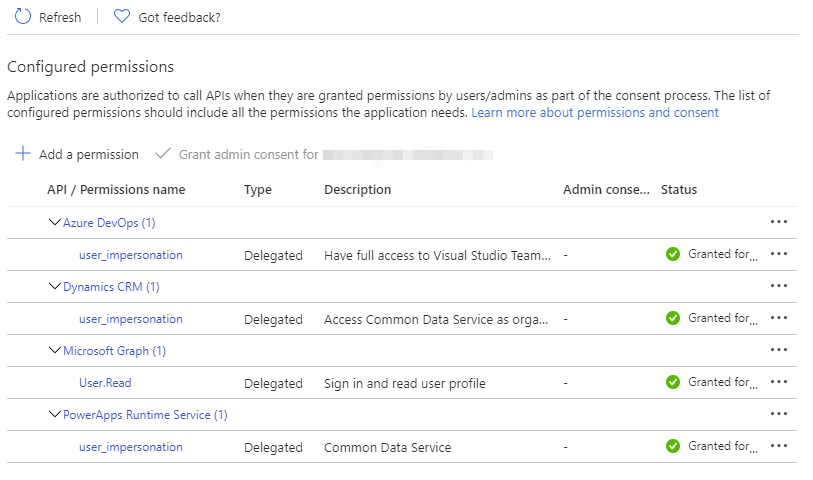
At this point you should have tenant id, application id and client secret. But, we need to provide access to different APIs. To do so, click on “API permissions” on the left blade, then click on Add Permission. Under Microsoft API, choose Dynamics CRM ; and under permission check user_impersonation ; click Add permissions.
Similarly you can add more APIs, like for Power Platform Service Connection in Azure DevOps you need to add PowerApps Runtime Service. Once you have added all the APIs, you will need to grant admin consent to those APIs. If the Grant admin consent is disabled then you will need to reach out to the Azure Admin to provide the consent. Finally the API permission page should look like below.
Creating user in Dataverse
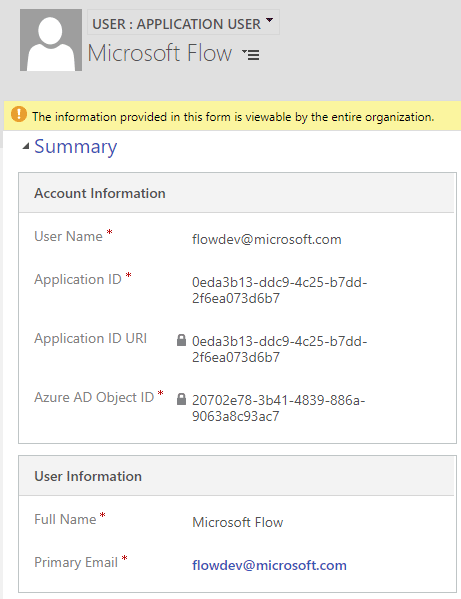
Now, head to your Dataverse environment and go to Settings > Security > Users. Make sure to change the view to Application Users. Once on that view click on “ New “. If “User” form loads then change it to “Application User” from the form selector. On this page enter your preferred username; something like integration.admin@yourdomain.com. Now, paste the copied application id from Azure on the Application ID attribute; enter the fullname and email address (can be same as username). Save the form – even though Azure Object ID is required it will let you save – and system should populate “Application ID Uri” and “Azure AD Object ID”.
Don’t forget to provide proper security role to this user.
Now, you can use this user to authenticate using Service Principal; for that you will need Application Id and Client Secret we had copied from Azure.
Hope this helps.
Don’t forget to subscribe to my Power Platform Dev Newsletter



Oldest comments (0)