Code-named "One Piece," Vue 3.0 is the latest version of one of the most popular front-end frameworks.
Sept 18th, 2020, came bearing the good news of Vue 3.0's release.
The Vue.js team announced its release via its official Twitter account:
I was excited to try it out and decided to create a small Todo app.
In this article, I'll walk you guys through the process of creating a web app using Vue 3.0.
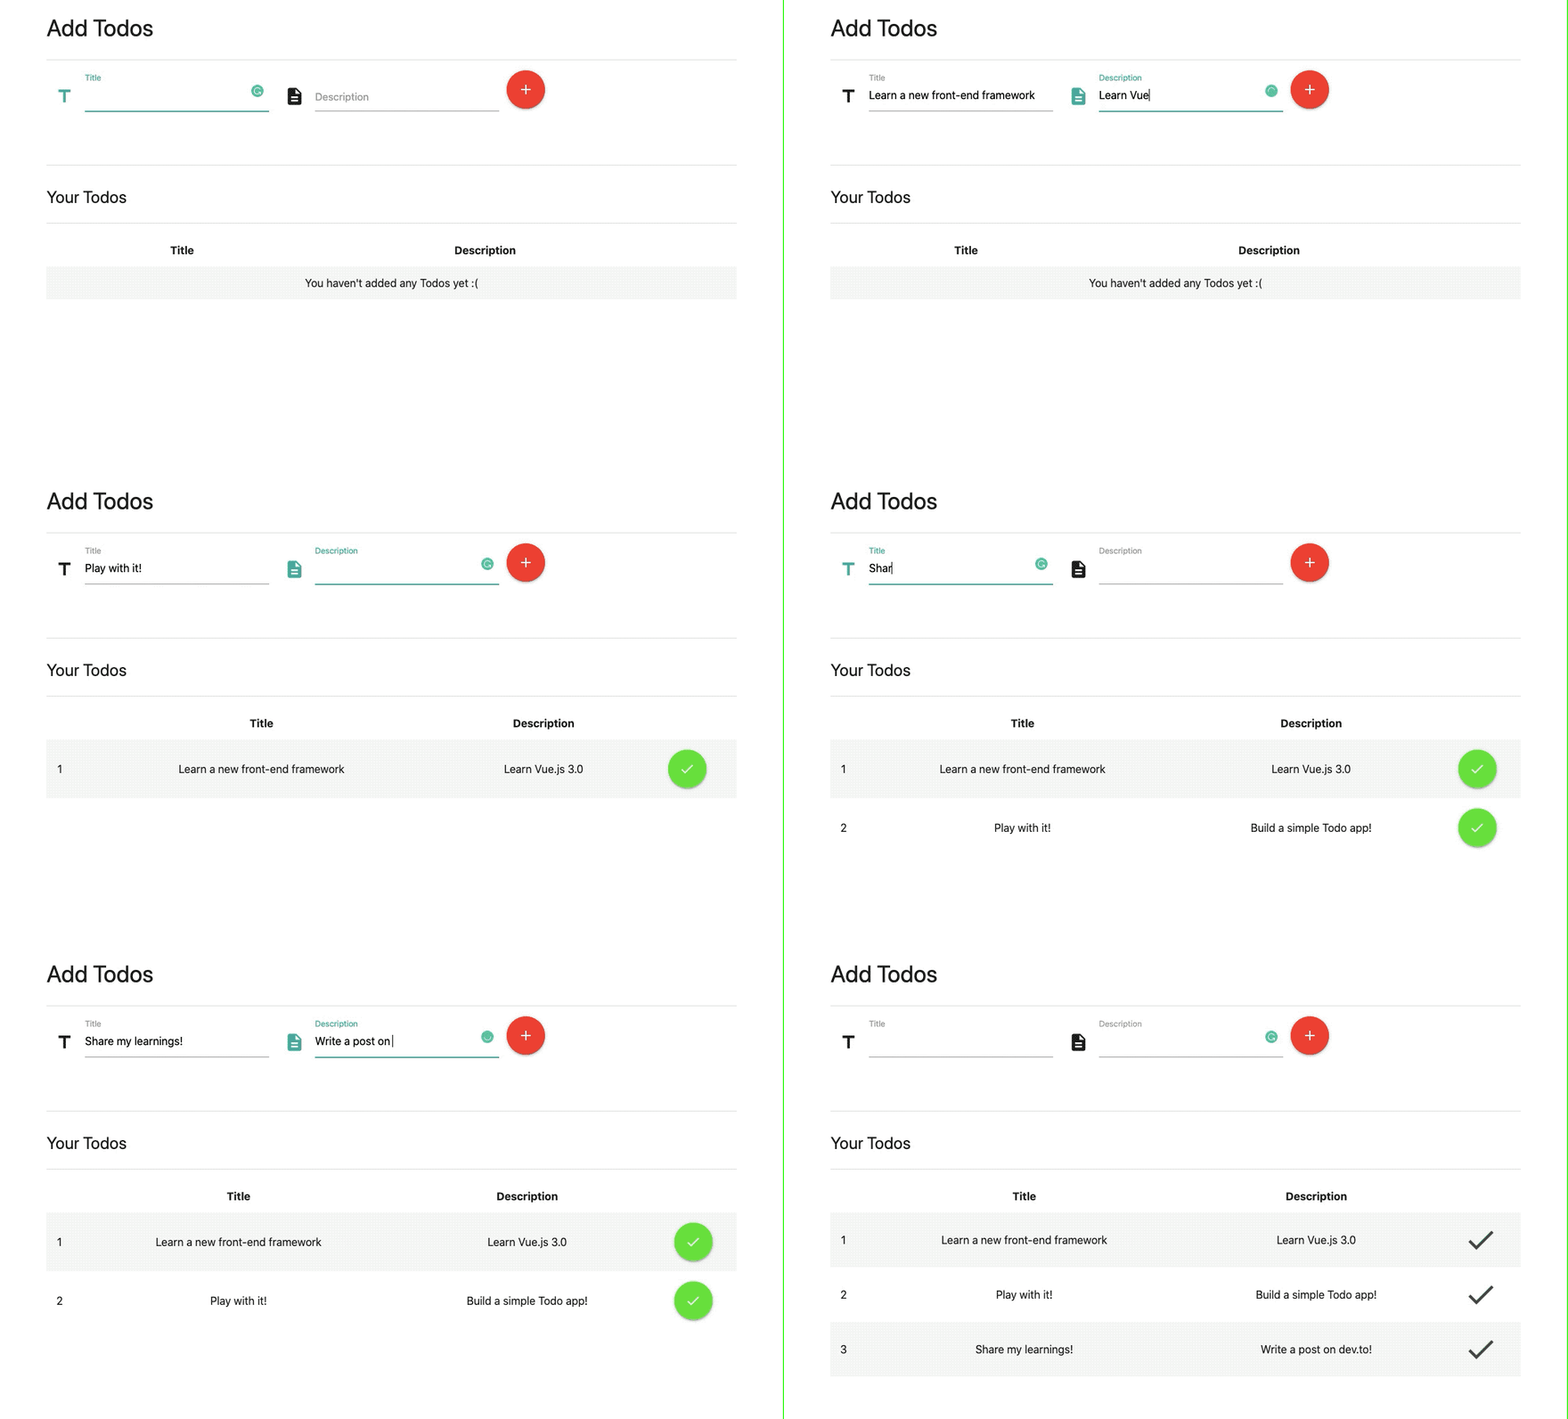
But before we start, let me give you a glimpse of what we are about to create:
Now that you have got a visual clue of how it's going to look and how it's going to function, let's dive into the code.
Step 1.
Setting up your app to use Vue 3.0
We won't be using npm, the popular JavaScript package manager, to keep things simple.
Instead, we'll use the good ol' <script> tag to import vue.js into our app directly from a CDN:
<script src="https://unpkg.com/vue@next"></script>
Note the @next in the above code. It is used to indicate to unpkg.com that we want the latest version of vue.js.
If you omit the @next, unpkg.com will provide you with vue 2.6.12, the current LTS version of Vue.js.
Step 2.
Importing other third-party libraries
The only third-party library that I have used is the Materialize CSS.
This isn't really necessary, but it gives the app a nice swanky look :)
So let's import it:
<link rel="stylesheet" href="https://cdnjs.cloudflare.com/ajax/libs/materialize/1.0.0/css/materialize.min.css">

<script src="https://cdnjs.cloudflare.com/ajax/libs/materialize/1.0.0/js/materialize.min.js"></script>
As you can see, we need two imports here:
- The Materialize CSS file
- The Materialize JS file
The JS file is required for displaying toasters and tooltips provided by the Materialize CSS.
Step 3.
Creating the HTML template
We'll need a form with two input fields: one for the title and one for the description. We'll also need a button that will allow the user to submit a todo item to the app.
Here's the code:
<form class="col s12">
    <div class="row">
        <div class="input-field col s4">
            <i class="material-icons prefix">title</i>
            <textarea v-model="todo.title" id="todo_title" class="materialize-textarea"></textarea>
            <label for="todo_title">A small title would be nice...</label>
        </div>
        <div class="input-field col s4">
            <i class="material-icons prefix">description</i>
            <textarea v-model="todo.description" id="todo_description" class="materialize-textarea"></textarea>
            <label for="todo_description">Maybe add a little description...</label>
        </div>
        <div class="s4">
            <a class="btn-floating btn-large waves-effect waves-light red tooltipped" data-position="bottom"
                data-tooltip="Add Todo!" @click="addTodo()"><i class="material-icons">add</i></a>
        </div>
    </div>
</form>
We'll also need a table to display all the todos that the user has added.
Here's how we design it:
<table class="striped centered responsive-table">
    <thead>
        <th></th>
        <th>
            Title
        </th>
        <th>
            Description
        </th>
        <th></th>
    </thead>
    <tbody>
        <tr v-for="(todo,id) in todos">
            <td>
                {{id}}
            </td>
            <td>
                {{todo.title}}
            </td>
            <td>
                {{todo.description}}
            </td>
            <td>
                <a
                   v-show="!todo.done"
                   class="btn-floating btn-large waves-effect
                   waves-light light-green accent-4 tooltipped"
                   data-position="bottom"
                   data-tooltip="I'm done with this one!"
                   @click="markAsDone(todo.id)">
                    <i class="material-icons">check</i>
                </a>

                <i v-if="todo.done"
                   class="todo-done-tick material-icons
                   tooltipped"
                   data-position="bottom"
                   data-tooltip="You're done with this
                   one!">
                 check
               </i>
            </td>
        </tr>
        <tr v-show="todoCount == 0">
            <td colspan="4">
              You haven't added any Todos yet :(
            </td>
        </tr>
    </tbody>
</table>
Step 4.
Creating the app.js
Let's create the app.js, which will bring our app to life:
const TodoApp = {
    data() {
        return {
            todoCount: 0,
            todo: {
                id: 0,
                title: '',
                description: '',
                done: false
            },
            todos: {}
        }
    },
    mounted() {
        const vm = this;
        vm.initialize();
    },
    methods: {
        initialize() {
            const vm = this;
            vm.addTooltips(vm.findTooltippedElementsFromDOM());
        },
        addTooltips(tooltippedElements) {
            const vm = this;
            M.Tooltip.init(tooltippedElements, {});
        },
        findTooltippedElementsFromDOM() {
            const vm = this;
            return document.querySelectorAll('.tooltipped');
        },
        addTodo() {
            const vm = this;

            if (!vm.todo.title || vm.todo.title.trim() === '') {
                M.toast({ html: 'Need a title for this Todo!', classes: 'rounded' });
                return;
            }

            if (!vm.todo.description || vm.todo.description.trim() === '') {
                M.toast({ html: 'A small description would be nice!', classes: 'rounded' });
                return;
            }

            vm.todo.id = ++vm.todoCount;
            vm.todos[vm.todo.id] = vm.todo;

            vm.todo = { title: '', description: '' };
            vm.addTooltipsToDynamicElements();
        },
        markAsDone(id) {
            const vm = this;
            vm.todos[id].done = true;
            vm.addTooltipsToDynamicElements();
        },
        addTooltipsToDynamicElements() {
            const vm = this;

            setTimeout(function () {
                vm.addTooltips(vm.findTooltippedElementsFromDOM());
            }, 500);
        }
    }
}

Vue.createApp(TodoApp).mount('#todoapp');
Once we glue all the above code together, our app will begin to function, as we'd seen in the gif at the beginning of the article.
In case you want to see a live demo of this app (and maybe change its code and play with it), head over to the Codepen below, where I've uploaded all the code:


Latest comments (1)
Nice article but you've skipped the entire Vue3 update, you must try to write your component again using the composition API.