Welcome to this blog we'll learn how to set up using AmplifyV6
We'll deploy our backend using aws-cdk
We'll deploy our frontend (Next 14) on aws amplify hosting
If you feel lost with the steps or code do check out the GitHub repo
Only authenticated users are greeted!
Live App
The Complete code for this blog is available here :
So let's get Started
Create a parent folder initialize git init and add a .gitignore file
take auth-cognito
Add the following in the .gitignore file
**/node_modules/
**/.env
**/.env.local
now let's start building our backend
Backend
let's initialize our CDK project backend
take backend in your terminal
cdk init app . --language=typescript in your terminal
let's remove the git to avoid conflicts with our monorepo
rm -rf .git [works on linux and mac]
Now run cdk bootstrap in your terminal
Now Let's create a handy script to synthesize and deploy our cdk application in package.json
"deploy": "cdk synth && cdk deploy --all"
now rename your lib folder to stacks and create
auth.stack.ts in your stacks folder
Let's create our user pool and user pool client
import * as cdk from "aws-cdk-lib";
import { Construct } from "constructs";
import { aws_cognito as Cognito } from "aws-cdk-lib";
import * as iam from "aws-cdk-lib/aws-iam";

interface authStackProps extends cdk.StackProps {}

export class AuthStack extends cdk.Stack {
  public readonly userPool: Cognito.UserPool;
  public readonly userPoolClient: Cognito.UserPoolClient;

  constructor(scope: Construct, id: string, props?: authStackProps) {
    super(scope, id, props);
    this.userPool = this.createUserPool();
    this.userPoolClient = this.createWebClient();
    this.output();
  }

  createUserPool(props?: authStackProps) {
    const userPool = new Cognito.UserPool(this, "UserPool", {
      userPoolName: "UserPool",
      selfSignUpEnabled: true,
      autoVerify: {
        email: true,
      },
      passwordPolicy: {
        minLength: 8,
        requireLowercase: false,
        requireUppercase: false,
        requireDigits: false,
        requireSymbols: false,
      },
      signInAliases: {
        email: true,
      },
      standardAttributes: {
        email: {
          required: true,
          mutable: true,
        },
      },
      customAttributes: {
        name: new Cognito.StringAttribute({
          minLen: 3,
          maxLen: 20,
        }),
      },
    });
    return userPool;
  }

  createWebClient() {
    const userPoolClient = new Cognito.UserPoolClient(
      this,
      "UserPoolClient",
      {
        userPool: this.userPool,
        authFlows: {
          userPassword: true,
          userSrp: true,
        },
      }
    );
    return userPoolClient;
  }

  output() {
    new cdk.CfnOutput(this, "UserPoolId", {
      value: this.userPool.userPoolId,
    });
    new cdk.CfnOutput(this, "UserPoolClientId", {
      value: this.userPoolClient.userPoolClientId,
    });
  }
}
Now lets this stack to our bin and deploy
#!/usr/bin/env node
import "source-map-support/register";
import * as cdk from "aws-cdk-lib";
import { AuthStack } from "../stacks/auth-stack";

const app = new cdk.App();
const authStack = new AuthStack(app, "AuthStack");
take npm run deploy
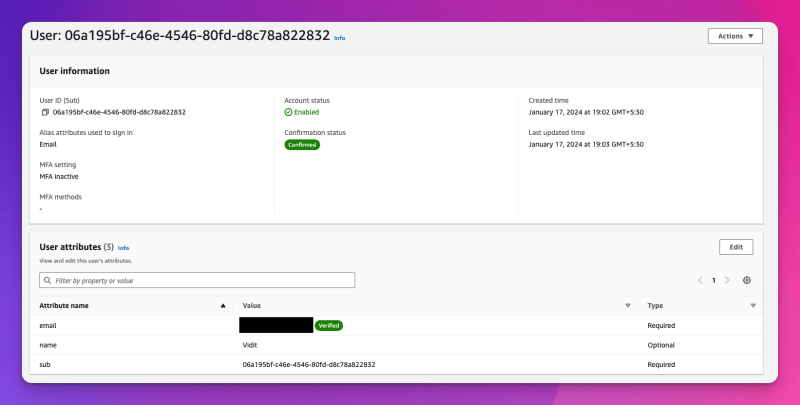
Don't forget to note down the values from the UserPool and UserPool Client
Frontend
All the code can be found under the frontend folder of repo
FrontEnd
Now let's start building our frontend you can clone the repo and run cd frontend && npm init
create .env.local file and add your Userpool and UserpoolClient Values
NEXT_PUBLIC_USER_POOL_ID=<USER_POOL_ID>
NEXT_PUBLIC_USER_POOL_CLIENT_ID=<USER_POOL_CLIENT_ID>
Configuring Amplify on ServerSide
create a folder utils and create amplifyServerUtils.ts
this file exports runWithAmplifyServerContext with our config object in it
import { createServerRunner } from "@aws-amplify/adapter-nextjs";
import { ResourcesConfig, AuthConfig } from "@aws-amplify/core";

const config: ResourcesConfig = {
  Auth: {
    Cognito: {
      userPoolId: process.env.NEXT_PUBLIC_USER_POOL_ID as string,
      userPoolClientId: process.env.NEXT_PUBLIC_USER_POOL_CLIENT_ID as string,
      signUpVerificationMethod: "code",
    },
  },
};
export const { runWithAmplifyServerContext } = createServerRunner({
  config,
});
Let's dive into setting up our protected routes in the root of the folder you'll find
middleware.ts
The middleware function takes care of all the request-response and cors
export const config = {
  matcher: ["/"],
}
this line protects our home route
the authenticated function checks whether the User is authenticated if the user is not authenticated we redirect the user signup, try it yourself
return NextResponse.redirect(new URL("/signup", request.url));
Now let's work to configure AWS to amplify the Client Side
if you see the ConfigureAmplifyClientSide.ts
The steps are pretty much the same but we will be adding into our root layout

Hosting
Make sure you've uploaded your mono repo on Github
Go to AWS Amplify and select hosting
Select GitHub and Grant Permission
have a look at how to work with a mono-repo

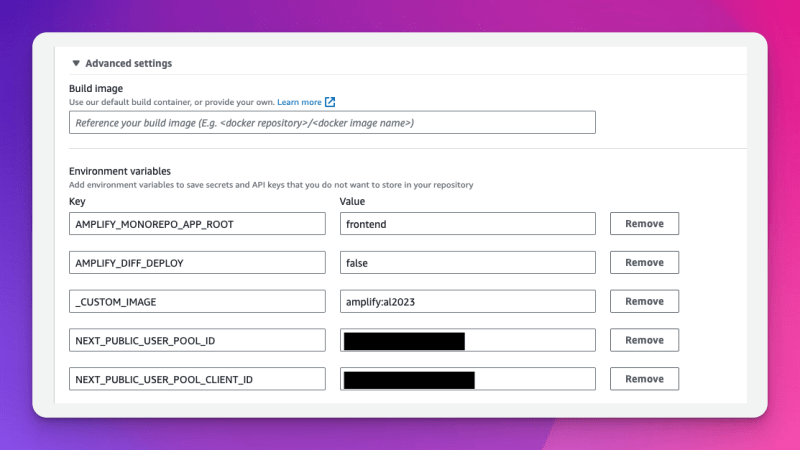
Now click on advance settings and add your environment Variables
Make sure you add this custom image value
_CUSTOM_IMAGE=amplify:al2023
NEXT_PUBLIC_USER_POOL_ID=<YOUR VALUES>
NEXT_PUBLIC_USER_POOL_CLIENT_ID=<YOUR VALUE>

And Tadddaa We're done
If you Like to learn about dynamo DB :Click here
If you like to learn about cognito :Click here
Connect on X/Twitter = Follow here

Top comments (0)