This blog will explain how to create a Google Keep clone using reactjs.
Step 1
Building input to take note
This input show open up on click as in Google Keep. For this, state has visible set as false and on clicking anywhere on the input, visible will be set as true and the input will open up. The same visible will be set false on clicking the close button.
Step2
Taking notes
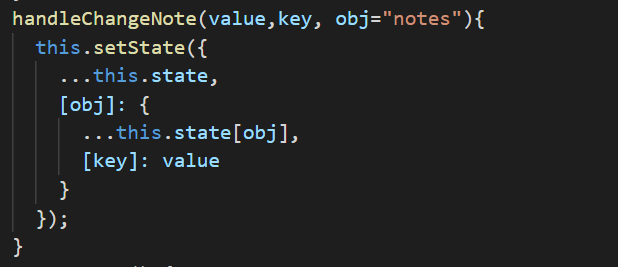
For taking notes, a controlled input is used. It will take input from user. The state has a propety note. The title and input of note will be updated using handleChangeNote function
Then, on clicking the close button this note will be appended to notes_list of state using unshift method.
If there is no user input provided, then the close button will only set visible as false close the input.
Step 3
Displaying notes
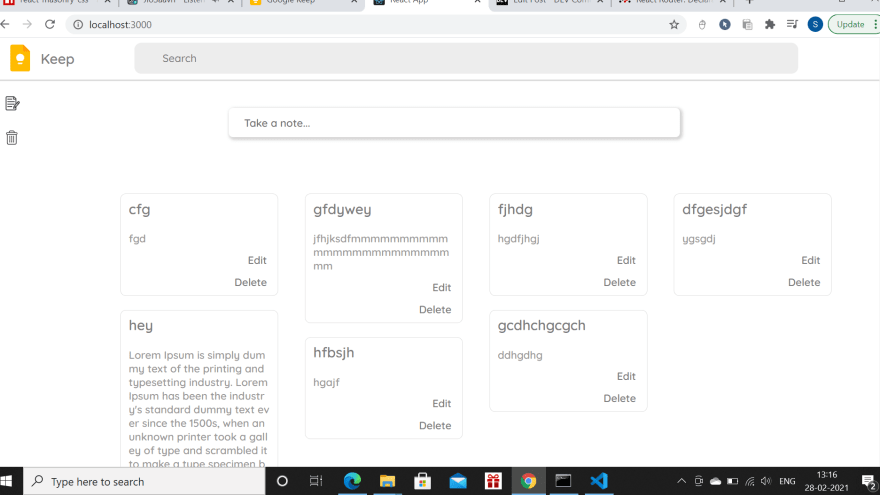
To display notes, react-masonry-css is used. It is a masonry component powered by CSS built specifically for React projects.
Why react-masonry-css ?
I tried using normal layout to display all the notes with height set as auto for each note. But this concept had an issue. Each row of notes took height of the longest note. Hence, to get Masonary look, I used react-masonry-css.
Installation
To install react-masonry-css, run the following command in your command propmt.
The breakpointCols is used to define the number of columns required in the layout.
To display each note from the notes_list, I've used filter and map method.
Step 4
Deleting note
To delete a note, we need to remove the note from the array.
For this, I used a function removeFromNotes. This function is called with note index and notes_list is updated & returned with all the notes except for the one with the mentioned note index.
Step 5
Pinning note
On clicking the pin button, a function will run which will have note id as parameter. The state has a property pinned_id set as null. This function will set pinned_id as the note id.
Therefore, it will be check if pinned_id is null or not. If not, the pinned note will be displayed above all notes.
For deleting a note from pinned note, I just removed the note from notes_list and set the pinned-id as null as shown above in removeFromNotes.
Step 6
Searching a note
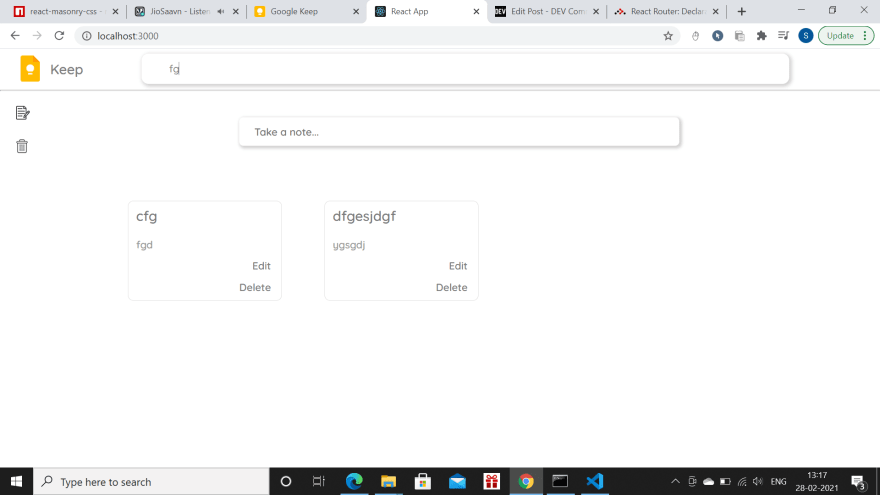
When note to be searched is put in search bar, the change will be updated in the search property of state. Search is initially set to null. Then, the serach_list of state will be updated with all the notes which include what's been searched. This is done using includes method on title as well as input of note.
To display the searched note, a ternary operator is used to check if search of state is null or not. If not null, the searched note is displayed.
Step 7
Editing note
When edit button is clicked, a function will run which will set a boolean showPopUp to true from false, the popup_id will be set to the note id, and edited_note is updated with the note. Hence, the popup will show which will have z-index 1.
Any change in note will be handled with handleChangeNote function. And the close button will run a function which will update notes_list with the edited note.
Step 8
Trash bin
Trash Bin will be a different component. All the things mentioned above will go in Home component. To go to trash from home without refreshing page, react-router is used. Firstly, react-router-dom should be installed by running the installation command ( npm install react-router-dom ) in command prompt.
When delete button is clicked, the note id will be passed as parameter for the function removeFromNotes. The deleted_note of state will be updated with the note to be deleted. And this deleted_note will be added to trash_list of state using unshift method.
Step 9
Deleting Forever
The notes in trash bin is having a button to delete it forever. To delete the note forever, the trash_list should be updated and the notes, having id other than the id that was passed, should be returned.
Step 10
Persisting data on browser
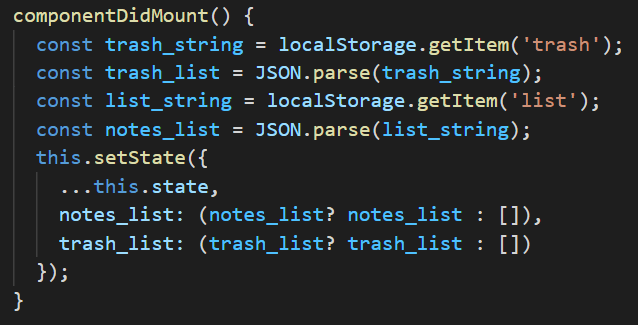
To persist the data on the browser, localstorage API is used.
Firstly, while running addToNotes, the notes added are passed to localstorage using setItem.
Then, on deleting the note, the localstorage is updated.
The notes stored will not be lost on a refresh. As soon as the App component will mount, the notes on home page and in trash will be shown.
The screenshots provided below will you a glimpse of how the app looks.
Live Demo: http://bit.ly/2O9Fm36
Source Code: https://github.com/shambhavijs/gkeep-lite


Top comments (17)
This looks amazing.
Things you can add.
Enter to save can be really easily done just wrap input in form tag and handle your form submit event with on submit and prevent default event.
Thanks, I'll try this.
Sure, will look into this.
Not compulsory unless you're changing it clone of Google Keep to something yours.
Great! I wanna try it by myself :)
I think it would be nice to use a textarea to allow multiline text and avoid to alter the cards size on hover
This looks amazing!!!! I will definitely try this keep sharing and growing
Thanks Pranav!
This looks really cool 👌
Thank you so much
Good one!!
Thankyou!
That's neat mate!
Thanks!
All is amazing!
However, how to wrap it all up to become a mobile app? does React native use different commands?
Some comments may only be visible to logged-in visitors. Sign in to view all comments.