This article explains to deploy a Strapi MySQL on a traditional hosting provider.
Author: Abdulwahab Ashimi
If you have a Strapi app you want to deploy but are uninterested in the multiple cloud or VPS options and want to use a shared hosting package instead, this article is for you.
At the end of this tutorial, you should know how to set up a shared hosting package, install your core requirements, tweak your database options, and deploy your Strapi project.
Introduction to Strapi
Strapi is an headless Content Management System that offers you the chance to develop API with distinctive features. Built on Node.js, works with any GraphQL enabled Frontend Frameworks and is open-source.
What is a Shared Hosting Package?
Shared hosting is a low-cost multi-tenant web hosting with hundreds of users each getting a personal section of a server and co-utilizing its resources to host their website and application.
Prerequisites
To follow through this article, you should have:
- Basic knowledge of JavaScript
- Basic understanding of Strapi - get started here.
- Git installed
- Node.js v14+
Strapi Hardware Requirements
Your computer should have these to enable you run Strapi effectively:
- At least 1 CPU Core (Recommended: 2 CPU Cores)
- Minimum 2GBs RAM (Recommended: 4GBs)
- Disk Space Minimum of 32GBs
Things to Consider Before Purchasing a Hosting Package
Before buying a hosting package, you should consider the price, tech specs or limitations, tech support, and scalability.
Almost all shared hosting providers promise security and 24/7 uptime which is often true. What you should really pay attention to is the cost of the shared hosting compared to alternatives, the availability of their tech support when you run into issues and how easy it is to upgrade your package. Does it serve your need? What are possible challenges you might face? What do existing users have to say about them?
Setting up Strapi Locally
We will start by creating a Strapi app on your local machine. Create an empty database in your Phpmyadmin and using the terminal, run the following command:
npx create-strapi-app@latest my-project
Select the following options:
- Installation Type: Custom
- Preferred Language: Javascript or TypeScript but I will be using JavaScript
- Database Client: MySQL
- Database Name: Your database name
Navigate into the project folder and run the command below:
npm develop
The project should be live on your local machine and database.
Let’s deploy our project on our shared hosting.
Setting up Hosting
We will be using Namecheap for this tutorial. Go to the Namecheap Shared Hosting page and select your preferred package. They all support our Strapi Requirements but I will be using the Stellar package.
Click “Get Started” on your preferred package and follow the process. Once you have successfully purchased your hosting, check your mail for instructions and log in to the cPanel or access it from the Namecheap dashboard.
Type “Terminal” on the Search Box
Click on the icon and launch your terminal.
Setting up Your Project
Make sure git is installed by running the command below:
git version
The command above will show you the current version of git and if it turns an error, you will have to install git.
Now, you need to clone your Strapi Project from Github.
On your terminal, navigate into the Public_html folder and run
git clone (url)
In my case, it is:
git clone https://github.com/ibn-ashimi/my--project.git
Now that we have our project on the cPanel, we will proceed to install~~ing~~ Node.
Note: If you didn’t push your project to git, you can simply zip the file and upload it via File Manager.
Setting up the Database
Navigate to your cPanel homepage. Search and click on MySQL Database.

Create a new database and user, then assign them to one another.

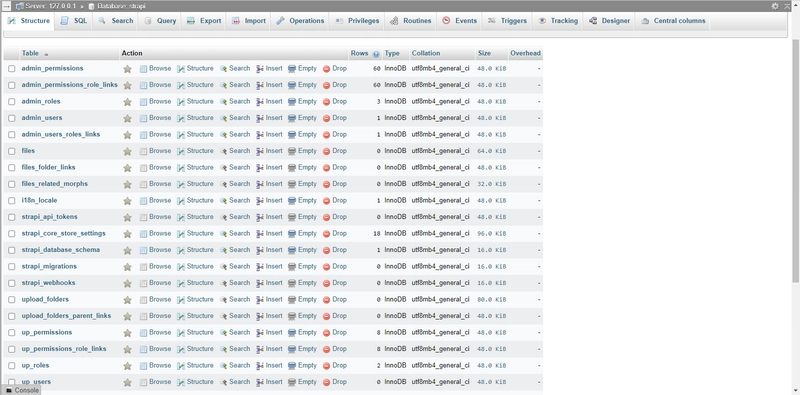
Proceed to Phpmyadmin on your Cpanel. Locate your database and import your local SQL file.

Installing Node
Navigate to your cPanel homepage. Search and click on Setup Node.js App.

Click on “Create Application”.

Choose 12.22.9 as Node.js Version, Production as the application mode. Input your Strapi directory as the application root, the subdomain or domain as the application URL and use server.js as the application startup file. Click on “Create” and you will be redirected here.
Launch your terminal and run the provided command (see the circled part of the image above). This will start up a development environment inside the project folder.
Locate database.js in your config folder and access it using
nano database.js
Run this command on terminal to create your env file:
cp .env.example .env
You can access and edit it using:
nano .env
Start your Strapi server using the code below:
NODE_ENV=production run build
Conclusion
Well done! You deployed your Strapi project on a Traditional Hosting with MySQL Database.
Note that it is not so effective and not always recommended to use a traditional hosting. Cloud or VPS Hosting are better options. Start a Discussion below with your questions and share with others too.


Top comments (0)