This article elaborates creation of a .txt file in Azure Data Lake store from webMethods Integration Server.
You will need access to the below services of Azure,
          Azure Storage Account
          Azure Active Directory
Below are the high-level steps involved:
Step 1: Install CloudStreams Provider for Azure Data Lake Store on webMethods Integration Server
Step 2: Configure Storage Account on Microsoft Azure
Step 3: Integration between webMethods Integration Server to cloud Azure Data Lake Store to create a .txt file
We will now go over each of these in detail.
STEP1: Install CloudStreams Provider for Azure Data Lake on webMethods Integration Server
Download and install webMethods CloudStreams Provider for Microsoft Azure Data Lake Store from the below link,
Also, ensure that you have CloudStreams Development installed on your Integration Server (IS).
Once the installation is done, you should be able to see the CloudStreams related package on your IS,

Now your webMethods Integration Server installation is ready.
Next step will be to configure the Azure Data lake store.
STEP 2: Configure Storage Account on Microsoft Azure
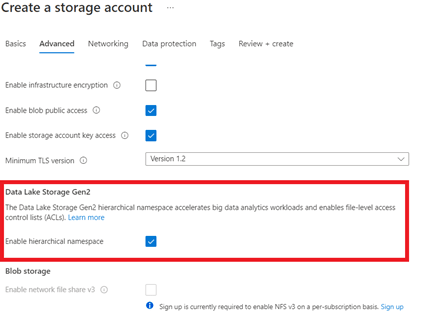
Create a storage account as below,

Enable hierarchical namespace and leave all other default parameters as-is. Review and Create.
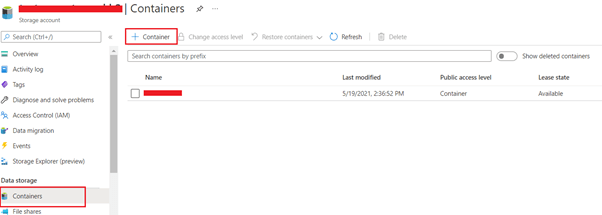
Now the Storage Account is created.
Next, create a container in the storage account. We will fetch the container details from IS to validate connectivity in later part of the POC.
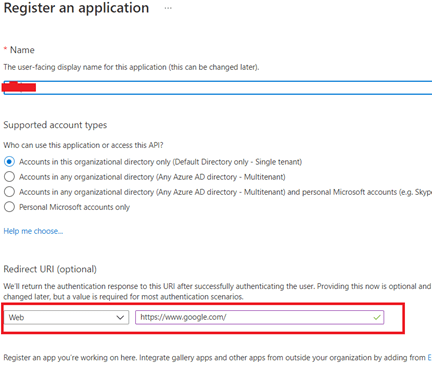
The next step is to grant API permissions so this can be accessed from outside of Azure.
Navigate to Active Directory and register the application as below. Configure the redirect URI. This will later be used to generate auth code.
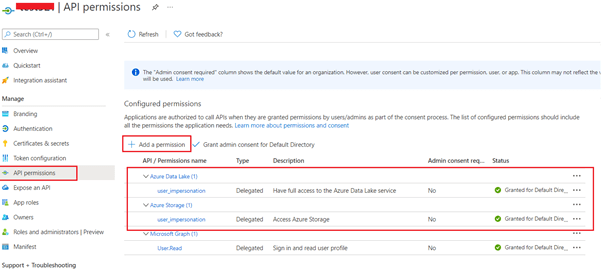
Grant appropriate permissions to the newly created application as below. Also Grant Admin Consent for Default Directory.
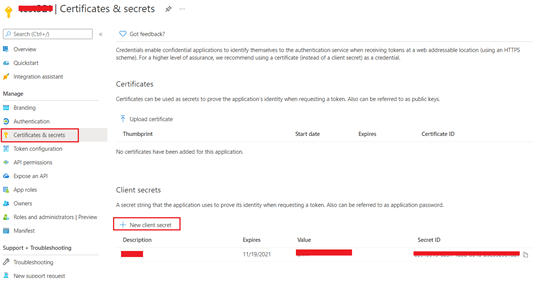
Create a client secret in the application and note down the secret value. This secret will be used to authorize the incoming requests.
Now configuration on Azure is complete. The next requirement is to create access token and refresh token, which along with client secret and other parameters will be used to authorize the request from IS or any third-party app.
Generate authorization code using the below:
https://login.microsoftonline.com/(tenant id)/oauth2/authorize?response_type=code&prompt=login&redirect_uri=(redirect uri)&client_id=(client id)

To generate an access token and refresh token set up a POST request to the URL https://login.microsoftonline.com/(tenant id)/oauth2/token through postman
Note down the resulting access_token and refresh_token

We now have all the required inputs to configure a Microsoft Azure Data Lake Store connection on webMethods Integration Server.
STEP3: Integration between webMethods Integration Server to cloud Azure Data Lake Store to create a .txt file
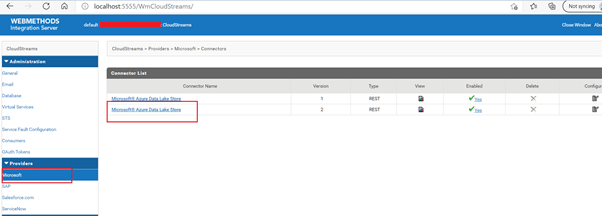
Navigate to IS administrator in your browser as below. This will open a new tab,

In the new tab navigate to Providers>Microsoft>Microsoft Azure Data Lake Store
Ensure the version is 2.
Create a new connection with all the required parameters,

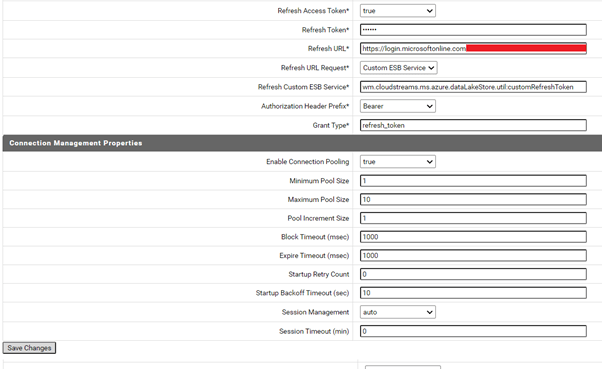

Save the newly created connection and enable it.

Now the connection is successfully configured.
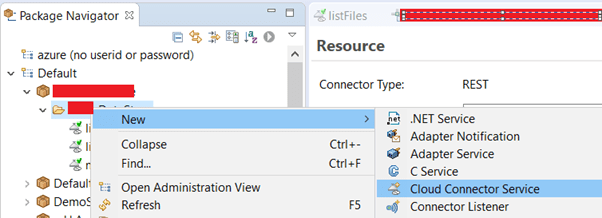
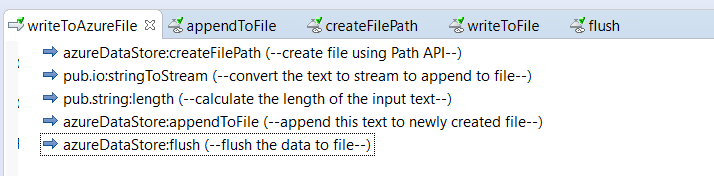
Next step is to create a .txt file from Designer. Open designer and create a new Cloud Connector Service.
We will create the below services,

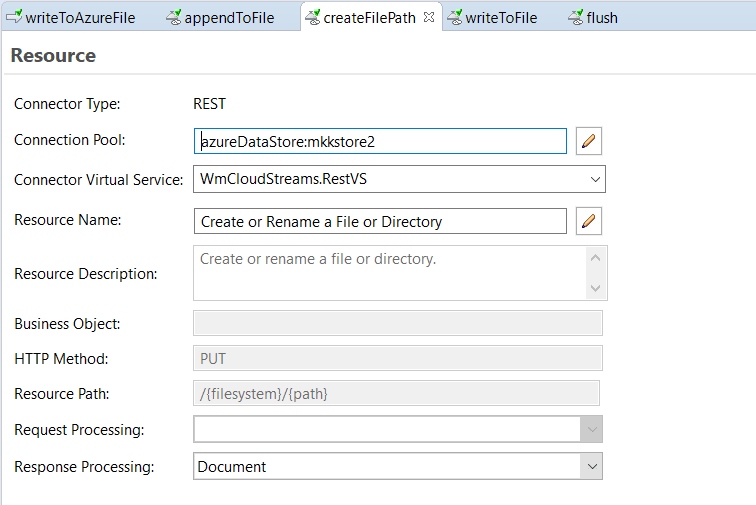
- createFilePath - this connector service will create a .txt file in Azure. Configuration is as below,
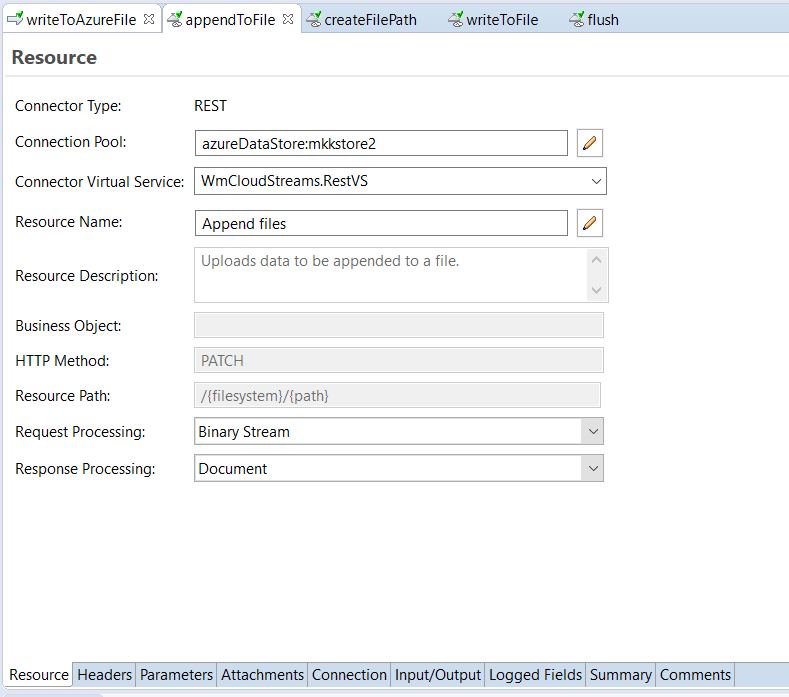
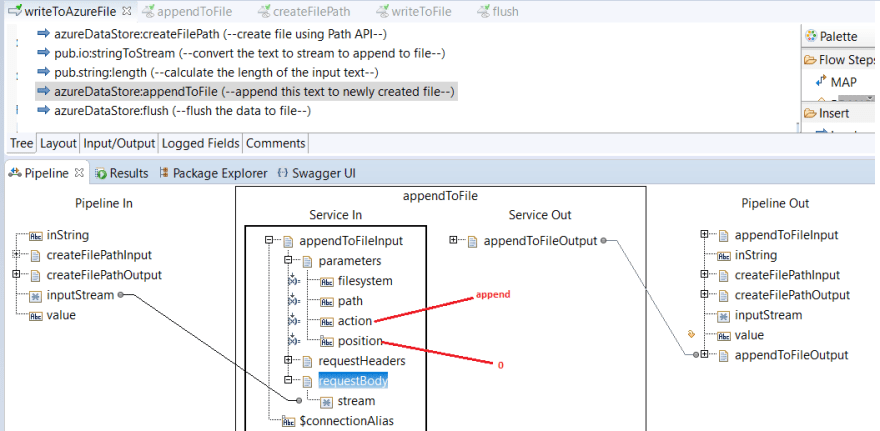
- appendToFile - this connector service will add data to newly created .txt file. Configuration is as below,
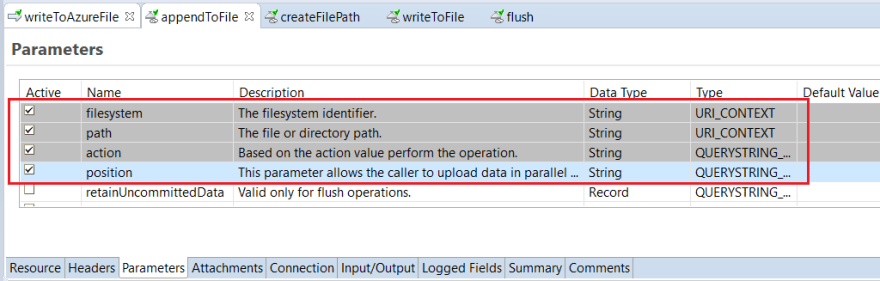
 Under Parameters, ensure that the below are selected,
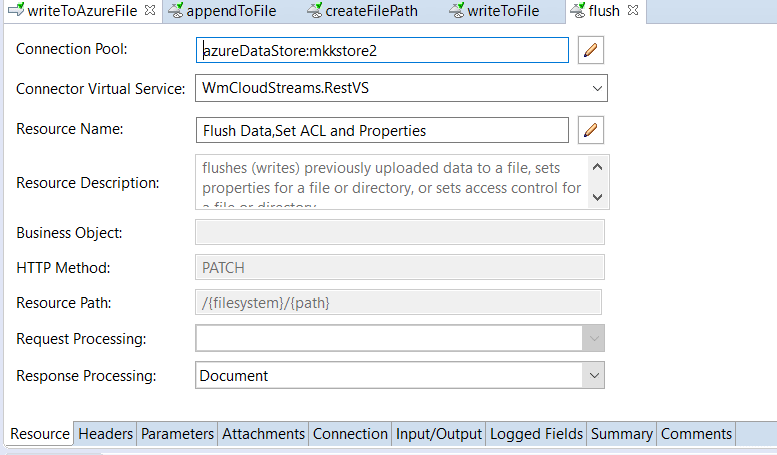
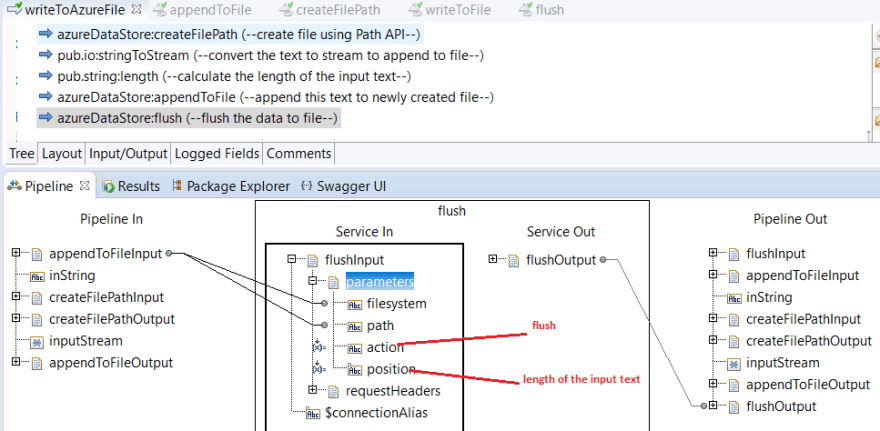
- flush - create and configure a flush connector service, this will commit the data to the .txt file created. Configuration is as below,
- writeToAzureFile - this is the flow service where we will use the connector services and create and write to file in Azure Data Lake Store,
 Below is the elaborate pipeline for the above steps:

 Save and run the service:
 Go back to Azure and verify file creation:


Top comments (0)