
Introduction
In Vets Who Code we have a pretty solid curriculum where we teach from the basics to the more advanced. Week 1 of training involves the command line, VS Code, Markdown, and Git. This tutorial is on the basics of Git.
Git is a distributed version control and collaboration system that tracks changes in code during development. It hosts repositories of your code so that you can see what changes you have made and allows you to go back to a previous version. It also allows you to share code to allow collaboration on projects. In this tutorial we are going to be talking about Github, one of the more ubiquitous repository hosting systems.
Requirements
- A Github account
- A code editor. I recommend VS Code. VS Code is VWCs primary text editor. Download it here and play around with it to become familiar since you will spend many hours in this environment. This tutorial is using VS Code.
Table of Contents
- Create a Repository
- Clone Your Repo Locally
- Create a New Branch
- Make, Add, Commit, and Push Changes
- Making a Pull Request
- Wrapping it up
- Vets Who Code
Create a Repository
When I am starting a new project, one of my first steps is creating a repository (repo) to organize my project.
To create a repo, go to your Github account and click "Repositories". It is the second tab on the top of the page next to your profile image.

Click the green button labeled New.
Then fill out the Repository name, Description, make sure Public is checked, Initialize this repository with a README is checked, then Create repository
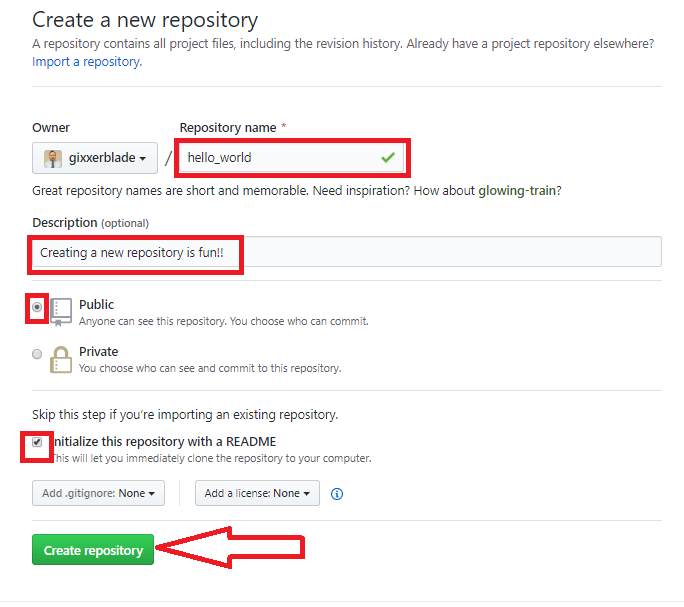
You just created your first repo! 🤙
Clone Your Repo Locally
In the previous section we created a repo which is a good start. Next we want to make a local copy on our computer so that we can make changes to it.
- In your newly created Github repo click the green button labeled Clone or download.
- Copy the link. It looks like
git@github.com:your_username/your_repo_name.git - Open up VS Code
- In the menu go to
View => Terminalto open a new command line. (Or CTRL + ` in Windows)
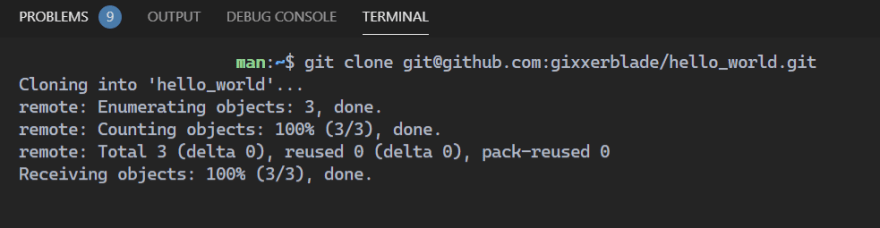
- Type
git clone <your repo you just copied>then Enter. Your result should look like this:
- Then change directory to that newly created directory you created by typing
cd <name of your repo>
Create a New Branch
Recently, I was working on the Vets Who Code website when we talked about adding a blog to it. There are some very talented veterans on our team that are very capable of creating a blog very easily but I also wanted to try my hand out on it. Instead of writing to the original code base, I "branched" off my own code base and began writing my own version of the blog for our site. When I was done I sent my branch to the kind people at Vets Who Code by making a pull request. Don't worry, we'll talk about pull requests later.

As you can see from the image above, I made a new branch off of the original code so I had a fresh copy of the updated code. That way I could work on the a version of the repo without messing up the original repo.
When you clone a repo, you are cloning the master branch. For good practice, I was always taught to never work on the master branch but always work on another branch. The master branch should represent the 'stable' version of your code. Use branches to experiment with new features (like a blog in the example above), implement them, and when they are stable, you can merge them back to the master branch.
- Open up VS Code again.
- Open a terminal and then type
cd <name of your repo> - Type
git checkout -b <name-of-your-new-branch> - Type
git branch. You should be left with this:

You're doing great! You've just created a new branch you can work on, independent of the master branch.
Make, Add, Commit, and Push Changes
In the last section we created a new branch. Now we want to make changes to this branch, then add these changes to our working tree, commit those changes to our files, then push those changes to our online Github branch. Here's how we're going to do it:
- In your terminal, type
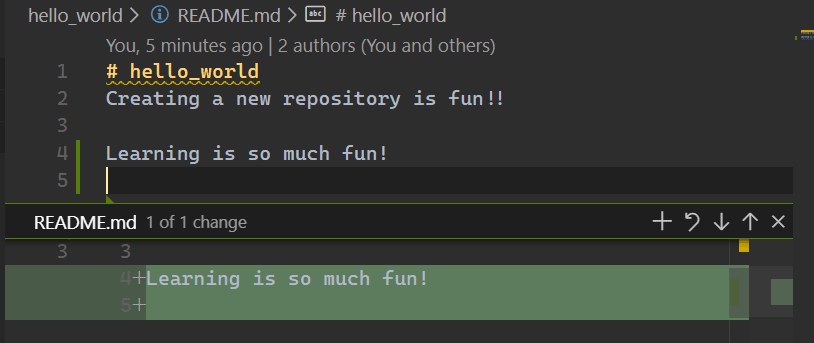
code README.md. This will open the editor portion for you to edit in VS Code. - Add a comment to your
README.md.

As you can see we added one single line of text. VS Code is already tracking this change. See that green line next to your text? That's telling you that you've made changes to the document. It shows that we've changed two lines (denoted with the + sign); we've added the text and we've added one empty line.
- Go back to your terminal and type
git add README.md. Again, we adding this file to our working tree of changed items. - Type
git commit -m "Added one line of text to README.md". The commit command stages all the files you added. The-mflag followed by quoted text is a short synopsis of those changes. - Type
git status
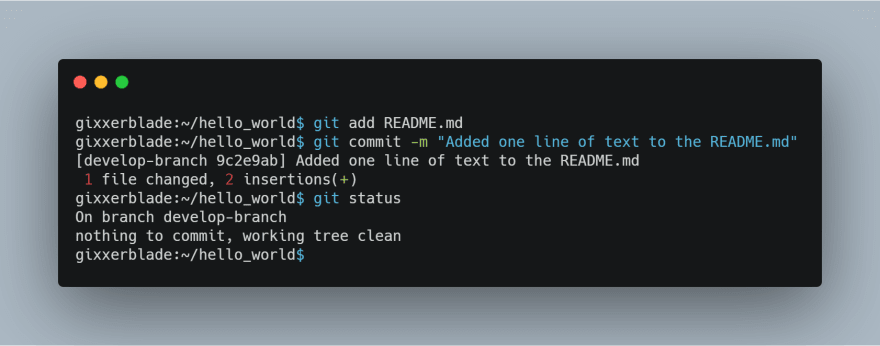
As you can see we received several messages from these two commands. First, the message shows us we are on the develop branch with a unique serial number. Then it shows that we changed one file (README.md) and made two insertions: the one line of text and the one empty line when we hit return. That unique number is just a portion of a longer number.
- Type
git log

From the git log we can see the full history of commits we have made on this one repository which is helpful if you are running into merge problems down the road. It also shows the entire unique commit number, in this case 9c2e9abe44d48b9be159fc244758251545161786.
- Type
git push. Uh-oh, we seem to have afatal error. Git is smart and helps us find a solution to the error.

- Type
git push --set-upstream origin develop-branch.

What we just did is change our remote origin from master to develop-branch. If you go to https://www.github.com/your-username/your-repo you will see that it is now updated online and it reflects the changes you made locally, on your computer. No it isn't updated. What is going on? Let's find out in the next section.
Making a Pull Request
A pull request is a request to merge a branch that is not the master branch. A recap, earlier we created a new branch named develop-branch so we could make changes to a document independent of the original work or master copy of the document. Now we are going to merge these changes with the original work:
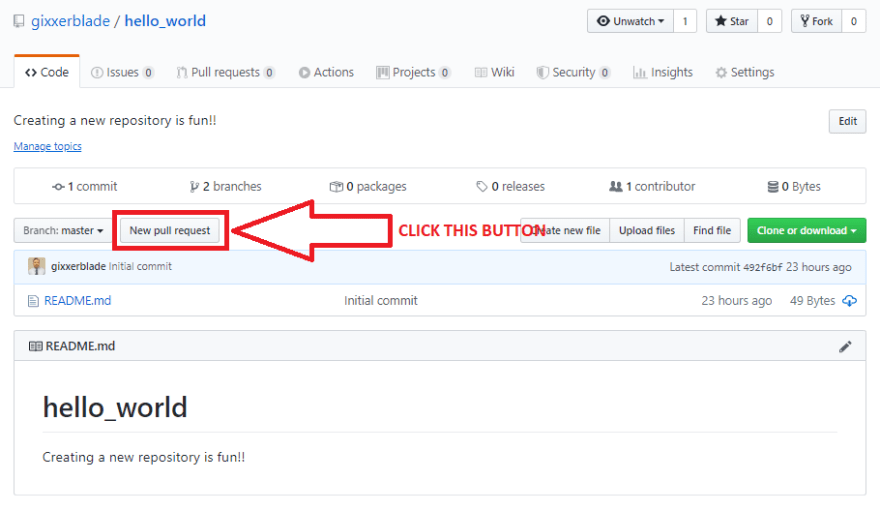
- Go to www.github.com/your-username/your-repo and click on New pull request button.
- On the next page, right below the Compare changes heading where it says
base: master<==compare:master, select thecompare:masterdropdown and selectdevelop-branch.
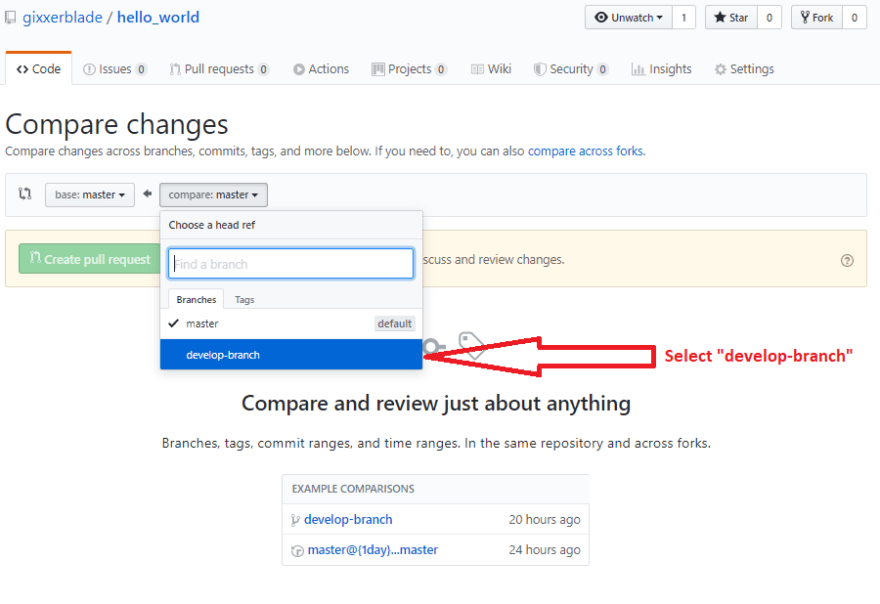
What we are doing is comparing the develop-branch to the master branch and to let Github see what changes were made.

As you can see, we are able to merge these two branches/documents together without any weird behavior.
- Click the green button labeled Create pull request and see the results.

This branch has no conflicts with the base branch
Merging can be performed automatically.
- Finally, click the Merge pull request button then the Confirm merge.
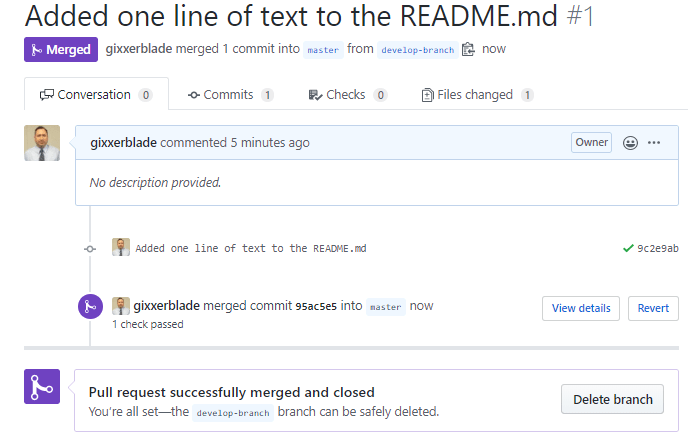
✅ Success!
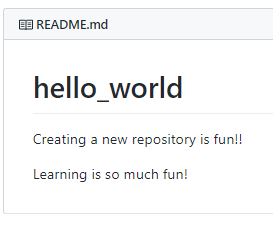
- Two things here. You can either delete the develop-branch here or keep it. I recommend keeping it, only because it can be a regularly used branch to make small changes to a project. If it was a branch named feature/add-blog you could safely delete it because once a feature is merged to the main code base, you won't be using it anymore, just creating new branches to fix bugs. At any rate, you can see your work if you go back to the main page of your repo:
Congratulations, you finished, now go out and build and conquer your world.
Do you want a real world test of your newly acquired skills? Wait for part two of this tutorial where we learn how to fork a project, make changes, then make a pull request. You also get a free sticker for your efforts.
Wrapping it up
Don't worry if you're a little lost. I just wanted to fully explain the functionality of everything instead of just blasting an answer at you. I figure working things out is the best way to learn a concept.
Vets Who Code
Did you like what you read? Want to see more?
Let me know what you think about this tutorial in the comments below.
As always, a donation to Vets Who Code goes to helping veterans, like myself, in learning front end development and other coding skills. You can donate here: VetsWhoCode
Thank you for your time!

Oldest comments (0)