Introduction
I find automating tasks one of the coolest things about programming. Lately, I've been thinking about ways to utilize APIs to automatize some things, and I came up with the idea of making my Twitter profile banner image change automatically from time to time. It would be like having access to a Twitter feature that no one has, the capability of having a slideshow as a banner instead of a single image.
I will use NASA's Astronomy Picture of the Day API to obtain the images I will use. This API provides a different image daily, making it appropriate for this specific purpose. Also, by using this API, I know that my Twitter banner will repeat no pictures. You can use images from other APIs or your own.
Obtaining access to the APIs
Before starting, you'll need access to the Twitter API and the NASA API.
Twitter API
To access the Twitter API, you must go to Twitter's developers portal. Make sure to log into the portal with the same account you want your banner to change automatically. I'll not cover step-by-step what you need to do to obtain access to the Twitter API, but here is guide. You'll need to apply for Elevated Access to the API (step four) because the request to update one's profile is part of the v1.1 endpoints. It is not difficult to obtain elevated access. You'll have to explain how you will use the API so they know you are following their terms of conduct.
NASA's API
Next, you will need access to NASA Open APIs. NASA's APIs are free to use. It is possible to utilize the API without your API Key by utilizing "DEMO_KEY" as the key.
For example:
https://api.nasa.gov/planetary/apod?api_key=DEMO_KEY
The only limitation is that with the demo key, you can only make 30 requests per hour and 50 requests per day per IP address, while with your API key, you can make up to 1000 requests per hour. The demo key provides enough requests for this project to work since I'm only making one request per day. But I decided to utilize my API key anyway because I would make multiple requests per hour while writing and testing the code. Also, it is easy to obtain.
To obtain access to the NASA API:
Go to api.nasa.gov.
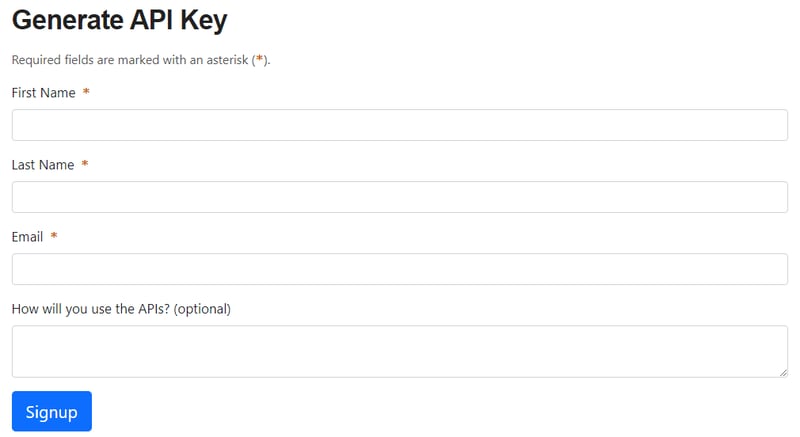
Scroll the page down until you find a form called Generate API Key.
Fill in your personal information and click on signup. You should receive an API key right after.
Implementation
Prerequisites
The are three libraries that you will need.
Tweepy for more easily use of the Twitter API,
requests to obtain the information from the NASA API through an HTTP request,
python-dotenv, which I used to store and access my private keys without exposing them publicly.
You can manually install these libraries or if you cloned my Github repository, install through the requirements.txt file.
pip install tweepy
pip install requests
pip install python-dotenv
pip install requirements.txt
If you are using python-dotenv, you must create a .env file and write your API keys and access token. Example:
TWITTER_API_KEY="YOUR_TWITTER_API_KEY"
TWITTER_API_KEY_SECRET="YOUR_TWITTER_API_KEY_SECRET"
TWITTER_ACCESS_TOKEN="YOUR_TWITTER_ACCESS_TOKEN"
TWITTER_ACCESS_TOKEN_SECRET="YOUR_TWITTER_ACCESS_TOKEN_SECRET"

NASA_API_KEY="YOUR_NASA_API_KEY"
Getting the content from NASA's API
import requests
from dotenv import load_dotenv
import os
load_dotenv()

api_key = os.getenv('NASA_API_KEY')

json = requests.get(f'https://api.nasa.gov/planetary/apod?api_key={api_key}').json()

if json['media_type'] == 'image':
    title = json['title']
    imageURL = json['hdurl']
    content = Content(title, imageURL)
In the code above, I send an HTTP request and obtain a JSON containing information about today's astronomy picture of the day. Here is an example of what today's JSON looks like using the demo key. From this, I get the image's title and URL. There are two URLs. The difference is that hdurl is in a higher resolution.
I'm checking if the value of 'media-type' is 'image' because sometimes the API returns a video instead of an image. In that case, I'll skip that day and not update the banner.
Download the image
img_data = requests.get(url).content
if not os.path.exists('tmp'): os.makedirs('tmp')
with open('tmp/banner.jpg', 'wb') as handler:
    handler.write(img_data)
If it does not exist, I create a folder called 'tmp' in the main directory, where I will save the banner image. I get the image from the URL I obtained from the NASA API.
Auth on Twitter API
import tweepy
from dotenv import load_dotenv
import os
load_dotenv()

api_key = os.getenv("TWITTER_API_KEY")
api_key_secret = os.getenv("TWITTER_API_KEY_SECRET")
access_token = os.getenv("TWITTER_ACCESS_TOKEN")
access_token_secret = os.getenv("TWITTER_ACCESS_TOKEN_SECRET")

auth = tweepy.OAuthHandler(api_key, api_key_secret)
auth.set_access_token(access_token, access_token_secret)
api = tweepy.API(auth)
Using Tweepy to handle the authentication, I pass my API key and secret to Tweepy's OAuthHandler object, set my access token, and then create an API instance.
Updating profile
text = f'Banner photo: {content.title}\nfrom: https://apod.nasa.gov/apod/astropix.html'
api.update_profile_banner(filename = 'tmp/banner.jpg')
api.update_profile(description = text)
Now that I have created an API instance using Tweepy, obtained the content from the NASA API, and downloaded the image, all I have to do is update the banner. I'm also updating my bio to display the title of the picture.
Deploying and setting a scheduler
By running this code, your profile banner and bio will be updated. You'll have to run it daily, so your profile is updated daily. I deployed the code on Heroku and used a scheduler to run the main script every day. Heroku allows you to have up to 5 free projects, so I did not have to pay to use this alternative.
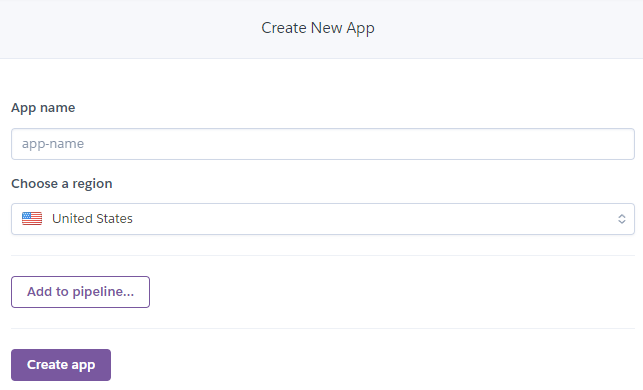
First, create a new app.
On your app's deploy tab, choose how you want to deploy your project. I linked my app to the Github repository. Still, you can also use the Heroku CLI to deploy your project if it is not on Github.
Under the settings tabs, there is a field to add your config vars. You must add your API keys, access tokens, and secrets there. These variables will then become accessible as if they were in a .env file.
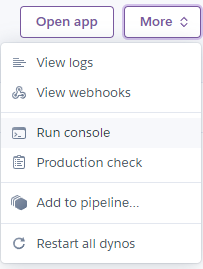
You can open the console on the top right and run the main script of your project to test if it applies the changes to your Twitter profile by running it on Heroku.
$ python main.py
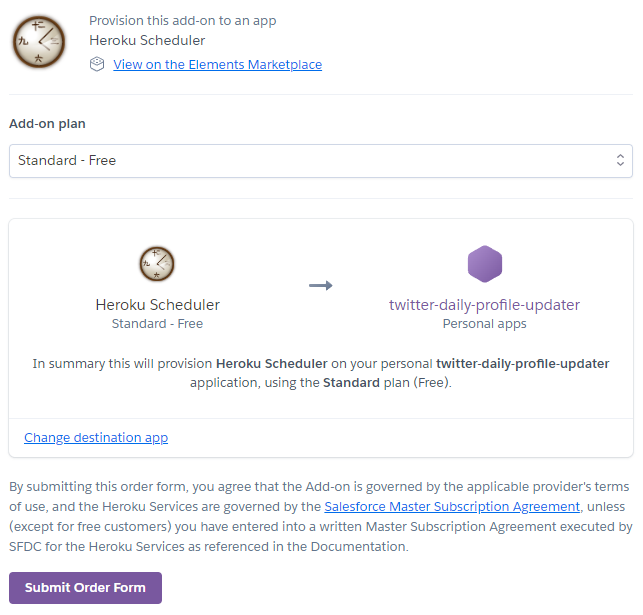
Next, you'll have to go to the Addons page and look for an addon called Heroku scheduler. Open the scheduler page and click on install. You'll have to select the project you want to use this addon.
To use any addon on Heroku, you need to have added your credit card info to your account billing settings. Still, it will not charge you since this addon is free unless you run the application many times a month.
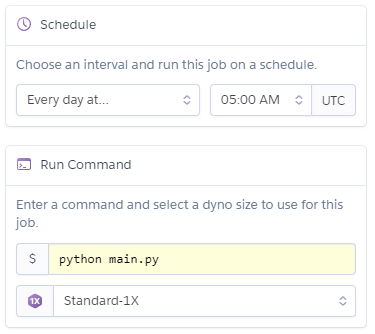
Finally, go back to your app overview tab. You should see the Heroku scheduler under the installed addons. Open it and click on create a new job. You will then have to fill in what command you want to run and at what interval it will run.
Conclusion
Thank you for reading. Let me know in the comments if you have any questions or suggestions.
Here is the GitHub repository:
https://github.com/viniciusenari/twitter-profile-updater





Oldest comments (4)
Great work Vinicius✨🥳🥳🥳😊
Thank you!
Welcome☺️
welcome☺️