In this tutorial, we will show you how to create a Weather Station using a raspberry pi and send events to Wia.
This is an updated version of our old tutorial. There have been several changes to the Wia dashboard and code since our last tutorial.
What You Will Need
- Raspberry Pi 2 or Model 3 B+
- Raspberry Pi Sense HAT
- Node.js and NPM must both be installed on the raspberry pi.
If you do not have it already installed, learn how to install node.js here.
Setting up the Raspberry Pi
First, you have to set up the Raspberry Pi. Our tutorial will walk you through it! Be sure to follow each step carefully. When you're ready, run ssh pi@('RASPBERRY-PI-IP-ADDRESS'). This will allow you to begin working in the raspberry pi terminal through your computer.
Setting up the Wia Node.js SDK
First, we need to create a folder on the raspberry pi to store our files. Create a new folder called wia-wether-device.
Next, initialize the package by creating a packackge.json file using the command line npm init. Hit enter for each of the prompts, they are not important at this time.
Once you are through that, you can install the Wia SDK onto the raspberry pi by using the command line npm install --save wia.
Using the Sense HAT with Node.js
Next, we must install nodeimu so that we can use the sensors. Use the command npm install --save nodeimu.
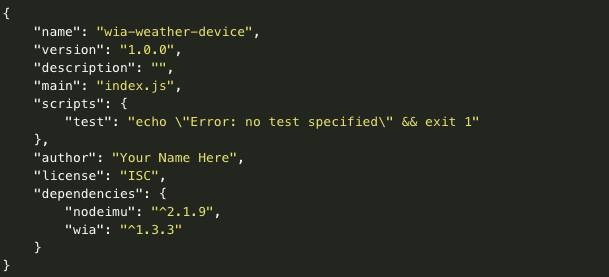
Your package.json file should look like this:

Create Your Weather Device
Go to the Wia Dashboard and select Create a New Space then select Devices. Add a device and give it a name. Now, in the Configuration tab for your device, you will find device_secret_key which should begin with d_sk. This will be important later on.
The Code
Create a file called index.js. Then, copy the code from the example below and paste it into the index.js file.
Replace the device_secret_key with your device's secret key.
'use strict';
var wia = require('wia')('device-secret-key');
var util = require('util')
var nodeimu  = require('nodeimu');
var IMU = new nodeimu.IMU();
var tic = new Date();
var callback = function (error, data) {
 var toc = new Date();
 if (error) {
   console.log(error);
   return;
 }
 // Send temperature data
 wia.events.publish({
   name: "temperature",
   data: data.temperature.toFixed(4) // data received from temperature sensor
 });
 // Send pressure data
 wia.events.publish({
   name: "pressure",
   data: data.pressure.toFixed(4) // data received from pressure sensor
 });
 // Send humidity data
 wia.events.publish({
   name: "humidity",
   data: data.humidity.toFixed(4) // data received from humidity sensor
 });
 setTimeout(function() { tic = new Date(); IMU.getValue(callback); } , 250 - (toc - tic));
}
// Using the MQTT stream
wia.stream.on('connect', function() {
 IMU.getValue(callback);
});
wia.stream.connect();
To test your program, run node index.js
Now, you should see events appearing in the Events tab for your Device in the Wia Dashboard.
The App
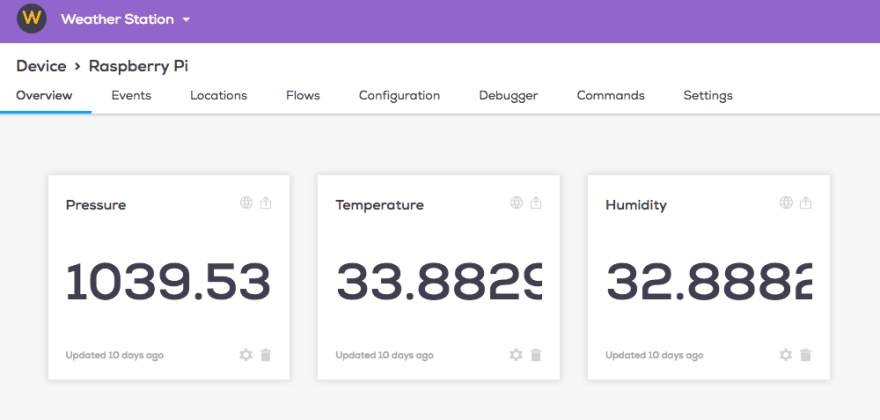
Next, we will make a few Widgets through Wia to present the data that the Weather Station collects. Log in to the Wia dashboard, and navigate to your Device. Select the Widgets tab and create a new Widget. Name it Humidity. For the event box, type humidity exactly as it appears in the node.js code that you copy and pasted before. Select done and you will see the latest update. Follow these steps for temperature and pressure to finish your Weather Station project.

Web Page
Next, create a webpage and host it on GitHub so you can check the weather from your Weather Station any time!
If you don't have a github account already, you can make one here.
Once you are set up with github, create a new repository and name it your-username.github.io. Check the box to initialize with a README.
Now, navigate to your new repository and create a new file. It must be named index.html. Copy and paste the following block of code:
  <!DOCTYPE html>
<html>
  <head>
    <meta charset="UTF-8">
  </head>
  <body>

    <h1>Wia Weather Station</h1>

  </body>
</html>
So far, our webpage is pretty blank. Navigate back to your Wia Dashboard and in the overview for your Device, you can see your Widgets. In the upper right hand corner of the Widget, there should be a box with an arrow. Click the box and a screen like this should pop up.
Change the settings so that Anyone can view this Widget and embed it in any website. You should also Embed code, which will start with <iframe> and end with </iframe>. Copy the entire code and paste it below the <h1>Wia Weather Station</h1> line and above the </body> line. Your full code should look something like this:
  <!DOCTYPE html>
<html>
  <head>
    <meta charset="UTF-8">
  </head>
  <body>

    <h1>Wia Weather Station</h1>

    <iframe> YOUR WIDGET </iframe>


  </body>
</html>
Do this again with each Widget.
Click commit changes and visit your site at https://github.com/username/username.github.io
You should be able to see the weather from your raspberry pi appear on your own webpage!


Top comments (0)