If you've ever wondered how to make an image classifier that you can easily implement into your own Xcode project without writing a single bit of code, here's how!
First, let's access CreateML! Start by opening Xcode. As soon as you get to the opening screen, as shown on the image below, right click the Xcode icon and press Open Developer Tools. From there, you will get multiple choices to pick from. Select Create ML.

As you open CreateML, you will be greeted by the Finder. If you are opening a preexisting ML Model file, then you can pick from the files, but in our case, you will then go to File and then New Project as shown in the screenshot below.

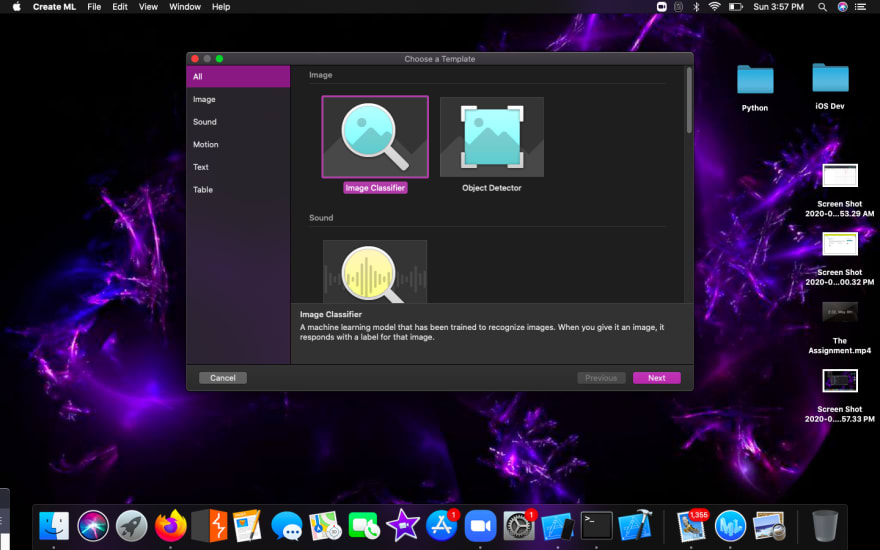
Upon opening the New Project, you will see something like the image below come up. CreateML offers multiple types of machine learning platforms, including text recognition, sound identification and even an object detector! For our case, you will select the first one, which is the Image Classifier.
Go ahead and name your Project! This step is quite self explanatory.

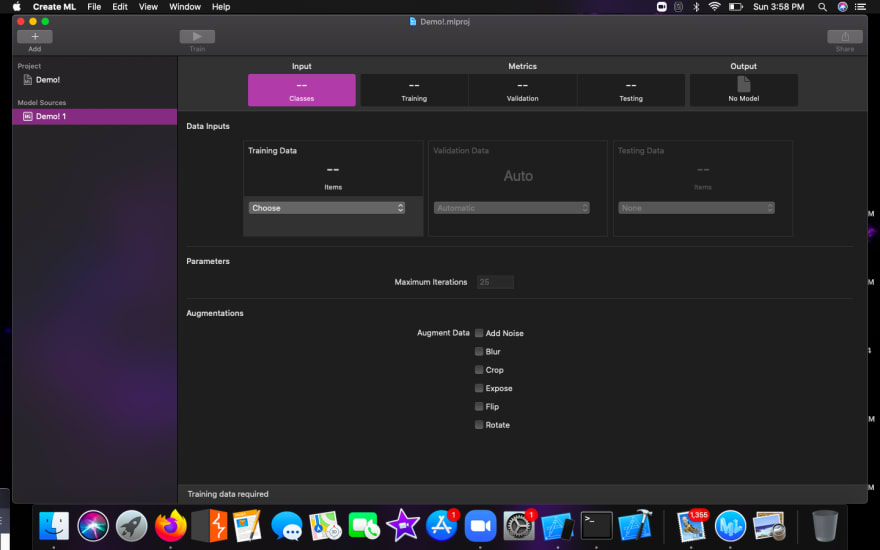
After naming your project, you will come to this screen. As you can see, there is an option to add both training and testing data. In addition, you add additional parameters such as the number of iterations desired (how many times do you want the model to repeat itself?) along with augmentations. These help you in the training of your model in order to increase both the precision and recall rate, something we will talk about nearing the end of this tutorial.
How do you organize your data?
Organizing your data carefully is extremely important in order for the model to work properly and to increase the precision rate. As shown by the series of images below, there are certain easy steps you should follow while organizing your data. First, divide it into both testing and training data. You will be dragging and dropping both these files into CreateML later on.
The image below shows the folders inside the Training data folder. Both the training and testing data should be formatted exactly the same (at least for now at this point of the tutorial). The naming of your folders here is extremely important as it defines the class names. For example, these are my top 5 clouds I used in my Cloudifier app. I programmed my app to pull data out of this model and the model is trained to only return these class names.

Here comes the difference between testing and training data, and that is by the amount of data put in. Any naming of the images is not required, as shown below, so you can drag them into the file from your browser "raw". What's extremely important is that all the data is relevant towards the class name. In addition, the training data, should be MORE than the testing data.

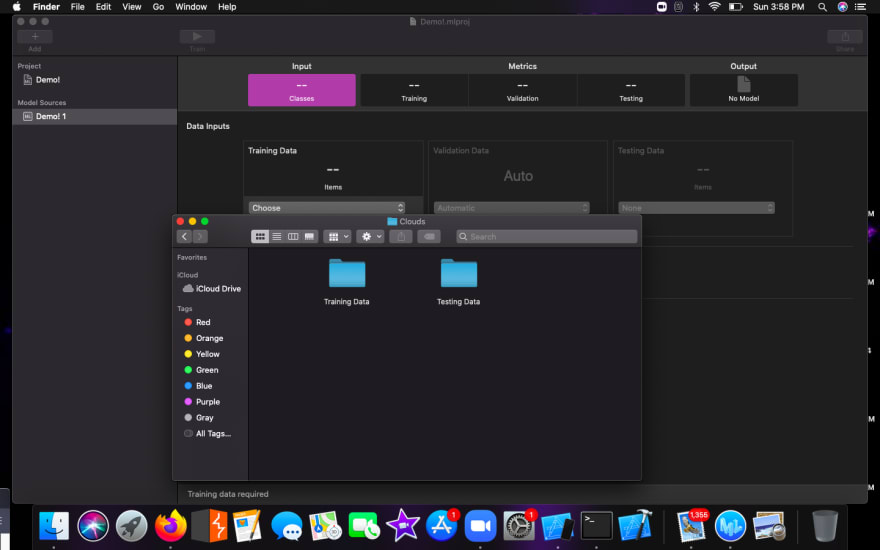
Now that data organization is over with, we can start focusing on how to actually train the model. First drag and drop the training data into the Training Data section, as shown below.

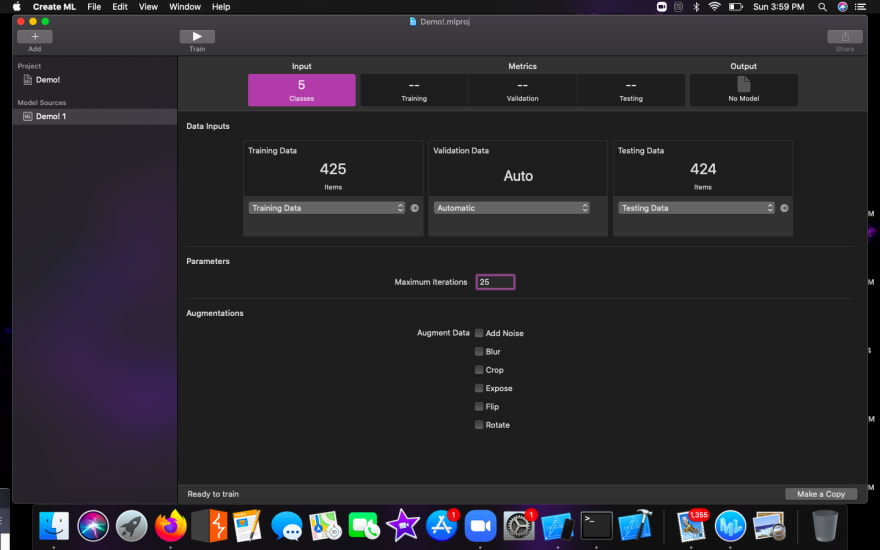
After adding both the training data AND the testing data, you can then selection the amount of times you want to the model to iterate itself, along with other augmentations such as cropping, flipping, rotating, etc. For those using lower end MacBook models, I recommend steering clear from augmentations and keeping the iteration number not too low nor high for a higher chance of increasing precision rate.
Press the "Train" button with Play symbol on the upper left hand corner to run your project. This will begin the process of training which usually takes a couple of seconds to multiple hours depending on the number of data and the augmentations. You can always press the Cancel button as shown below if it doesn't work.

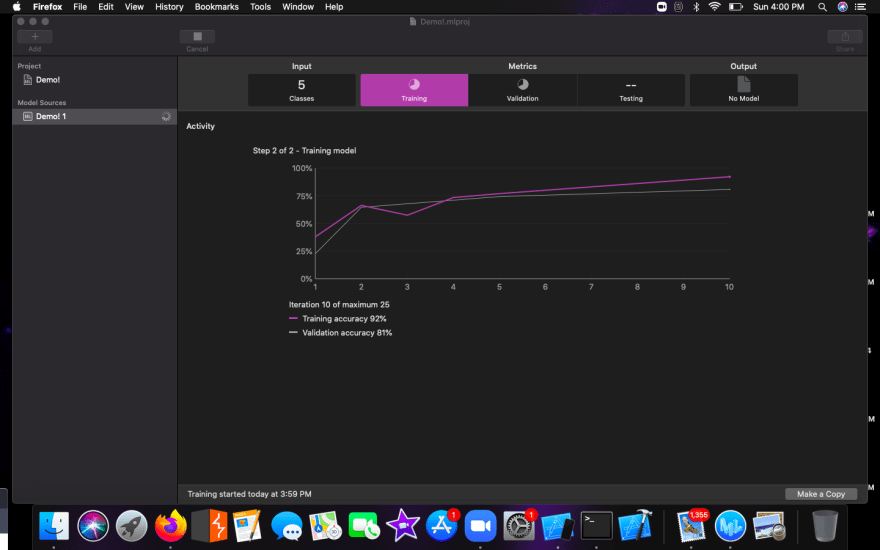
After both the extraction of features and the iterations process is complete, then you will begin to see a graph which models the accuracy rate for both the training and validation accuracy. The validation accuracy is used to evaluate the model's performance.
As the model graph is done graphing, you will then see a table which shows both the precision and recall rate of the data trained. Usually, having rates greater than 96% means that the data is well-trained. If somehow the accuracy is slightly less try adding other augmentations and/or decreasing and increasing the number of iterations.

The model will then automatically begin to test the testing data based on the accuracy shown by the training data, as shown by the screenshot below.

This is the step where you get your final and most important results. Here, you see the both the precision and recall rate of the testing data. Although the validation rate is slightly less in this model, keep on tweaking certain features to increase all the rates of accuracy in order to further improve your model.

After this, you can simply go to the Output file and drag the ML model as shown below into your file structure in Xcode.

That's it! I hope you liked this tutorial and will use it for your own applications! Here's the link to the orginal post on my blog (there isn't much content since I just started!): https://millenniumx.carrd.co/#machinelearning

Top comments (3)
I really liked your article!
Fantastic article !!!!!!
Thank you! It means a lot!