In-App Purchases can end up making you tons of money with your next app…
Why In-App purchases?
If you haven’t noticed, the biggest apps in the market like Spotify and Evernote are free, which attract far more users than any paid app. What makes these apps different is that they have In-App purchases which usually far surpass any income a solo developer can accumulate with a paid app. If your incentive is to not only help others and create something that the people want, but also making a good amount of money off of it, In-App purchases are perfect for you. Here is a short, easy tutorial on how to implement In-App purchases into your next app in just 13 steps…
1) Go to App Store Connect
First, go to App Store Connect (https://appstoreconnect.apple.com/)
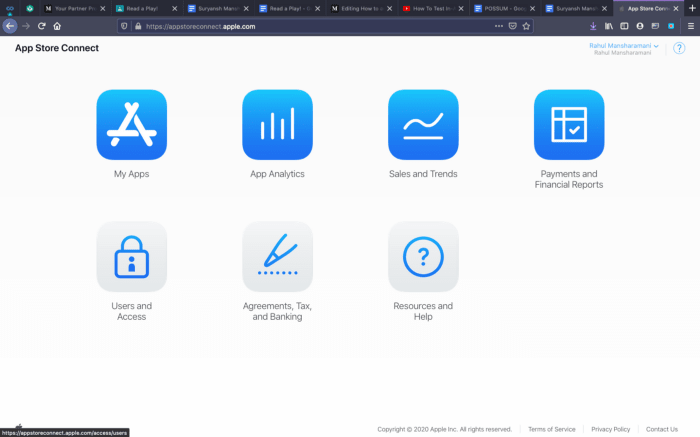
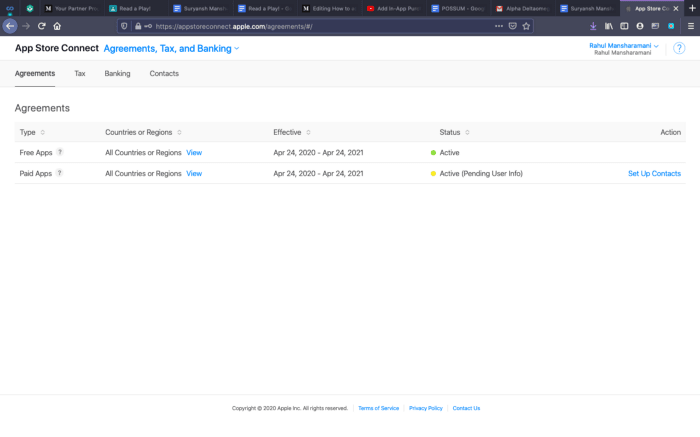
2) Check the Paid Apps Status
Press the Agreements, Tax and Banking button to check if you’re able to create an app with any paid components in it. If it says Active, then your fine. If the dot under status for the Paid Apps type is red, then you have to add certain information before creating this app.
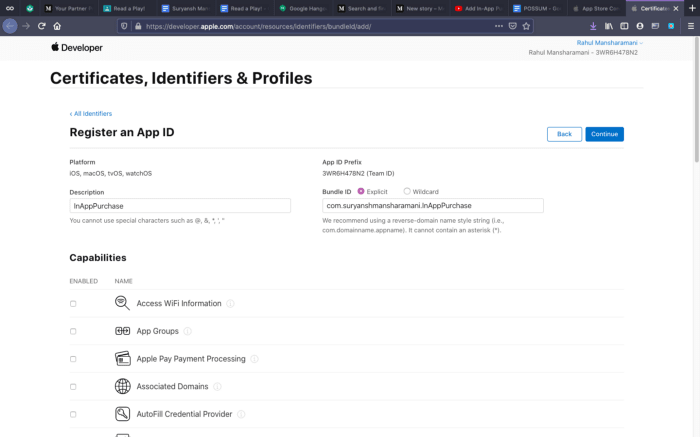
3) Registering the App ID
Now we need to register the App ID (https://developer.apple.com/account/resources/identifiers/bundleId/add/) .
First, for the description, write something quite generic or just the app name. The Bundle ID will be set to explicit. The Bundle ID has to be unique, so the convention usually is the following:
If you have a website, then write com.[websitename].[appname]
If you don't have a website, then write com.[fullname].[appname]
Although the capabilities section is preset, its good practice to scroll down in the Capabilities section to check that In-App Purchases is enabled.
4) Setting the Project Info
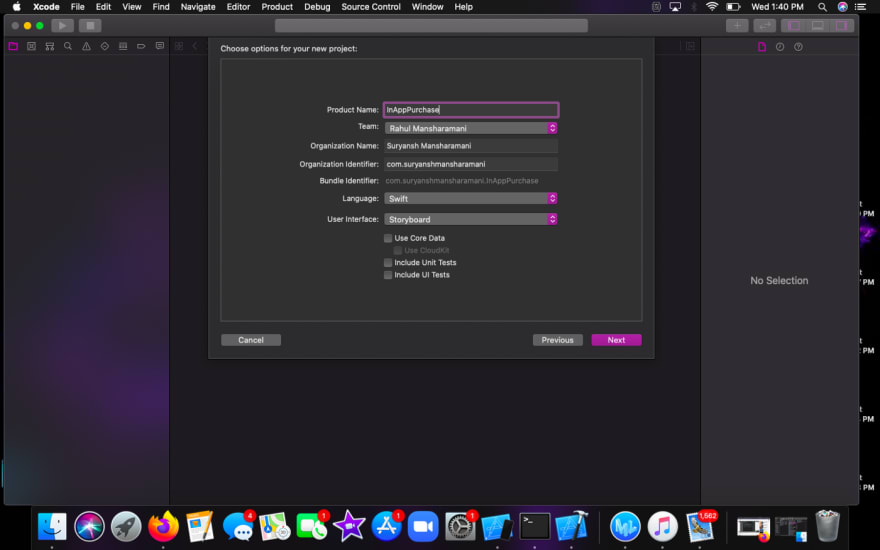
Next, open up Xcode and create a project with the same App ID description. This is a requirement because, as you can see, the Bundle Identifier is heavily dependent on both the Product Name and the Organization identifier, which follows nearly the same form:
For those with a website, it will be com.[websitename]
For those without a website, it will be com.[fullname]
For this project, we will be using Swift and the Storyboard User Interface.
5) Adding the In-App Purchase Capability to Xcode
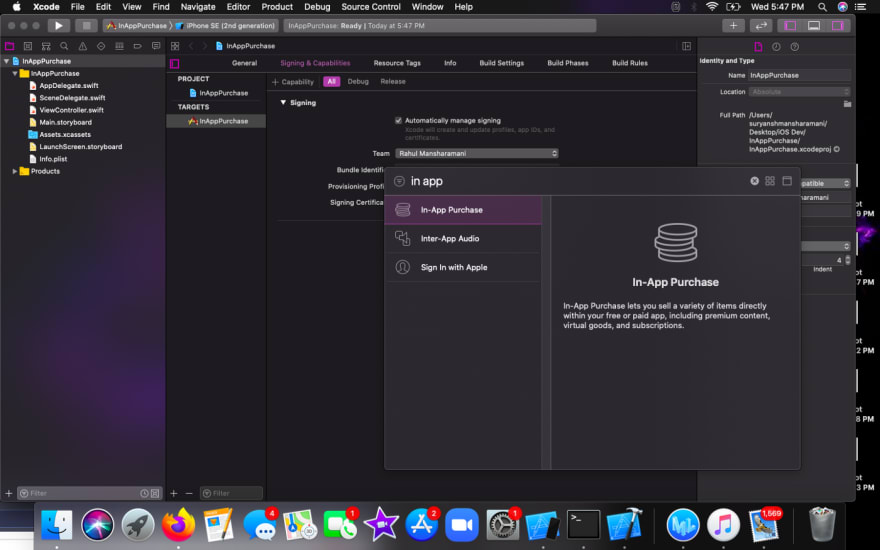
After successfully creating the project, go to the project file and then to the Signing and Capabilities section. For the latest version of Xcode, you will have to go to the top left corner of this section which says “+ Capability” to add a capability. After the window opens, search for the In-App Purchase capability and add it to your project.
6) Creating the New App
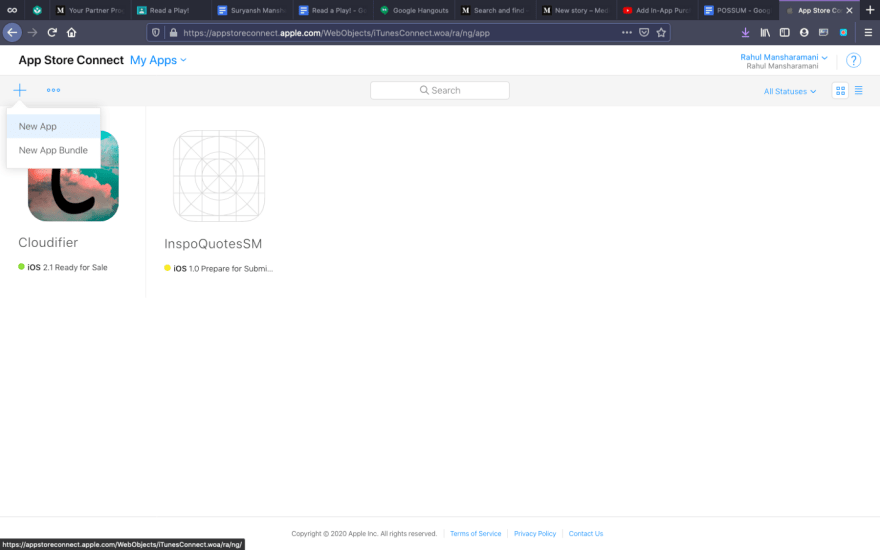
Now, let’s go back to App Store Connect. On the upper left corner, there will be a “+” sign, where you will have to press the New App button in order to create a new app.
7) Setting the New App Info
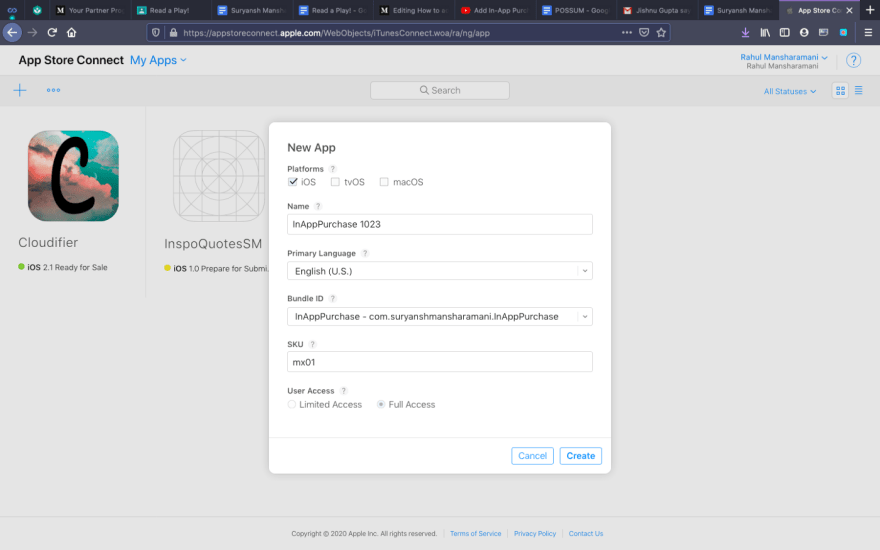
Upon pressing the button, the following window will pop up. Here we will select the platform, which for us, will be iOS. First, start out by entering the name of the app. Remember, the name has to be unique, and while the description was quite clear, it isn’t counted and compared to the other existing apps.
In our case, I named the app InAppPurchase 1023. The primary language is quite self-explanatory and the Bundle ID will be the same bundleID we created before for this app. The SKU is basically a unique string that won’t be displayed anywhere. I encourage following this format for the SKU:
[2 or 3 letters][00]
The 00 will then change to 01 an on as you create more apps. The user will have access to the full app, so be sure to select Full Access.
8) In-App Purchase Types
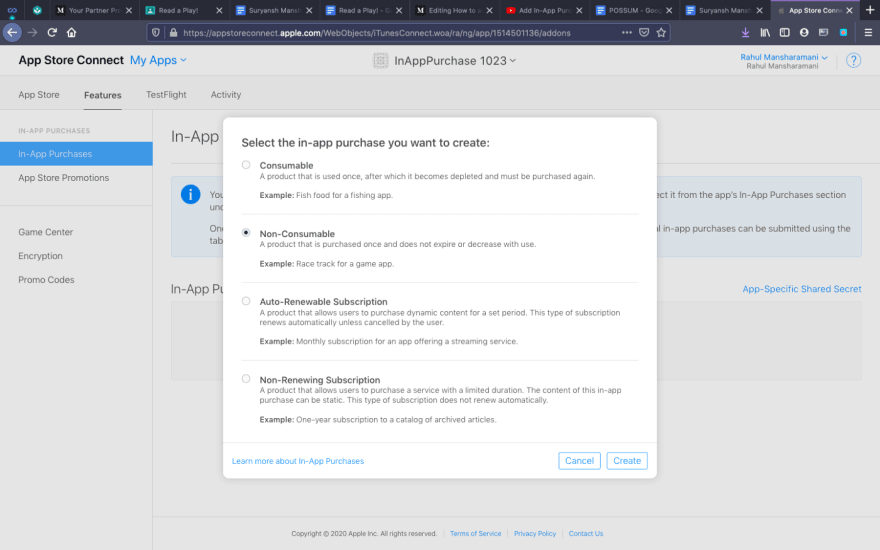
Now, let’s go to Features and then In-App Purchases. When adding an In-App Purchase, make sure to only check Non-Consumable.
While Apple explains these 4 types of In-App purchases, here is a short, easy to understand the description of them:
Consumable: You can only use this once, and once you have to use it again, then you have buy it again. This applies to games that use coins, etc.
Non-Consumable: As soon as you buy a non-consumable In-App Purchase, it will stay with you forever. This usually applies to unlocking special levels in games, premium versions of apps, etc.
Auto-Renewable Subscriptions: These are great for apps like Spotify, etc. As soon as the subscription is bought, it will keep on renewing after the desired amount of time automatically unless the user chooses to cancel the subscription.
Non-Renewing Subscription: As soon as the user buys the subscription to the app, it will not automatically renew, but the user has to renew it manually.
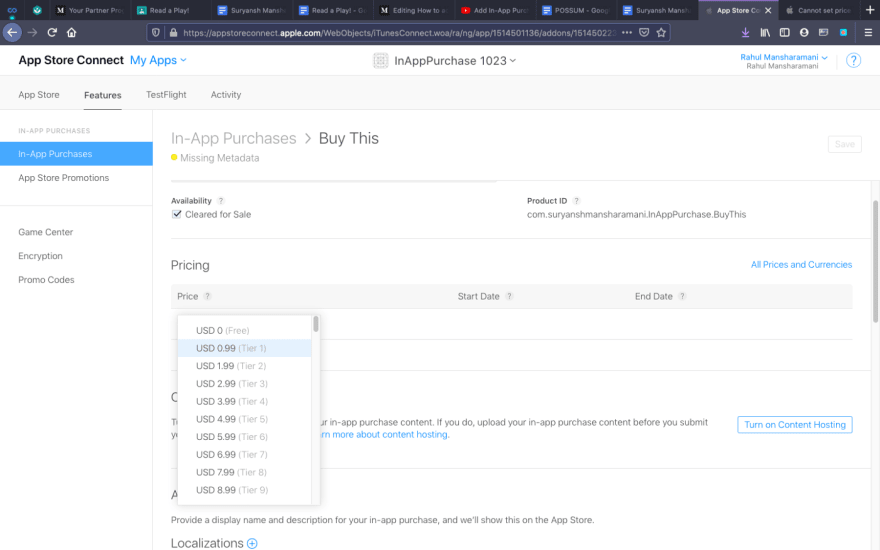
9) Setting the price
After pressing Create, the box below might take some time to fully process. Upon finishing, you will see a drop-down which will show the different Tiers of prices. We will go with Tier 1, so if the sandbox section of this tutorial does not work out for you, it's only going to cost you 99 cents. To save some times, copy the Product ID as will be using that later.
10) Setting up the UI
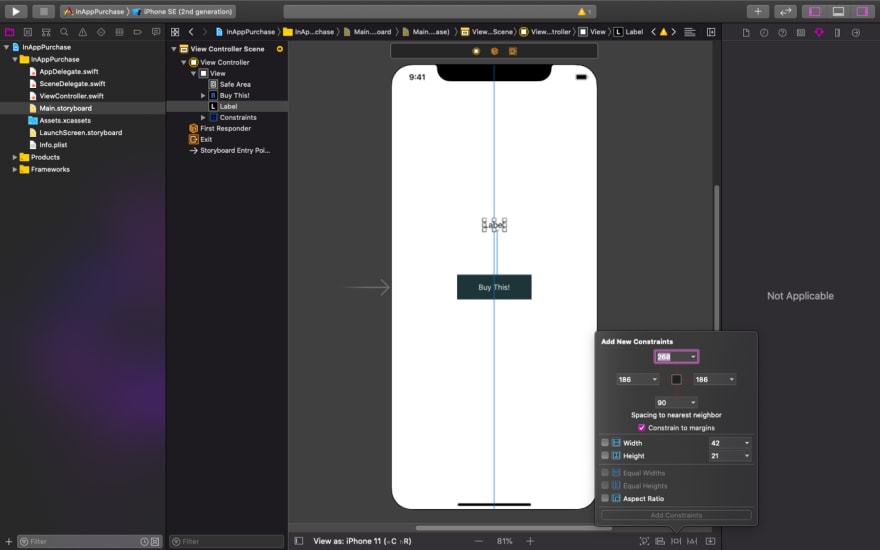
Now, let's go back to Xcode and into the Main.storyboard file. By using Cmd+Shift+L, we can search and add a UIButton to our interface.
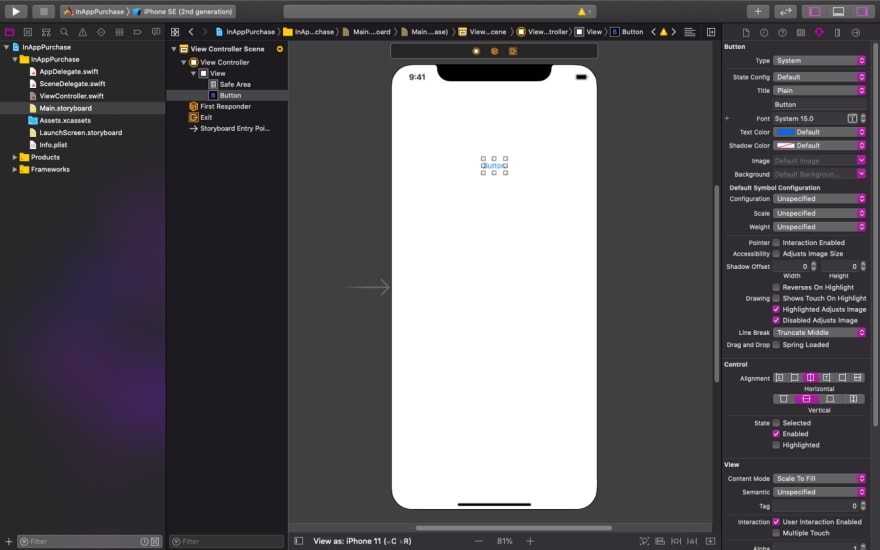
Lets set the button horizontally and vertically in the container.

Set the width 150 and the height to 50.

After that, once again, use Cmd+Shift+L to create a Label and set its alignment constraints to be horizontally in the container.

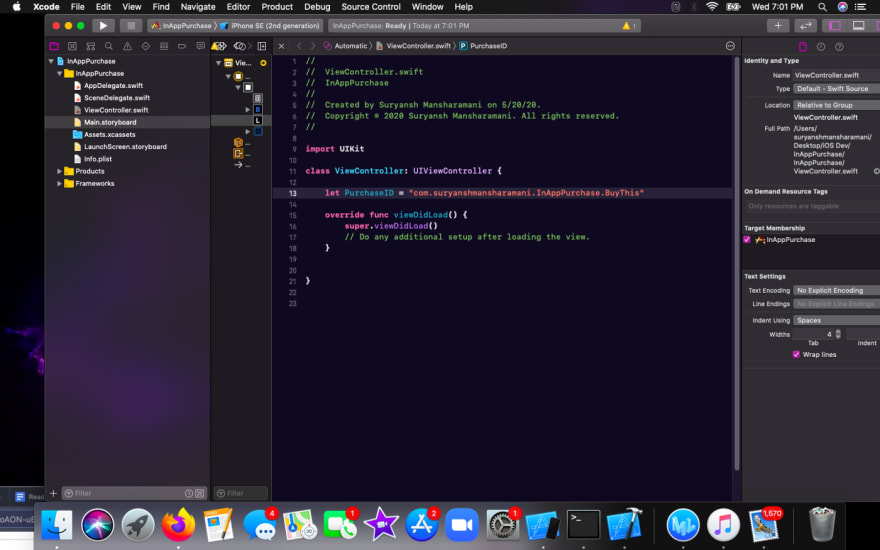
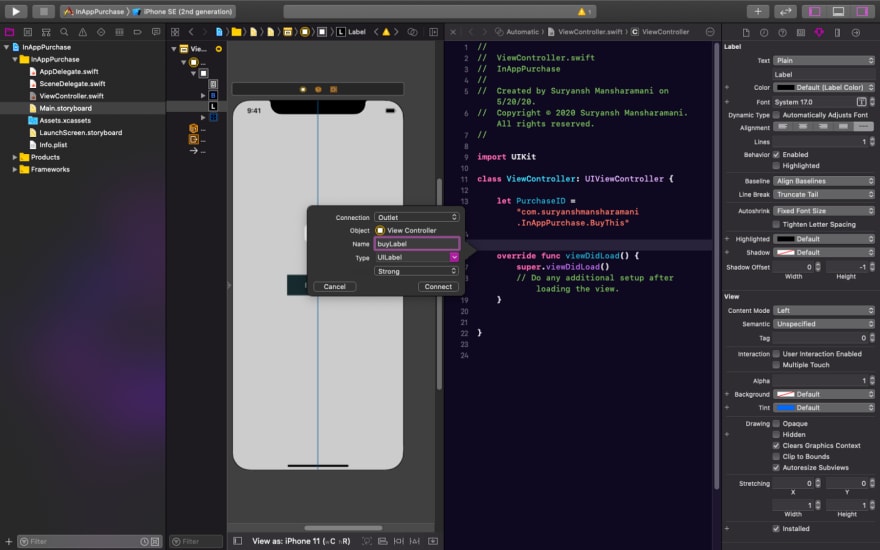
Now, let's go to the ViewController.swift file, where will paste the ID we had copied before into a new constant called PurchaseID as a string.
To make it a little bit more neat, lets set a couple more additional constraints in terms of the y position.
Now, by holding Control and moving the label to the View Controller. Set the type to UILabel and the name to buyLabel.
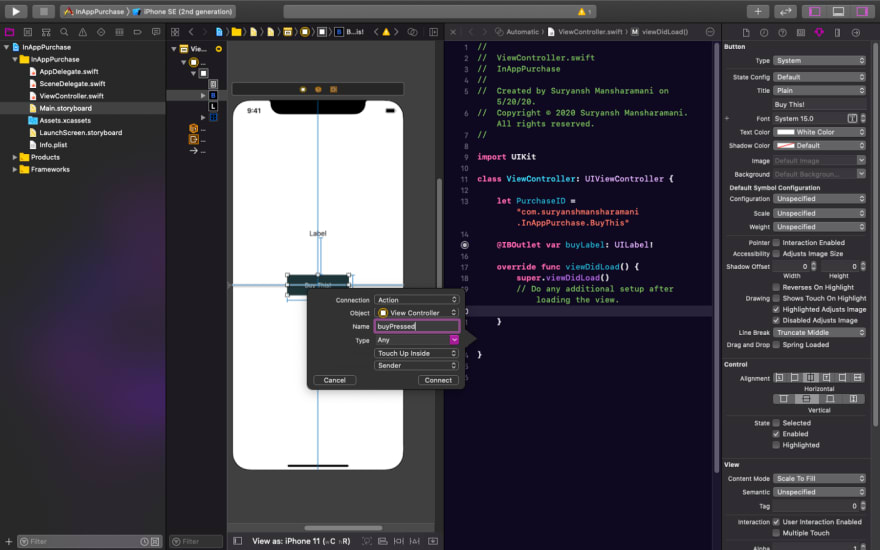
Let's use the same concept for the button and name it as buyPressed.
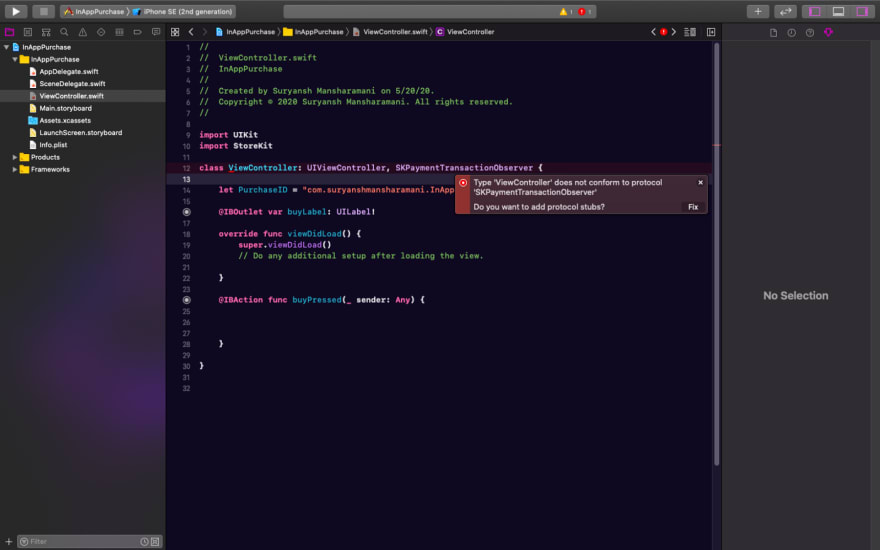
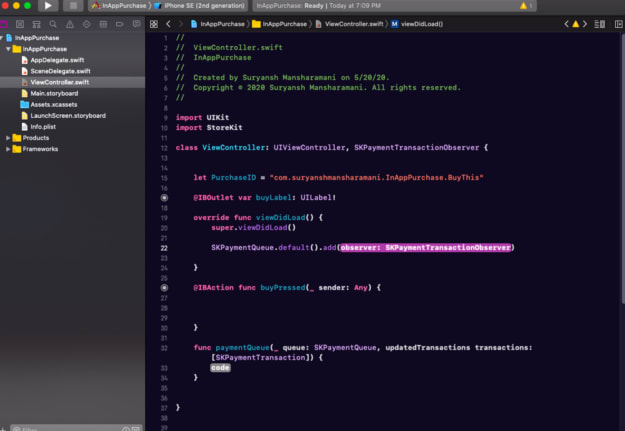
First, import the StoreKit in order to access certain commands for the In-App Purchases ability. After the colon and then the UIVewController, use the SKPaymentTransactionObeserver.
11) Let’s start the actual programming!
Create a function called as payment queue to handle the transaction states. Now in the function viewDidLoad() we will add the SKPaymentQueue, which as described by Apple, is a “A queue of payment transactions to be processed by the App Store.”. If you aren’t that proficient with Swift, I really recommend to look at this link for further information: https://developer.apple.com/documentation/storekit/skpaymentqueue
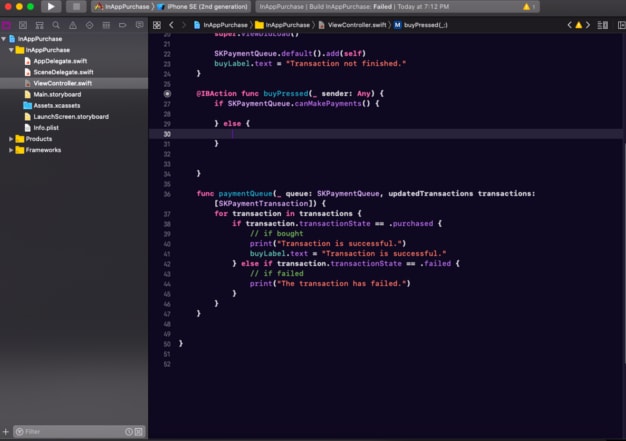
In the paymentQueue function, we will add the true content of this tutorial into it. Use the if-else statement to see if the transaction state is purchased, and if it is, let the console print back “Transaction is successful” just to be sure and change the label of the buyLabel to the same. Now use else if to see if the transaction failed or not and change the label to “The transaction has failed.”
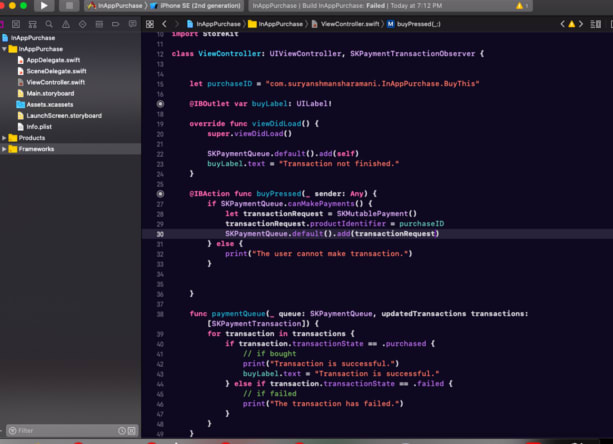
According to Apple, the SKMutablePayment class is “A mutable request to the App Store to process payment for additional functionality offered by your app.” We will name the constant accordingly, as transactionRequest. Within this, we will “tell Apple to recognize” the purchaseID as the productIdentifier and “add” the same transactionRequest to the SKPaymentQueue.
12) Setting up testing
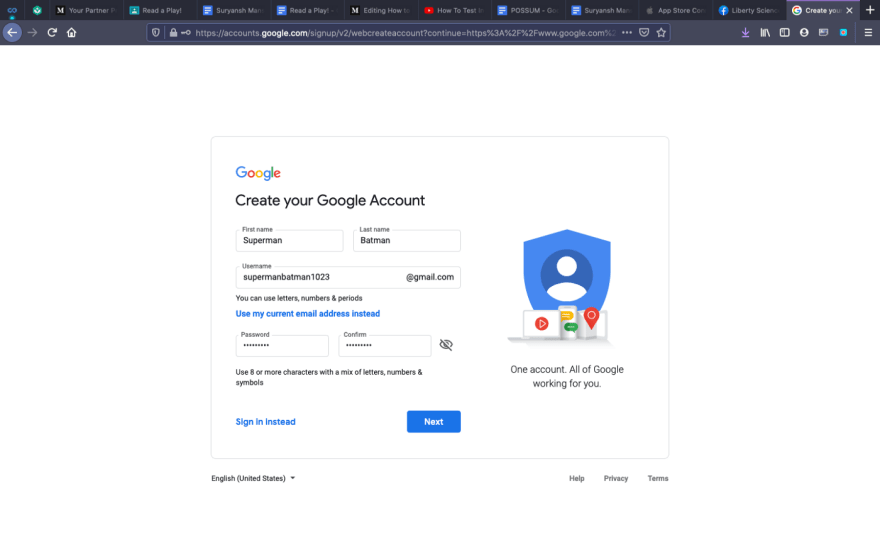
Now, its time to test our app! Instead of paying to make sure it works, we have to create a “sandbox account”. To do this, let's create a fake account on google. This will be your “sandbox account” from now on. You can’t use any of your own accounts since they will be associated with an Apple ID (or have been).
After entering the data below, Google will ask for your birth date, the country you live in, and phone number. You need to type in the right phone number for this to work as you will need to verify the account. Also, do NOT add a backup email, since it will be associated with your Apple ID (in most cases).
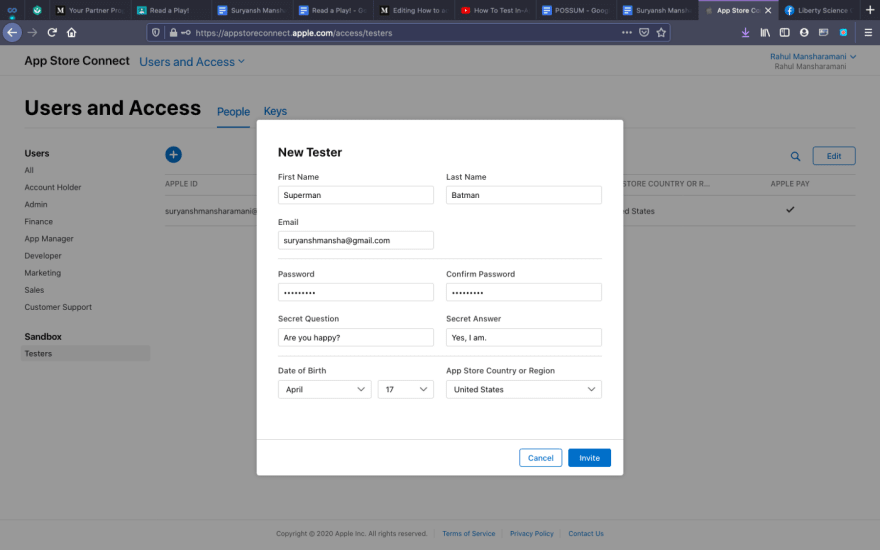
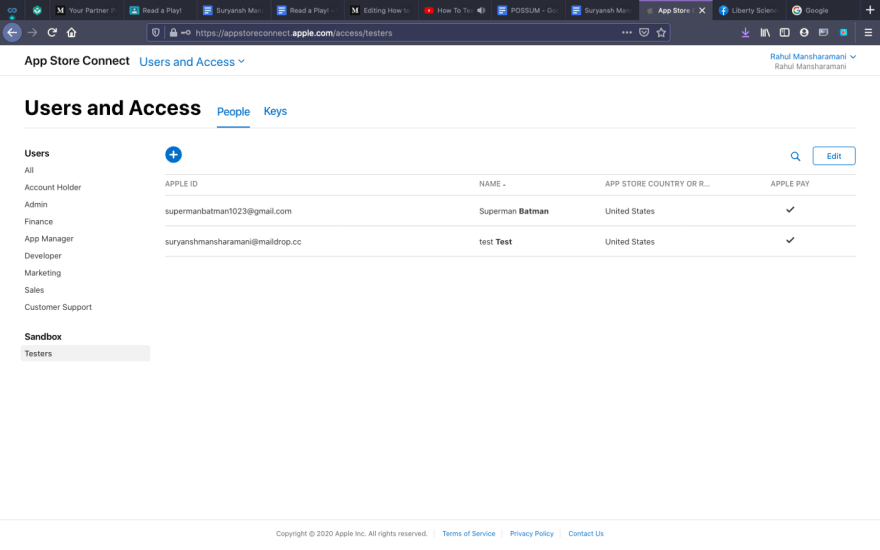
Now, let's go back into App Store Connect and into Users and Access. To the bottom left, there will be a section in bold called “Sandbox” as shown by the image below. Press on Testers under Sandbox. Here, you will notice a blue plus icon which will allow you to create a new tester. Here, enter the required information.
13) Testing
Done!
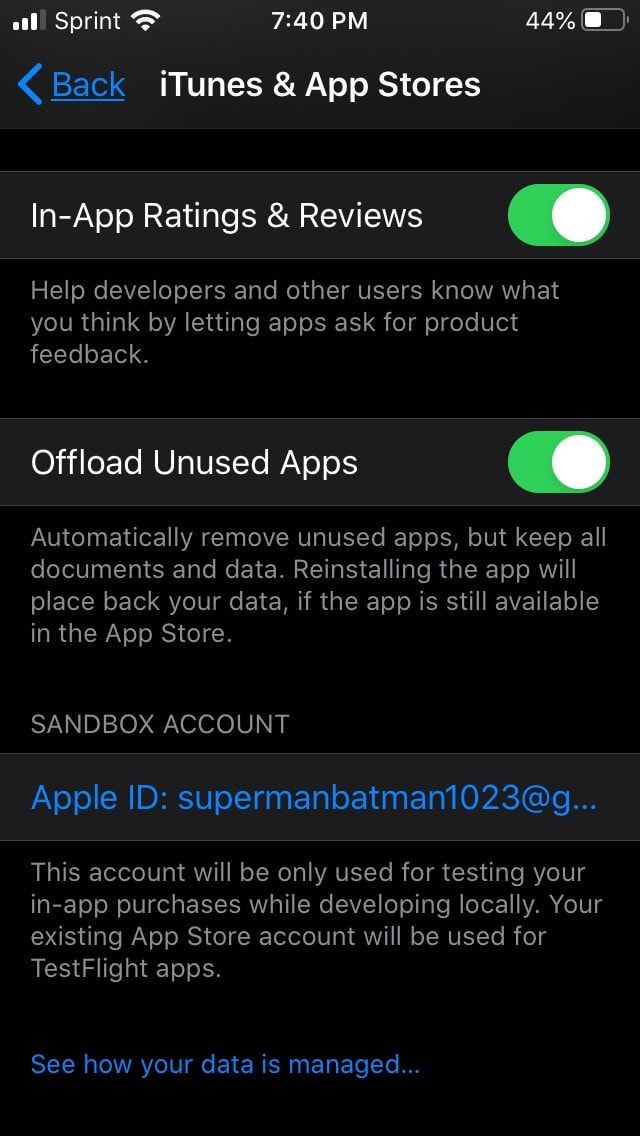
Let's go an run your app on your device, NOT the simulator, as this won’t work if you use a simulator. First, to avoid any chances of paying (although 99 cents won’t hurt) go to Settings. In Settings, scroll down to iTunes & App Stores. Under here, you should see a “Sandbox Account” section where there should be your tester account. If it’s there, then congratulations, you did it! If it isn’t, go back to the beginning and try again.
Thank you for reading my tutorial! It means a lot, and I’m sure that others would want to see this too, so don’t forget to 👏 and follow me on Medium at: https://medium.com/@suryanshmansha

Top comments (1)
Very detailed article. Well done!