Hi guys, in this article, I will be showing you how to install, configure and connect Kibana to elasticsearch on Windows. In case you missed it, you can install elasticsearch on windows by following the steps defined in the previous article here.
Downloading Kibana
You can download Kibana from the official website here. Choose windows from the dropdown and click on the download button.

Configuring Kibana
Once downloaded, extract kibana and navigate into the bin directory inside kibana-8.4.3 folder then Click on kibana.bat.

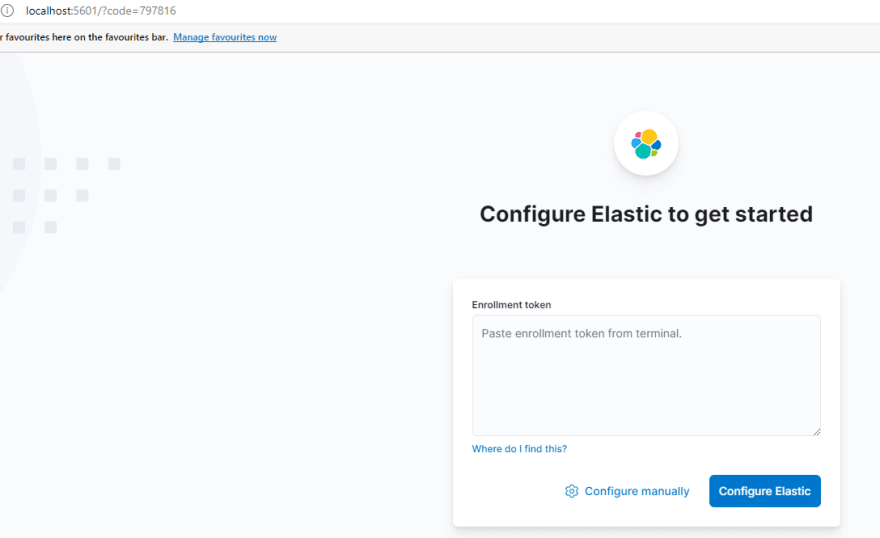
You should see Kibana has not been configured. Click on the URL displayed in your terminal to get started.

Once you navigate to the URL, you should see something like this

Copy and paste the enrolment token from elasticsearch (you can get it by following the steps here)
If your enrolment token has expired or you get this error message while configuring with enrolment token

Use the command below to create a new token then copy and paste the newly generated token into kibana.
bin/elasticsearch-create-enrollment-token -s kibana
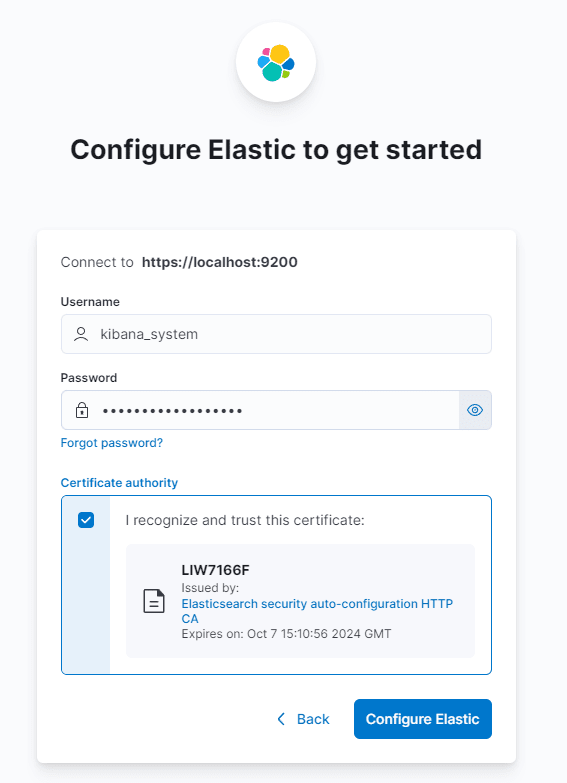
Configuring Elasticsearch manually
You can click on Configure Manually

Check address, enter the username and password, check the trust certificate and click on Configure Elastic to continue.
I strongly recommend you paste the enrolment token for smooth configuration.
If you made it to this point, well done! You are done with the configuration.
You will be asked to enter username and password (this is the username and password generated for you while setting up elasticsearch.
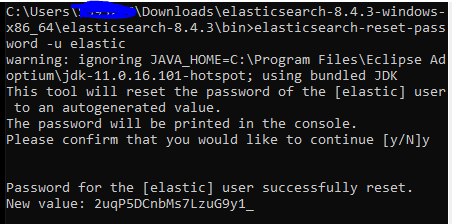
In case you forgot your elasticsearch password use the command below to reset it (you should run this command in elasticsearch bin directory)
elasticsearch-reset-password -u elastic
Copy and paste the new password and login. Voila! You are in!

If you made it to this point, you have successfully connected Kibana and Elasticsearch.
If you have any questions, you can drop them in the comments section or visit elastic forum to dicuss with other great minds.
Thanks for reading :).


Top comments (0)