Hi guys and welcome to another episode of the Elasticsearch series. In case you missed my previous series on How to Create a Full Autocomplete Search Application with Elasticsearch and NestJS, you can catch up here.
In this article, I will be showing you how to setup elastic search on Microsoft Windows. PS: This process works on Microsoft Windows 8 and above :).
Running Elasticsearch on Windows
Navigate to the elasticsearch download page and choose windows from the dropdown, then click on the Download button (as shown below)
Extract the downloaded file and navigate into the elasticsearch-8.4.3 folder (your version may be higher, but the process remains the same!)
In the bin folder, click on elasticsearch.bat

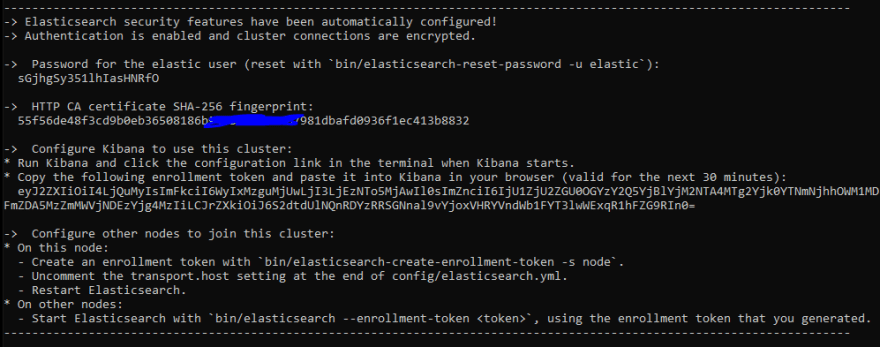
Once you've done that, you should see something like this:

On your browser, navigate to https://localhost:9200, you will be asked for username and password. By default username is elastic and password is shown on your terminal above
Once you input the right username and password, you should see this welcome page. This page shows you some information about elasticsearch installed on your computer.

That's it!
Elasticsearch is up and running on your windows machine! Yay!
Thanks for reading.


Top comments (0)