
Lightsail offers Load Balancer. It's very easy to provision one and attach one or multiple instances to it. Let's create one and attach instances to it.
Prerequisites
You need one or more Amazon Lightsail instances to attach to the load balancer in the same region. You can create it by following Deploy Laravel Application to Amazon Lightsail or Deploy WordPress App to Amazon Lightsail
⚠️ Warning: Amazon Light Load Balancer going to cost you USD$18/month. It has no pre-tier available. Be sure before going to provision one. You can check the whole article before creating.
Provision a Load Balanced
Go to the homepage of the Amazon Lightsail console. Click on the Networking tab and click on the Create load balancer button.

-
You are in the Create a Load balancer screen like this 👇
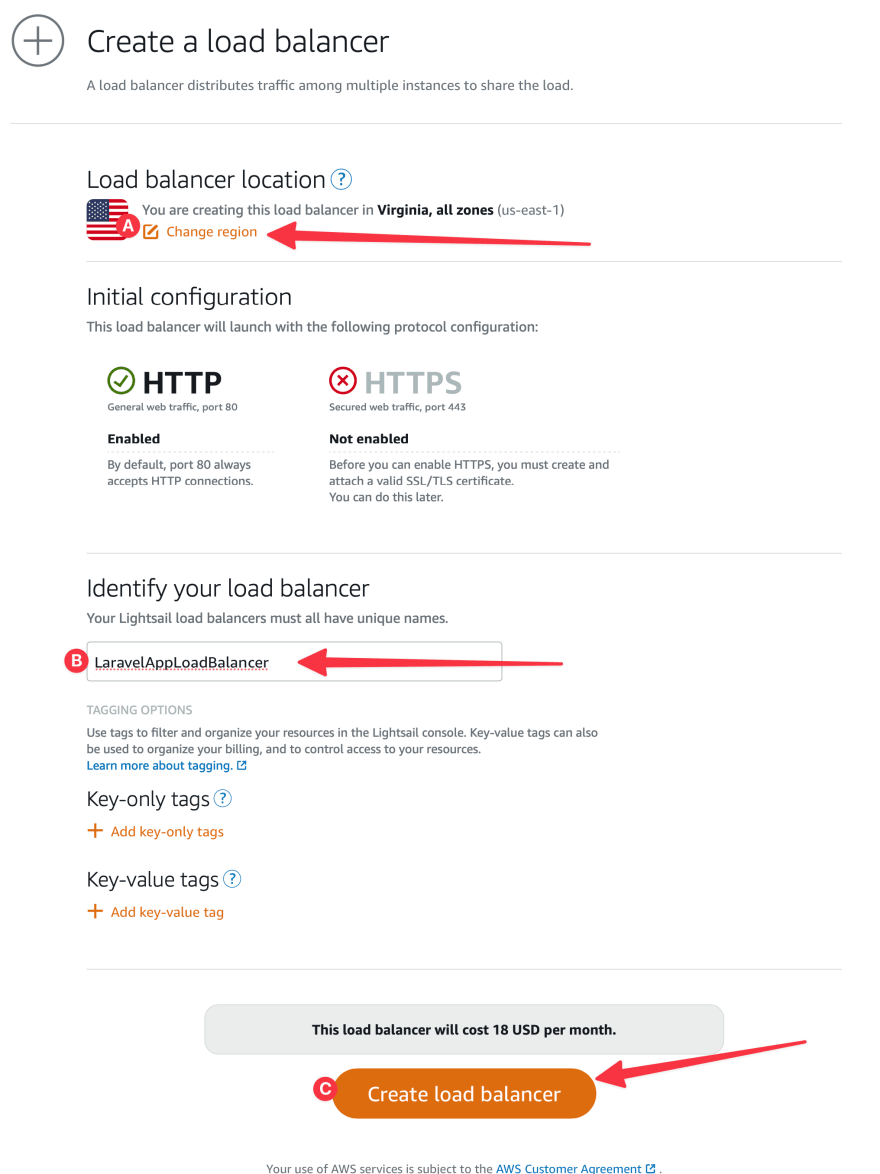
- A. Change your region to where your instances are. My instances are in Virginia.
- B. Give it a name, and
- C. Hit the Create load balancer button from the bottom.
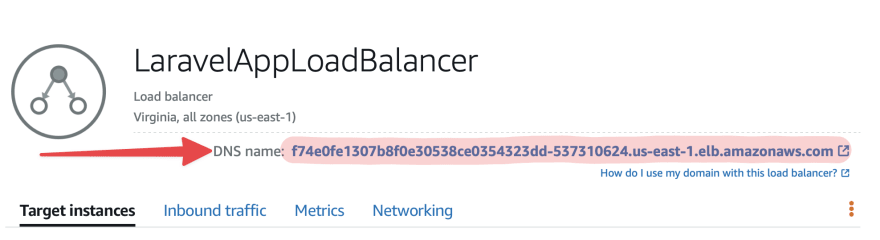
Load balancer will be created in a moment and you should land on the Load balancer page.
Attach instances to the Load balance
Go to the homepage again and then click the Networking tab. You should see Loadbalancer(s) including the one just created. Click on the name of the Load balancer.

Our load balancer doesn't have any attached instance(s) yet, we are going to attach one or more. Select your instance in the Target instances section.

I just have one in this region. You should see all of the instances you have in the region where the load balancer is provisioned.Confirm the attachment of your instance

Do the same process until you attached all of your target instances.
Go to Load balancer URL (DNS name) and you should see your application.
ℹ️ If you don't see the desired page, check your application or other tools (Apache, Nginx, etc.) setting.
Add Domain or Sub-Domain
You can create DNS Zone in Lightsail for your domain and configure it. Follow this to add your domain/sub-domain.
You can add the Load balancer URL (DNS name) as A record in your domain's DNS control panel.
Enable HTTPS
- Go to the Inbound traffic tab of your Load balancer setting.

- A. Create an SSL certificate for your domain by clicking the Create certificate + button.
- B. You should see all of the created certificates in the SSL/TLS certificate list and select the one you just created.
- C. Optionally, you can Redirect from HTTP to HTTPS. (After enabling the HTTPS).
Conclusion
Hope you enjoyed this short article. You can subscribe to my newsletter, and follow me on Twitter, Dev.to, and Hashnode.

Top comments (0)