Last week we introduced using Jenkins as our main CI (Continuous Integration) tool, how to use it and we even built our very first jobs, using the Bash shell and using out Github repos. Today we will continue where we left off, creating our very first Jenkins CICD Pipeline.
This idea was inspired by days 24 and 25 of the #90DaysofDevops challenge.
Deployment Project
Today, we will deploy a node.js application on an EC2 instance and set up a Jenkins CI/CD pipeline. We will next use GitHub integration to connect to our Jenkins task and our GitHub repo. As a result, make sure you have a running EC2 machine with Jenkins and Docker installed, as well as a GitHub repository.
We must submit a public SSH key to GitHub in order to integrate Jenkins with GitHub. Run the ssh-keygen command on the EC2 instance. You will need to copy the the content of the Private key id_rsa and Public key id_rsa.pub.
To view the contents of the id_rsa and id_rsa.pub file, use the cat command.
cat /home/ubuntu/.ssh/id_rsa
cat /home/ubuntu/.ssh/id_rsa.pub
Setting up SSH for our Github account
Go to GitHub Settings ->SSH and GPG Key -> Click on New SSH Key -> Title (Name the Key) and now Paste the id_rsa.pub file's contents which you had copied from the ec2 instance in the key section -> Finally, click on Add SSH Key.
NB: Make sure to leave
Key typeas Authentication Key
Setting up the Job on Jenkins
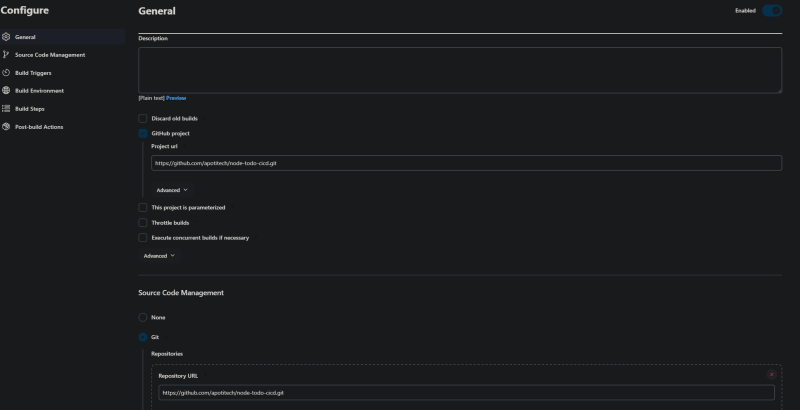
Create a GitHub project in Jenkins and paste the GitHub repo URL.
Setting up Credentials on Jenkins
To add your credentials to your Jenkins server. First make sure you copy the id_rsa file you created in the previous step.
On your Jenkins welcome page, go to -> Manage Jenkins on the left pane -> Click on Credentials -> Under Stores scoped to Jenkins Click on (global)
-> Now click on -> Add credentials and now paste the content of the id_rsa credential file that you had copied as seen below:
Take note that your login is the same as the username used to establish the EC2 instance.
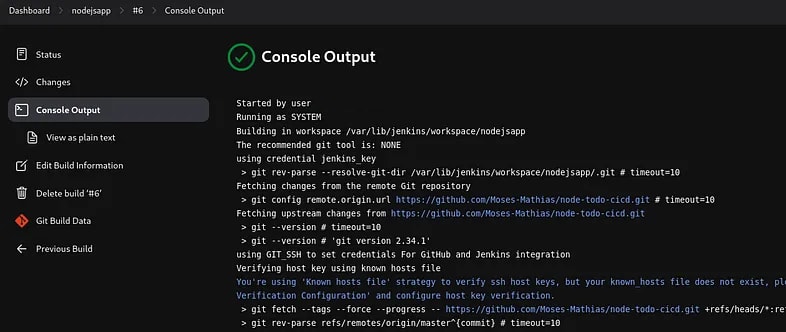
Save your item and then build it.
Now we must install the required dependencies listed in the README.md file.
Setting up our Security Group on AWS
The last command returns the URL where the app is running. By default, port 8000 is not authorized in our AWS EC2 Security Group, so we must add this port to our Security Group so it can be allowed, before we can access it.
On your AWS account, navigate to Instance -> Security -> Security groups -> Add rule -> Edit inbound rules, select Custom TCP, type 8000 as port and add 0.0.0.0/0 -> Save
To access the application in a browser, copy the public IP address of the EC2 instance and add port 8000 to it. Now go ahead and paste it in the browser adding :8000 behind for port 8000 where your app is running.
Yay!!! 👏 Success, we can see our page in our browser.
Creating our Docker App
Next, let us now develop a docker application of the NodeJS To-Do app that anyone may access from anywhere. Assuming we have docker installed, we can do the following:
Create your Dockerfile as follows:
FROM node:12.2.0-alpine
WORKDIR app
COPY . .
RUN npm install
RUN npm run test
EXPOSE 8000
CMD ["node","app.js"]
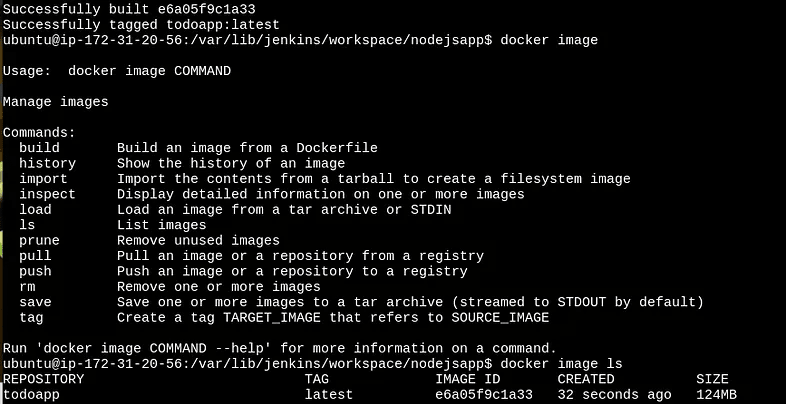
Let us create the image using the Dockerfile.
docker build -t todoapp .
Next, we create a container:
docker run -d --name todoapp_c -p 8000:8000 todoapp:latest
Let's try accessing the app via the public IP address and port 8000. It should be easily accessible.
By adding the commands to Jenkins, we can now automate the process.
Now, we can build our project and we will be able to access it from the browser, just as before
Browser view
The task is now automated. All we need to do is set up a web-hook that will handle repository updates by automatically triggering our next build processes. Remember to destroy all containers, else the builds will fail due to conflict.
On your Jenkins home page, go to -> Manage Plugins -> System Configuration -> Plugins -> on the plugins page ... select Available Plugins -> Search for the GitHub Integration plugin -> select Install without restart.
On your Github page, first go to Repo settings -> then Webhooks -> select Add Webhook -> Payload URL (put in your Jenkins URL) -> content type-> application/json -> finally select Add webhook.
In the Jenkins build page , under Project, go to the Configure pane and tick GitHub hook trigger choice, now save.
Now it is time to test our updated Jenkins Job. To do this, go ahead and update any file (such as the README.md file) in your Github URL. Once your change is done on the git branch you selected in your Jenkins configuration, your job will be triggered automatically.
That concludes our Jenkins CICD project.
Conclusion
Building a CI/CD pipeline with Jenkins is indeed a significant step forward in any developer's journey. It's a testament to the evolution of your skill set, and more importantly, your understanding of the importance of automation in modern software development.
Rome wasn't built in a day, and neither is a robust CI/CD pipeline.
There may be moments of confusion, roadblocks, or unexpected errors. But every stumble is an opportunity to learn and grow. It's part of the process, and it's what makes the journey truly rewarding. And remember, the Jenkins community is always there to lend a helping hand.
With the power of Jenkins at your fingertips, you are paving the way for faster, more efficient, and more reliable software development.
It's all about embracing change, one build at a time.
As you continue to explore Jenkins, remember to have fun with it. Experiment with new plugins, integrate with different tools, and continue to push the boundaries of what you can achieve.
The beauty of technology is its endless potential, and the same applies to you, as a developer.
So here's to continuous learning, continuous integration, and continuous deployment! Keep building, keep innovating, and keep pushing code. Your journey in the world of CI/CD with Jenkins is just beginning, and we can't wait to see where it takes you.
Stay tuned for more insightful articles on Jenkins and other exciting tech topics. Until then, keep coding, keep deploying. Let's keep changing the world, one line of code at a time! After all remember -
The only constant in technology is Change!!!
Please feel free to ask any questions you may have, and I will be pleased to answer them.
Until the next time. 👋
Thank you for taking the time to read this! If you like the article, please clap (up to 50 times!) and connect with me on LinkedIn, Medium, Dev.to and even Vocal to remain up to speed on my future articles. 😅


Top comments (0)