Hey there! In this article, Microsoft Graph Toolkit will be consumed in an ASP.NET Core MVC web app to enable:
- Microsoft identity platform authentication
- The agenda from Outlook Calendar
- The tasks from Planner
- E-mails from Outlook
If you never heard of Microsoft Graph Toolkit before, it is a powerful collection of reusable web components that enables accessing Microsoft 365 data with just couple lines of code! Believe it or not, Microsoft identity platform authentication can be implemented in seconds.
This web app will be a quick scenario to try out Microsoft Graph Toolkit!

You can get the source code from here.
Create ASP.NET Core MVC web app in Visual Studio Code
- Open the Terminal in Visual Studio Code (Ctrl+Shift+`)
- Then, create a new folder for the project
PS C:\Users\user> cd Desktop
PS C:\Users\user\Desktop> mkdir GraphToolkitNetCore
- Create ASP.NET Core MVC app
PS C:\Users\user\Desktop> dotnet new mvc
PS C:\Users\user\Desktop> cd GraphToolkitNetCore
- The app is created successfully! Now, click on “Open Folder” to open your project folder.

- Press F5 to run the project
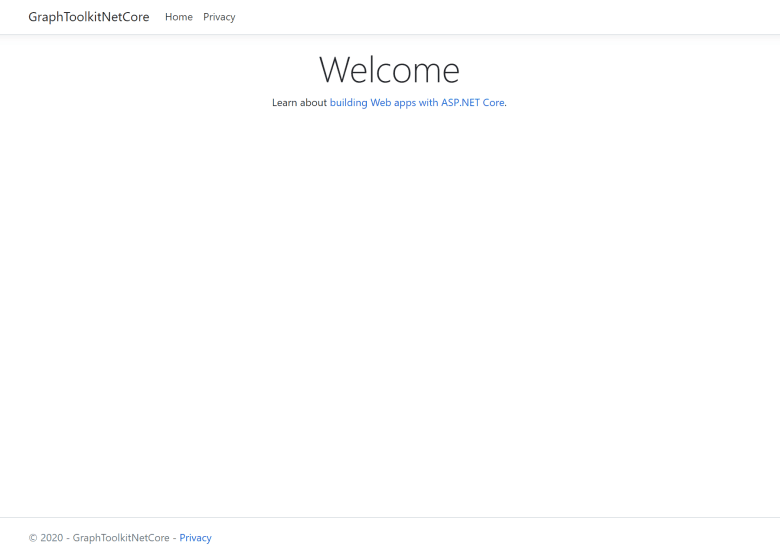
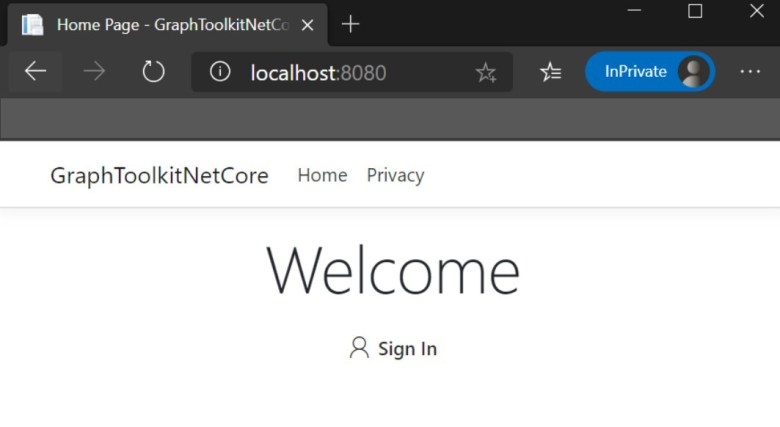
- Our project is working fine. Before we start building our app with Microsoft Graph Toolkit, let’s go to Properties > launchSettings.json and set “http://localhost:8080” to applicationUrl

Register an app in Azure Active Directory
- First thing first, go to Azure Portal!
- Under Azure Active Directory, go to App Registration and click on New Registration

- Give a name to your app
- Choose the access level
- Choose Web and place http://localhost:8080 as a Redirect URI

- Go to Authentication tab
- Then, check Access tokens and ID tokens

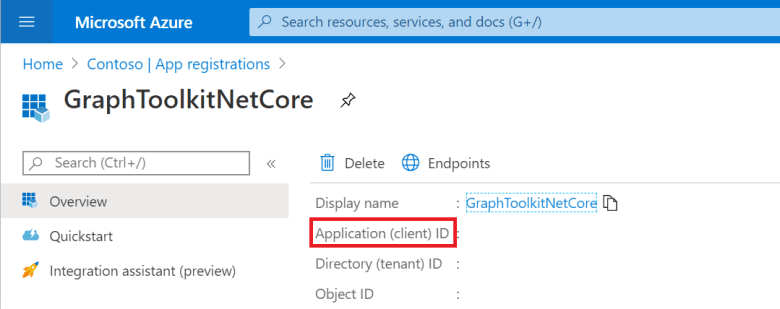
- Finally, go to Overview tab
- Copy Application (client) ID to a notepad, we will need it later
Setup Index.cshtml
- Go to Index.cshtml and add a row and three columns inside the row
<div class="row" id="content">
<div class="column" id="one"></div>
<div class="column" id="two"></div>
<div class="column" id="three"></div>
</div>
~~~
* Copy below additional css to **site.css** under **wwwroot>site.css**
~~~css
/* Main content */
#content, html, body {
height: 98%;
}
#one {
float: left;
width: 33%;
background:transparent;
height:500px;
overflow: hidden;
}
#one:hover {
overflow-y: auto;
}
#two {
float: middle;
width: 33%;
background: transparent;
height: 500px;
overflow: hidden;
}
#two:hover {
overflow-y: auto;
}
#three {
float: left;
width: 33%;
background: transparent;
height: 500px;
overflow: hidden;
}
#three:hover {
overflow-y: auto;
}
/*Email*/
.email {
box-shadow: 0 3px 7px rgba(0, 0, 0, 0.3);
padding: 10px;
margin: 8px 4px;
font-family: Segoe UI, Frutiger, Frutiger Linotype, Dejavu Sans, Helvetica Neue, Arial, sans-serif;
}
.email:hover {
box-shadow: 0 3px 14px rgba(0, 0, 0, 0.3);
padding: 10px;
margin: 8px 4px;
}
.email h3 {
font-size: 12px;
margin-top: 4px;
}
.email h4 {
font-size: 10px;
margin-top: 0px;
margin-bottom: 0px;
}
.email mgt-person {
--font-size: 10px;
--avatar-size-s: 12px;
}
.email .preview {
font-size: 13px;
text-overflow: ellipsis;
word-wrap: break-word;
overflow: hidden;
max-height: 2.8em;
line-height: 1.4em;
}
a.navbar-brand {
white-space: normal;
text-align: center;
word-break: break-all;
}
~~~
###**Let’s start working with Microsoft Graph Toolkit**
####**Login**
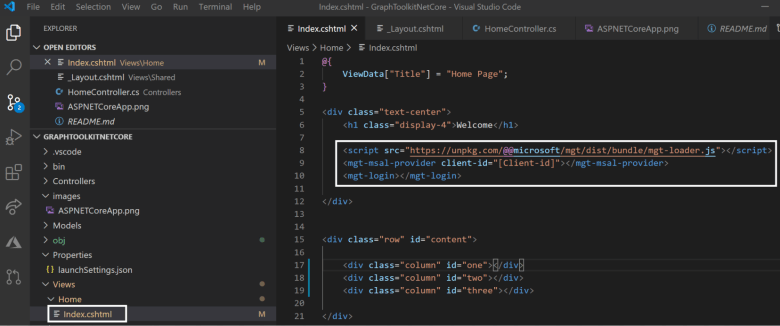
* Go to **Home>Index.cshtml**
* Implement MSAL provider in Index.cshtml
* Make sure it is placed under the welcome message
~~~html
<script src="https://unpkg.com/@@microsoft/mgt/dist/bundle/mgt-loader.js"></script>
<mgt-msal-provider client-id="[Client-id]"></mgt-msal-provider>
<mgt-login></mgt-login>
~~~
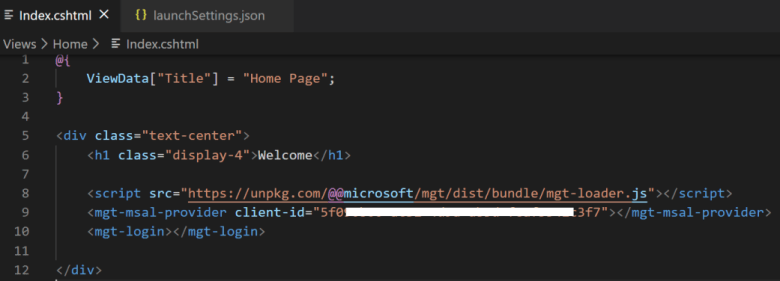
* Paste **Application (client) ID** that you copied earlier from Azure Active Directory
* Press F5 to run your application
* Click on sign in button and login with your account
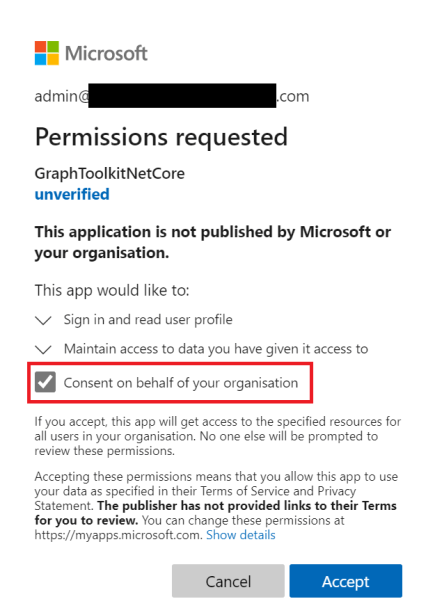
* Accept to permission request
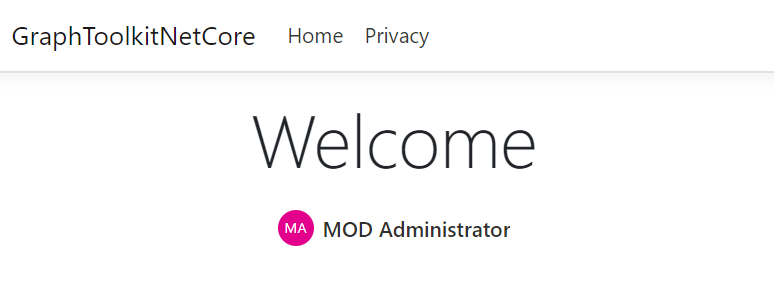
* When the authentication is completed, you should see your details in the page
####**Get E-mails**
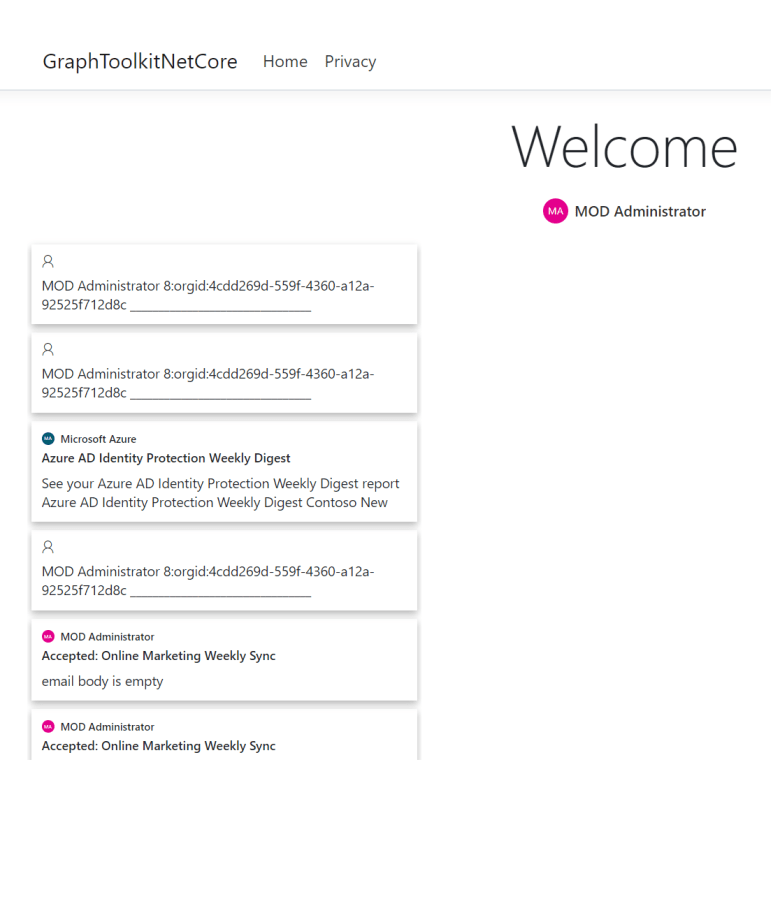
* Use **mgt-get** to get user’s e-mails. Implement below code as **column 1** in **Index.cshtml**
~~~html
<mgt-get resource="/me/messages" version="beta" scopes="mail.read" max-pages="1">
<template>
<div class="email" data-for="email in value">
<h4><mgt-person person-query="{% raw %}{{email.sender.emailAddress.address}}{% endraw %}" show-name person-card="hover"></mgt-person></h4>
<h3>{% raw %}{{ email.subject }}{% endraw %}</h3>
<div data-if="email.bodyPreview" class="preview" innerHtml>{% raw %}{{email.bodyPreview}}{% endraw %}</div>
<div data-else class="preview">email body is empty</div>
</div>
</template>
<template data-type="loading">loading</template>
<template data-type="error">{% raw %}{{ this }}{% endraw %}</template>
</mgt-get>
~~~
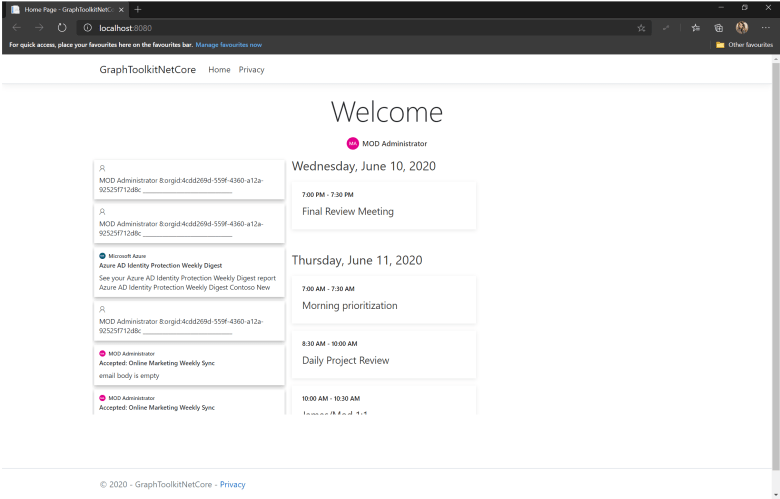
* Press F5 to run the app, you should be able to see the emails
####**Agenda**
* Use **mgt-agenda** to get a user or group calendar. Implement below code as **column 2** in **Index.cshtml**
~~~html
<mgt-agenda group-by-day></mgt-agenda>
~~~
* Then, press F5 to run the app. You should be able to see the agenda on the right side of the e-mails
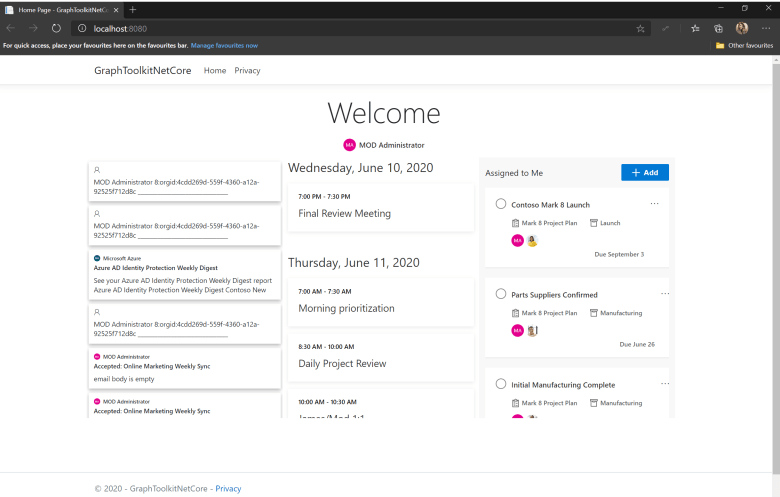
####**Tasks**
* Use **mgt-tasks** to get a user or group calendar. Implement below code as **column 3** in **Index.cshtml**
~~~html
<mgt-tasks></mgt-tasks>
~~~
* Press F5 to run the app, you should be able to see the tasks on the right side of the agenda
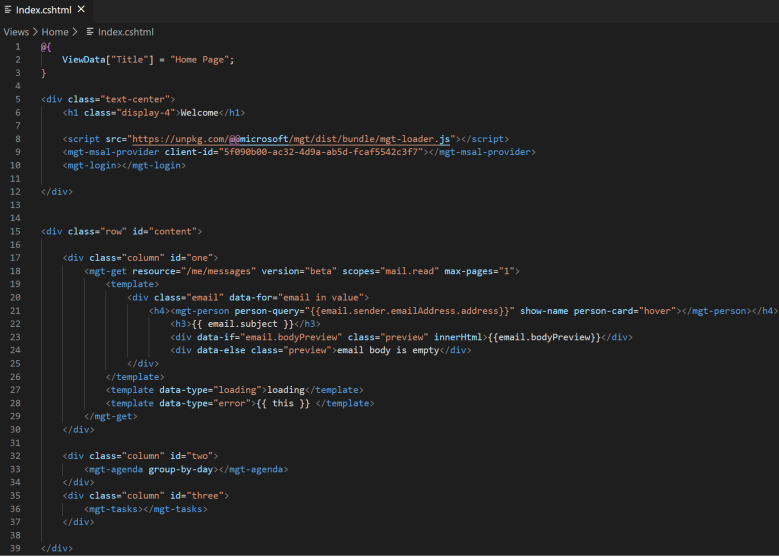
Final version of **Index.cshtml** will look like below:
Our app is ready! As a result, we have our e-mails, agenda and tasks in one place. I hope you enjoyed using Microsoft Graph Toolkit. You can get the source code from [here](https://github.com/aycabas/MicrosoftGraphToolkit-NetCore/tree/master).

Let me know about your experience or if you have any feedback!

Latest comments (1)
any demo for Microsoft Fluid Framework?