For the final post in the series, I will stitch together HTML, CSS, and JavaScript. JavaScript is used to make websites more dynamic and interactive.
In this case, we will add a way to toggle between forms by using the jQuery library from the Google hosted libraries. jQuery is a Javascript library which allows us to implement these special effects.
Before implementing the Javascript code, let's add a few more lines of code to both the HTML and CSS files.
Login_page.html
Open login_page.html and modify the code by adding "alternate" as the class name for both paragraph tags as shown below.
<!-- Login/Registration Page - HTML -->

{% load static %}

<link rel="stylesheet" type="text/css" href="{% static 'css/login.css' %}">

<div class="login">
    <div class="form">
        <form class="registration-form">
            <input type="text" placeholder="name" />
            <input type="password" placeholder="password" />
            <input type="text" placeholder="email" />
            <button>Create</button>
            <p class="alternate"><a href="#">Log In</a></p>
        </form>
        <form class="login-form">
            <input type="text" placeholder="username" />
            <input type="password" placeholder="password" />
            <button>Login</button>
            <p class="alternate"><a href="#">Register</a></p>
        </form>
    </div>
</div>

<!-- baltlogs.com -->
We have added a class name for the paragraph tags, so that we will be able to control this element of the template later on by using JavaScript. We'll do this in a similar way as how we styled the HTML template by referring to the class names of the HTML elements in the CSS file. Also, notice that inside the paragraph tags we have some nested hyperlinks tags (a).
Let's style the paragraph tags and the nested hyperlinks tags by adding the following code to the CSS file.
Login.css
/* path -> static/css/login.css */

@import url(https://fonts.googleapis.com/css?family=Lato:300);

.login {
  width: 500px;
  padding: 10% 0 0;
  margin: auto;
}

.form {
    position: relative;
    z-index: 1;
    background: #FFFFFF;
    max-width: 360px;
    margin: 0 auto 100px;
    padding: 45px;
    text-align: center;
    box-shadow: 0 0 20px 0 rgba(0, 0, 0, 0.2), 0 5px 5px 0 rgba(0, 0, 0, 0.24);
  }

.form input {
    font-family: "Lato", sans-serif;
    outline: 0;
    background: #e7e4e4;
    width: 100%;
    border: 0;
    margin: 0 0 15px;
    padding: 15px;
    box-sizing: border-box;
    font-size: 14px;
  }

.form button {
    font-family: "Lato", sans-serif;
    text-transform: uppercase;
    outline: 0;
    background: #262725;
    width: 100%;
    border: 0;
    padding: 15px;
    color: #FFFFFF;
    font-size: 14px;
    -webkit-transition: all 0.3 ease;
    transition: all 0.3 ease;
    cursor: pointer;
  }

.form button:hover,.form button:active,.form button:focus {
    background: #3d3d3d;
  }

.form .alternate {
    margin: 20px 0 0;
    font-size: 16px;
  }
.form .alternate a {
    color: #3d3d3d;
    text-decoration: underline;
  }
.form .registration-form {
    display: none;
  }

body {
    background: #3d3d3d;
    font-family: "Lato", sans-serif;
  }

/* baltlogs.com */
We have added a few lines of code in the middle. We access the form elements by using the dot operator. To access a nested element, we use the dot operator as well. For example, .form .alternate .a will refer to the nested hyperlink element.
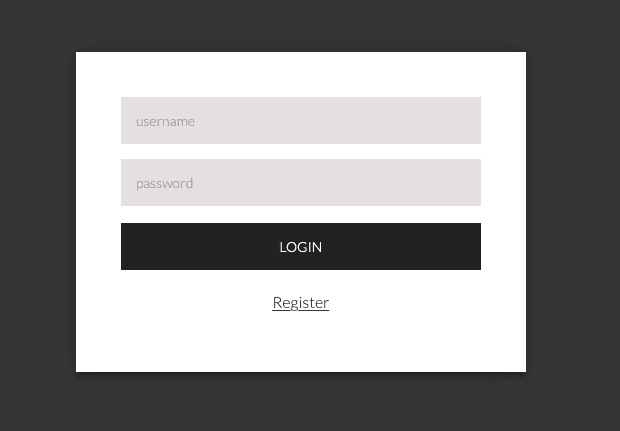
The changes involve adding font size and some top padding for the paragraph tags which contain the hyperlinks. The color of the hyperlinks for register and login have been underlined and changed to a darker color as well.
Save the changes and run server to see the changes take place.
Finally, let's add the JavaScript code needed to toggle between forms.
We can add JavaScript code to the template in multiple ways. Since the code needed is just a few lines, we will include it at the bottom of the HTML template.
However, it's usually recommended to create a folder with the JavaScript code and then import it into the template in the same way as we did with the CSS code. For this tutorial since I already did the import for the CSS code, we will try it the other way.
Login_page.html
Open login_page.html and add the following lines of code at the top and at the bottom as shown.
<!-- Login/Registration Page - HTML -->

{% load static %}

<link rel="stylesheet" type="text/css" href="{% static 'css/login.css' %}">
<script src="https://ajax.googleapis.com/ajax/libs/jquery/3.5.1/jquery.min.js"></script>

<div class="login">
    <div class="form">
        <form class="registration-form">
            <input type="text" placeholder="name" />
            <input type="password" placeholder="password" />
            <input type="text" placeholder="email" />
            <button>create</button>
            <p class="alternate"><a href="#">Log In</a></p>
        </form>
        <form class="login-form">
            <input type="text" placeholder="username" />
            <input type="password" placeholder="password" />
            <button>Login</button>
            <p class="alternate"><a href="#">Register</a></p>
        </form>
    </div>
</div>

<script>
    $('.alternate').click(function () {
        $('form').animate({ height: "toggle", opacity: "toggle" }, "slow");
    });
</script>


<!-- baltlogs.com -->
The script tags are used at the bottom to include the code needed and at the top to point to an external script file which will import the library needed to add the special effects.
.click ()
Used as a handler which means that a function will be executed each time the event is triggered. In plain English means, if you click on the HTML element which has the class name "alternate", which corresponds to the paragraph elements in this case, something will happen.
.animate()
Performs a custom animation for the form element, in this case, the toggling of the forms when we click on register or login. What goes in the parentheses such as height, opacity, and duration are just properties that we want the animation to have.
There are many effects that can be added to make the page more dynamic. The ones used above are very basic and straightforward, but feel free to play around and add more.
Check out the useful links to see some of the things that jQuery provides.
This is the end of the series, leave your thoughts or questions in the comments.
Thanks for reading along!
Learn more about Django:
Login/Registration Page with HTML,CSS,& JS Series - PART I


Top comments (0)