What is CloudFormation?
CloudFormation is a IaaC(Infrastructure as Code), which lets you create, update and destroy AWS resources on the fly. Instead of having to build up server racks on-premises and then install network cables, routers, switches, firewalls, etc... You create a template and define your resources and configuration you need to deploy for your application and/or infrastructure.
For Example you can do the following with a CloudFormation Template:
- Create a Security Group
- Then, create 2 EC2 instances which will use this security group
- Create 2 Elastic IP's that these EC2 will use
- Create a bucket in AWS S3
- As well as create a load balancer (ex. Application Load Balancer) in front of these machines
CloudFormation will then know exactly in which order to create these resources and create then in the right order for you and with the configuration that you specified in the template.
Why use CloudFormation when starting out with AWS?
When you start out using and exploring AWS, you will mostly use the console, which is really great and a nice way to get familiar with the 100's of AWS services they provide. That is where you should start as well to get a feel for the service, how the configuration works, and how it is setup. Once you done this and comfortable with the console, you will realize that using the console is not a very efficient way to create/update and destroy resources. That is where CloudFormation comes in, specially when you are testing out your application at the start and don't want to pay for resources you are not using anymore. CloudFormation will help you create all the resources you need/define in code and does the rest, while you wait for your resources to be created on the fly. Now you can test you application and when you are done, you can delete your entire stack and all the resources in the template will be destroyed, saving you $$$ on resources not being used anymore. Then the next day you can create the resources again for further testing.
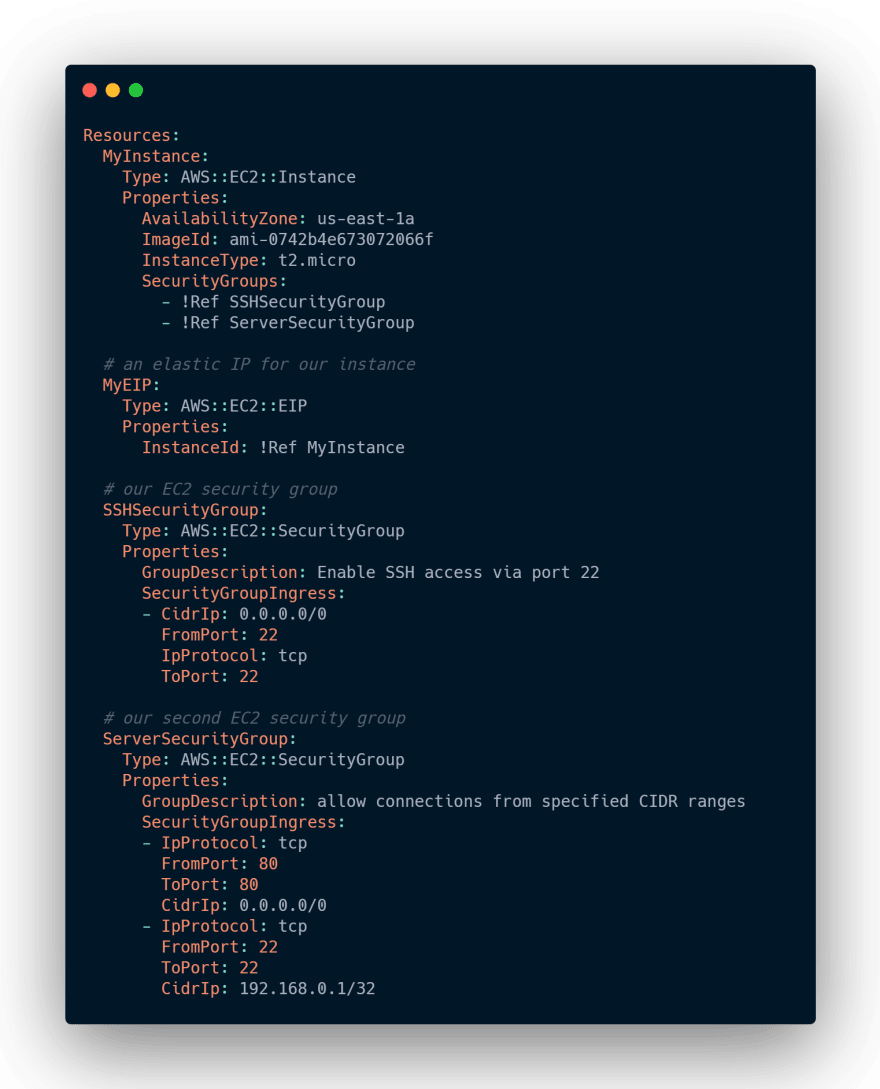
Now for an example:

CloudFormation can be written in YAML and JSON, but as you can see YAML is easier to use and read on CloudFormation templates especially on more advanced templates.
- We start with the Resources section, this is required for the template and also where you will declare all your resources to be created.
- Now you can declare a name for the resource to be created, which is up to you. Ex. MyInstance for the EC2 and MyEIP for your Elastic IP, SSHSecurityGroup for the Security group 1.
- Now we can specify what resource we actually want to create by specifying the Type. Here you can find a whole list of resources you can use: AWS Resources Type
- Next, we create properties specific to the resource we want to create, you can also read in the documentation as to which property fields are available to which resource.
Uploading your CloudFormation template
- Log into your AWS console. And then search for CloudFormation in the top search bar.

- From here we can click on Create stack.

- From here select the following: Upload a template file and choose your YAML CloudFormation template file that you want to upload.

- Click on Next. You will be asked to provide a Stack name, you can make that anything you want. And then click next and leave everything as default for simplicity. And then your resources will be created.
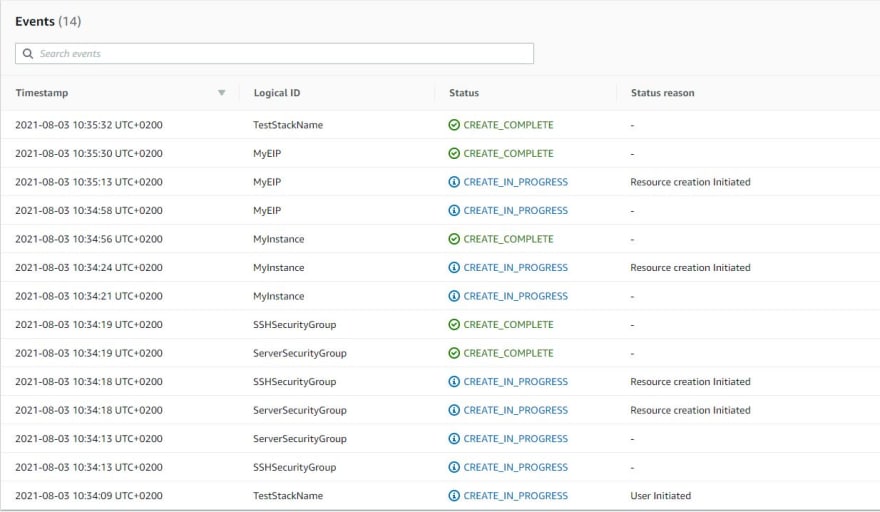
- After everything ran successful you should see a screen similar to this one:

- When you are done testing/using the resources, you can click on Delete, which will then remove all the resources the stack just created in the right order.
Conclusion
As you can see with this simple YAML template file we were able to create and destroy the resources easily and we are also to reuse this template multiple times, we can use it within other accounts. This was just a basic high-level overview of CloudFormation and you can do some pretty amazing things with it once you master all the basics it has to offer. You will never want to manually create resources yourself again after using CloudFormation!


Top comments (0)