In part 1 of Requiring Authorization to Access your Web Application's Resources, we covered how to ensure your users were members of the administrator role to be able to complete specific actions. If you missed it or would like to refresh your memory please check it out here. In part 2, we are going to look on how to expand this capability. Previously, we stated that we had two requirements regarding authorization.
Those requirements were as follows:
- Users can only create new debtors with an administrator role.
- Users can only make changes to an existing debtor if they are the creator of the debtor entity.
Using the same application from part 1, we are going to create a custom authorization requirement and authorization handler. This will allow us to complete our second requirement of making sure only the user who created a debtor is able to make modifications to it. The code of this application can be found on my Github.
Creating the Authorization Policies
Before we can enforce this requirement, we will need to create the necessary authorization requirement and handler. The requirement in this case is used to map our application configuration and authorization handler. It is a basic class that just implements an interface, "IAuthorizationRequirement". We will call it the "SameDebtorOwnerRequirment" to help reflect its purpose.
 public class SameDebtorOwnerRequirment : IAuthorizationRequirement
 {
 }
The actual logic that will handle the authorization requirements will be defined in our handler. The handler extends the base class "AuthorizationHandler". Here we will map our requirement, the "SameDebtorOwnerRequirement" to the resource we are going to protect, the Debtor. We will implement most of our logic in the HandleRequirmentAsync method that we will need to override.
Our logic will consist of getting the user id of the signed-in user and making sure that it matches the id of the owner stored on the debtor resource.
 public class DebtorAuthorizationHandler : AuthorizationHandler<SameDebtorOwnerRequirment, Debtor>
{
        private readonly UserManager<IdentityUser> _userManager;

        public DebtorAuthorizationHandler(UserManager<IdentityUser> userManager) => _userManager = userManager;

        protected override Task HandleRequirementAsync(AuthorizationHandlerContext context, SameDebtorOwnerRequirment requirement, Debtor resource)
        {
            string userID = _userManager.GetUserId(context.User);
            if (userID != null && resource != null)
            {
                if ((userID == resource.OwnerID) && context.User.IsInRole(ApplicationRoles.Administrator.ToString()))
                {
                    context.Succeed(requirement);
                }
            }
            return Task.CompletedTask;
        }
}
If the authorization check passes, then a success is recorded in the web application context and returned. If not, then the task is returned as complete, but the context is not modified. This is because you may have multiple requirements defined in your application, and they will not run if you sent a failure in the context instead. This allows you to create multiple requirements to account for multiple scenarios. If you would like to see an example of why you would want to do this, please check out Microsoft's example using .Net Core.
Storing the resource creator in the Debtor model
Our next step in the process is to make sure that we store the id of the current user in our Debtor model, as this is necessary for our authorization requirement. We will add a "String" property to our Debtor model to store the User's id as "OwnerID". We will then make sure to store this information whenever a new Debtor is created.
Debtor class:
  public class Debtor
  {
        public int DebtorID { get; set; }
        [RegularExpression(@"^[A-Z]+[a-zA-Z""'\s-]*$")]
        [Required]
        public string FirstName { get; set; }
        [RegularExpression(@"^[A-Z]+[a-zA-Z""'\s-]*$")]
        [Required]
        public string LastName { get; set; }
        [DataType(DataType.EmailAddress)]
        [Required]
        public string Email { get; set; }
        [Iban]
        public string IBAN { get; set; }
        public string OwnerID { get; set; }
        public virtual ICollection<Invoice> Invoices { get; set; }
  }
To add the user id to the Debtor, we just need to use the UserManager service to get the id of the current user and store this before saving the Debtor entity.
 [Authorize(Roles = "Administrator")]
    public class NewDebtorModel : BasePageModel
    {
        ....CODE REMOVED FOR SIMPLICITY

        public async Task<IActionResult> OnPostAsync([Bind("FirstName,LastName,Email,IBAN")]Debtor debtor)
        {
            if (!ModelState.IsValid)
            {
                return Page();
            }

            debtor.OwnerID = UserManager.GetUserId(User);
            Context.Add(debtor);
            await Context.SaveChangesAsync();

            return RedirectToPage("./ViewDebtor", new { id = debtor.DebtorID });
        }
    }
Before we can use our newly defined handler and requirement, we will need to add them to our startup.cs. In our ConfigureServices method, we will add our requirement and map it to a name. In our case, "DebtorEditPolicy".
public void ConfigureServices(IServiceCollection services)
{
....
services.AddAuthorization(options =>
            {
                options.AddPolicy("DebtorEditPolicy", policy => policy.Requirements.Add(new SameDebtorOwnerRequirment()));
            });

            services.AddScoped<IAuthorizationHandler, DebtorAuthorizationHandler>();
}
Finally, we are now ready to add support to our pages to utilize our defined requirements and handler. To support this, we will need to make sure that our razor page has access to the web application's authorization service. This can be accomplished by passing in the authorization service to the page's constructor via dependency injection. Afterwards, we can then utilize the authorization service in our page's methods to enforce our requirements.
One of our main requirements is that our created Debtors can only be modified by their owner. In our update metho,d we will add the following to account for this.
public async Task<ActionResult> OnPostAsync(int? id)
{
            ....

            Debtor debtorToEdit = await Context.Debtors.FirstOrDefaultAsync(item => item.DebtorID == id);

            AuthorizationResult result = await AuthorizationService.AuthorizeAsync(User, debtorToEdit, "DebtorEditPolicy");
            if(!result.Succeeded)
            {
               return new ForbidResult();
            }

            ....
}
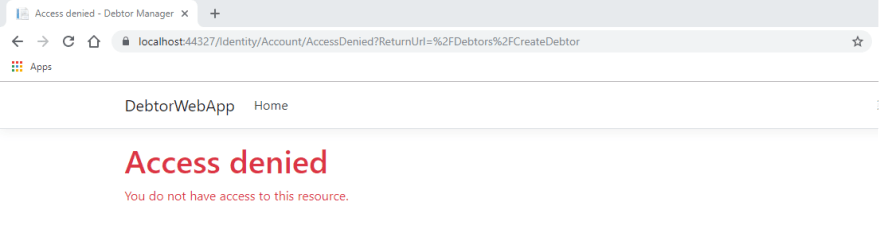
If the current user is not signed in or not the creator of the resource, they will then receive an access denied message.

Top comments (0)