Must read previous post first before reading this one :D
Previous Post about celery
Aim of this post
- Install celery beat in django project and understand how it is used
- Settings for sending emails in django project using gmail
- Create a task that sends email
- Create schedule using django admin and integrate it with email task Eg) Send notification email to users every Fridays at 4 a.m.
What is celery beat?
celery beat is a scheduler. When it's time to run the task, it delivers the entry to the worker node. (Periodic task execution)
Install celery beat
pip install django-celery-beat
Migrate - Tables will be created to store tasks and schedules
python manage.py migrate
settings.py
INSTALLED_APPS = (
    ...,
    'django_celery_beat',
)
Settings for emails
1 . Click Manage your Google Account

2 . Make sure 2 step verification is on in Security > 2 step verification

3 . Create app password. App passwords > select app > other > Name it whatever!
4 . Add settings.py
# e-mail settings
EMAIL_USE_TLS = True
EMAIL_PORT = 587
EMAIL_HOST = 'smtp.gmail.com'
EMAIL_HOST_USER = {YOUR EMAIL ADDRESS}
EMAIL_HOST_PASSWORD = {YOUR PASSWORD FROM NO.3}
EMAIL_BACKEND = 'django.core.mail.backends.smtp.EmailBackend'
Email setting is finished!
Where does celery beat store tasks and schedules?
1. Default entries are taken from the beat_schedule setting
task.py
app.conf.beat_schedule = {
  'add-every-30-seconds': {
        'task': 'tasks.add',
        'schedule': 30.0,
        'args': (16, 16)
    },
}
app.conf.timezone = 'UTC'
Or if you want more control over your schedules use crontab
from celery.schedules import crontab

app.conf.beat_schedule = {
    # Executes every Monday morning at 7:30 a.m.
    'add-every-monday-morning': {
        'task': 'tasks.add',
        'schedule': crontab(hour=7, minute=30, day_of_week=1),
        'args': (16, 16),
    },
}
Start celery beat service
celery -A <project name> beat
2 . Use custom stores - I will store them in database
- Let's create a task that sends email to users ```
@app.task(name="send_notification", bind=True, default_retry_delay=300, max_retries=5)
def send_notification(self, subject, message):
from django.core.mail import send_mail as sm
# Fetch all users except superuser
users = User.objects.exclude(is_superuser=True).all()
user_emails = [user.email for user in users]

# try sending email
try:
    res = sm(
        subject=subject,
        html_message=message,
        from_email=EMAIL_HOST_USER,
        recipient_list=user_emails,
        fail_silently=False,
        message=None)
    print(f'Email send to {len(user_emails)} users')
except Exception:

    # retry when fail
    send_notification.retry()
So here I created a task called `send_notification`.
`default_retry_delay` : retry after 300 seconds when fail
`max_retries` : only retry 5 more times then STOP.
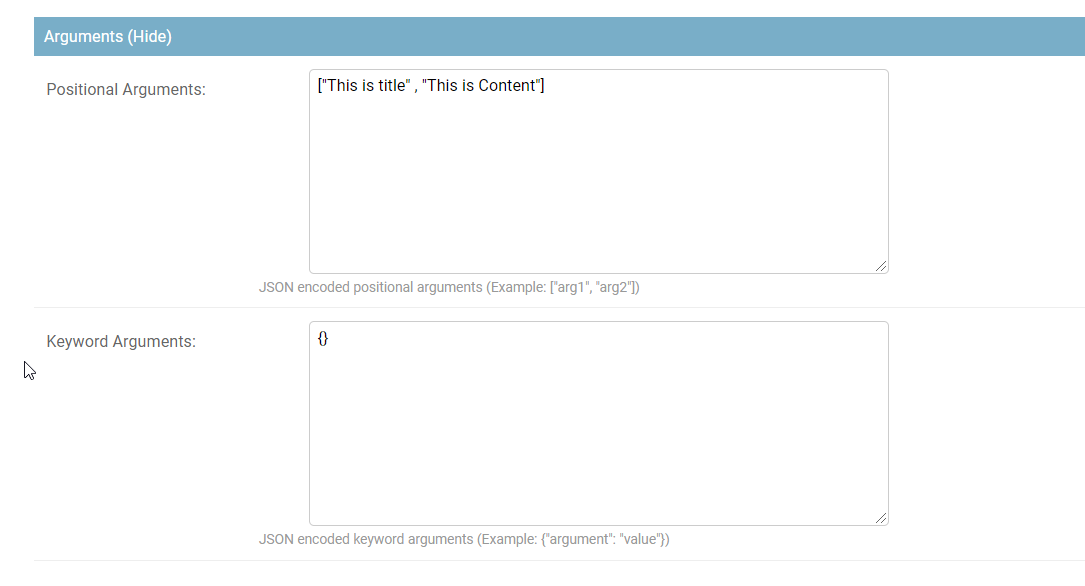
Here I am also getting `subject` and `message` as arguments. This means I can pass `subject` and `message` from django admin. I will show you this later.
2. Let's go to django admin
`localhost:8080/admin`.
**You will see new `Periodic Tasks` Menu**
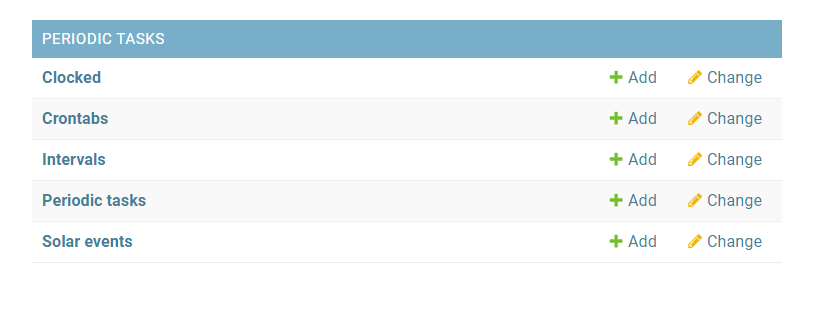
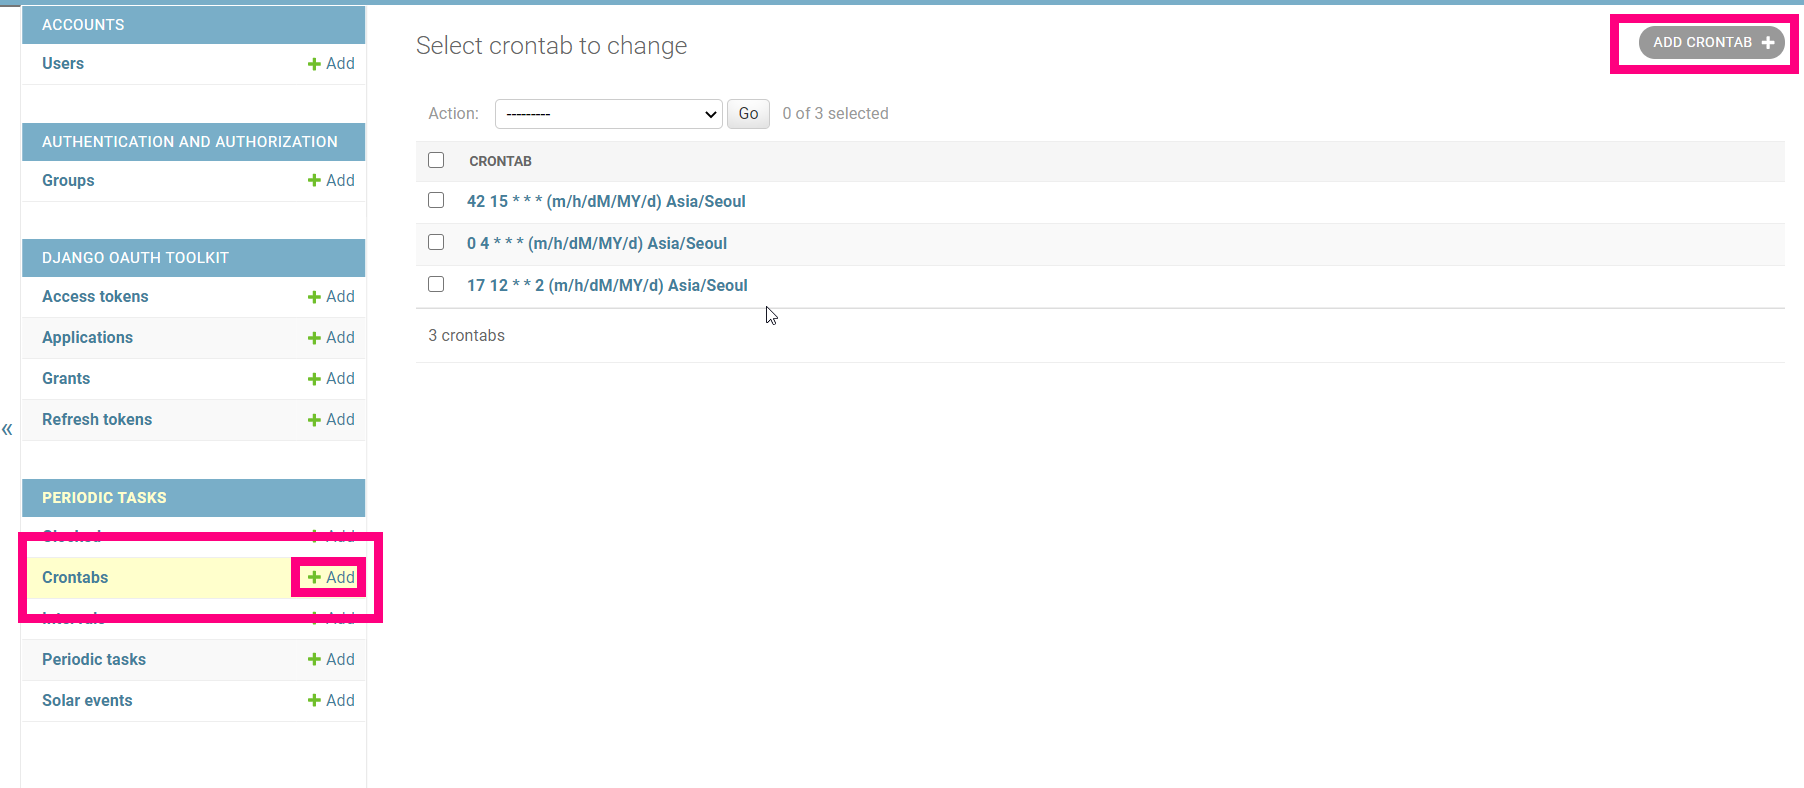
**Let's make a `crontab` Crontab > Add crontab**
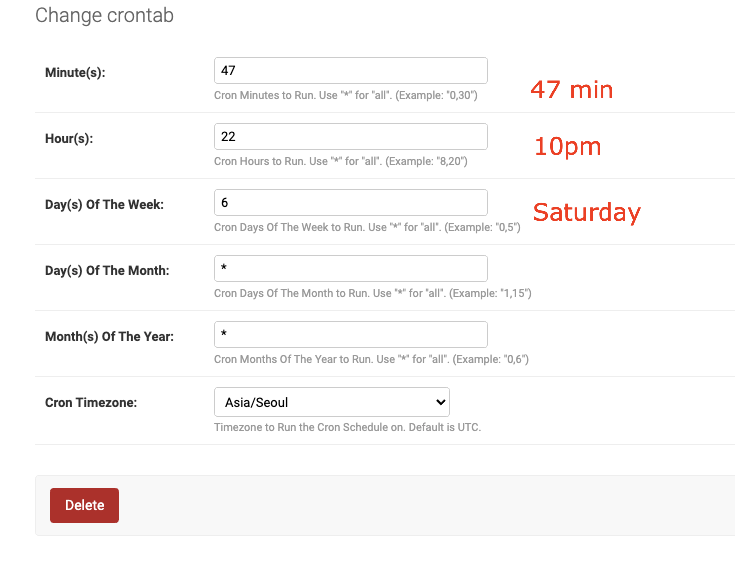
**Let's create a crontab .Here I created one. `Every Saturday @ 10:47 p.m.`**
If you are not sure about crontab, check this out [Crontab examples] (https://crontab.guru/examples.html)
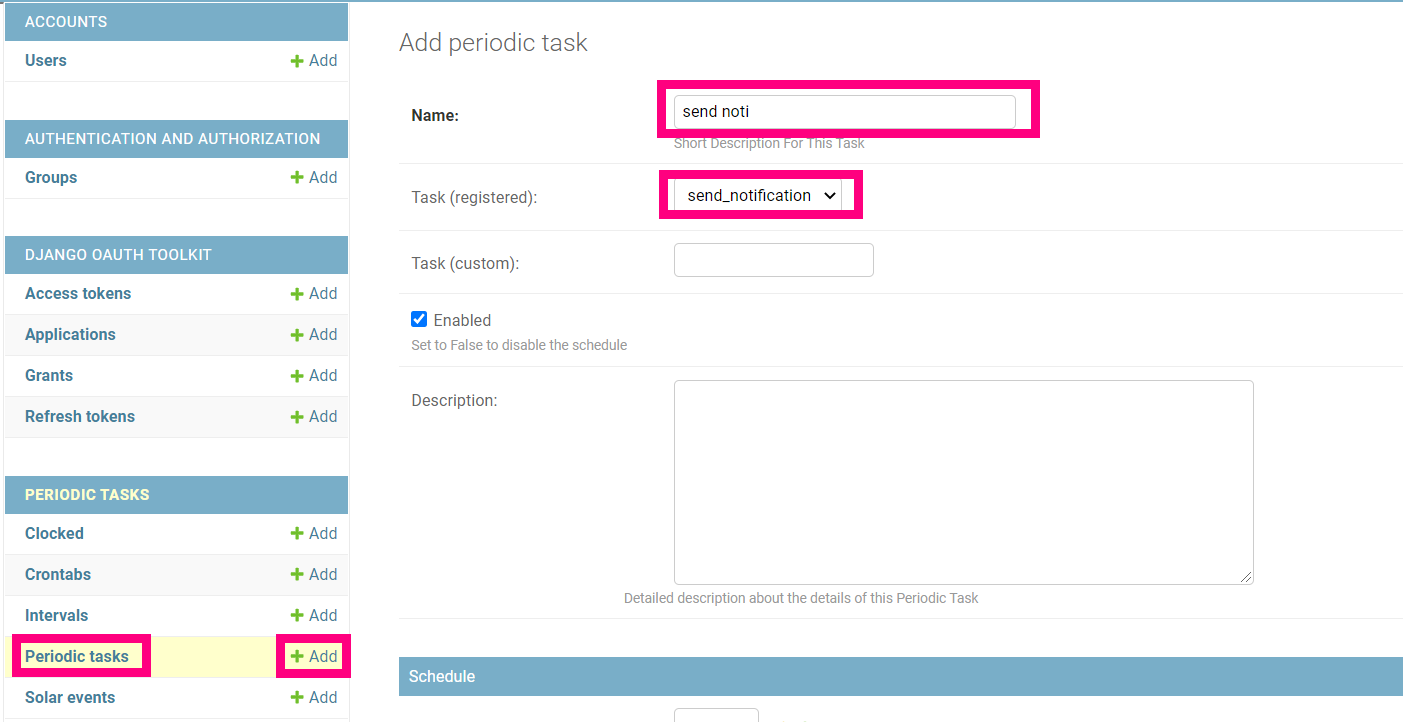
**Let's create a periodic task**
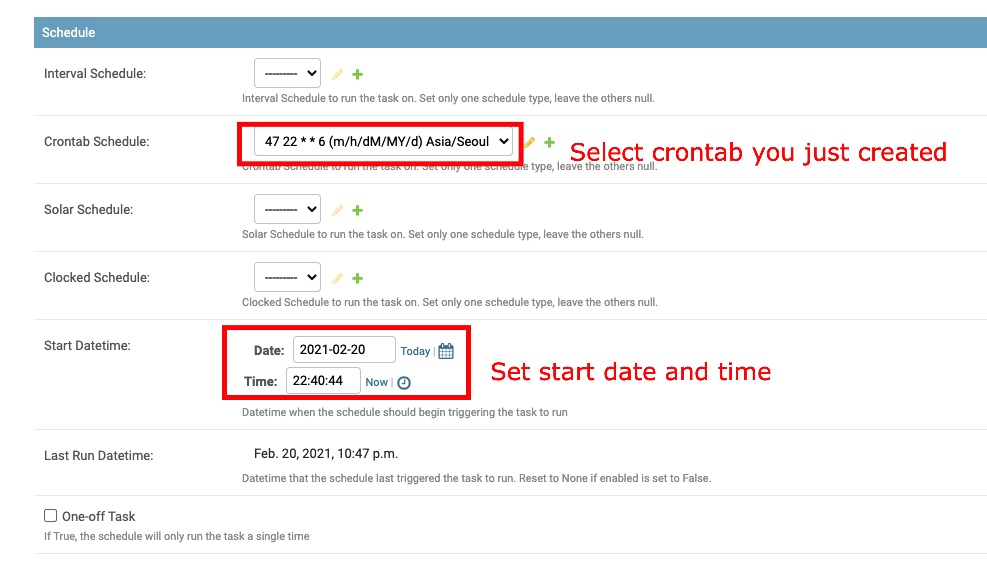
Click `Periodic tasks` > `Add`. Create a new name of your choice. Find `send_notification` task that we have created up there
`Schedule` > `Crontab Schedule` > Find the `crontab` you just created.
Add the `Start Datetime`
This is where you pass the arguments `subject` and `message`
So we are all set and ready to go.
Start django server, start rabbitmq
Start celery
`celery -A djangocelery(app name) worker --loglevel=info`
Start celery beat in different terminal
`celery -A djangocelery(app name) beat -l INFO --scheduler django_celery_beat.schedulers:DatabaseScheduler`
Let's check out the terminal of celery beat
@10:47 p.m. celery beat scheduler is sending `send_notification` task that we have created!! to celery!!

Check celery terminal. Celery has received the task and email is sent.

And I have received the email at 10:47 p.m. on Saturday with the title and content that I have set up in django admin!

###Conclusion
So `celery beat` is a `scheduler` and `celery` is the one that executes the `task`. `Database scheduler` is one of the method of celery beat where tasks and schedules are stored in database which means you can manage them in `django admin`.
<br/>
That's it for django celery beat!
The end.


Top comments (1)
I have also used these awsome combination. It's great