Prerequisites
[OPTIONAL] Install a package manager - scoop
You can use Scoop package manager to install various packages. If you want to skip this step, you can install WezTerm manually. Open a PowerShell terminal and type
Set-ExecutionPolicy -ExecutionPolicy RemoteSigned -Scope CurrentUser
Invoke-RestMethod -Uri https://get.scoop.sh | Invoke-Expression
Install a terminal - wezterm
This step is necessary for displaying LazyVim and special icons appropriately. You have to use a terminal that supports LazyVim - wezterm. If you haven't installed scoop, you can just manually download and install WezTerm from here
scoop bucket add extras
scoop install extras/wezterm
First steps - configuring WSL
You can try to run LazyVim from Windows directly, but my experience is that it comes with plenty of tradeoffs and many features are currently broken. I'll try to give an explanation at the end of this article.
Make sure you have WSL2 with latest stable Ubuntu LTS installed.
wsl --list --online
wsl --install -d Ubuntu-24.04
Start wsl
wsl -d Ubuntu-24.04
Reference: https://learn.microsoft.com/en-us/windows/wsl/install
Install command line prerequisites
Install NeoVim latest stable
sudo snap install nvim --classic
Reference: https://github.com/neovim/neovim/blob/master/INSTALL.md#snap
Install LazyGit
LAZYGIT_VERSION=$(curl -s "https://api.github.com/repos/jesseduffield/lazygit/releases/latest" | \grep -Po '"tag_name": *"v\K[^"]*')
curl -Lo lazygit.tar.gz "https://github.com/jesseduffield/lazygit/releases/download/v${LAZYGIT_VERSION}/lazygit_${LAZYGIT_VERSION}_Linux_x86_64.tar.gz"
tar xf lazygit.tar.gz lazygit
sudo install lazygit -D -t /usr/local/bin/
Reference: https://github.com/jesseduffield/lazygit?tab=readme-ov-file#ubuntu
Install gcc, make and other tools (required for nvim-treesitter and for installing python versions)
sudo apt install build-essential \
  dpkg-dev \
  gcc \
  gnupg \
  libbluetooth-dev \
  libbz2-dev \
  libc6-dev \
  libdb-dev \
  libffi-dev \
  libgdbm-dev \
  liblzma-dev \
  libncursesw5-dev \
  libreadline-dev \
  libsqlite3-dev \
  libssl-dev \
  make \
  pkg-config \
  tk-dev \
  uuid-dev \
  wget \
  xz-utils \
  zlib1g-dev
Install all other tools to work with fzf-lua. Required for LazyVim to effectively navigate in your project files.
sudo apt install fzf ripgrep fdclone
Install NodeJS with a version manager - nvm
Mainly required for the builtin LazyVim package manager, called mason.
curl -o- https://raw.githubusercontent.com/nvm-sh/nvm/v0.40.2/install.sh | bash
nvm install --lts
nvm use --lts
Check if it's working
npm --version
Reference: https://github.com/nvm-sh/nvm?tab=readme-ov-file#installing-and-updating
Install pyenv to manage Python environments.
Note, that uv is not supported currently as a Python provider. Also, uv does not allow you to use a specify Python version in your PATH. Follow this open GitHub issue for more information.
curl https://pyenv.run | bash
Change .bashrc to include pyenv features
cat >> ~/.bashrc
export PYENV_ROOT="$HOME/.pyenv"
[[ -d $PYENV_ROOT/bin ]] && export PATH="$PYENV_ROOT/bin:$PATH"
eval "$(pyenv init - bash)"
Install latest Python version and make it global
pyenv install 3.13
pyenv global 3.13
Reference: https://github.com/pyenv/pyenv-installer?tab=readme-ov-file#install
Ready to Roll! 🚀
At this point, you're ready to install LazyVim and take the first look. For the reference this command is taken from here
Make a backup of your current Neovim files:
# required
mv ~/.config/nvim{,.bak}

# optional but recommended
mv ~/.local/share/nvim{,.bak}
mv ~/.local/state/nvim{,.bak}
mv ~/.cache/nvim{,.bak}
Clone the starter
git clone https://github.com/LazyVim/starter ~/.config/nvim
Remove the .git folder, so you can add it to your own repo later
rm -rf ~/.config/nvim/.git
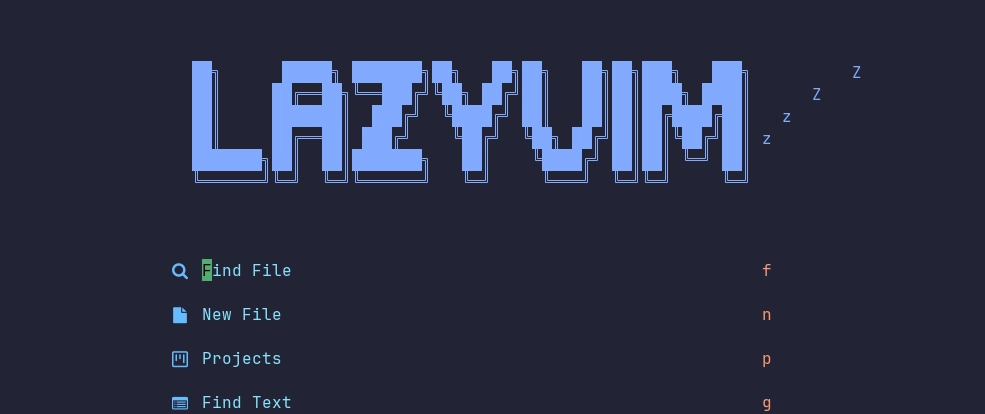
Start Neovim for the first time!
nvim
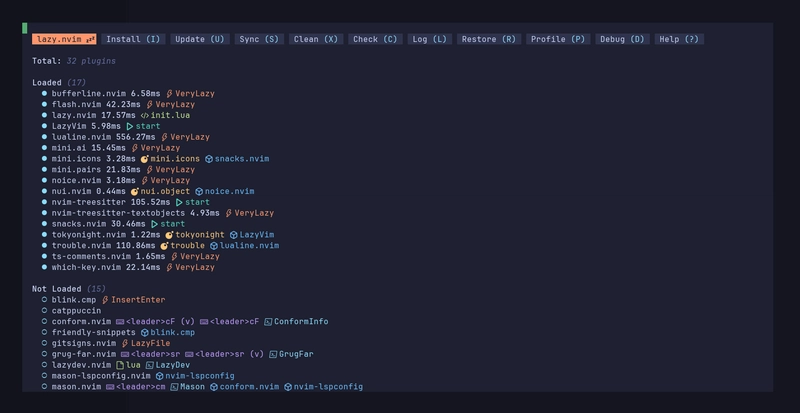
You should see the package manager installing packages, wait until it finishes.
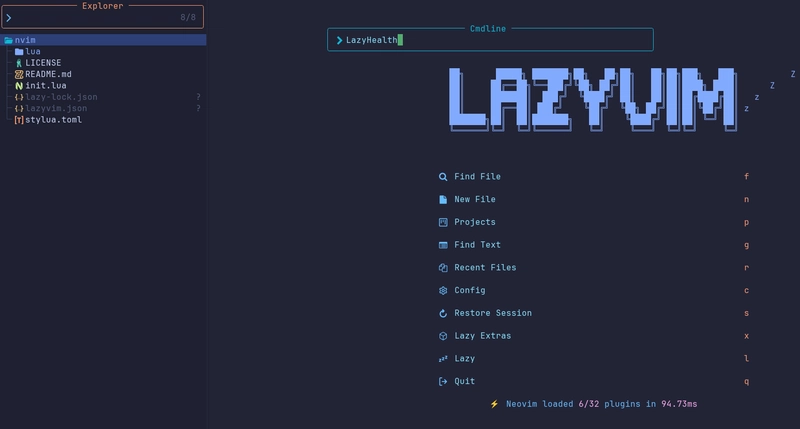
Checking installation
Type :LazyHealth to open up the window showing package statuses.
Using LazyVim Extras to install Python IDE
Next type :LazyExtras to go to the LazyVim Extras. Type / python to search for Python related packages.
Press x to install related packages (at the cursor, called lang.python). Do the same for dap.core, test.core editor.refactoring, lang.json, lang.markdown, and lang.toml. Optionally you can install ui.mini-animate for an animated cursor and coding.yanky for and advanced clipboard experience.
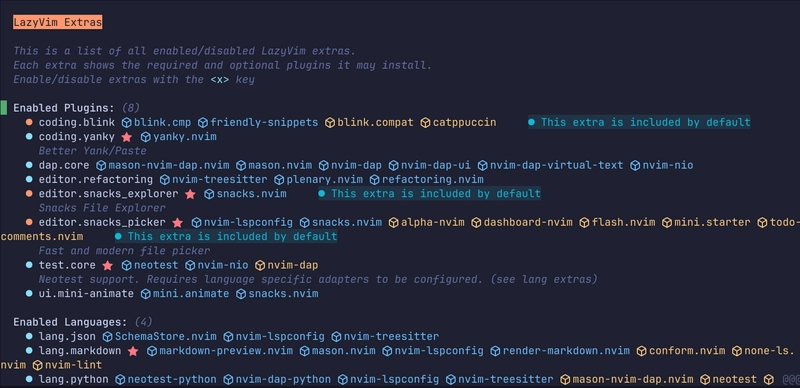
Press q to quit LazyExtras.
Configuring plugins
Your next step will be to configure some of the Python plugins to ensure, that they're working as you expect. Start LazyVim with the following command to edit your configuration:
nvim ~/.config/nvim
First thing to do is to configure the Python extra by setting your LSP server + Ruff command. Edit your lua/config/options.lua file and these lines:
-- LSP Server to use for Python.
-- Set to "basedpyright" to use basedpyright instead of pyright.
vim.g.lazyvim_python_lsp = "pyright"
-- Set to "ruff_lsp" to use the old LSP implementation version.
vim.g.lazyvim_python_ruff = "ruff"
Reference: https://www.lazyvim.org/extras/lang/python#options
Create a test.lua under nvim/lua/plugins folder and configure it like the example below:
return {
  "nvim-neotest/neotest",
  opts = {
    adapters = {
      ["neotest-python"] = {
        dap = { justMyCode = false },
        args = { "--capture=no" },
        pytest_discover_instances = true,
      },
    },
  },
}
This will ensure, that neotest and neotest-python allows you to:
- flush output buffer during testing, so
stdoutandstderrmessages are appearing, while tests are running - set breakpoints and debug inside library code
Next you should create a debug.lua under nvim/lua/plugins folder and configure it like the example below:
return {
  {
    "mfussenegger/nvim-dap-python",
    opts = {
      justMyCode = false,
    },
  },
}
This will ensure, that nvim-dap and nvim-dap-python allows you to set breakpoints and debug inside library code. The end result should look something like this:

Creating your first python project
We'll use pyenv to create a Python project and a virtual environment. Also add pytest package to verify if testing and debugging works well.
mkdir python-sandbox && cd python-sandbox
pyenv global 3.13
python -m venv .venv
. .venv/bin/activate
Install pytest executables for testing under your local project
pip install pytest
Make sure you have your local project in the PYTHONPATH on bash. You can start LazyVim now within your project.
PYTHONPATH=`pwd`:$PYTHONPATH nvim .
Checking if key features are working
LSP
After creating a Python project you can use <leader>cl to view the LSP config. You should be able to see pyright and ruff at the top of the list with its settings.

Testing
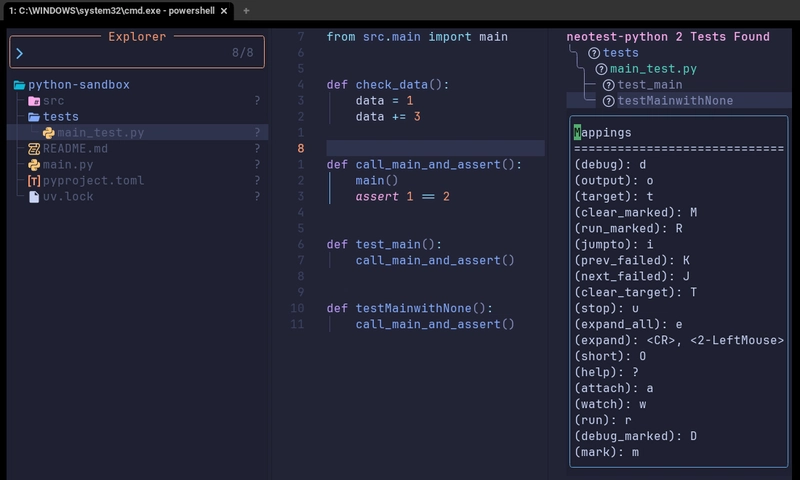
You need to verify if your Neotest is interacting properly with neotest-python.
Create a simple pytest test-case and use <leader>ts for showing up all your test functions implemented under the project. Use r to run one of your tests to ensure, that things are wired together properly.
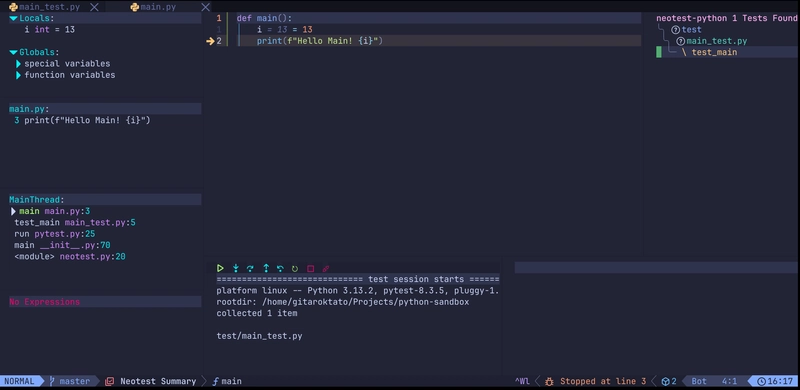
Debugging
Final thing to verify if nvim-dap is interacting with nvim-dap-python correctly. Put a breakpoint in your code, by using <leader>db on a line. Next, start a test after showing up all the test functions with pressing d on the test case's name.
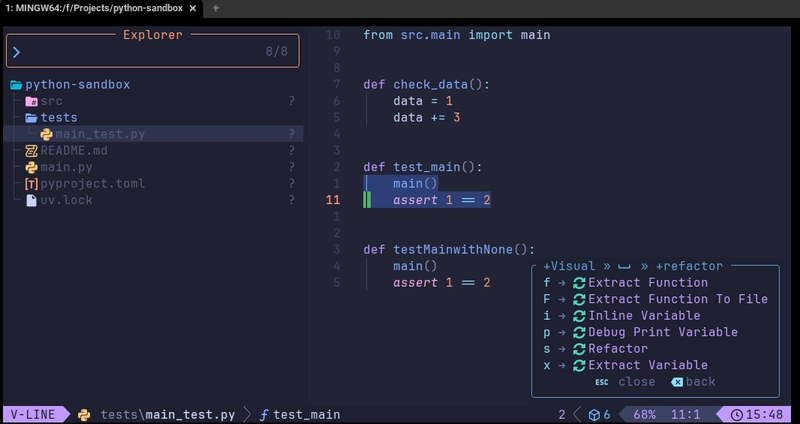
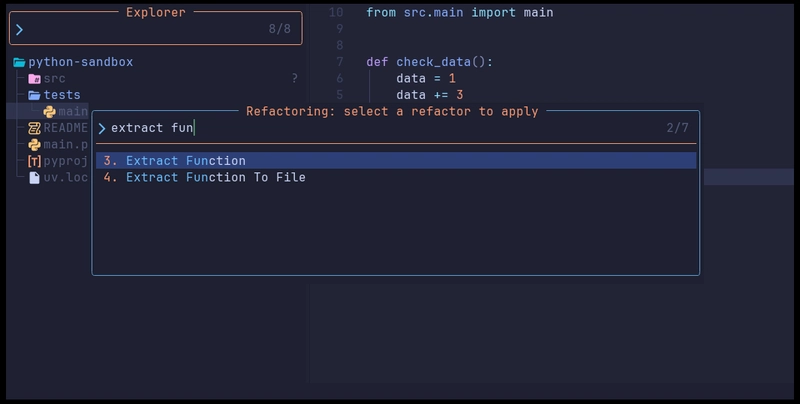
Refactoring
Stop on a function and try hitting <leader>rs for showing the refactoring menu. You should be able to do simple things, like extracting a new function under selection by pressing f.
Final thoughts
Limited functionality under Windows
I found out, that testing and debugging has several broken features if you run them from Windows natively. I haven't looked at the root cause, but one of the possible issues are inside nvim-dap-python and neotest-python libraries providing debugging and testing functionality. These extension libraries have to make distinction between Windows and Linux runtimes as binaries and virtual environments follow a different convention (e.g. venv/bin/python VS venv/Scripts/pythonw). These "conditions" and special cases are often getting broken and patched afterwards.
Using uv as a Python version manager
Currently it seems like uv is not supporting global python versions you can see from this GitHub ticket. If you really like the speed and performance of uv you can try to combine the best of both worlds: Using pyenv for managing global Python versions and using uv for managing your project-specific dependencies.

Top comments (1)
Note: I recently found out, that using WezTerm is slightly slower, than a native experience. I changed my setup to using Windows Terminal with Nerd Fonts and the experience was a bit better. Less input lag. So that's what I would recommend as an alternative to WezTerm.